Tag Archives: photography

Milky Waters (mildly NSFW)

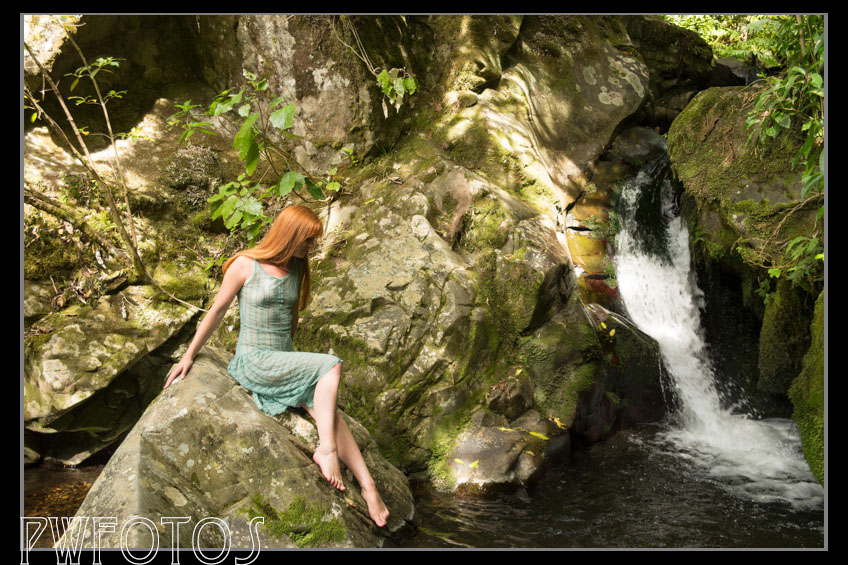
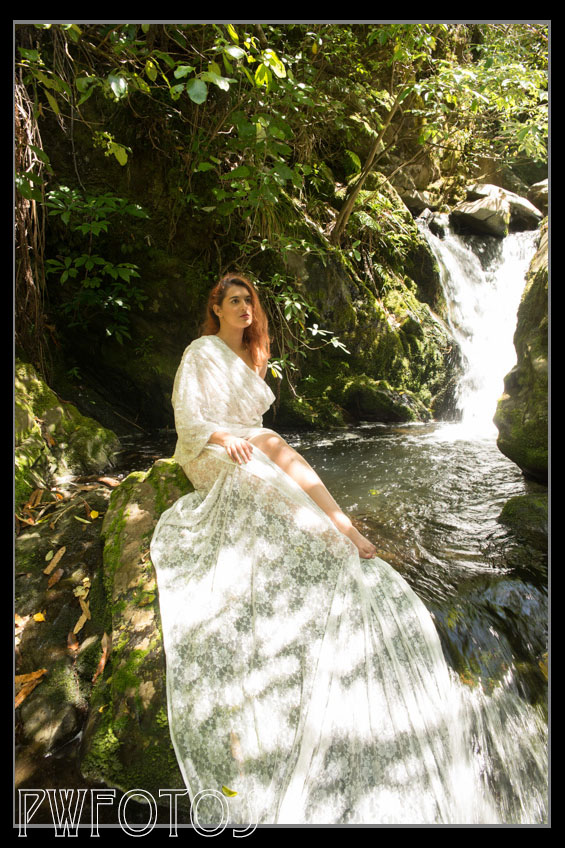
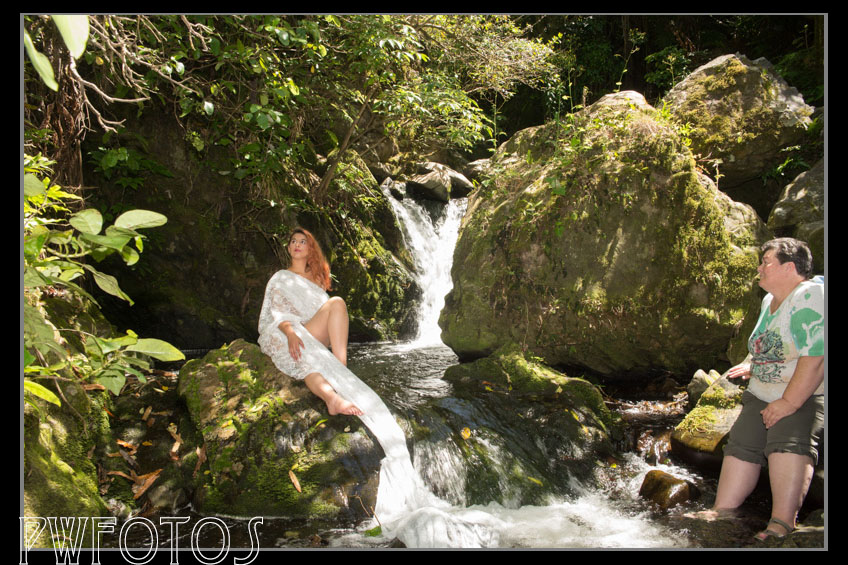
Those who have looked through this blog will realise that water tends to play a major part in my outdoor natural light shoots. The issue that you run into though is finding a place that is safe for the model as well as not too public so that you can try out options without offending people.

Now the weather in the Wellington region is not really conducive to outdoor swimming pools so it is not that easy to find one. However just before Christmas i saw an ad for a kids paddling pool that was 1.6m long, 600mm wide and 400mm deep. It sounded like it would be perfect as you could shoot full length in relative safety, and at only $20 was pretty cheap.

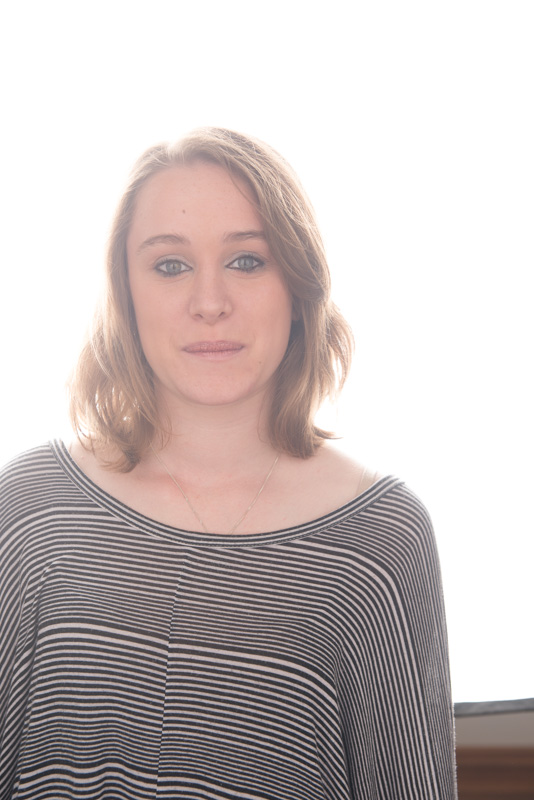
I had not actually planned any shoots with the pool when i was contacted me by Rebekkah (who I had shot before) who wanted to do a water shoot with Kristara (who I have shot on a number of occasions). They wanted the water to be cloudy so that it was only an implied nude as well as there being flowers in the water.LR_Pool-1

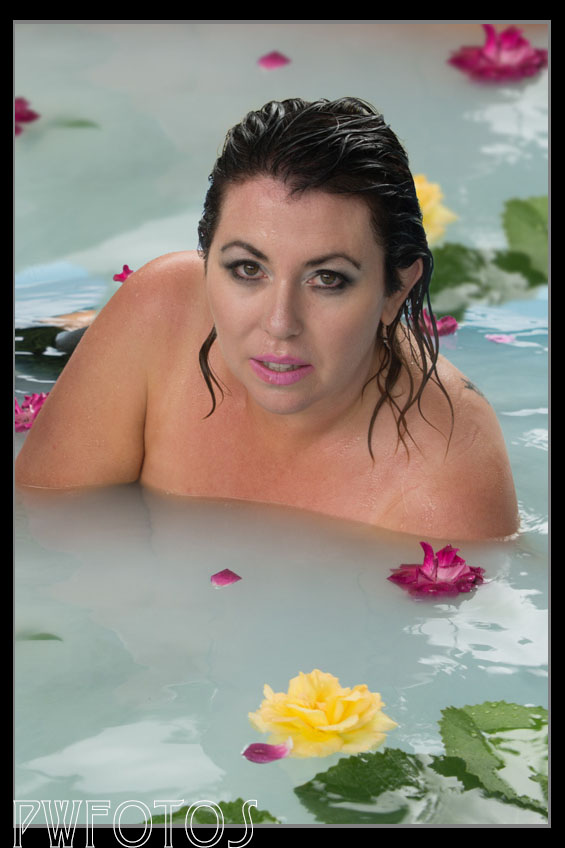
I filled the pool up two days before the shoot in the hope that the sun would have a chance to warm the water because I knew that in unheated water there is a very definite amount of time before the goosebumps start growing on top of other goosebumps.

We had had a really dry January so it was a little bit of a downer that it was planning to rain on the day of the shoot. We decided to proceed because the girls were going to get wet anyway and I knew that shooting with overcast conditions was actually better for the colours and light control than a clear blue shy day.

LR_Pool-3Now the pool holds over 500 litres of water so I was really not sure what to add to get the desired milky effect. Google was absolutely no use as it kept bringing me to examples of using a slow shutter speed to make moving water appear milky. In the end the suggestion was that simply add milk, but how much was the question. I bought a three litre bottle of full cream milk and just before the shoot starting to add it. Just over a litre produced the desired effect.

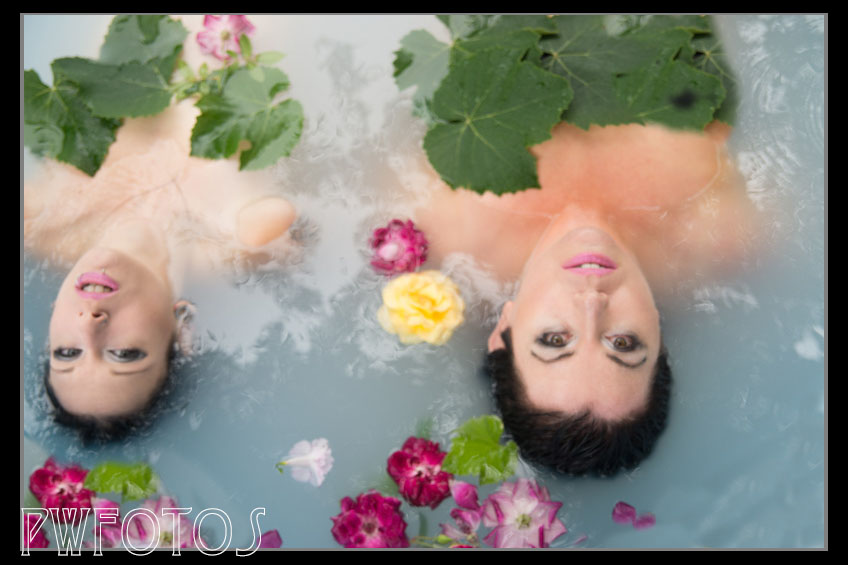
Both girls were wearing black which when we went to fuller length showed up to well so I suggested that they be removed and replaced with Grape leaves which covered very well.

LR_Pool-7 LR_Pool-12

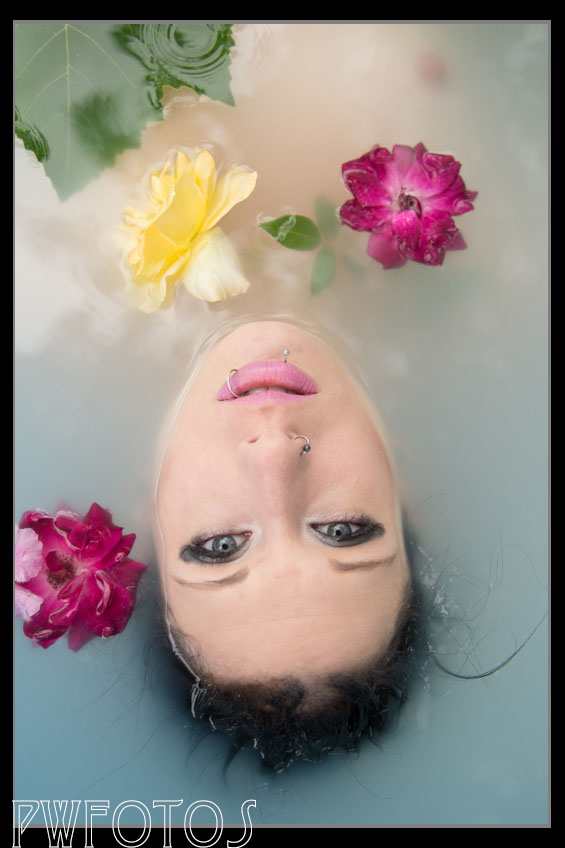
Rebekkah had also seen some shots of water running down a face so we tried that. Getting the correct amount of water flow and the angle of the head was a bit of trial and effort and it is not something you can do without an assistant.

LR_Pool-18 LR_Pool-15

Kristara and I had planned a nude shoot in the past which never quite timed right so before she froze I shot a full length in the water.

LR_Pool-20

You may have noticed no pool edges in the images. Basically they were removed in photoshop.

I am really pleased with the way that the pool performed and the models appear happy with the finished results.

At the Rehearsal

I am always amazed when I hear about wedding photographers who simply show up on the day and are very inflexible in the timeframe that they will cover.

Now I will admit that we do not photograph that many weddings a year and we certainly don’t shoot the ones we do solely for the money. As such I am willing to give as much effort in order to ensure the couple get the best service on the day. And for a wedding that starts with attending the rehearsal.

For the wedding of Hayden & Chloe the rehearsal happened on February 22 and as with most rehearsals I have attended it was a fun and happy event. Unlike the nerves that will kick in on the big day the rehearsal is often very relaxed.Rehearsal-3 For me these are the main reasons why it is important to attend the rehearsal:

  1. It give you an opportunity to meet and discuss your requirements with the person performing the service, and to get agreement on such things as the use of flash, where you can and can’t go. Better to find this out two days before the event than 20 minutes before.Rehearsal-1
  2. If they are present it also lets you talk with the videographer so that you can determine the best angles for both of you.
  3. It gives you a real opportunity to view the venue and work out the best angles for shooting that will both give you the images you want but at the same time not block key people from seeing the events. It also lets you work out where you and your second shooter will stand.

    From the previous visit to the church I knew that the angles were tight. When you got the couple , minister and 8 attendants at the alter it got really crowded.
    From the previous visit to the church I knew that the angles were tight. When you got the couple , minister and 8 attendants at the alter it got really crowded.
  4. It give you the opportunity to see what the plan of the service will be so that you can ensure adequate coverage.Rehearsal-4
  5. It lets you play with settings in the camera when if you fail to get a clear shot it really does not matter.Rehearsal-5

From this rehearsal I realised that it was going to be very tight at the alter and realistically the best angles for many of the activities would be from the rear which meant that my second shooter would take care of those. The Minister made no unreasonable demands, and video guys were very co-operative. We did have an issue with one camera not giving us the best results so that ended up being used outside the church only.

Waterfall shoot with Sian (NSFW)

The second shoot at the waterfall for 2015 involved Sian as the model. I have shot Sian twice before and so I knew she was very comfortable in front of the camera. The shoot happened earlier than the previous one as she wanted to go house hunting in the afternoon.

While these waterfall shoot are intended to incorporate drapes or nudes we actually started with Sian fully clothed as I have had this dress in the cupboard for a while and I wanted to test out shots closer to the top fall. As this part of the location is fully visible from the track I tend the ensure that not to much skin is on display from this point.

I have wanted to use this dress in a water shot for a while and given that this part of the fall is fully visible from the path made perfect sense.

We then moved onto using a length of a satin type material on the large rock and around the top of the second falls. This material is nearly 5 metres in length and when it gets wet becomes fairly heavy. As such I impressed to Sian that she was in a secure position on the rock before she let the material go anywhere near the water.

This length of satin is about 5 meters so it was able to stretch a long way. We had to be careful though because when it got wet it became very heavy.

We then moved down to the pool at the bottom of the lower fall. Sian was willing to go into it and so we used my monopod as a gauge to work out how deep it was. Once it was determined that the pool was not too deep Sian took a position by the falls. I wanted to try a longer exposure but there was no place to mount a tripod so I attached the monopod to the camera instead. The shot is not completely sharp but close enough for essentially a hand hold at 1/6 of a second at f13.

SIan was willing to go into the pool and go without the  drapes. Her we tried a slower shutter.
Sian was willing to go into the pool and go without the drapes. Here we tried a slower shutter.

We then moved out of the pool and Sian wrapped a length of red organza around her. The shot is nice however the material in the water does not have a lot of live to it unlike the blue organza used in the previous shoot. This was totally due to the angle of the sun not directly lighting up the material.

This red organza spread out great, however where it went into the water falls a little flat.

Sian then agreed to lose the drape and we would slow the shutter down. This image was essentially hand held at 1/13 second at f22. The shot is virtually straight out of camera. I would have to say that it is my favourite image of the shoot. It has a very classical look to it.

My favourite shot of the day.

I was relatively pleased with the results of the shoot, however when Sian looked at them she thought that she could improve on some of her expressions so we are planning another visit to the falls. I also still have a list of other models who want to take part so this series will run for a whole yet.

Pre-shoot with Chloe & Hayden

Next weekend we are shooting the wedding of Chloe & Hayden which is being held in a small church in Pauatahanui and in planning for it I met with the bride & groom and carried out a small pre-shoot with them starting at the church and then moving onto some of the locations that i have planned to use for the formals.

Now some photographers refer to this as an engagement shoot but personally I clearly state that it is a pre-shoot, because I believe that they are fundamentally different.

To me an engagement shoot  happens as soon as the contract to do the wedding has been signed which may many months before the wedding. The purpose is solely to allow the photographer and couple to get comfortable with each other. as such the location is irrelevant.

A pre-shoot has a similar goal to enable a rapport to be established between the couple and the photographer plus to plan for the actual shots on the day. When I book a pre-shoot I try to arrange it for a location close to the where we will be shooting on the day and if possible shoot at the same time. That lets me determine where the light is coming from and what issues I am likely to run into.

It is also a good opportunity to try out poses with the couple, and to see whether they like the locations your are thinking about. It is also a great opportunity to sort out transport issues on the day, rather than when you have a large wedding party in tow.

The shots below are a selection from the pre-shoot and in captions I have outlined what the situation I was looking for.

While the B&G do not want a photo of all the people at the wedding, the largest family group shot will have 25 people. We determine that this lawn area in front of the church will be fine for that. While it is in front of the graveyard the people will cover those.
The day of the pre-shoot had little cloud and that enabled me to determine that the bride's eyes are very susceptible to light. We will have to watch shot taken facing the afternoon sun.
The day of the pre-shoot had little cloud and that enabled me to determine that the bride’s eyes are very susceptible to light. We will have to watch shot taken facing the afternoon sun.
Same location but this time the couple are being shaded with a diffusion panel.
This walkway will be used in the formals. The couple loved it. The road beside it can be quite busy and those timing will be needed to ensure no cars in the shots. There is also a real estate sign on the fence that needs to be eliminated.
Finally a macro shot of the ring. Chloe wanted to see whether a clean would be in order to get the best sparkle out of it

Back to the Waterfall with Grace

Last year I took a series of images at a local waterfall with models in fabric drapes (which you can read here) and decided that this year I would work further on the series. So I posted a casting call on Facebook and got enough interest for a whole series of shoots. One thing that had disappointed me about the images from the previous series was that the underwear the girls was wearing showed through and disrupted the flow of the fabric. So this year I made it quite clear that no underwear was permitted.

The first shoot in the 2015 series took place last Sunday with Grace (who had been a make up artists on a number of my shoots as well as being my book queen). Her mum Caroline asked to come as well and I was only too happy to have her along as a extra pair of hands.

On the Saturday I went up the falls and checked that nothing had changed significantly since last year. It also gave me the opportunity to scout out the area and plan where each shot was to take place. The little falls are down a slope from the main track which in summer is very popular. Given the lack of clothing I wanted to work out how much of the shoot area could be seen from the track.

Sunday dawned beautiful and we went through three drapes for the shot. We started on the main rock with a multi colored silk. Then we moved slightly down and shot a white lace material and finally with a blue organza that I ordered specifically for this year.

Green silk on the top rock
White lace
White lace
Caroline helping out
The blue organza took on a plastic look when wet

The area is quite slippery in areas and as cameras and water don’t mix I tried to particularly careful.

Light was quite an issue in that in some areas there was not enough and in other too much. For some images a flash was used to add a bit of fill and in some cases it was bounced off a gold reflector to add a bit of warmth.

The next shoot in the series is tomorrow.

Collaboration

As I reflect back on what I achieved in 2014 I realized that what made this year different from previous ones was the level of collaboration with other skilled people that made the shots. In prior years the images were mainly the result of a single model (who did there own makeup) and me.

But at the start of this year I started to work more with stylist, hair and makeup artists and the results were so much better.

I thanks each and every one of you for your help this year and I look forward to working more with you in 2015. Unfortunately I do not have behind the scenes images from all of the shots but here are a sample.

To Ivy, Grace, Crystal, Tiffany, Sophie, Samantha and Alan thanks for the help this year.

Sophie applying makeup to Megan on location at Palmer Head
Tiffany starts the process of attaching the paper for my Paper Queen shoot
Grace applying a makeup fix to Kat in my Autumn Goddess shoot
Alan helping out with a lighting test

Trying out a new studio with Ali

I met Ali through a casting call she had placed on Facebook. She had wanted to have some lingerie shots taken, and I generally make it a rule to never go into a shoot like this without meeting the model first. It helps build up a rapport and a trust which is really important.

We met at a local cafe on a Sunday morning. She had agreed to shoot with another photographer the day before and had not enjoyed the experience at all. He had constantly pushed for her to reveal more than she wanted and she had found the whole experience sleazy.

I promised her that that I she would have a much better experience with me. I thought that it was a great opportunity to try put a new studio in Upper Hutt run by Paul Maka-Kea. We arranged the shoot for Friday night.

The studio is based at Trentham Racecourse and is huge, offering a seamless backdrop, a small bed set and plenty of other space.

Once Ali arrived we discussed the various shots that we were going to do and then selected the outfits for each. Given her first experience it was importantly to take the shoot slowly so we started with fully clothed sequences against the white seamless and then using some of the furniture.LR_Ali_20141212-7 LR_Ali_20141212-13LR_Ali_20141212-29 LR_Ali_20141212-21

Part of the area includes a very large powder room with full length mirrors and so I knew that I wanted to incorporate those. Having a room with mirrors presents interesting challenges when it comes to placing the lights but not impossible.

LR_Ali_20141212-39

When I meet a model for the first time I always ask them what they do not like about themselves. Ali said her feet so it became a little bit of fun throughout the shoot when I said that I would break her of that phobia by having lots of the them in the shots.

By the time that we moved to the bed set Ali was very relaxed and it came across in her images.

LR_Ali_20141212-41

We had planned to do a series of high key images but simply ran out of time however we did finish with another series against the white but this time with Ali only wearing a white shirt.

LR_Ali_20141212-58She tells me that she really enjoyed the session and we are planning on doing another one early in 2015 to get the shots we didn’t get around to.

The studio space worked out really well and I intend to use it again next year.

The Naked Art Class (NSFW) – Part One Shooting the image

The Naked Art Class
The Naked Art Class

Sometimes the time between getting an idea and actually executing it can be a long interval. About two years ago when my wife was doing art school and bringing home lots of drawings from her “life studies” classes, I got the idea to create a satirical image based on a class. In that I wanted to revert the roles whereby the model was clothed and all the class were nude.

I never really took it further than a concept but this year I decided that I needed to actually bring it to life as I am planning on submitting it for an exhibition next year. So I booked a studio and posted a casting call as well as contacting a number of models who had taken part in the body painting competitions. I also thought it would be more satirical if the model was male, as most life art models are female.

By the end of casting I has six models selected as artists and a male model, and everything seemed to be going to plan.

As often happens that plan went out the window when the male model and two female models became unavailable, then one got sick and then on the day two didn’t show. So having gone from being able to do the whole shoot in a single image I had a male model (Jacob) and two female artists (Sian and Kylie). This was going to change the way that the image was put together.

Below are a series of images and explanations of the various shots that made up the final image.

The first priority was to determine what f-stop would give me sufficient depth of field (DOF) to ensure that my model and artists were in sufficient focus. Generally the DOF runs from one third in front, and two thirds behind the focus point. In the case of my image that focus point was to be on the male model.

With the camera set on the tripod i estimated that f9 would be a good starting point, and with the help of a willing volunteer we shot two images. The camera was set to Aperture priority and the lights were not turned on at this stage.

First shot taken where the model was standing
Second shot where an artist would be standing

My guess was correct and so we now turned the lights on and made sure that the exposure was at f9 where the front easels were positioned.

Knowing that shoot had now become a composite the first image taken was of an empty room that would enable me to use as a base. BTS-NAS-3

At this stage the lighting was from two lights fitting with 1 metre soft boxes positioned at 45 degrees to the camera. You can see the lighting by the shadows cast.

Having only two models, and sox easels meant that they would be shot three times. I started with the right hand side of the image. At this stage Jacob was only in position to give the girls a reference point.BTS-NAS-4

I then moved the girls to the other side and repositioned a light so that it was providing f9 at the point where Jacob was standing so that from this series i Would select one for Jacob. BTS-NAS-5

We then moved Jacob out of the way, and moved both lights forward and metered the rear easels to f9 and shot the girls at the back of the room.BTS-NAS-6

I then positioned a light back on the central spot and had Jacob strike a pose. I took the camera off the tripod and moved to a position behind each easel and shot what the artist standing there would have seen.BTS-NAS-7

I thought that I had everything I needed for the image but as I was working through the composite (which will be in part 2) I realised that an element was not working. I decided that I needed a third model in the shot so I contacted Renee (who was the sick one) and a fortnight after the original shoot she came round home and we shot her.

This was shot in my family room with the stuff just moved around so please excuse the mess.

Getting the angles, and the distance right was the hardest part of the set up here.

In part two I will go into putting the image together.

Improving your photography one day at a time

We are at that time of year when people think of great promises that they will try to keep in the following year. We call them “New Year resolutions”. Now in all honesty very few survive the month of January but occasionally one of them will stick.

At this yearend I encourage everyone to make a resolution to improve their photography and the easiest way to do this is to challenge yourself to shoot a photo a day through 2015.

At the end of 2010 I decided to embark on such a challenge and encouraged a number of members of my camera club to do the same. Everyone started with great gusto, which did fade as the holidays ended, but there are still three of us going strong. On December 31 those remaining will shoot day 1461.

Now before you all say that this is to hard, consider the following:

  1. Firstly and most importantly a photo a day challenge does not require you to photograph a prize winning image each day. It is simply about training your eye to see images around you and capturing them. You may choose to share them or keep them to yourself. It is fully acceptable to have images that actually fail if you are learning from them.
This image from April 2011 will never win any awards. It simply records an event.
  1. You don’t need to have a wide variety of subjects or themes. There are people who challenged themselves to shoot the same lighthouse each day and another person shot 365 self-portraits. You choose how you want to plan the shoots
  1. Don’t stress about having to get the shot each day. If you look at some of the work of the great street photographers you will find that they have excelled at shooting the mundane everyday life around them.
From December 2012 a street scenes shot and then given a different treatment.
  1. You don’t need expensive gear. Simply shoot with what you have but get into a routine of carrying the gear with you. For most people now that camera will be the one in your phone.

    Shot with an iPhone
    Shot with an iPhone 
  1. Photo a day gives you the perfect opportunity to explore photographic genres that you may not consider to be your main areas (for example landscapes for me).

20130309

On the basis of four years experience there are some tips that I will share

  1. When you start make a list of fall back items. This may be things that you see one day after you already have that day’s image and others that you will shoot if all else fails on the day. And don’t worry we all have still life images shot late in the evening. On the first day that I went out walking I came back with a list of 30 items to shoot. Within a week there were 40 on it. Four years later there are still 40 items on it.
  1. Build the shooting into a daily routine. For me I find the weekends more troublesome than the week. This is because it is part of my routine that I shoot most of my images during my lunchtime.
  1. Once you have a shot do not worry about trying to improve on it immediately. Save that for another day. Generally speaking after I get my shot I will not bother trying to take another, unless I see something else that will only occur on that day.

20141129

Basic Lighting Designs

Last Sunday I had a studio booked for an art project I am working on so as I was going to have all my lighting gear set up decided that I would run a lighting workshop as well.

Over the course of 4 hours I took the photographers through seven different lighting arrangements using the lights and then finished utilising natural light. I had booked an experienced model for the event but she contacted me the night before to say that she was ill and not able to make it. So my daughter ended up stepping in to help and she did quite a good job.

I wanted to emphasise that lighting is an art and not a science and that the process of working with lights was to add them one at a time. I was mindful that not everyone can afford expensive studio lights so we started with arrangements that could be replicated with off camera flash using speed lights.

As I was instructing the others what to do I did not have time to shoot example images with each arrangement.

These are  the seven arrangements that I demonstrated:

Using one light

One light with reflector (45degrees)

This is one of the simplest and most common lighting arrangement. A single light is set at a 45 degree angle to the subject and then a reflector is introduced on the other side at a similar angle to bounce some light into the shadows. In this and the next arrangement the main light was in a 1 meter softbox.

One light at 45 degrees with reflector

One light with reflector (rim)

This lighting arrangement is similar to the first however the main light is brought alongside the subject. This produces a must stronger ratio of the light between the two sides of the face.

One light set as full rim

rim

Clamshell

This lighting involves a single light mounted above the camera aiming down at the subject and a reflector positioned below to fill in the shadows. The arrangement produces butterfly lighting with a shadow below the nose. For the clamshell the main light used a beauty dish.

Clamshell
Clamshell

Single Light Highkey

Normally when you think of highkey lighting you would think that it involves multiple lights. It can be produced with a single light and a couple of reflectors. In this case the single light is placed behind the subject and essentially becomes both the light and the backdrop.

In front of the subject two large white reflectors are placed and you shoot between them. The light is metered for the front of the subject resulting in a background blowing out.

The arrangement
The arrangement

For the shot ideally I would have liked to use my 1.5 meter October but I forgot to pack the adapter ring that allowed the Bowen mount to fit my Elinchrom lights so instead had to use a 1m softbox.

HIKey

Two Light arrangements

Two light axis lighting

An axis lighting arrangement has the subject standing in the middle of two lights aimed on the same axis. I demonstrated two arrangements. In the first both lights have the same modifiers. In the second arrangement the rear modifier was fitted with a small honeycomb grid. In this case its was much more of a hair light.

Equal front and rear lights
Second light was now solely set up as a hair light

Production

The final arrangement show was what a referred to as “production lighting”. This is used when you wish to shoot a large number of subjects quickly and the aim is to have well lit rather than dramatic lighting on the subjects.

In this arrangement both lights are set to the same power.

Lighting Workshop - 4

No Lights

As the studio we were using had large north facing windows at the end of session we simply used the window and reflector to produce images like this one, proving that you don’t need to spend much money at all.

window