This is the full series of the dressmaker and the story. If you want to read the background to the shoot you will find it on this post.
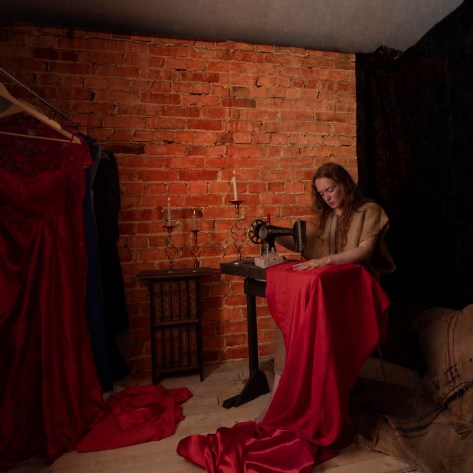
The dressmaker lived in poverty but she was extremely talented. All shehad to wear was clothes made from sacks the kind people at a nearby chocolate factory had given her.
All of the rich of the own came to here to make their gowns, but they barely paid her any attention.
The dressmaker dreamed of what it would be like if she could be like them.
As the night of the ball approached she had made quite a number ofdresses, and she wondered what it would be like to wear them.
Then a client told her that she no longer wanted the dress she had made, and she was not going to pay for it. The dressmaker thought what would happen if she did put it on.
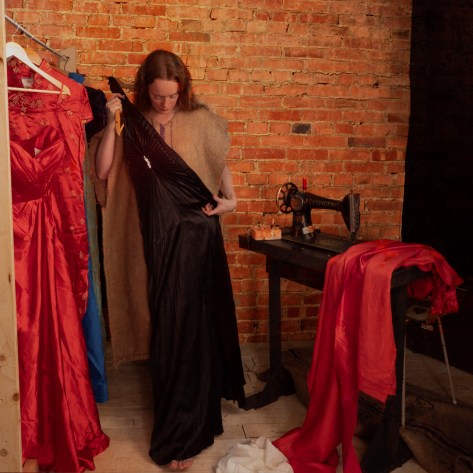
The night of masked ball came and the dressmaker decided to put on the unused dress and attend the event. In the new clothes the rich of the town did not recognise her and happily treated as one of their own.
This post will be quite different to others in that it will not contain any finished images. Rather it will go into the process that went into a set of images that tell a story. The actual images will be in the next post.
A number of years ago I saw a brilliant image of a girl using a sewing machine in a moonlit attic. It set a seed that took several years to come to fruition (over three in fact). I knew that I wanted to do an image of a girl and a sewing machine. As it developed it turned into a sort of Cinderella story and eventually became a series I have called “The Dressmaker”.
The first prop, the sewing machine was bought three years ago at the Petone Fair. A second hand shop was selling them off for $20.00. They were leftover when the tables they were originally sitting on were turned into furniture. I bought the machine and it sat in our storage for years.
The machine
Then this year a number of events came together that made me decide to do the shoot.
The first was my daughter leaving home which meant our family room could be used as a studio to shoot in, and the set could be left up. I knew that to make the image look realistic then staging was important.
The second was a chance visit to my works printers where I saw a pile of wooden crates that had packed some new machines they were installing. I thought that it would be create to use to create movable walls, (as well as providing materials to reline our garage), so I asked if I could have them. They said yes and I was shocked when I got home to find a large pile. It took four nights to denail it so that we could get the ply under cover.
What was a pleasant surprise was the state of the timber that had been used to make the frames. There were lengths that looked just like flooring.
There was other timber that I was able to use to build a table for the sewing machine on. The top proved tricky as the bottom of the sewing machine was not a consistent shape. The machine was quite heavy so the table had to be engineered to carry the weight.
The completed table
I had worked out that two ply sheets were sufficient to build a workable wall but how to safely stand them up took some thinking. Initially I was going to build a floor bracket for them to slot into. I had seen other floor standing walls work in similar form. The problem was that such brackets need to be suitable size to handle the weight.
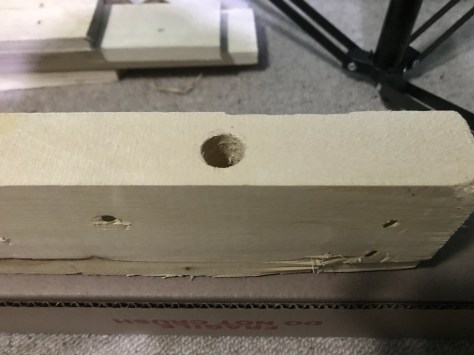
I then realised that if I took one of the left over lengths of timber I could drill some holes through it, and mount it on top of my existing background supports. Then the ply could be safely clamped to it. This worked perfectly. Once upright I used a roll of wallpaper bought from an Op shop to cover the ply and particular the join between the two panels.
The cross support
The final piece to fall into place was when I went to the Hutt Camera Club shoot at Fort Balance. The model Che wore a red dress that had a really long train. When I saw it I knew it was perfect for my shoot, so at the end of the shoot it ended up in my car.
Che and the red dress
I had already obtained cocoa bean shacks from my work as I had intended to use them in a model shoot. I therefore felt I had all of ingredients for the shoot.
From previous work I knew that Kimberley would be perfect for my dressmaker, so I posted a casting call on Facebook and ended up selecting a model for her client.
Sian, who I have shot on a number of occasions also said she was interested. She proved to a lifesaver when the model I had cast pulled out two hours before the shoot was to happen.
The shoot was scheduled and I started to build the set. I had worked out the camera angle and the lighting so as each piece was put into place I could see how it looked in the viewfinder.
To hide the walls in our family room I attached a second backdrop rail at a 90 degree to the ply and hung some old curtain material. To hide the edge of the flooring I used old suitcases and then on shoot day added some more sacks.
I had wanted to borrow a portable clothes stand for the dresses but could locate one so ended up building one from more of the left over timber.
The clothes rack support
It probably took the best part of two hours to get everything into place before I put in the lights. My fill light was my Godox AD600 in a 1.5 metre softbox positioned just to camera left. My main light was one of my Elinchrom set up high camera left and positioned above the end of the clothes rack. This light was gelled orange.
One of my recent purchases was a Godox receiver which should have worked with the transmitter on the camera. It was plugged into the back of the Elinchrom and should have triggered it at the same time as the other Godox lights. For some reason this didn’t work and the Elinchrom was firing after the main light, meaning that it was not having any impact on the shoot. Fortunately the Elinchrom has built in optical slaves which work perfectly.
For the shots of Kimberly on her own I wanted to give the impression of candlelight so I had a third light that was gelled orange, and in a gridded reflector to cast a very targeted light.
Each year the Heretaunga Rotary Club runs a major book sale and my wife is one of the volunteers that help sort the donated books as they come in. A number of weeks ago she brought home a collection of photographic magazines for me to look through. They were mainly out of date, however I do like looking for images that may provide inspiration for shots.
I came across an image is an old issue of Photo Review Australia in a section called “Emerging Talent” by Samantha Everton that I really liked.
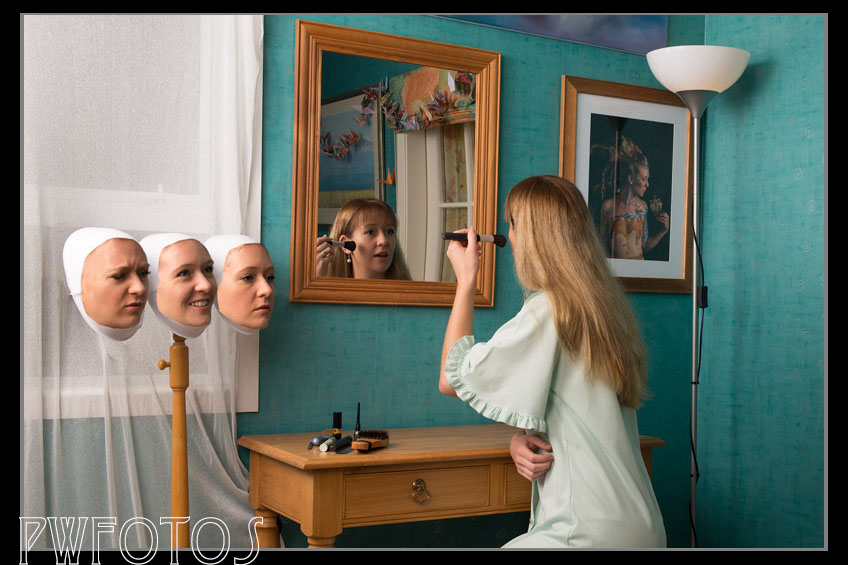
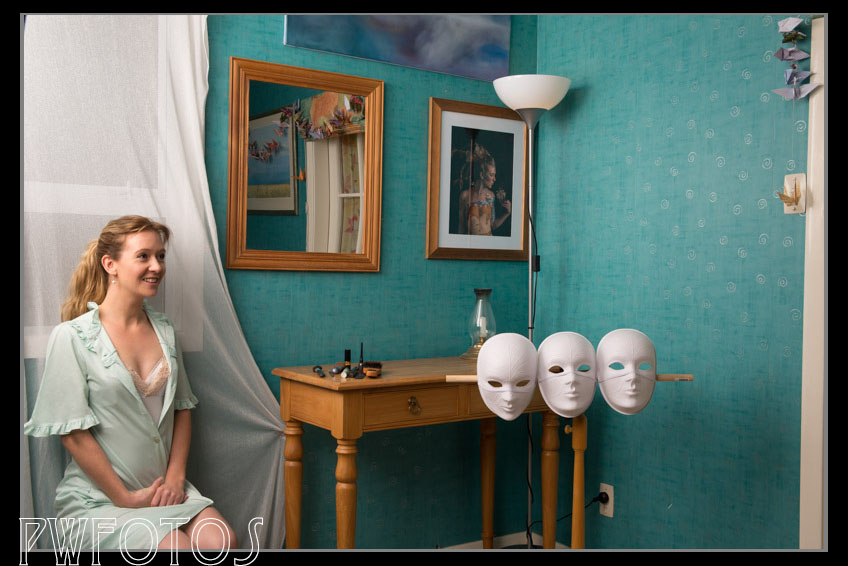
The expression “Putting on your face” immediately sprang to mind and so when I was doing the Getting Ready image in the model series I asked Sian would she like to help me create something.
I set up a small area of my studio to resemble a makeup area and has Sian sit an pretend to put makeup on. I had purchased three paper mache masks and attached them to a length of dowel that was sitting on a stand uses for needlework. The camera was mounted on a tripod so that all of the angles would stay consistent to make the compositing a little easier.
We tried a number of angles and poses to see which one would work before finally settling on one.
I then moved the masks out of the way and Sian positioned herself roughly where each had been and did a different facial expression at the three positions. Shooting in this way meant that the lighting was consistent across the whole image.
Lighting for the image was two soft boxes. The main one was set camera left and up high. (You can just see the edge of it is the top lefthand corner). The second light was camera right and lower down to add some fill. This light had to be carefully placed to ensure that it did not appear in the mirror.
The composite in Photoshop was fairly simple although given that Sian’s face and the masks are different I did have to use the liquify tool a bit.
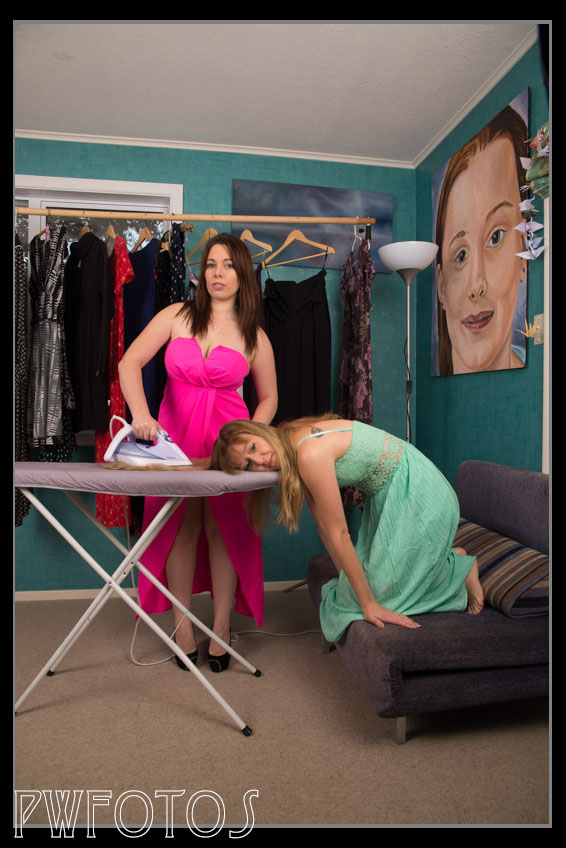
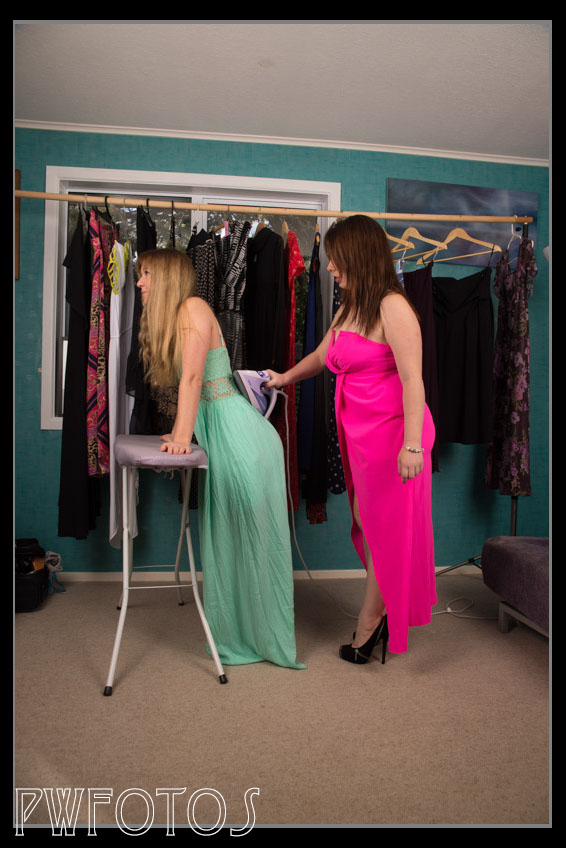
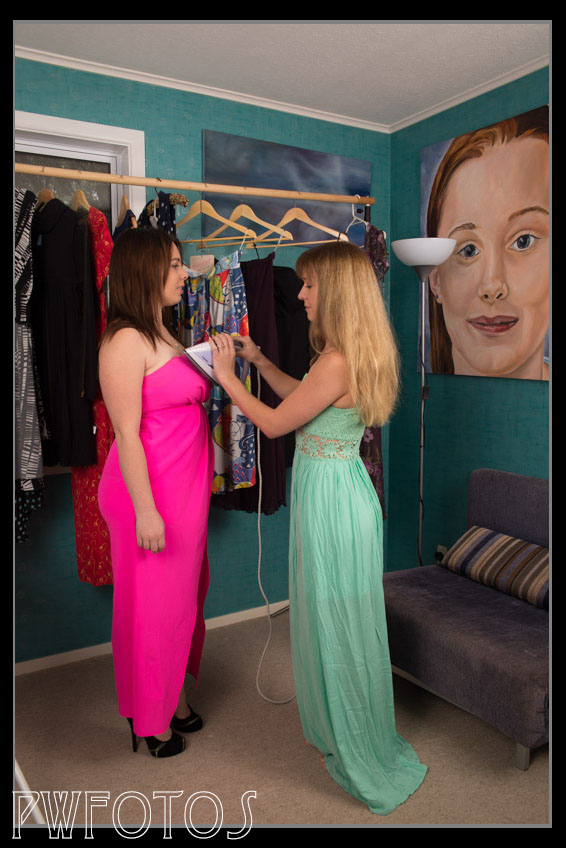
The latest image in the model series is entitled “Getting Ready” and continues with the theme that models and the clothes are connected to a point that while getting ready the model would already be in them.
For the shoot I was joined by two models that I have shot on a number of times before namely Renee (pink) and Sian (green). My home studio was set up like the dressing area of a show and we played with a number of different posing options before shooting the final image shown above.
The shoot was done in really high spirits and the girls had a great time ironing each other.
For the final shot we carefully positioned Sian onto the ironing board and very quickly took several shots. While it was a reasonably study board I was not sure how well it would last given that it was not designed to hold as much weight as was on it.
Fortunately it lasted the distance and it was only as Sian was getting off it that the bracket gave way. As I had it set at a height that we do not normally use I doubt that I will get in too much trouble with my wife.
The third image in the model series was entitled “Keeping Cleaning”. While the intention with each of the concepts is to produce a single image, this shoot has actually produced two, and so I am trying to sort out which one I will end up using in the series.
Not far from my home is a commercial laundry which I thought I could approach to get the background shots I needed. I had decided that it was better to composite the image rather than try to arrange for a location.
I cut a circle in another one of the bike boxes that had been obtained for the “Past Use By Date” shoot and then attached it to the front of the box. We stood the box up and then positioned it on two chairs to get it to the right height for the machine.
The mock up machine
For the shot of Christa inside of the machine the box was lowered to the floor and she carefully climbed inside.
I visited the laundry on a Saturday morning (when it was closed) and we took the required shots. The ones from the studio were on my iPad so that I could line this up as best as possible. The laundry manager was more than happy to help out and in fact she said that the machine was more than capable of handling Christa’s weight and that I could bring her along should the composites not work.
I tried to replicate the lighting as close as I could to that shot in the studio however an exact match was not possible as it was necessary to avoid reflection in the glass doors of the machine. As it was I was not able to completely eliminate them and had to fix the image in photoshop.
I was very pleased with the result that came out. The only issue with shooting against a green screen is that you can get a colour cast on the skin. This is shown in an earlier version of the composite. I still need to do some more work on removing this before the final image is produced.
By sheer fluke when I posted the images on Facebook one of the people who viewed it pointed out that the name on the machine Huebsch is German for “Pretty”. I have checked this out and it is not quite correct and in fact Hubsch is the correct spelling however they are pronounced the same way.
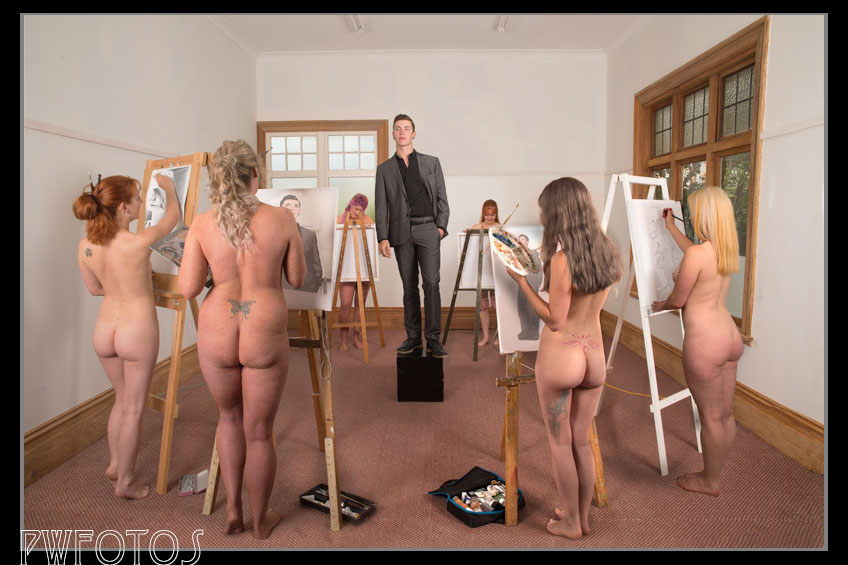
Sometimes the time between getting an idea and actually executing it can be a long interval. About two years ago when my wife was doing art school and bringing home lots of drawings from her “life studies” classes, I got the idea to create a satirical image based on a class. In that I wanted to revert the roles whereby the model was clothed and all the class were nude.
I never really took it further than a concept but this year I decided that I needed to actually bring it to life as I am planning on submitting it for an exhibition next year. So I booked a studio and posted a casting call as well as contacting a number of models who had taken part in the body painting competitions. I also thought it would be more satirical if the model was male, as most life art models are female.
By the end of casting I has six models selected as artists and a male model, and everything seemed to be going to plan.
As often happens that plan went out the window when the male model and two female models became unavailable, then one got sick and then on the day two didn’t show. So having gone from being able to do the whole shoot in a single image I had a male model (Jacob) and two female artists (Sian and Kylie). This was going to change the way that the image was put together.
Below are a series of images and explanations of the various shots that made up the final image.
The first priority was to determine what f-stop would give me sufficient depth of field (DOF) to ensure that my model and artists were in sufficient focus. Generally the DOF runs from one third in front, and two thirds behind the focus point. In the case of my image that focus point was to be on the male model.
With the camera set on the tripod i estimated that f9 would be a good starting point, and with the help of a willing volunteer we shot two images. The camera was set to Aperture priority and the lights were not turned on at this stage.
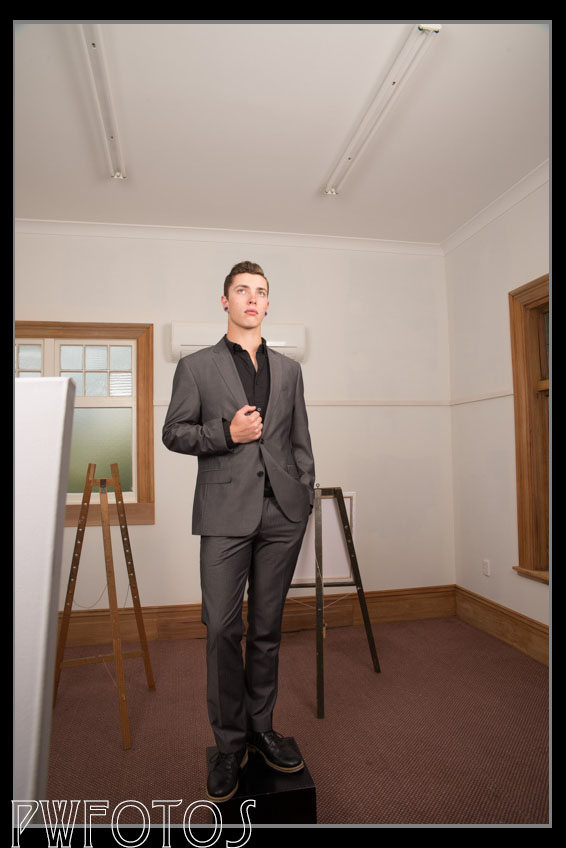
First shot taken where the model was standing
Second shot where an artist would be standing
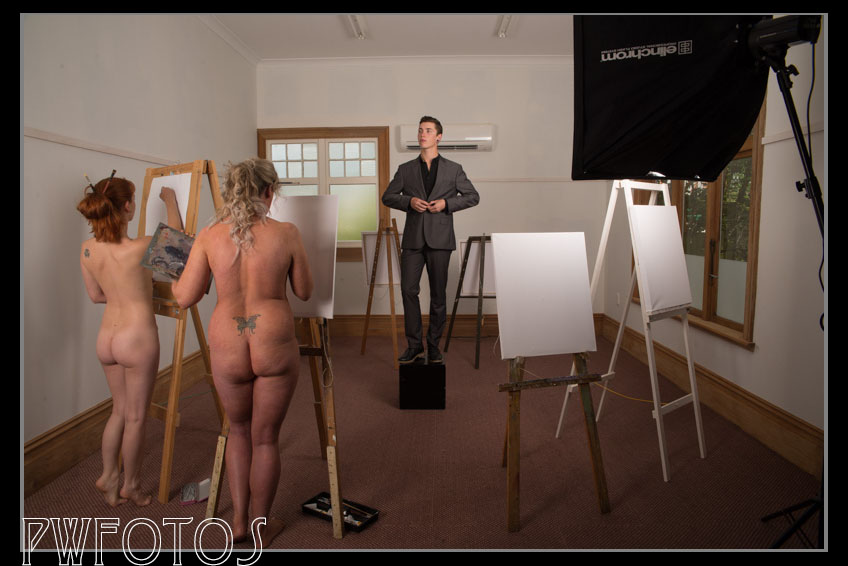
My guess was correct and so we now turned the lights on and made sure that the exposure was at f9 where the front easels were positioned.
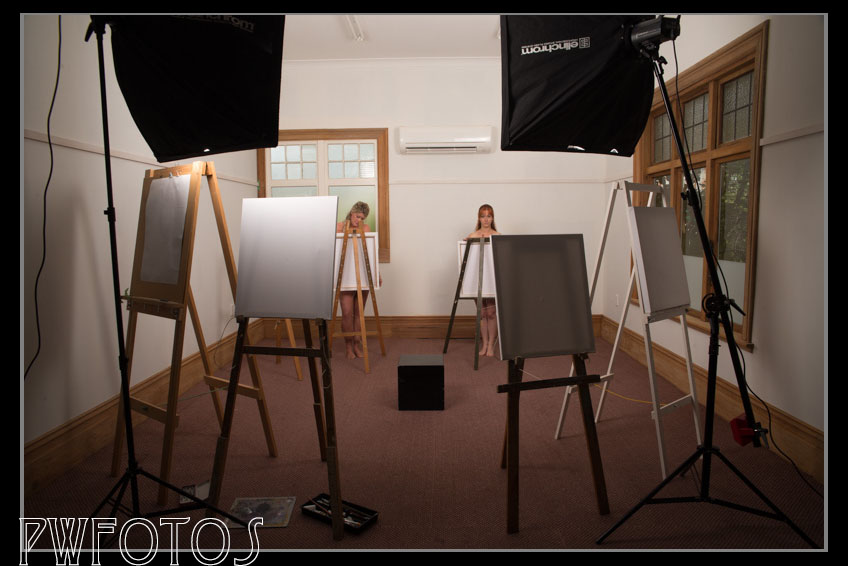
Knowing that shoot had now become a composite the first image taken was of an empty room that would enable me to use as a base.
At this stage the lighting was from two lights fitting with 1 metre soft boxes positioned at 45 degrees to the camera. You can see the lighting by the shadows cast.
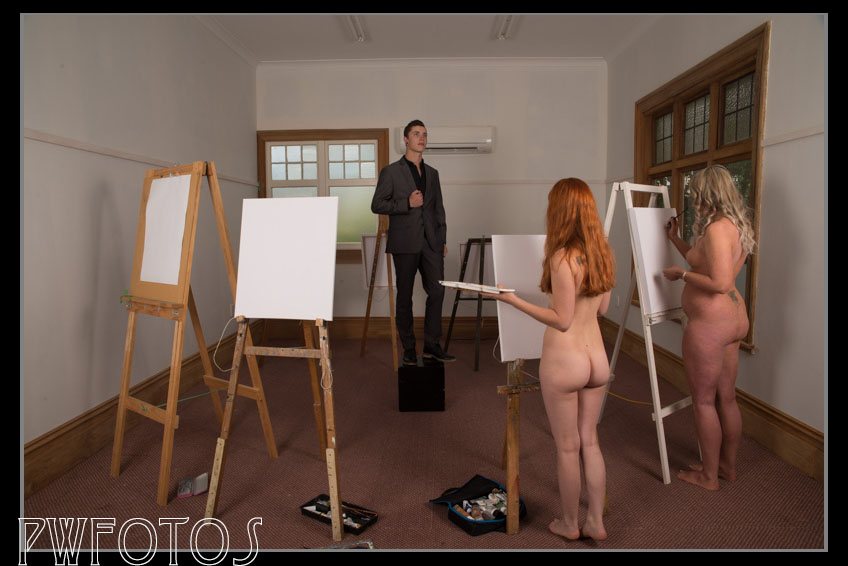
Having only two models, and sox easels meant that they would be shot three times. I started with the right hand side of the image. At this stage Jacob was only in position to give the girls a reference point.
I then moved the girls to the other side and repositioned a light so that it was providing f9 at the point where Jacob was standing so that from this series i Would select one for Jacob.
We then moved Jacob out of the way, and moved both lights forward and metered the rear easels to f9 and shot the girls at the back of the room.
I then positioned a light back on the central spot and had Jacob strike a pose. I took the camera off the tripod and moved to a position behind each easel and shot what the artist standing there would have seen.
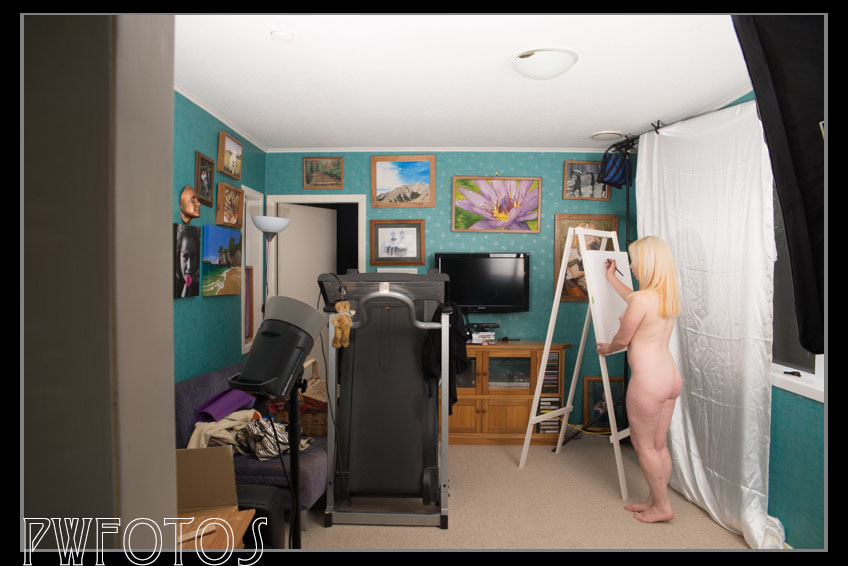
I thought that I had everything I needed for the image but as I was working through the composite (which will be in part 2) I realised that an element was not working. I decided that I needed a third model in the shot so I contacted Renee (who was the sick one) and a fortnight after the original shoot she came round home and we shot her.
This was shot in my family room with the stuff just moved around so please excuse the mess.
Getting the angles, and the distance right was the hardest part of the set up here.
In part two I will go into putting the image together.