This afternoon we closed the doors on the exhibition that has run for the last fortnight that combined painting by my wife and photos by me. The title of the exhibition was “Life’s little moments” and as such my images mainly fell into the genre of “street photography”.
Now that the exhibition is over I can share the images with a wider audience. While the digital images look good there is nothing like seeming them in white mattes on the wall of a gallery. The images are presented in the order that they appeared on the walls of the gallery.
Sometimes the best way forward, is to admit that what you are doing has gone of the rails, and the best way to fix it is to start again.
This was certainly the case when I started out to build the composite of the Art Class together. In Part One of this blog post I went through how the image was shot and that because a number of models had been unable to make it, I had to shoot it as a composite and assemble it in Photoshop.
The early draft image
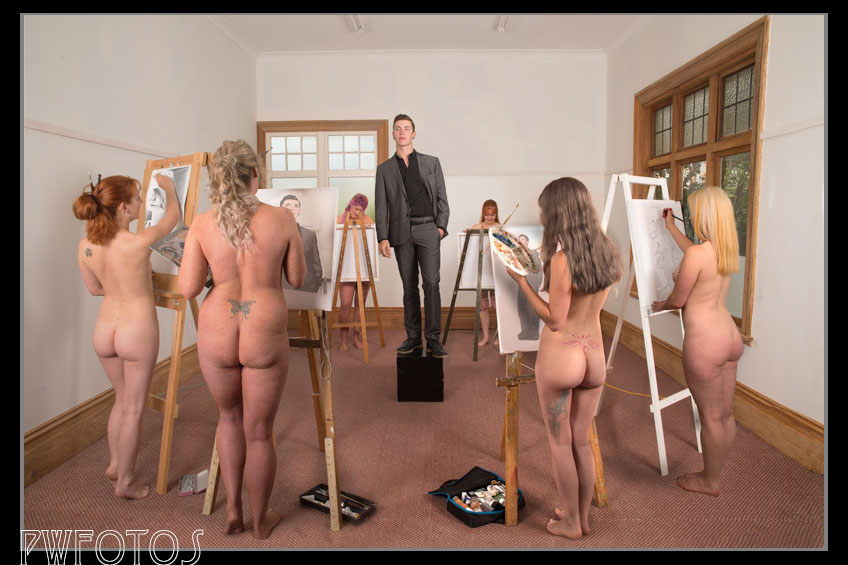
I selected the best images in lightroom and starting with the elements closest to the viewer, combined them as layers in photoshop masking out what I wanted to show through. After an hour I has a reasonable first cut. In order to save space I had only copied in the part of the element that I wanted rather than leaving a full layer.
I had an issue with shadows on the wall but other than that the image looked ok. The problem was that I did not want the viewer to immediately see that they were only two artists. Despite the fact that they had changed hair styles it was too obvious.
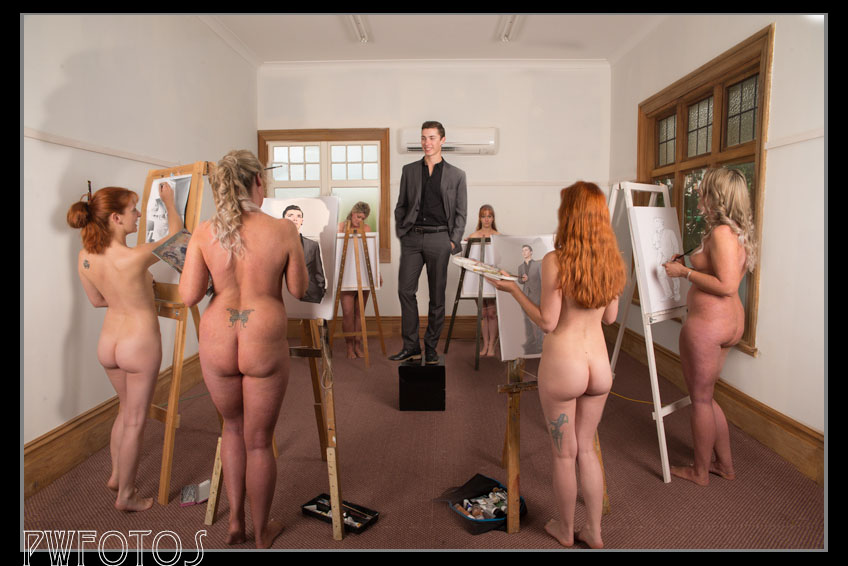
With Sian (redhead) adding a couple of extra tattoos and changing her hair colour made sufficient difference. But nothing I did really worked with Kylie so at that point I contacted Renee (who has been sick on the day) to see if she was available to shoot.
Once I had that image and tried to incorporate it the composite started to fall apart.
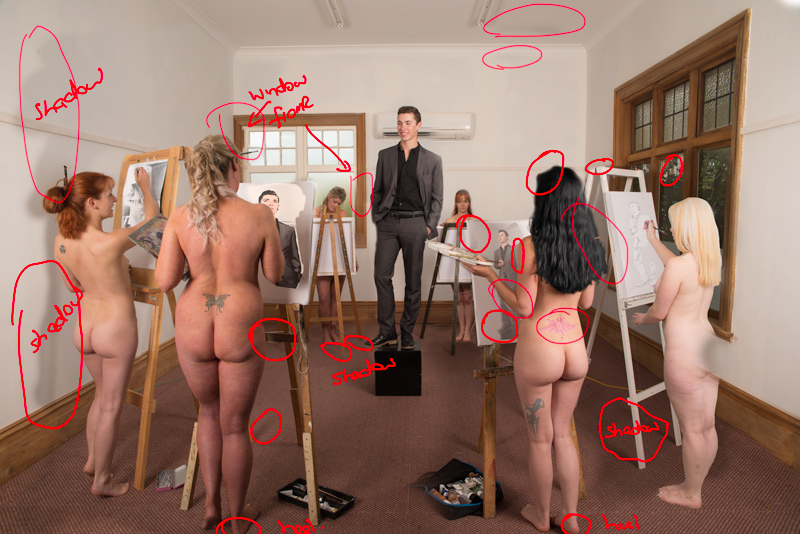
The image at the point I abandoned it.
I could not get the light to look consistent across the image and elements were not lining up. I also realised that I had cropped off the heels and needed to enlarge the canvas at the bottom and rebuild the missing part of the heel. Then I discovered that some of the elements on the layers that I had discarded was actually needed. After 45 minutes of struggling and getting nowhere fast I decided that the best approach was to scrap it and start again.
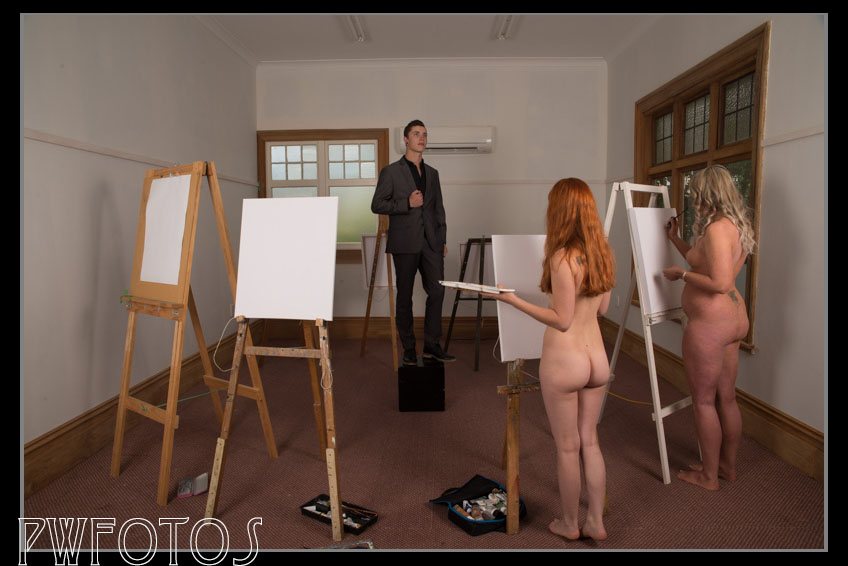
This time I started with the empty room which I enlarged slightly at the bottom so that I had space to deal with the missing heel. I placed the girls at the back first, balanced the exposure and then moved forward. Admittedly incorporated Renee into the image was the hardest element as she was not shot in the same environment and some more work is still needed there, as the feet are not there yet. Unfortunately feet are the hardest part of a composite to get right, and the usual techinques (not showing them, or making the area around them very dark) are not available to me.
Given that I have plenty of time before I have to exhibit the image I am sure that I will get it looking right by then. If you want to learn more about composites then the best resource I have found are the videos produced by Aaron Nace at www.phlearn.com
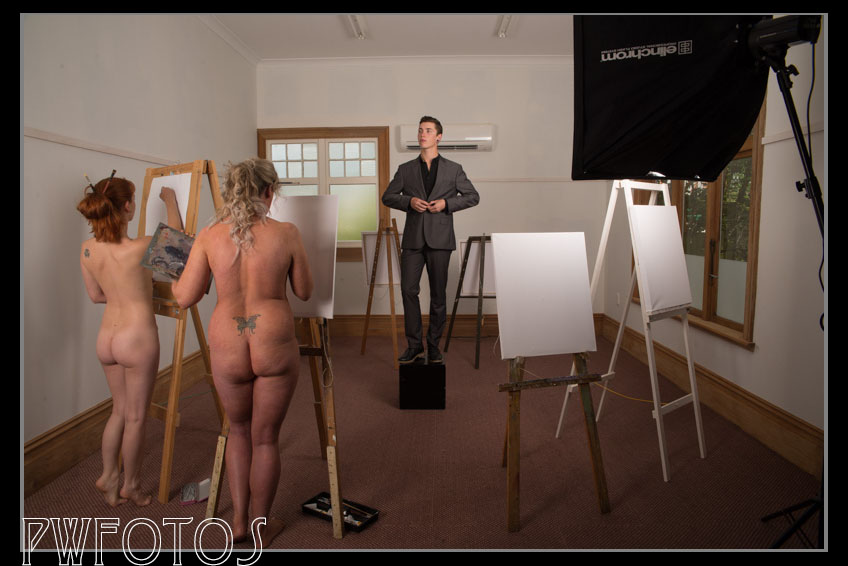
Sometimes the time between getting an idea and actually executing it can be a long interval. About two years ago when my wife was doing art school and bringing home lots of drawings from her “life studies” classes, I got the idea to create a satirical image based on a class. In that I wanted to revert the roles whereby the model was clothed and all the class were nude.
I never really took it further than a concept but this year I decided that I needed to actually bring it to life as I am planning on submitting it for an exhibition next year. So I booked a studio and posted a casting call as well as contacting a number of models who had taken part in the body painting competitions. I also thought it would be more satirical if the model was male, as most life art models are female.
By the end of casting I has six models selected as artists and a male model, and everything seemed to be going to plan.
As often happens that plan went out the window when the male model and two female models became unavailable, then one got sick and then on the day two didn’t show. So having gone from being able to do the whole shoot in a single image I had a male model (Jacob) and two female artists (Sian and Kylie). This was going to change the way that the image was put together.
Below are a series of images and explanations of the various shots that made up the final image.
The first priority was to determine what f-stop would give me sufficient depth of field (DOF) to ensure that my model and artists were in sufficient focus. Generally the DOF runs from one third in front, and two thirds behind the focus point. In the case of my image that focus point was to be on the male model.
With the camera set on the tripod i estimated that f9 would be a good starting point, and with the help of a willing volunteer we shot two images. The camera was set to Aperture priority and the lights were not turned on at this stage.
First shot taken where the model was standingSecond shot where an artist would be standing
My guess was correct and so we now turned the lights on and made sure that the exposure was at f9 where the front easels were positioned.
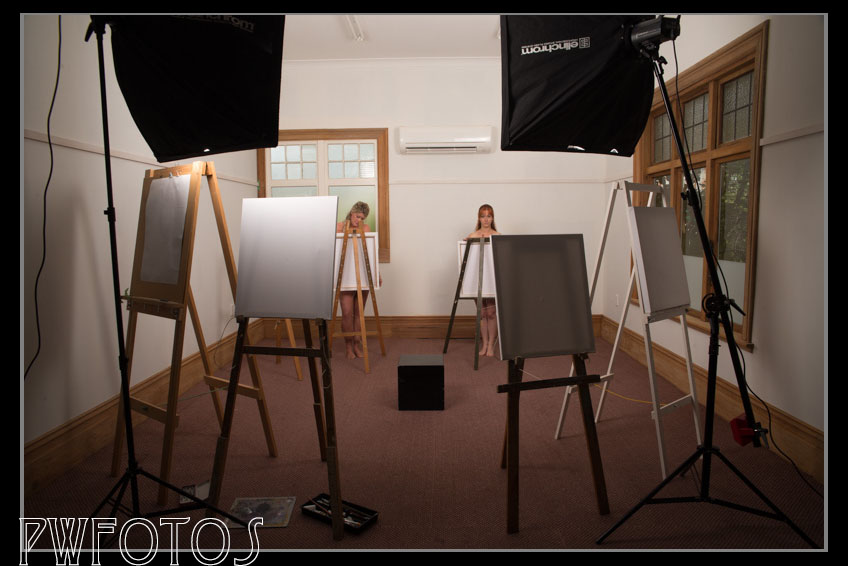
Knowing that shoot had now become a composite the first image taken was of an empty room that would enable me to use as a base.
At this stage the lighting was from two lights fitting with 1 metre soft boxes positioned at 45 degrees to the camera. You can see the lighting by the shadows cast.
Having only two models, and sox easels meant that they would be shot three times. I started with the right hand side of the image. At this stage Jacob was only in position to give the girls a reference point.
I then moved the girls to the other side and repositioned a light so that it was providing f9 at the point where Jacob was standing so that from this series i Would select one for Jacob.
We then moved Jacob out of the way, and moved both lights forward and metered the rear easels to f9 and shot the girls at the back of the room.
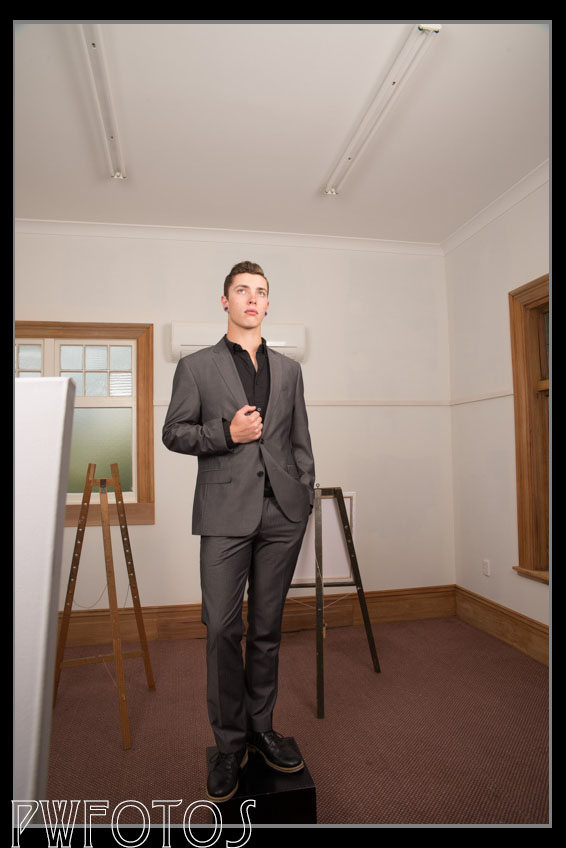
I then positioned a light back on the central spot and had Jacob strike a pose. I took the camera off the tripod and moved to a position behind each easel and shot what the artist standing there would have seen.
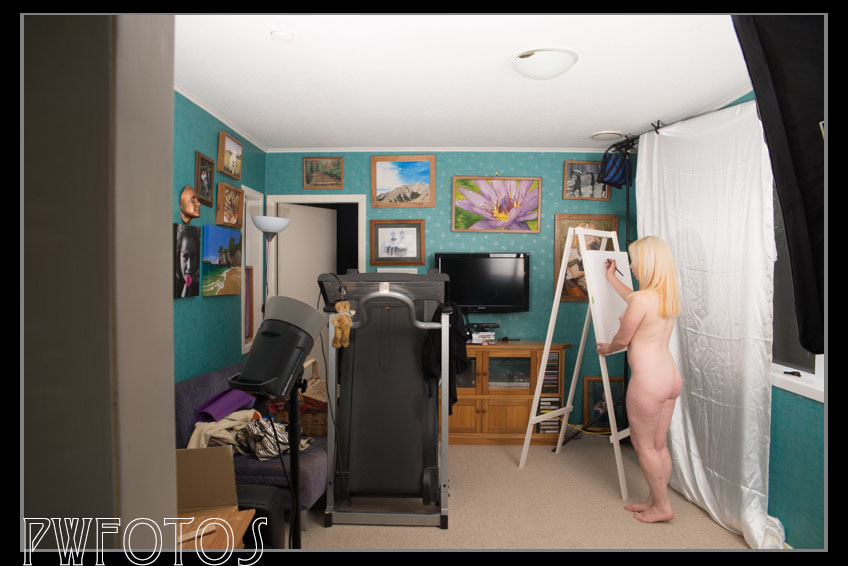
I thought that I had everything I needed for the image but as I was working through the composite (which will be in part 2) I realised that an element was not working. I decided that I needed a third model in the shot so I contacted Renee (who was the sick one) and a fortnight after the original shoot she came round home and we shot her.
This was shot in my family room with the stuff just moved around so please excuse the mess.
Getting the angles, and the distance right was the hardest part of the set up here.
In part two I will go into putting the image together.