
This post will be quite different to others in that it will not contain any finished images. Rather it will go into the process that went into a set of images that tell a story. The actual images will be in the next post.
A number of years ago I saw a brilliant image of a girl using a sewing machine in a moonlit attic. It set a seed that took several years to come to fruition (over three in fact). I knew that I wanted to do an image of a girl and a sewing machine. As it developed it turned into a sort of Cinderella story and eventually became a series I have called “The Dressmaker”.
The first prop, the sewing machine was bought three years ago at the Petone Fair. A second hand shop was selling them off for $20.00. They were leftover when the tables they were originally sitting on were turned into furniture. I bought the machine and it sat in our storage for years.

Then this year a number of events came together that made me decide to do the shoot.
The first was my daughter leaving home which meant our family room could be used as a studio to shoot in, and the set could be left up. I knew that to make the image look realistic then staging was important.
The second was a chance visit to my works printers where I saw a pile of wooden crates that had packed some new machines they were installing. I thought that it would be create to use to create movable walls, (as well as providing materials to reline our garage), so I asked if I could have them. They said yes and I was shocked when I got home to find a large pile. It took four nights to denail it so that we could get the ply under cover.
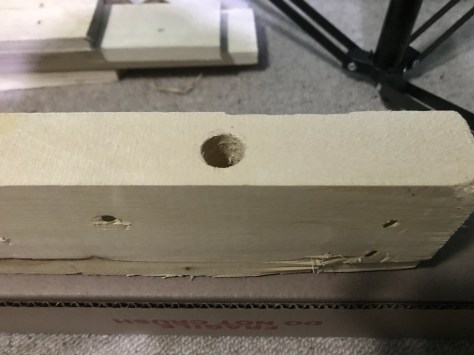
What was a pleasant surprise was the state of the timber that had been used to make the frames. There were lengths that looked just like flooring.
There was other timber that I was able to use to build a table for the sewing machine on. The top proved tricky as the bottom of the sewing machine was not a consistent shape. The machine was quite heavy so the table had to be engineered to carry the weight.

I had worked out that two ply sheets were sufficient to build a workable wall but how to safely stand them up took some thinking. Initially I was going to build a floor bracket for them to slot into. I had seen other floor standing walls work in similar form. The problem was that such brackets need to be suitable size to handle the weight.
I then realised that if I took one of the left over lengths of timber I could drill some holes through it, and mount it on top of my existing background supports. Then the ply could be safely clamped to it. This worked perfectly. Once upright I used a roll of wallpaper bought from an Op shop to cover the ply and particular the join between the two panels.
The final piece to fall into place was when I went to the Hutt Camera Club shoot at Fort Balance. The model Che wore a red dress that had a really long train. When I saw it I knew it was perfect for my shoot, so at the end of the shoot it ended up in my car.

I had already obtained cocoa bean shacks from my work as I had intended to use them in a model shoot. I therefore felt I had all of ingredients for the shoot.
From previous work I knew that Kimberley would be perfect for my dressmaker, so I posted a casting call on Facebook and ended up selecting a model for her client.
Sian, who I have shot on a number of occasions also said she was interested. She proved to a lifesaver when the model I had cast pulled out two hours before the shoot was to happen.
The shoot was scheduled and I started to build the set. I had worked out the camera angle and the lighting so as each piece was put into place I could see how it looked in the viewfinder.
To hide the walls in our family room I attached a second backdrop rail at a 90 degree to the ply and hung some old curtain material. To hide the edge of the flooring I used old suitcases and then on shoot day added some more sacks.
I had wanted to borrow a portable clothes stand for the dresses but could locate one so ended up building one from more of the left over timber.

It probably took the best part of two hours to get everything into place before I put in the lights. My fill light was my Godox AD600 in a 1.5 metre softbox positioned just to camera left. My main light was one of my Elinchrom set up high camera left and positioned above the end of the clothes rack. This light was gelled orange.
One of my recent purchases was a Godox receiver which should have worked with the transmitter on the camera. It was plugged into the back of the Elinchrom and should have triggered it at the same time as the other Godox lights. For some reason this didn’t work and the Elinchrom was firing after the main light, meaning that it was not having any impact on the shoot. Fortunately the Elinchrom has built in optical slaves which work perfectly.
For the shots of Kimberly on her own I wanted to give the impression of candlelight so I had a third light that was gelled orange, and in a gridded reflector to cast a very targeted light.
Tomorrow I will show you the finished series.
