With the ice skater and flower shoots done now turned her attention to some images that Melissa asked to be taken with one of her chickens. She changed into a a simple gypsy style outfit for this part of the shoot. The chicken had been caught earlier and it spent the time inside of a pet carriage case.
As I wanted a more classical look to the image I put a painted backdrop over the white that we have previously used and pulled out the background lights. I repositioned the main light into Rembrandt orientation and match this with a reflector to provide a little fill.
There is an old saying in Hollywood that you should never work with children or animals and I’m afraid it was true in this case. In hindsight we probably should have got the chicken out of the garden shortly before we were shooting with it, rather than leaving it in the cage through the other two shoots.
As a result when it came out of the parks it really it really didn’t want to sit still.
In fact it decided that it wanted to be a parrot and sit on Melissa’s shoulder.
A couple of days before I was to shoot with Melissa she asked me if it was okay if the second photographer (Clara) could join us at the shoot. Clara had an idea that they wanted to use but had no lighting gear. I had no problem in helping another photographer out so I said it was fine and I would show Clara how to use my lights.
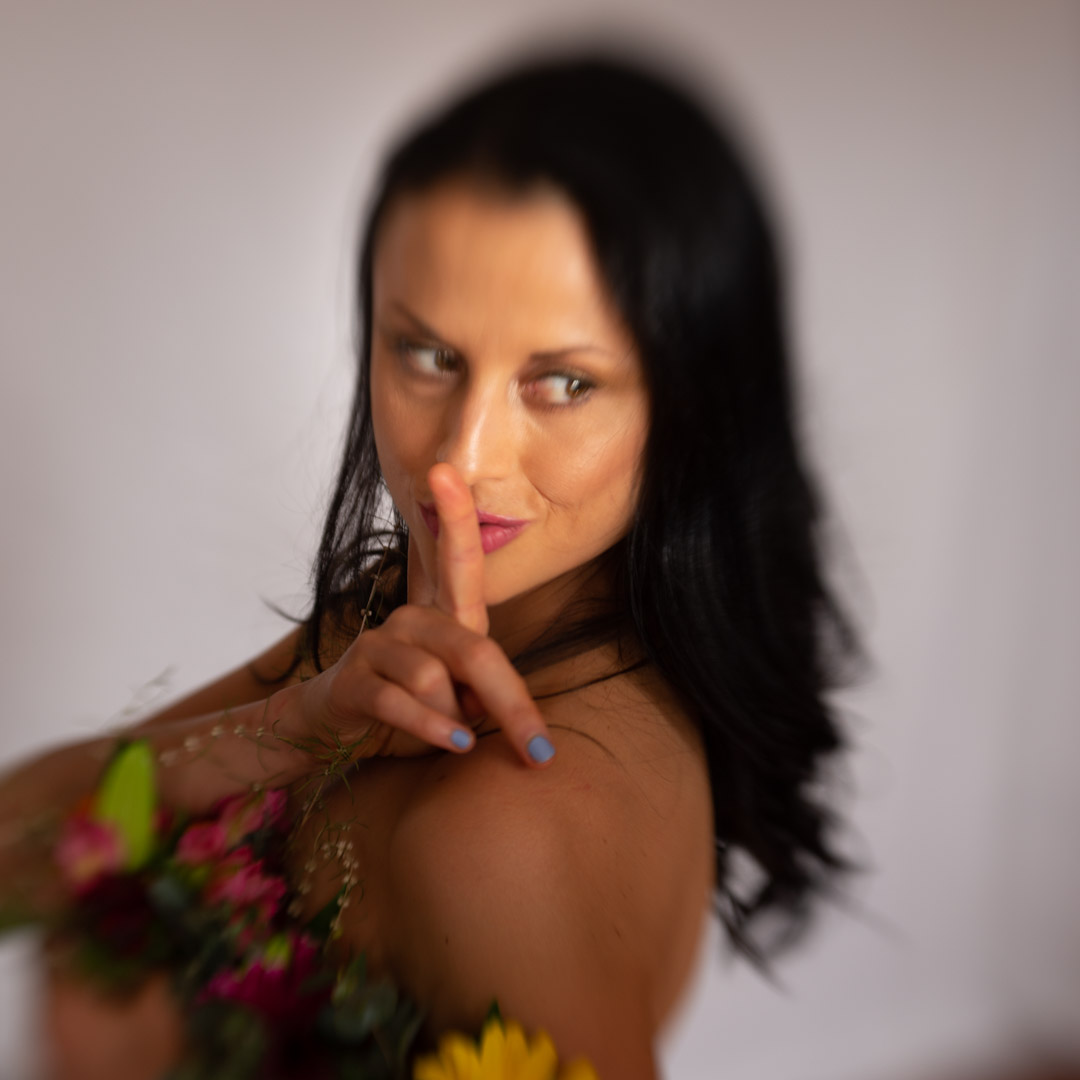
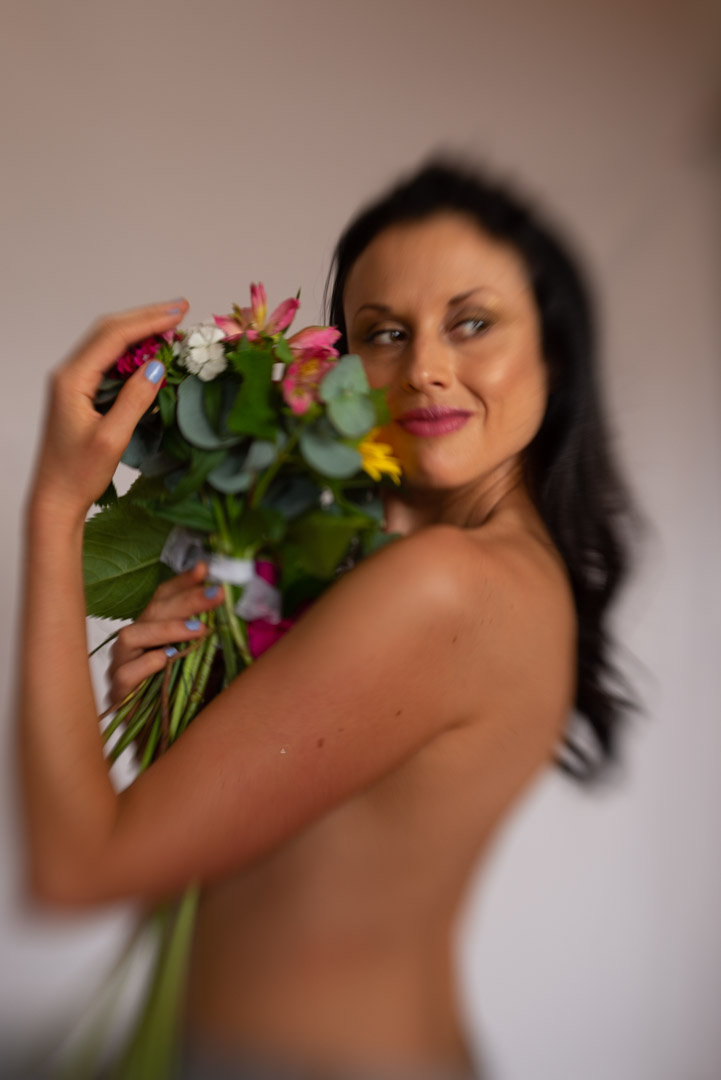
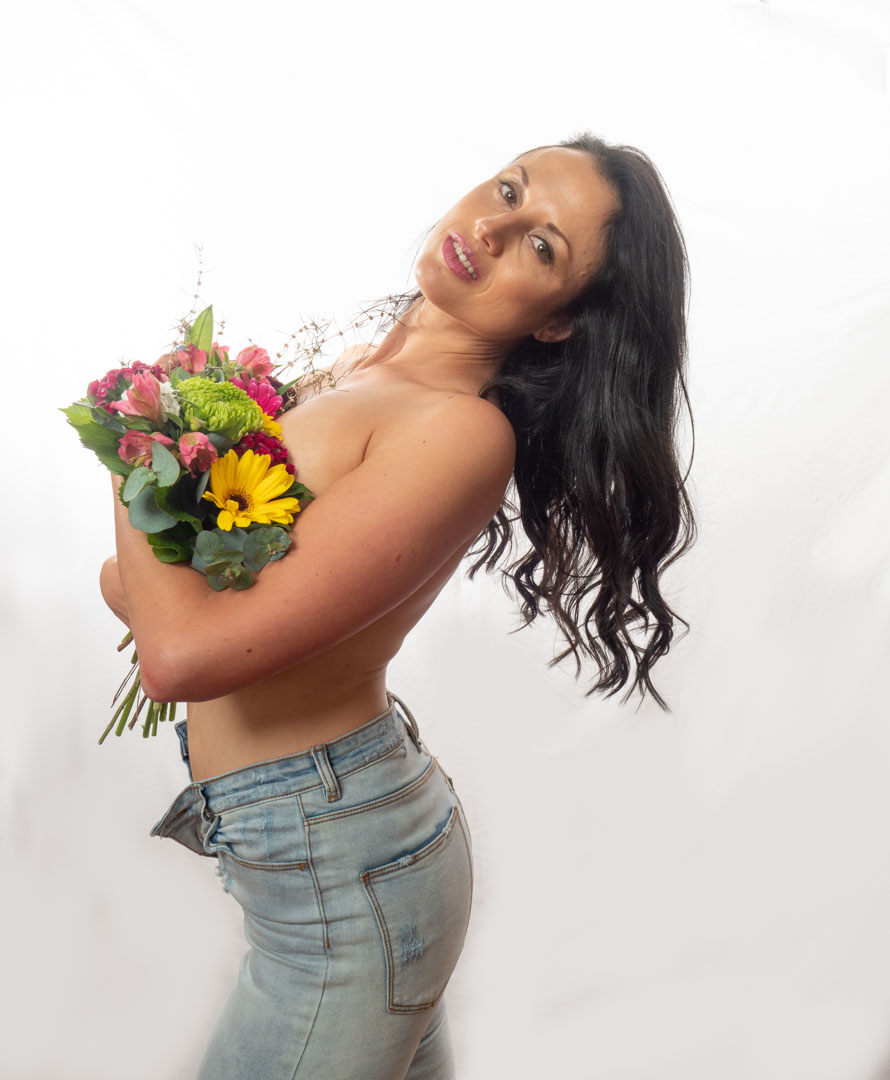
Clara’s idea was to shoot Melissa topless with a bunch of flowers strategically hiding her breasts. However when she arrived the small bunch of fake flowers she had were not gonna be sufficient, so while I was doing the skater shoot with Melissa she went off to the supermarket bought a bigger bunch.
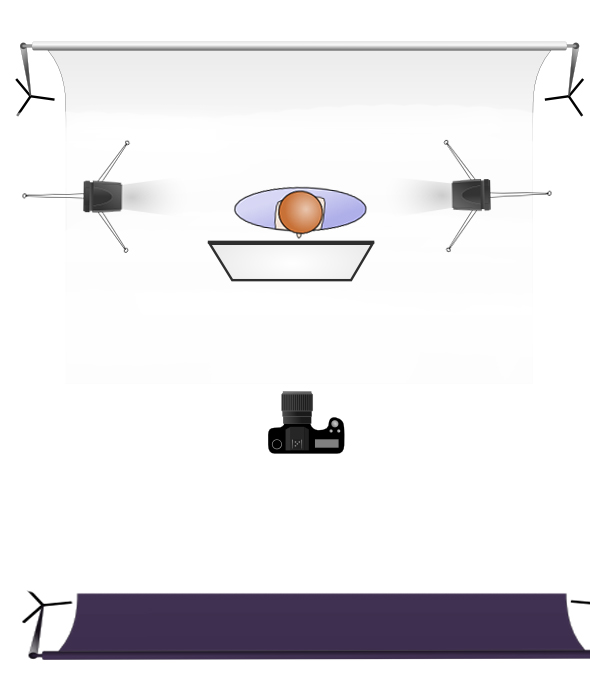
There was no need to alter the lighting setup with two lights on the backdrop and a main on Melissa. Although Clara was shooting with a Canon, the trigger I have worked seemlessly.
When I am shooting away from the studio I always take a back up camera which in this case was my Nikon d600. I also had my Lensbaby in the bag as well. I therefore decided to fit it and take some shots as I didn’t need to use the studio lights. The Lensbaby is quite tricky to focus it does produce an awesome result.
After Clara had finished I decided to take the trigger back and shoot some images of my own back on the Panasonic G9.
However in these I got Melissa to pose in completely different ways to what Clara had done so that she would have some alternative images. As it turned out these were the only images that Melissa got from the session.
I never actually saw the images that Clara shot so I’m not sure whether she actually got what she was wanting or not. Nor why she never gave any images to Melissa.
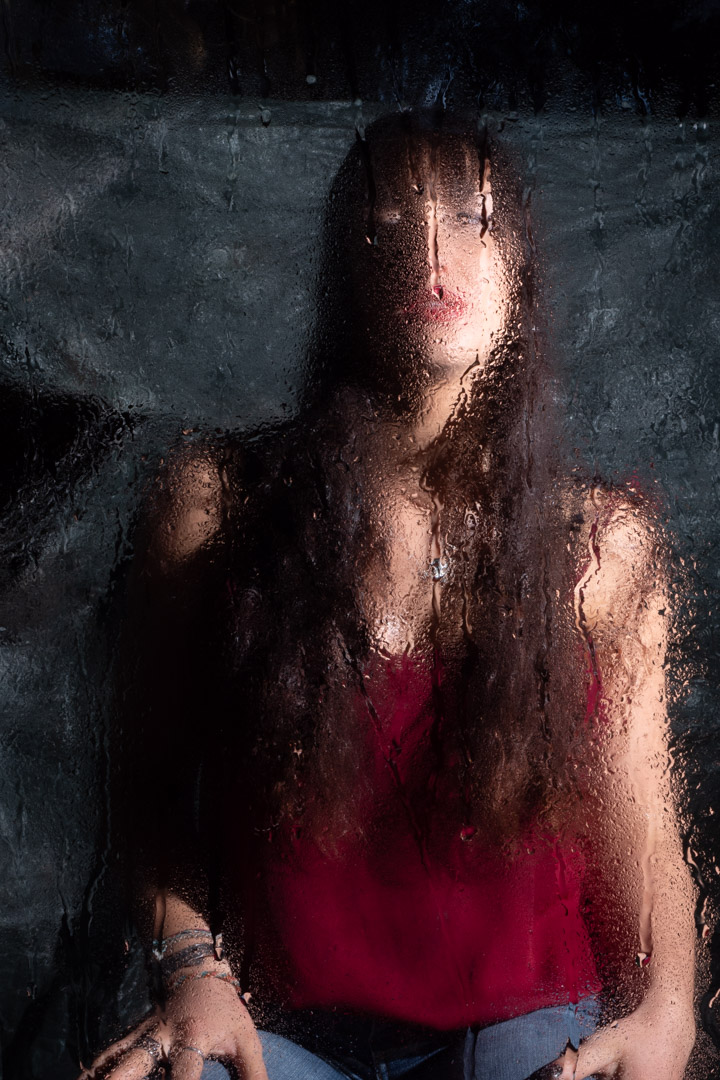
When Marianne and I started discussing options for her shot she said that she wanted to have a water look and showed me some examples that had clearly been shot in a shower. I agreed that we could do something similar and set to work figuring out how to do it.
Now the simple solution would be to shoot in an actual bathroom. Have done this is the past but one of the main issues you run into with such a shoot is having enough room to position the subject and lighting to the way that you want.
Fortunately I had an easy solution. When our main bathroom has been renovated, after a burst pipe, we had completely changed the shower. I had kept the door panel from the old shower as a possible prop for exactly this circumstances. So by using some upright supports and clamps, I was actually able to replicate a shower.
I chose an area under a large tree because this minimised the amount of natural light and let me have better control over the overall light. Generally speaking I will set the camera to remove all ambient light for only flash is used. When shooting outside this becomes more difficult and therefore any technique to limit the amount of natural light helps.
The main lighting was provided by two speed lights that were positioned on either side of Marianne and aimed so that they did not spill onto the glass. In order to avoid reflections on the front of the glass I positioned a large black backdrop behind the camera. As it turned out the light provided from the flash eliminated any reflections on the side of the glass facing the camera.
As we were not planning to shoot full body we positioned a stool and Maryann set on that. That gave the advantage that the lights and focus could be pretty much locked into place.
It was now a matter of applying the water. We used a spray bottle to apply water to both the glass and to Marianne and started shooting.
The glass worked really well and it is was a relatively simple setup so I am sure that I will use it again.
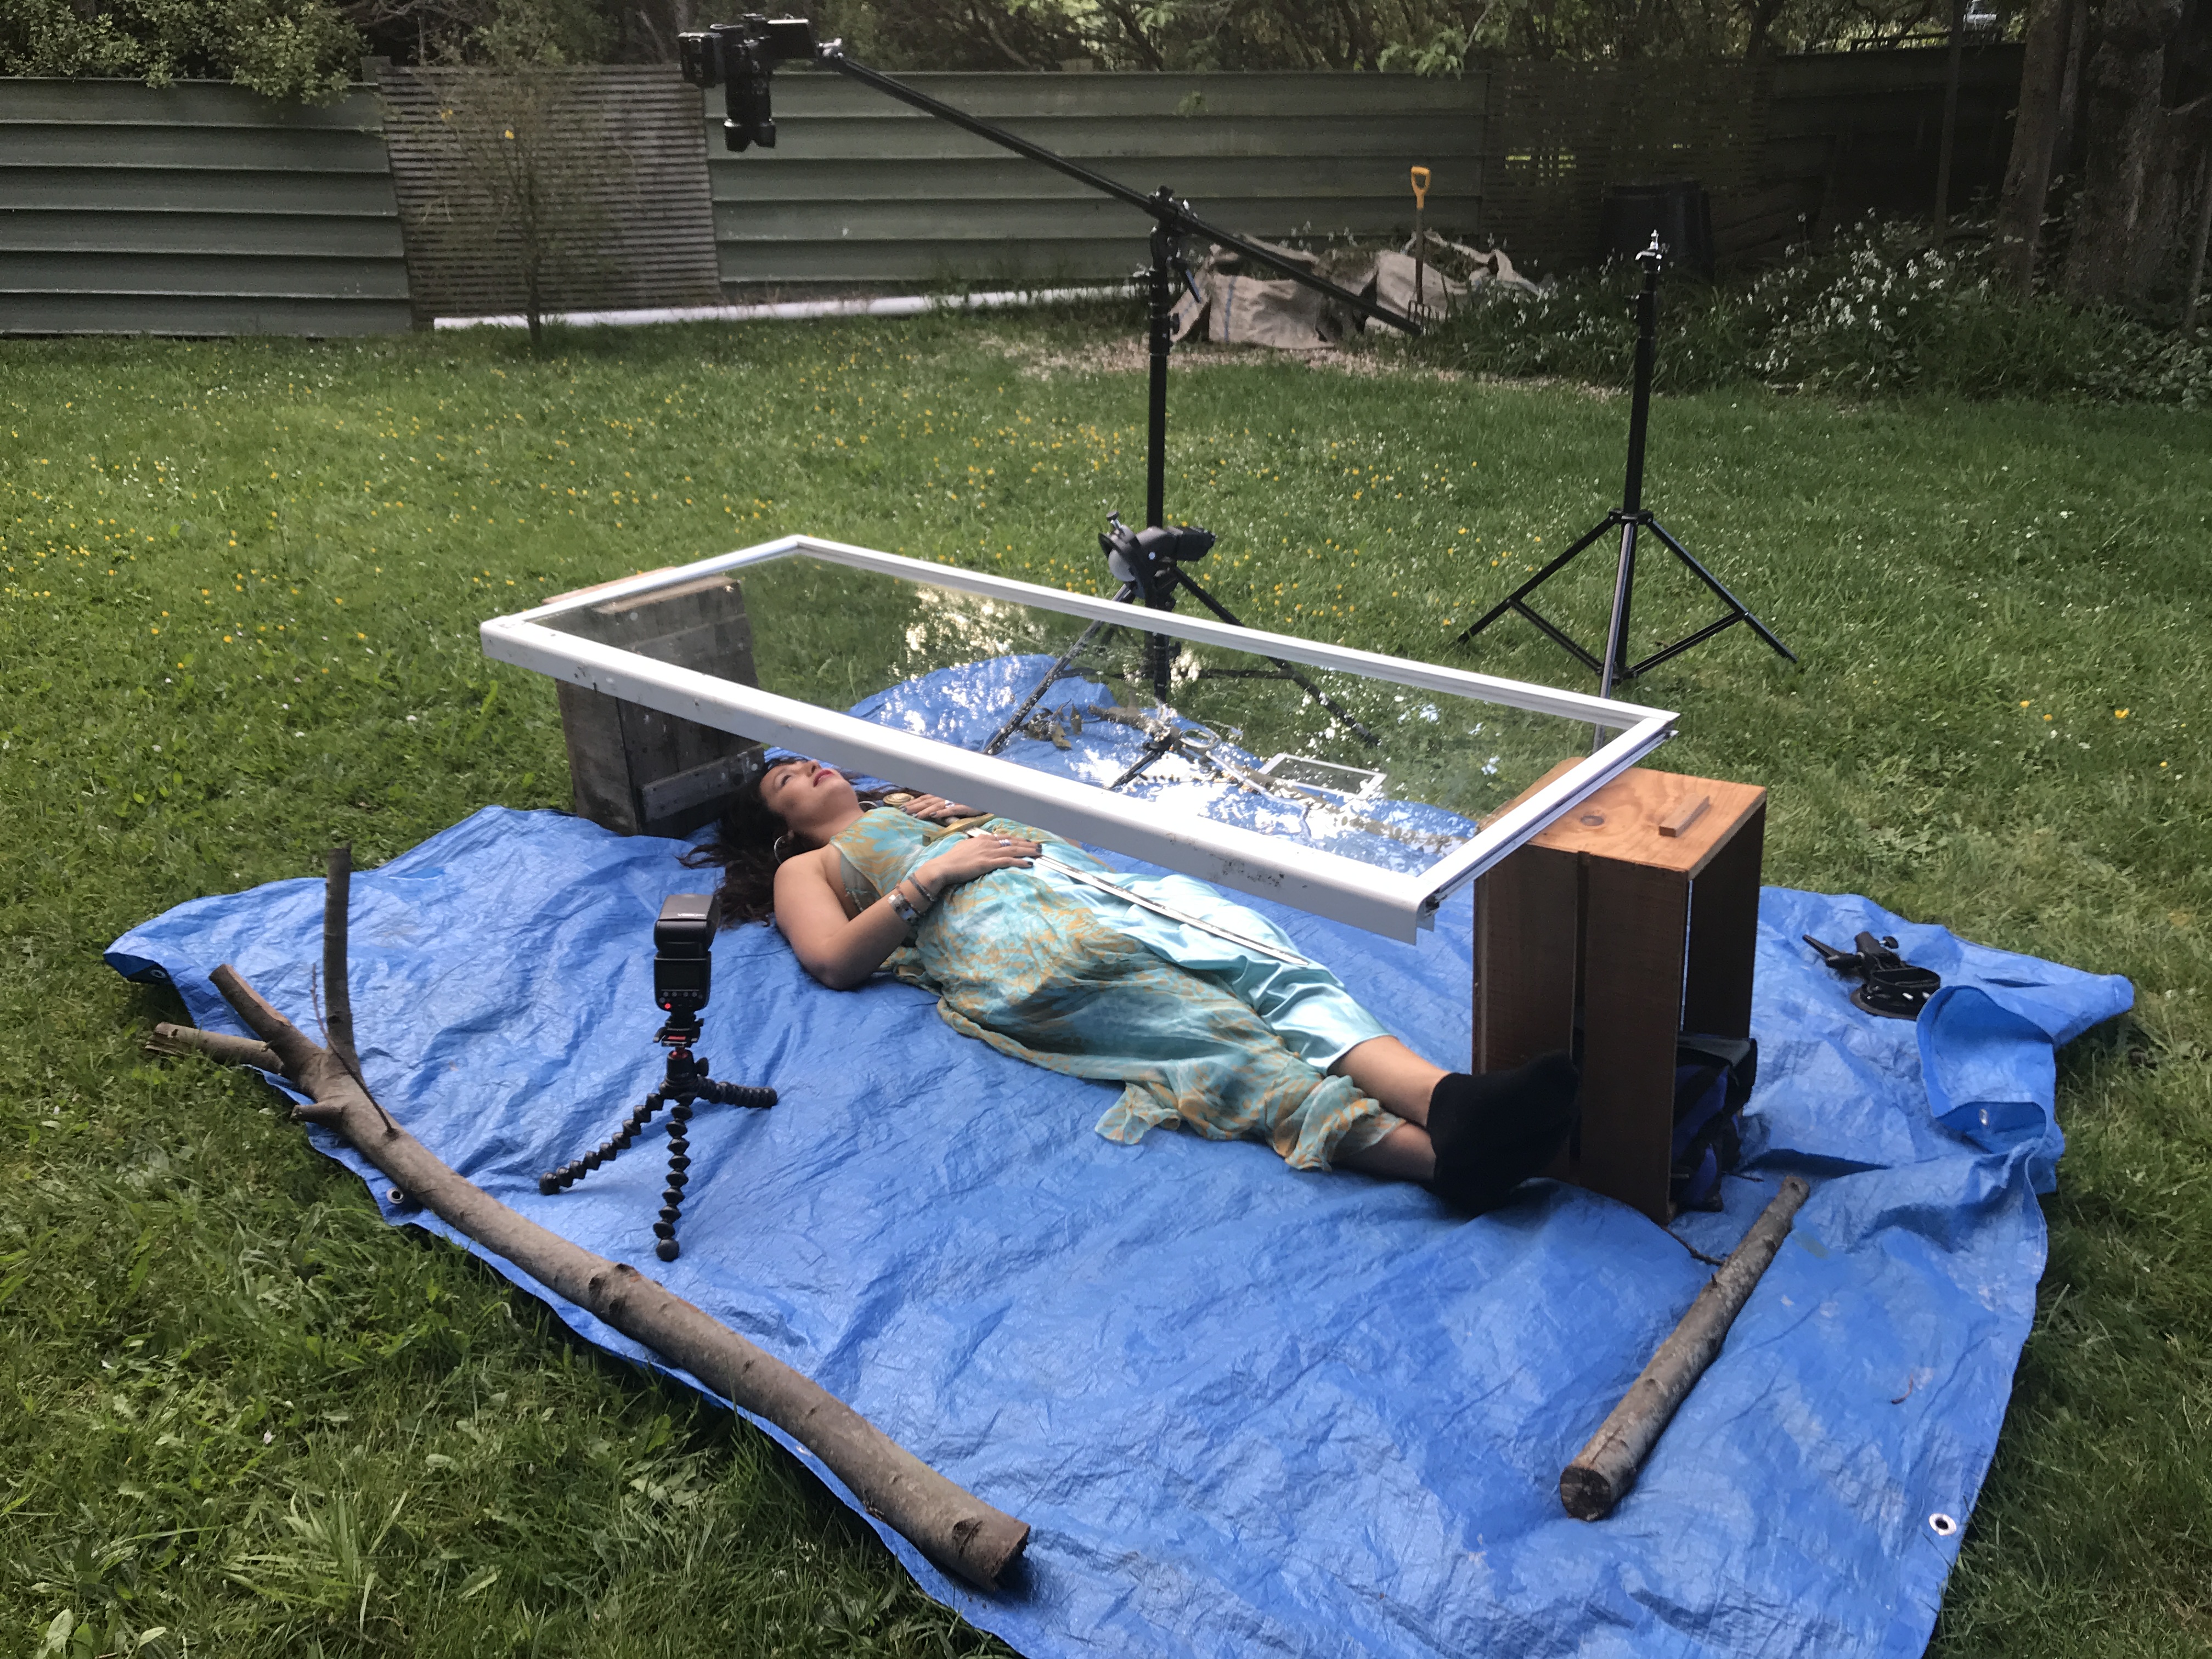
I then changed the setup to see if we could use it to replicate a model being under water. I had shot Megan a number of years before but that was in an actual bath.
I placed a tarpaulin on the ground and set the door on top of two boxes that made it high enough for Marianne to go under. I then positioned the camera on a boom and lights on either side of her. We then filled the top of the glass with about 1cm of water.
To try to mimic the water effect we placed a rolled up towel under Marianne’s neck so that her head was at the right angle. We then started to do a series of images before the local insect population decided were were on their dinner menu, and we were forced to call it quits.
While I ended up with some usable images I would have to say that work is still needed before I would be really happy with the technique. There were two main issues one of which is easier to solve than the other.
The first was that there was two much distance between the water and Marianne. By the time I had focused on her, the water essentially disappeared as it was completely out of focus. The result was an image that just looked soft. The answer would be to close the distance between the glass and subject.
The second issue in not so easy to fix. That is that the body changes shape when it is lying on the ground as opposed to being supported in water. Not sure what we do with that one.
Even though I didn’t come out with images exactly as I had hoped it was still a fun experiment to do.
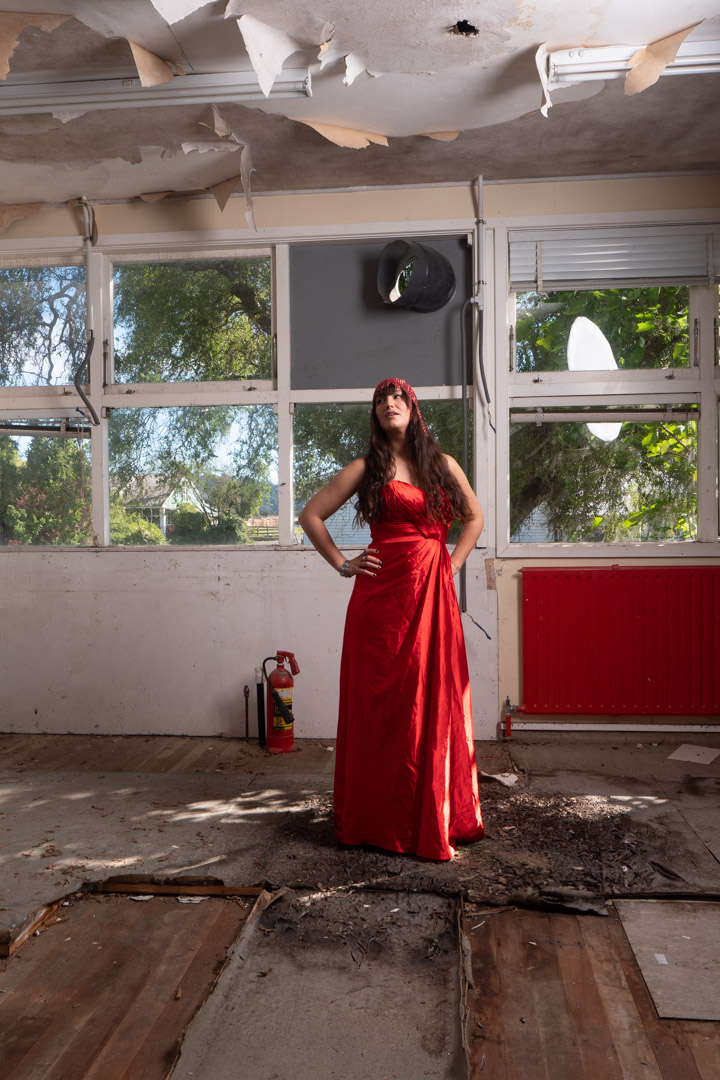
When Marianne and I went to the old science labs to do the levitation shoot I decided to pack another dress so that we could make the most of the location. As I expected she looked stunning in it.
We started in the same room as the other shots but this time I was using a single light which was positioned camera right in a rough Rembrandt location. This did present one slight challenge when I was shooting into a wall of windows as you clearly see in the image below.
The answer to this was to use the “double tap” technique that I have posted about in the past. Basically you take two shots in rapid fire. The flash will fire on the first but the second shot will occur before it has recharged. The second shot is then used to replace the glass in the area where the flash is visible.
We then moved to another room that had a complete wall of glass that was letting in lots of light. This meant that I could expose just for the ambient and the flash was not needed.
This had the advantage of being able to shoot multiple shots with Marianne walking. I find that option the best shots are obtained when you allow your subject to move freely rather than being posed.
In post I did have to remove some of the signs that were still on the wall as they were somewhat distracting.
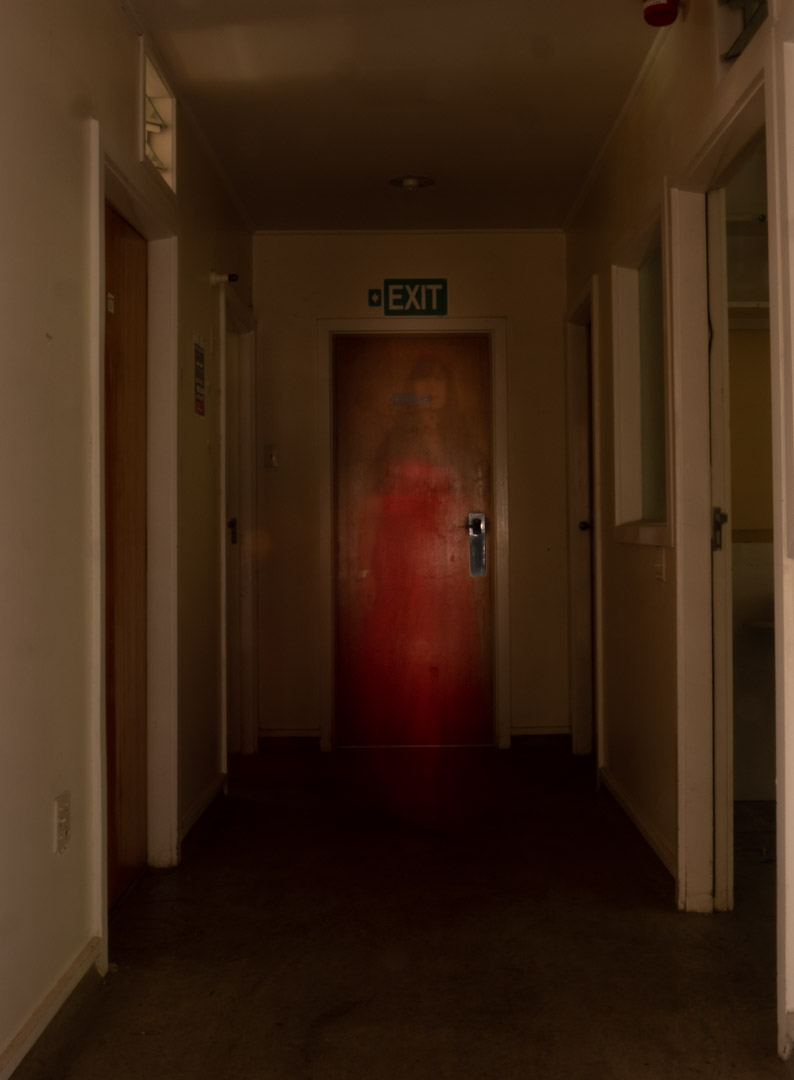
I then noticed that the passageway outside of the room was rather dark so we decided to do something a little ghostly. I took the camera right up to f22 and set a 4.0s exposure. I then had Marianne stand out of the shot. When the shutter was pressed she slowly walked into the screen holding for about a second. The created a very ghostly image.
We then moved into what must have been an old freezer room which was completely dark. we used the same setting of f22 for 4s but this time I fired the flash at a very low setting twice.
This created a very unusual double exposure.
For the final series of images we moved to a passageway that ran between two of the buildings. This had glass on both sides so again we were able to shoot without the need of flash.
Overall the venue worked really well and we were able to get a good variety of shots within a small space and time.
One of the things I am vert mindful of is that the model in a TFP (time for print) arrangement does need to get something out of the shoot. This is particularly so when they helping you out with personal projects where the images may end being quite different from the usual style.
With the Zodiac series I knew that the images were being heavily post processed, to keep the consistency of the set, but that was going to mean that the images with not necessarily be those the model would want for say a model portfolio. Therefore I make sure that we set time aside at each station to shoot images specifically for the model model.
After shooting the Libra images Zaniah got changed into her own outfits and using the same lighting and background I shot her with two different outfits.
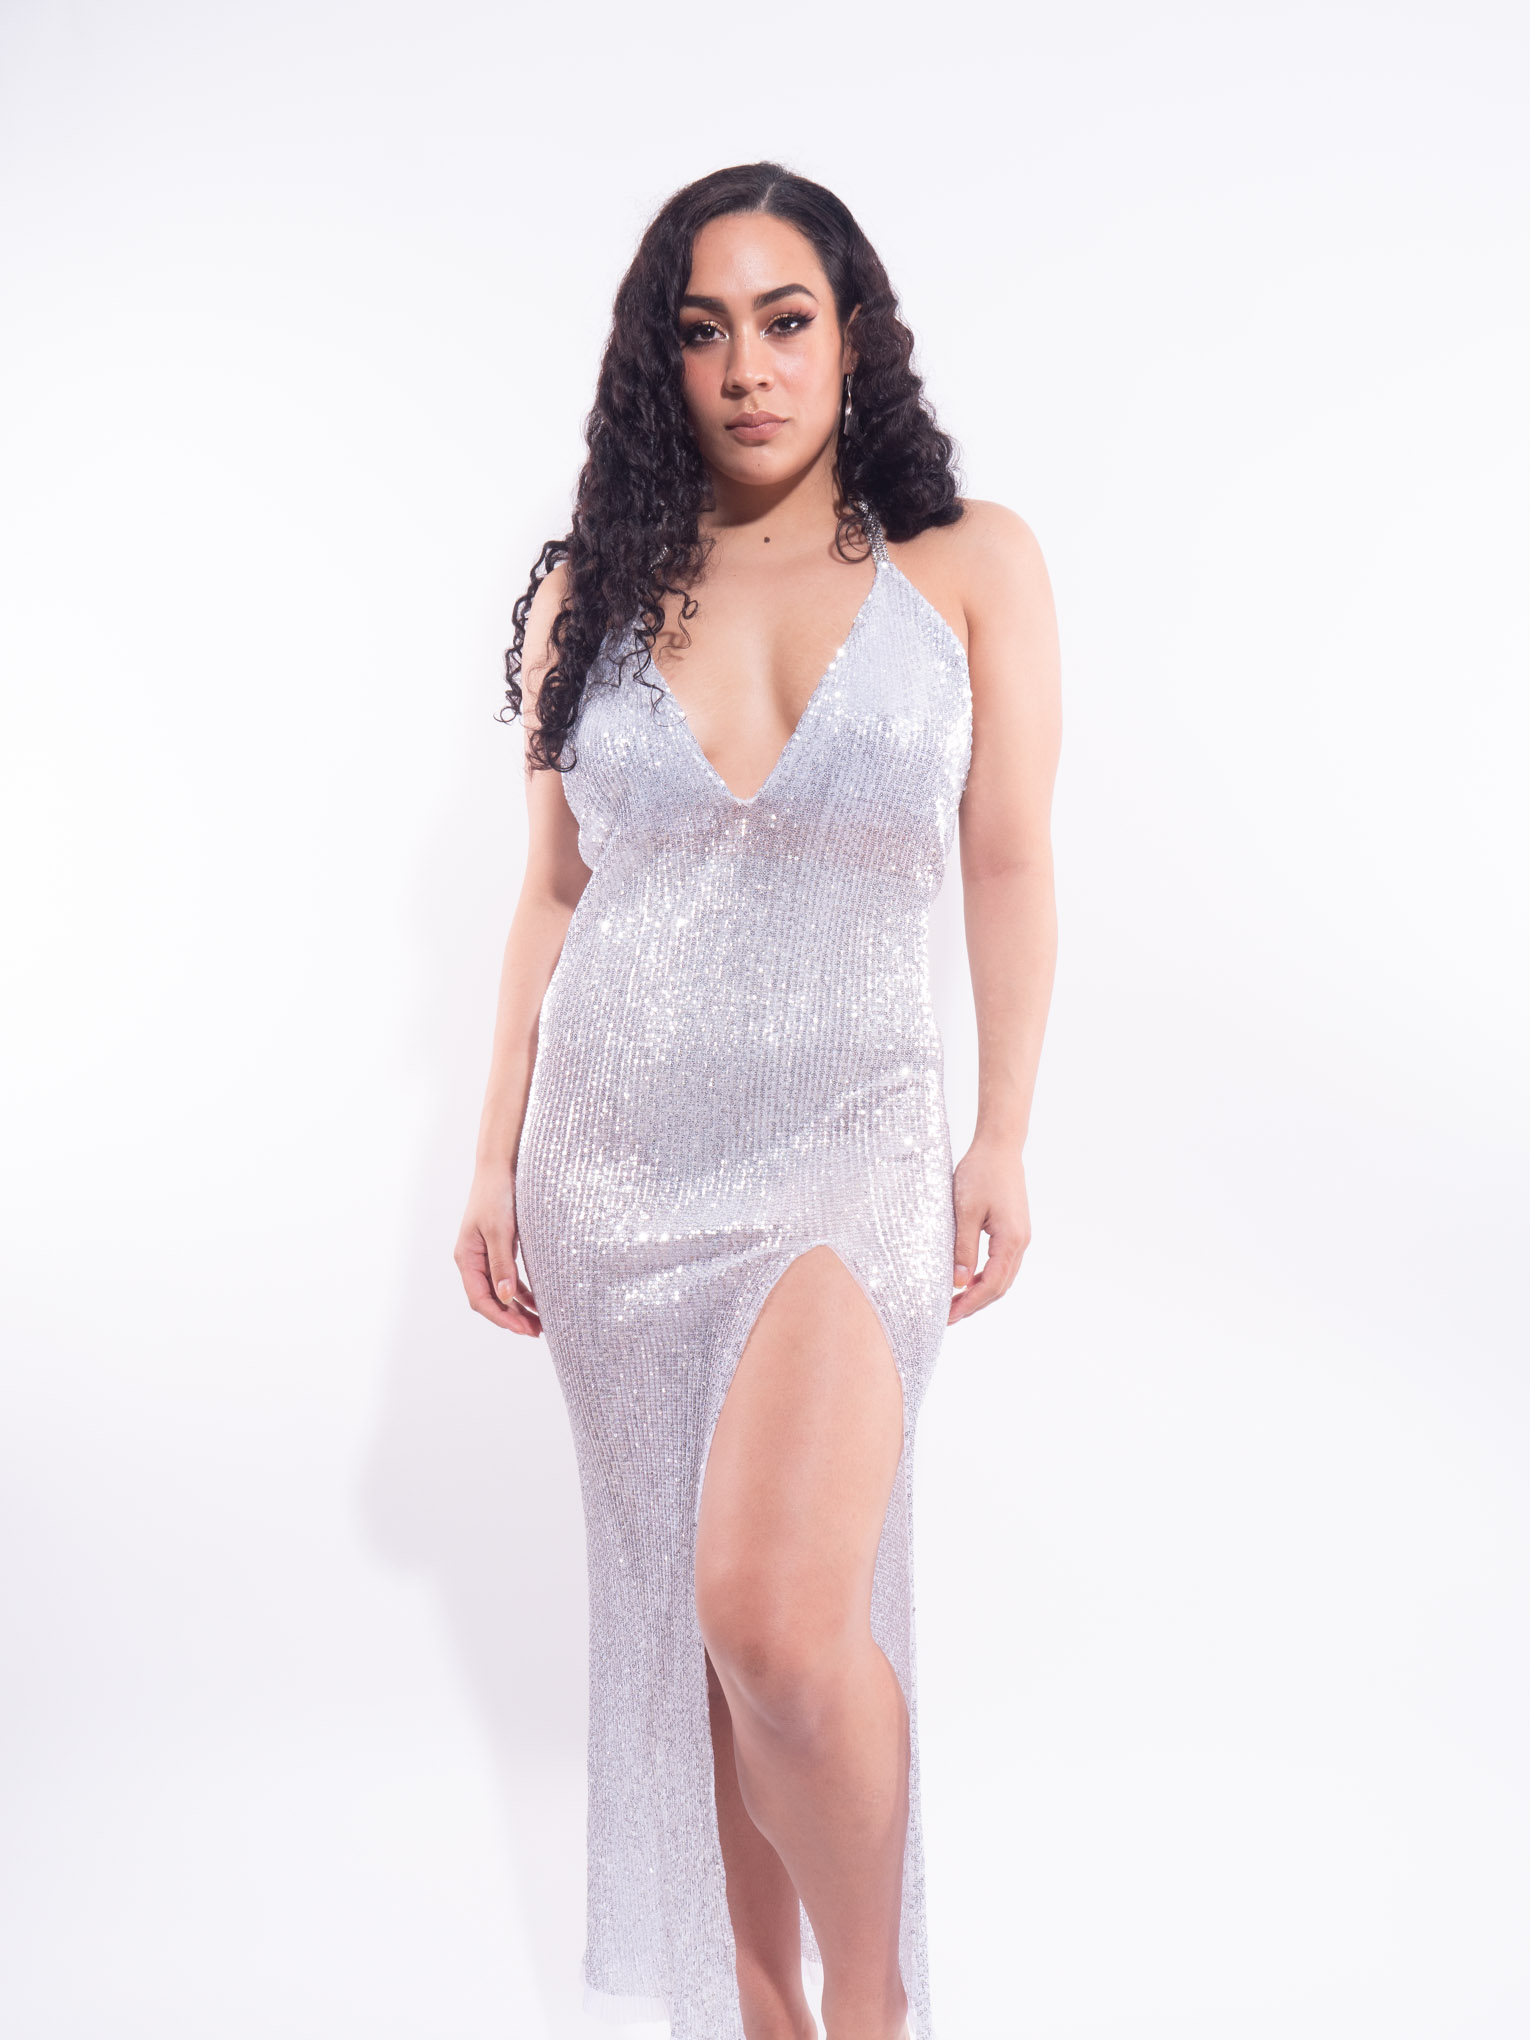
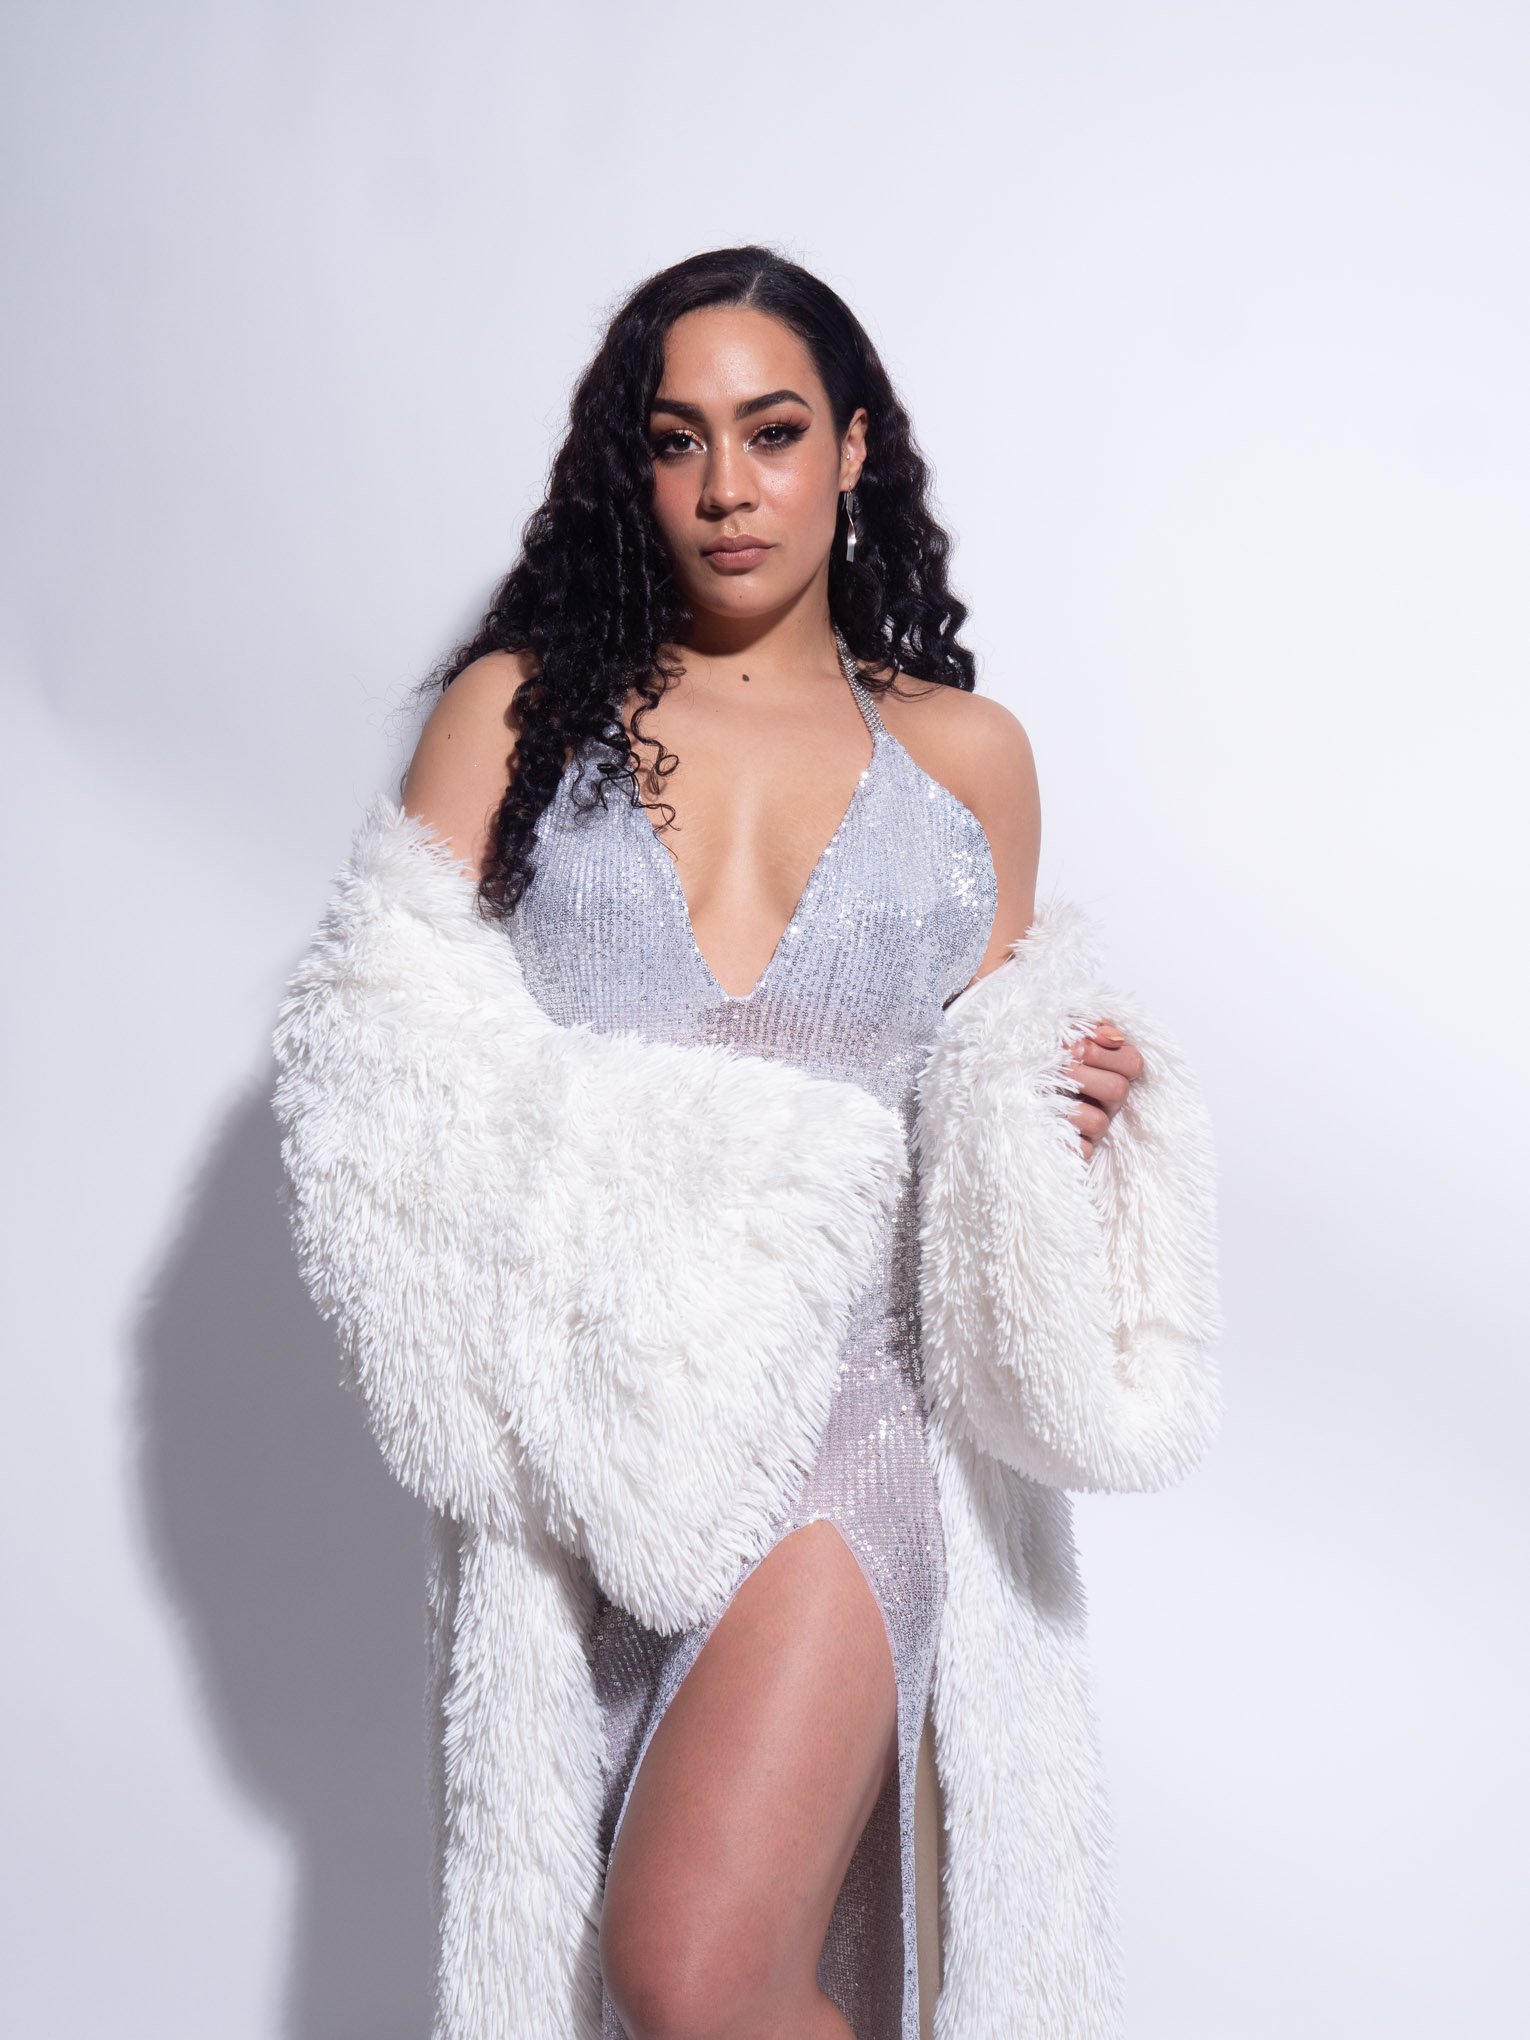
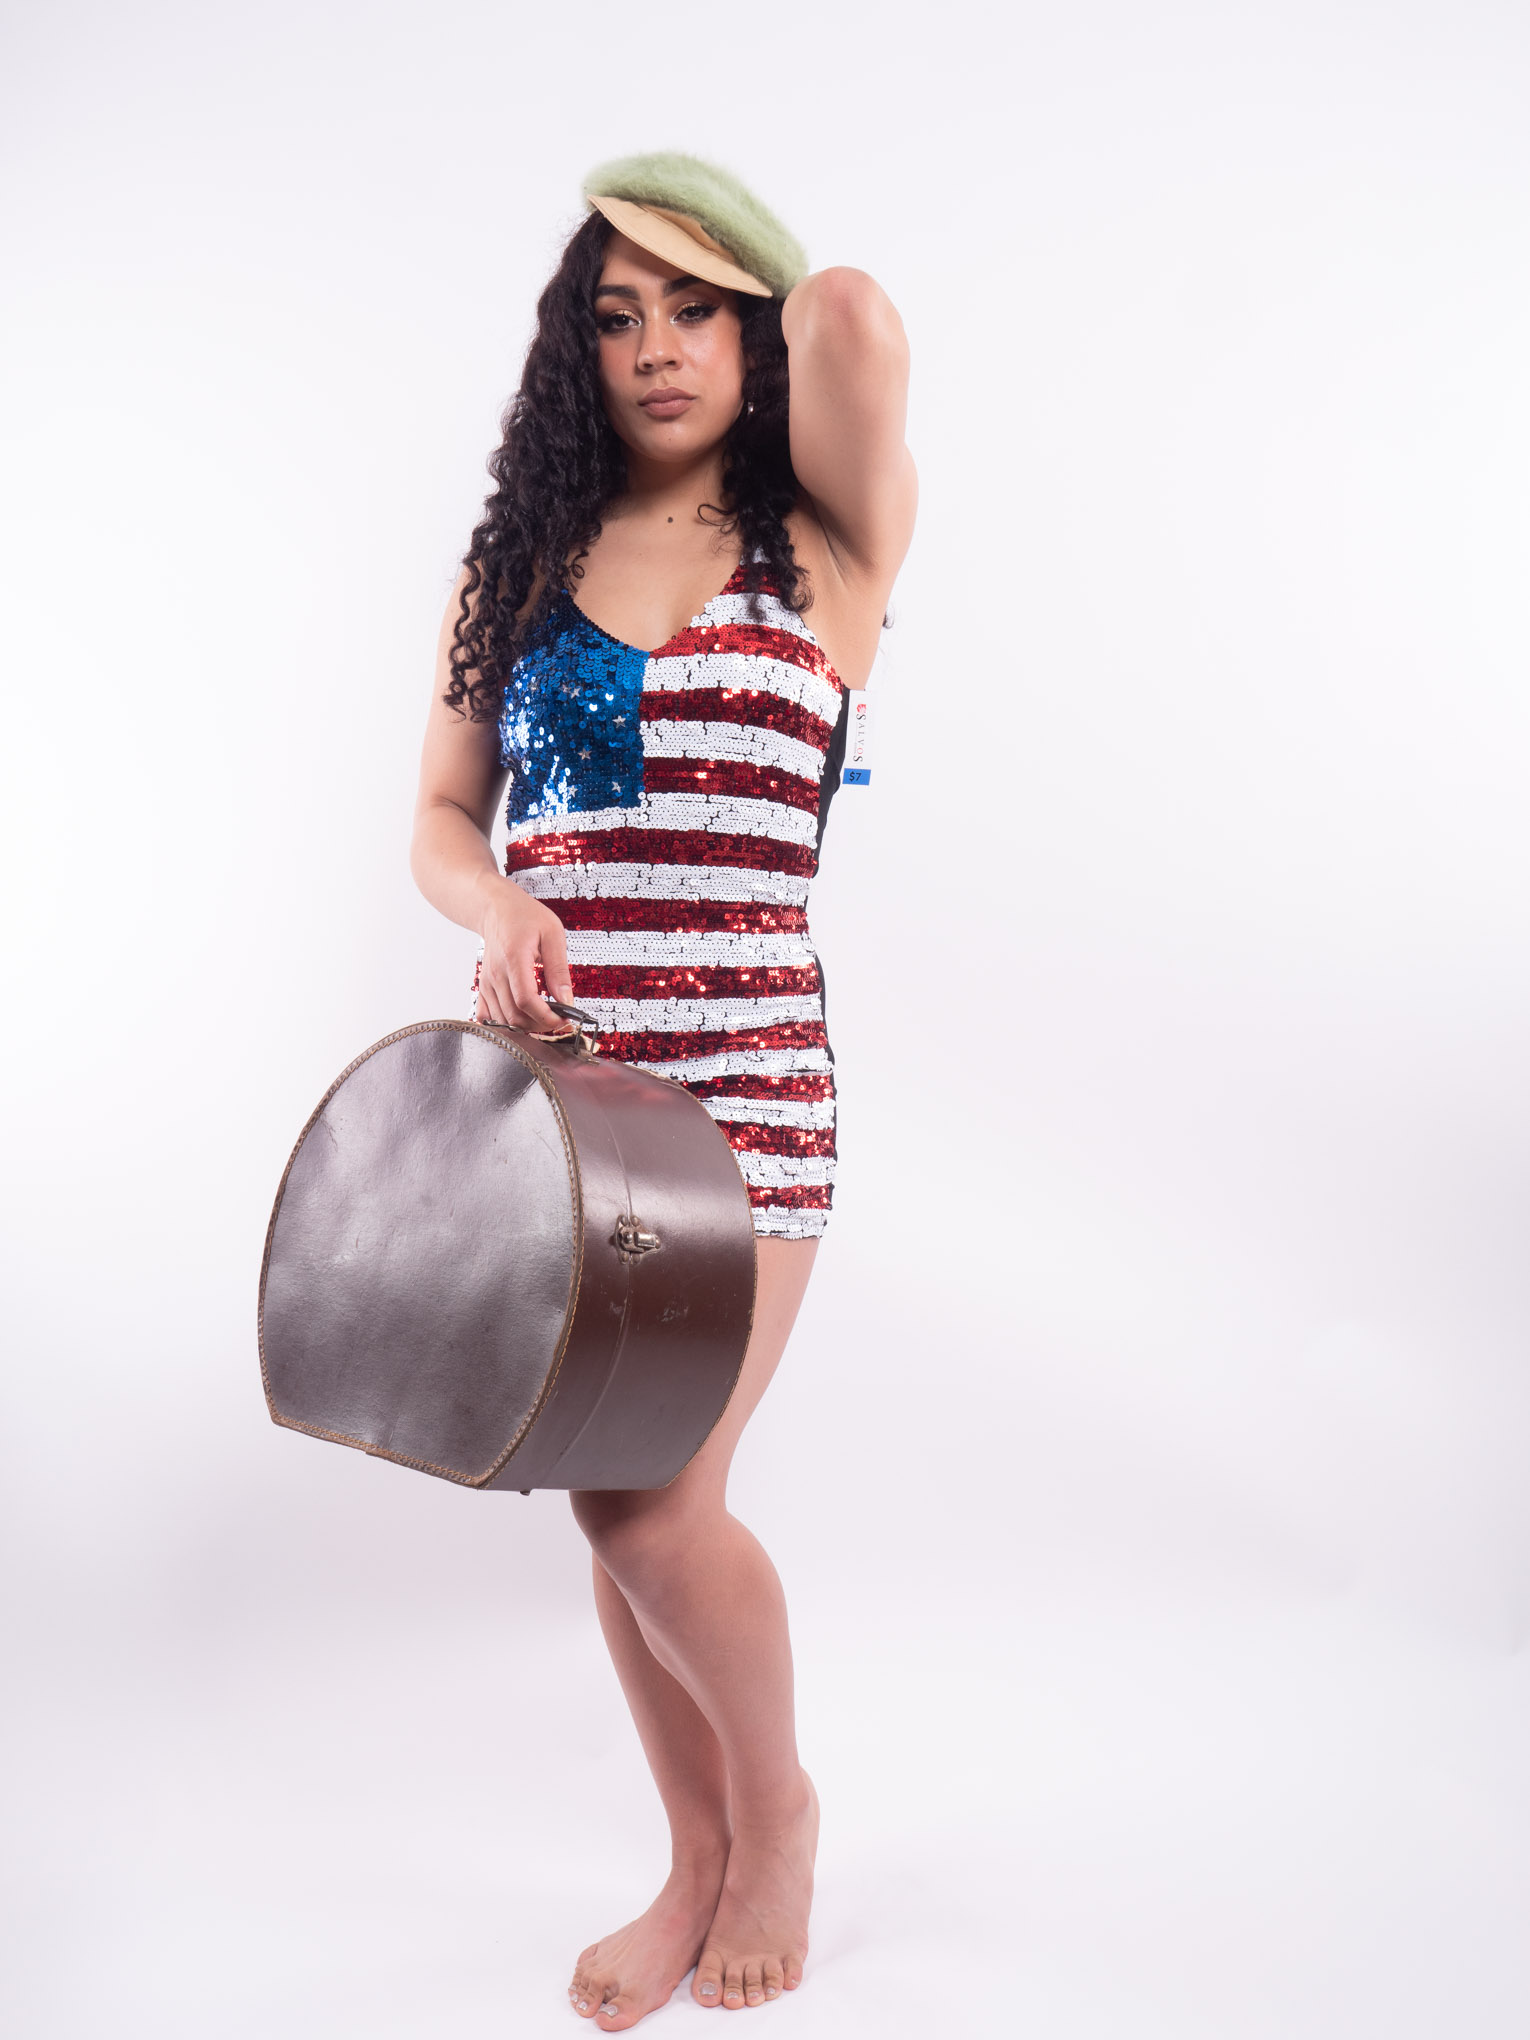
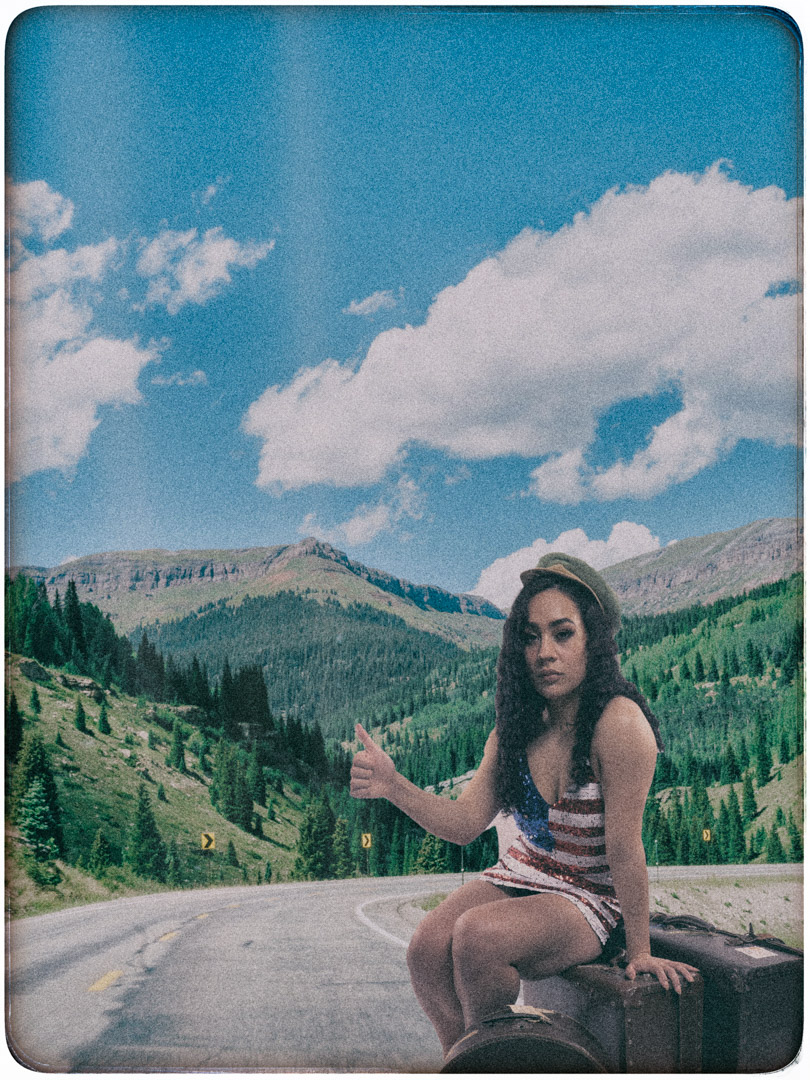
Late last year I have found a sequinned mini dress in a thrift store in Melbourne and I thought it would be great to incorporate that into the shoot. Zaniah was game even though the dress was a little small for her and we had a bit of fun shooting it. We also incorporated some old suitcases as props
We were so keen to shoot that we have actually taken quite a few images before we realised that the tag from the shop was still on the dress and quite visible in a number of shots. A simple facts in Photoshop but it was a good reminder that it does pay too carefully look before taking photos.
Afterwards I had of a bit of play with the with one of the images and composited into a road scene but I’m not sure if it really worked out nonetheless it was a fun try.
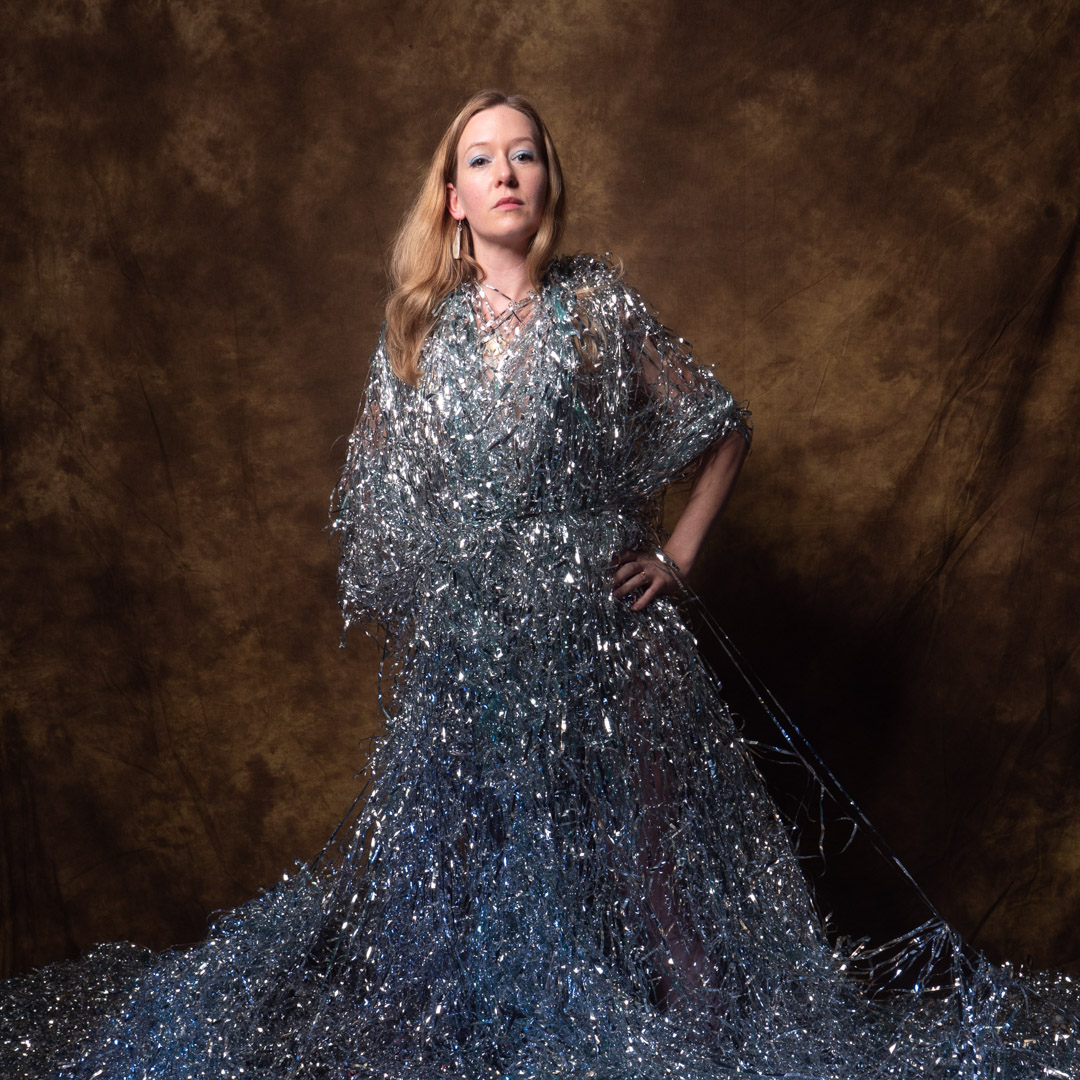
This is the final post about the shoot with Sian and a bag full of foil. sorry that you have had wait some time for it, but life and Covid got in the way. You can read the setup to the shoot in this part.
After shooting the Cancer images I had Sian stand up and drop the tape over her. There was plenty of this to go around and if was quite easy to cover her.
While this had been easy using the cassette tape, this foil proved more cumbersome to manipulate as the length of it were longer. A pair of scissors was needed to essentially cut the end of the foil from that lying on the ground.
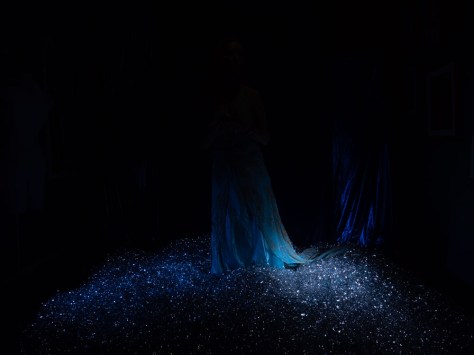
For the final shot I had Sian lying on the top of the foil and I can reposition the camera out on a boom arm to shoot straight down using the Lumix app on my iPad. I have use this app number of times and it is great as you don’t longer need to be behind the camera.
I repositioned the lights as Sian was now in a completely different location to before and I brought in some additional colour gels using my Lime cubes. I had learned from an earlier shot that the cubes got very hot and that you could not put the gel directly against the light so I made a holder out of a gel holder and a the head of a selfie stick which worked well.
The final image was exactly what I wanted and I was pleased with the results. My wife was also pleased with the shoot because the next day I bagged up all the foil and gave it away to another photographer that I know so it is no longer taking up space in our garage.
This will be a post in three parts. The first will go over the setup for the shoot ans the other two will cover the actual shoots. As such you will not see any finished images in this post. Rather the images will show the progress of the setup.
If you keep an eye out it is quite possible to acquire interesting props from the most unusual materials. What I was working for Whittaker’s Chocolate I visited Lamprint which in one of the companies that print the chocolate wrappers.
Labels are printed on a large roll several across and then in the final part process they cut into secret rolls. At either side of the main roll there is an amount of silver left over. This was being cut off and put in a bag for dumping.
When I saw it I instantly thought it would be great to repeat my tape shoot but this time with reflective metal and coloured lights. So I asked if I could have some foil.
The next day Shaun delivered a small bag to me. I said thanks, but told him that I was thinking of a much larger quantity. The next day he came back with the larger amount. Now ideally I would have had a shoot sorted out straight away, but in reality the bag sat in the garage for quite a few months, until my wife got sick of it and told me I needed to use it and then get rid of it.
The full bag of foil spread across the floor.
So I when Sian came round for the Dressmaker shoot I asked if she would like to do a shoot using the foil and she agreed. I also found out that her star sign was cancer, which is one of the water signs so I knew that I could make the foil look like water with the right lighting.
When my daughter left home, I claimed the family room back as my studio. The great advantage of this was that I could set it up over a number of days rather than trying to do everything in one go. It also means that I can take my time setting lights and trying different combinations before the model actually comes. In this respect my dress dummy is quite useful, although I have to be careful as it is shorter than a regular person.
As I knew we were going to be shooting two different concepts in the same session, I want to minimise changeover so I hung the backdrop for the second session and then placed a blue fabric over it for the first. I needed three pieces of fabric to do this and while they did not match that didn’t matter as the background would be fairly dark anyone.
I also placed blue fabric on the floor before covering it with the foil. This is because I had planned to shoot from above at some stage and I wanted the flexibility. Having the blue meant that if it did show through it would fit with the theme rather than work against it.
It was now time to set the lighting. I had planned a three light setup and when I use such a combination I always add them one light at a time. I start with a setting and shutter speed that will eliminate all of the ambient light in the room. That ended up being 1/100 at f6.3.
The setting that removed all ambient light.
I has positioned two lights near the floor to light the foil and these were both covered with blue gels. There was no real metering to these lights. rather they were adjusted until I got a look I was going for.
Light left
Right light
The main light was my Godox AD600 in the 24″ softbox on a boom arm. During the testing it was positioned camera right. It was providing quite a nice light and was also picking up some of the background. This was not an issue as I was going to replace the background anyway.
All lights in play
The advantage of taking the time ahead of time was that when Sian arrived we were pretty much ready to shoot. In fact the only change was to reposition the main light from camera right to camera left.
In my next post I will cover the first shoot with Sian, which was for the Zodiac series.
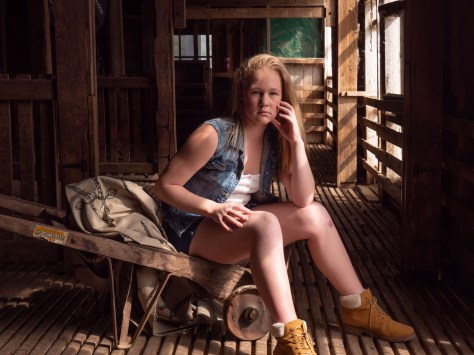
On the weekend away to the Glenburn Station, the organisers has arranged for Che to join again to model. After looking around the wool shed in the morning I knew that it would be a great location, so I arranged for Che to meet me before the others arrived. That way I was not competing with the other photographers, and I could help them if they needed it.
Despite the fact that I had brought lighting gear with me, I had worked out that there were pools of natural light in the building that could be used and we made the most of them.
Che bought a couple of outfits but I have chosen to only feature one here.
This post will be quite different to others in that it will not contain any finished images. Rather it will go into the process that went into a set of images that tell a story. The actual images will be in the next post.
A number of years ago I saw a brilliant image of a girl using a sewing machine in a moonlit attic. It set a seed that took several years to come to fruition (over three in fact). I knew that I wanted to do an image of a girl and a sewing machine. As it developed it turned into a sort of Cinderella story and eventually became a series I have called “The Dressmaker”.
The first prop, the sewing machine was bought three years ago at the Petone Fair. A second hand shop was selling them off for $20.00. They were leftover when the tables they were originally sitting on were turned into furniture. I bought the machine and it sat in our storage for years.
The machine
Then this year a number of events came together that made me decide to do the shoot.
The first was my daughter leaving home which meant our family room could be used as a studio to shoot in, and the set could be left up. I knew that to make the image look realistic then staging was important.
The second was a chance visit to my works printers where I saw a pile of wooden crates that had packed some new machines they were installing. I thought that it would be create to use to create movable walls, (as well as providing materials to reline our garage), so I asked if I could have them. They said yes and I was shocked when I got home to find a large pile. It took four nights to denail it so that we could get the ply under cover.
What was a pleasant surprise was the state of the timber that had been used to make the frames. There were lengths that looked just like flooring.
There was other timber that I was able to use to build a table for the sewing machine on. The top proved tricky as the bottom of the sewing machine was not a consistent shape. The machine was quite heavy so the table had to be engineered to carry the weight.
The completed table
I had worked out that two ply sheets were sufficient to build a workable wall but how to safely stand them up took some thinking. Initially I was going to build a floor bracket for them to slot into. I had seen other floor standing walls work in similar form. The problem was that such brackets need to be suitable size to handle the weight.
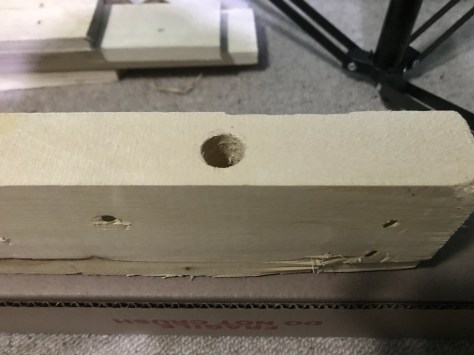
I then realised that if I took one of the left over lengths of timber I could drill some holes through it, and mount it on top of my existing background supports. Then the ply could be safely clamped to it. This worked perfectly. Once upright I used a roll of wallpaper bought from an Op shop to cover the ply and particular the join between the two panels.
The cross support
The final piece to fall into place was when I went to the Hutt Camera Club shoot at Fort Balance. The model Che wore a red dress that had a really long train. When I saw it I knew it was perfect for my shoot, so at the end of the shoot it ended up in my car.
Che and the red dress
I had already obtained cocoa bean shacks from my work as I had intended to use them in a model shoot. I therefore felt I had all of ingredients for the shoot.
From previous work I knew that Kimberley would be perfect for my dressmaker, so I posted a casting call on Facebook and ended up selecting a model for her client.
Sian, who I have shot on a number of occasions also said she was interested. She proved to a lifesaver when the model I had cast pulled out two hours before the shoot was to happen.
The shoot was scheduled and I started to build the set. I had worked out the camera angle and the lighting so as each piece was put into place I could see how it looked in the viewfinder.
To hide the walls in our family room I attached a second backdrop rail at a 90 degree to the ply and hung some old curtain material. To hide the edge of the flooring I used old suitcases and then on shoot day added some more sacks.
I had wanted to borrow a portable clothes stand for the dresses but could locate one so ended up building one from more of the left over timber.
The clothes rack support
It probably took the best part of two hours to get everything into place before I put in the lights. My fill light was my Godox AD600 in a 1.5 metre softbox positioned just to camera left. My main light was one of my Elinchrom set up high camera left and positioned above the end of the clothes rack. This light was gelled orange.
One of my recent purchases was a Godox receiver which should have worked with the transmitter on the camera. It was plugged into the back of the Elinchrom and should have triggered it at the same time as the other Godox lights. For some reason this didn’t work and the Elinchrom was firing after the main light, meaning that it was not having any impact on the shoot. Fortunately the Elinchrom has built in optical slaves which work perfectly.
For the shots of Kimberly on her own I wanted to give the impression of candlelight so I had a third light that was gelled orange, and in a gridded reflector to cast a very targeted light.
For my readers outside of New Zealand, our country response to the Covid-19 pandemic was to go into lockdown hard and early. While the economy has taken a hit, our health system didn’t, and we ended up with around 1,500 cases and 22 deaths. The vast majority of those deaths occurred in two aged demetia facilities.
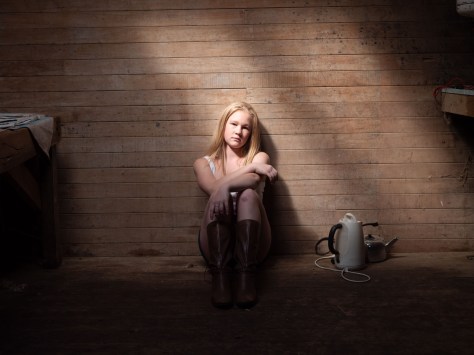
Kate
The benefit of these action is that we last had a case over 20 days and last Sunday (June 7) the last active case recovered. That meant that from Tuesday we could enter our new normal.
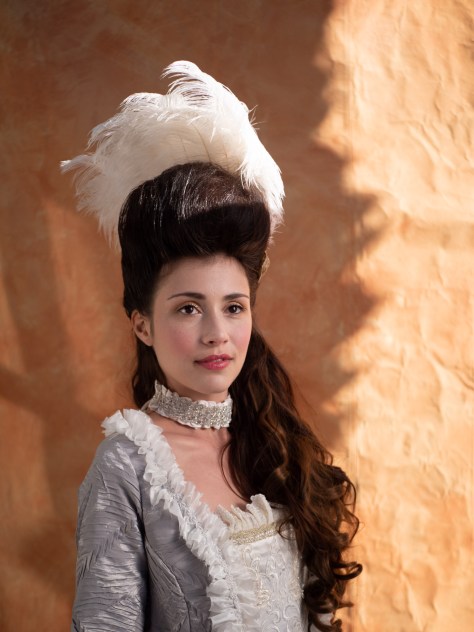
Kimbre Viviers
While the borders are closed life within New Zealand could return to a sense of normal. So much so, that over the weekend 60,000 people attended two rugby games, something that other countries can only dream about.
Kelly Kim Harrouk
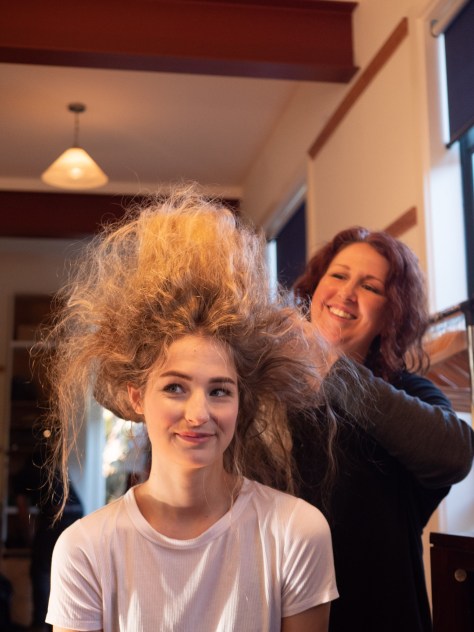
For portrait photographers to lock down was hard as rely on interacting with our subjects. So as soon as the restrictions were fully lifted a Sunday Club for the Fashion Collective was organised. It was great to be able to meet up with people with no need for social distancing.
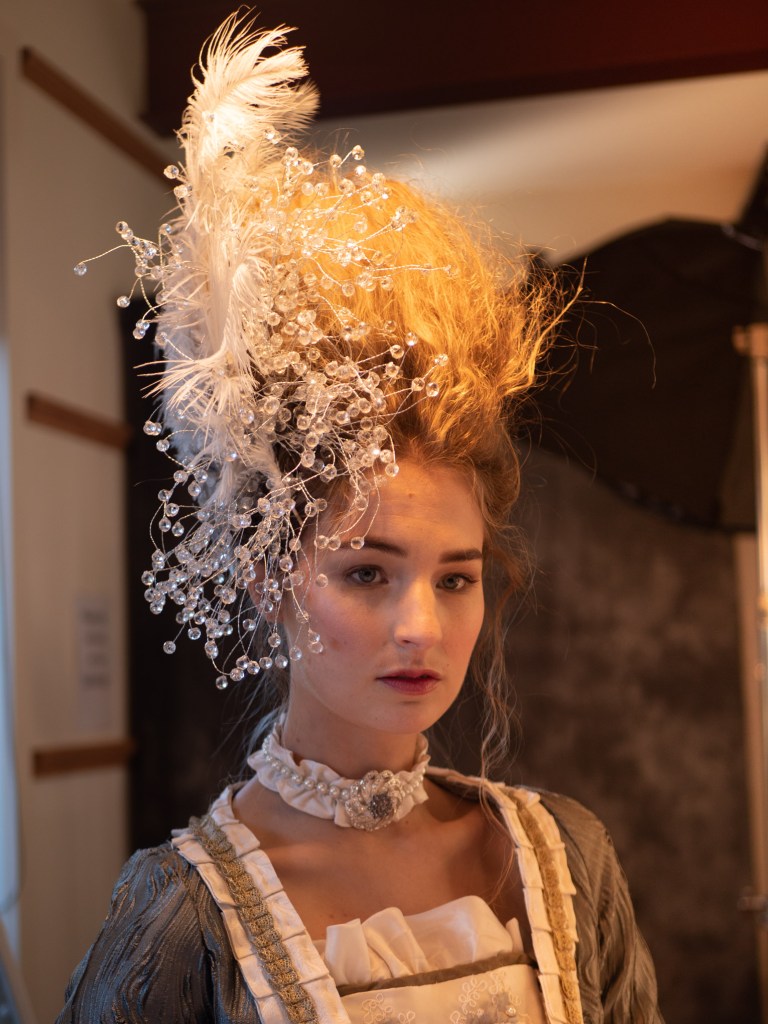
Nicola removes the hair arrangement from Kimbre
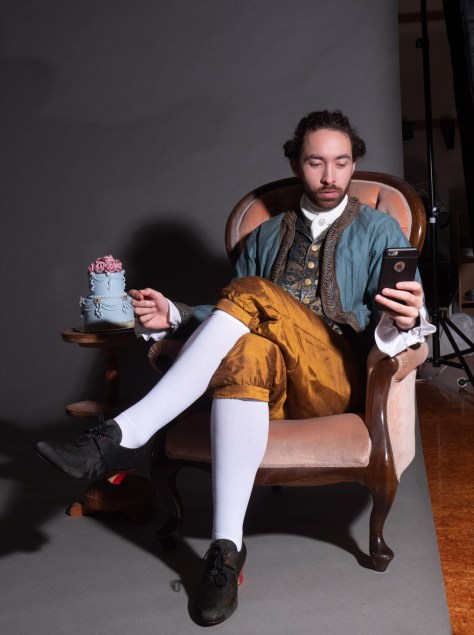
Adding to the afternoon was the fact that Charlotte Kelleher of CKFilmDesign had brought along some period costumes that her team had made. Combining those items with hair by Wei Jiang and makeup by Nicola Robinson and you could not help but take great images.
Jordan L Rivers
While the studio is full of lighting, the triggers that it used did not work on my camera so I could use them. I had taken my own lights but that was a bit of hassle with so many people present. So with the exception of the image of Jordan above, all of the others shots were taken using the ambient light in the room. Fortunately my G9 is pretty good at handling lighting conditions.
Neen
In addition to Charlotte, one of the other regular’s, Neen also brought some costumes so I shot her in one of the outfits.
It was great being able to socialise and shoot without any restrictions or fear. I have joined in with Zoom sessions with photographers in the USA and I know that they are far from being able to do that.