This is the final post about the shoot with Sian and a bag full of foil. sorry that you have had wait some time for it, but life and Covid got in the way. You can read the setup to the shoot in this part.
After shooting the Cancer images I had Sian stand up and drop the tape over her. There was plenty of this to go around and if was quite easy to cover her.
While this had been easy using the cassette tape, this foil proved more cumbersome to manipulate as the length of it were longer. A pair of scissors was needed to essentially cut the end of the foil from that lying on the ground.
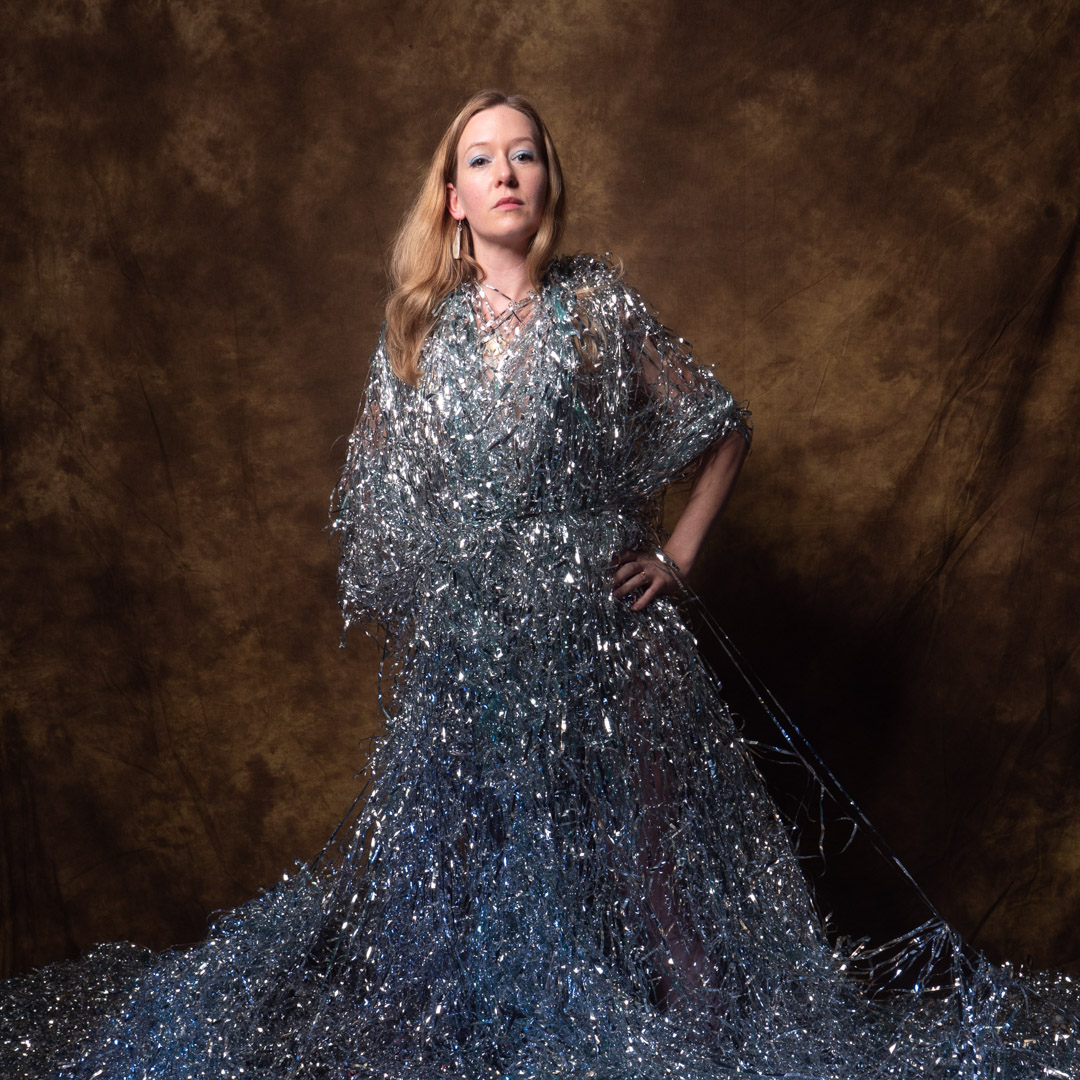
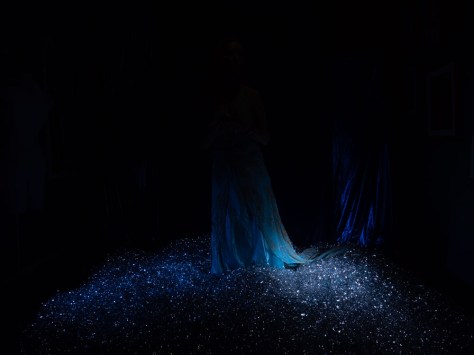
For the final shot I had Sian lying on the top of the foil and I can reposition the camera out on a boom arm to shoot straight down using the Lumix app on my iPad. I have use this app number of times and it is great as you don’t longer need to be behind the camera.
I repositioned the lights as Sian was now in a completely different location to before and I brought in some additional colour gels using my Lime cubes. I had learned from an earlier shot that the cubes got very hot and that you could not put the gel directly against the light so I made a holder out of a gel holder and a the head of a selfie stick which worked well.
The final image was exactly what I wanted and I was pleased with the results. My wife was also pleased with the shoot because the next day I bagged up all the foil and gave it away to another photographer that I know so it is no longer taking up space in our garage.
This will be a post in three parts. The first will go over the setup for the shoot ans the other two will cover the actual shoots. As such you will not see any finished images in this post. Rather the images will show the progress of the setup.
If you keep an eye out it is quite possible to acquire interesting props from the most unusual materials. What I was working for Whittaker’s Chocolate I visited Lamprint which in one of the companies that print the chocolate wrappers.
Labels are printed on a large roll several across and then in the final part process they cut into secret rolls. At either side of the main roll there is an amount of silver left over. This was being cut off and put in a bag for dumping.
When I saw it I instantly thought it would be great to repeat my tape shoot but this time with reflective metal and coloured lights. So I asked if I could have some foil.
The next day Shaun delivered a small bag to me. I said thanks, but told him that I was thinking of a much larger quantity. The next day he came back with the larger amount. Now ideally I would have had a shoot sorted out straight away, but in reality the bag sat in the garage for quite a few months, until my wife got sick of it and told me I needed to use it and then get rid of it.
The full bag of foil spread across the floor.
So I when Sian came round for the Dressmaker shoot I asked if she would like to do a shoot using the foil and she agreed. I also found out that her star sign was cancer, which is one of the water signs so I knew that I could make the foil look like water with the right lighting.
When my daughter left home, I claimed the family room back as my studio. The great advantage of this was that I could set it up over a number of days rather than trying to do everything in one go. It also means that I can take my time setting lights and trying different combinations before the model actually comes. In this respect my dress dummy is quite useful, although I have to be careful as it is shorter than a regular person.
As I knew we were going to be shooting two different concepts in the same session, I want to minimise changeover so I hung the backdrop for the second session and then placed a blue fabric over it for the first. I needed three pieces of fabric to do this and while they did not match that didn’t matter as the background would be fairly dark anyone.
I also placed blue fabric on the floor before covering it with the foil. This is because I had planned to shoot from above at some stage and I wanted the flexibility. Having the blue meant that if it did show through it would fit with the theme rather than work against it.
It was now time to set the lighting. I had planned a three light setup and when I use such a combination I always add them one light at a time. I start with a setting and shutter speed that will eliminate all of the ambient light in the room. That ended up being 1/100 at f6.3.
The setting that removed all ambient light.
I has positioned two lights near the floor to light the foil and these were both covered with blue gels. There was no real metering to these lights. rather they were adjusted until I got a look I was going for.
Light left
Right light
The main light was my Godox AD600 in the 24″ softbox on a boom arm. During the testing it was positioned camera right. It was providing quite a nice light and was also picking up some of the background. This was not an issue as I was going to replace the background anyway.
All lights in play
The advantage of taking the time ahead of time was that when Sian arrived we were pretty much ready to shoot. In fact the only change was to reposition the main light from camera right to camera left.
In my next post I will cover the first shoot with Sian, which was for the Zodiac series.
In an earlier post I wrote the failed attempt with Sian to recreate the images of Mayer George that involved shadows and light on models. By the end of the shoot we had concluded that the shapes had been projected onto the model using a data projector rather than a gobo on the studio lights.
Image by Mayer George
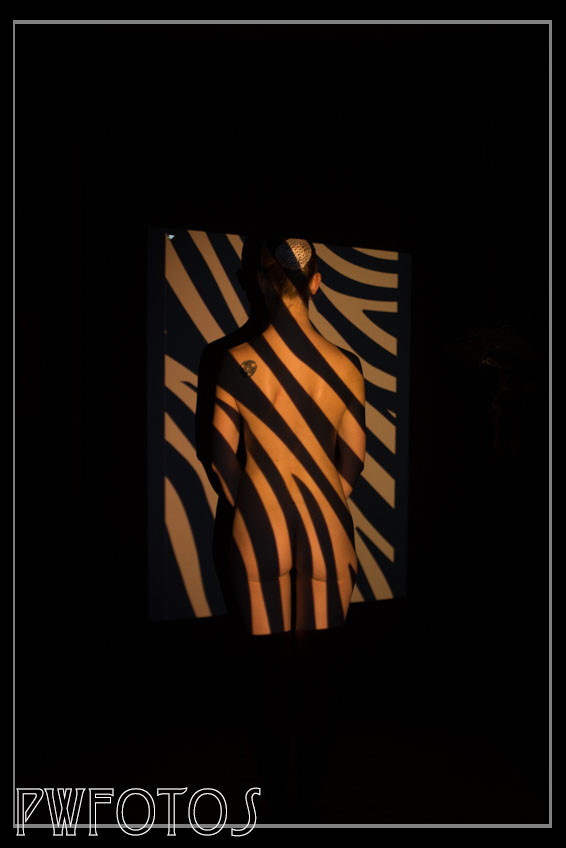
Sian was willing to give it a second go so I designed a series of shapes in photoshop. We had a lot of fun with the shoot along with a few challenges, with the first of them getting the images to display.
I work on a Mac but have an older laptop that I recently updated to Windows 10. That was the one to be connected to the data projector. I do not know why Microsoft insist on making things harder to do when they update their software, but that is exactly what they. Try as we may we could not get the screen to display the image full screen without toolbars. In the end I went back to the mac and using Fotomajico created a quicktime movie of the images. That at least I could display as I wanted it.
The second challenge was to get the image into a portrait orientation rather the natural landscape. The answer was to put the projector on its side but this meant holding it rather than having it on a stand. So once again I was like a one-armed paperhanger with the projector in my right arm and firing the camera with my left.
The results this time were much better than the first attempt however we still had the issue that the image was spilling from the model onto the backdrop. This does not occur in the ones that I was trying to replicate.
I have therefore come to the conclusion that images were produced by having the model go into a position in front of the projector and then the shadows are drawn so that they only fall on the model.
Sometimes you think you know how something is done and then discover that you are completely wrong. This was certainly the case with a photoshoot that happened a couple of weeks ago.
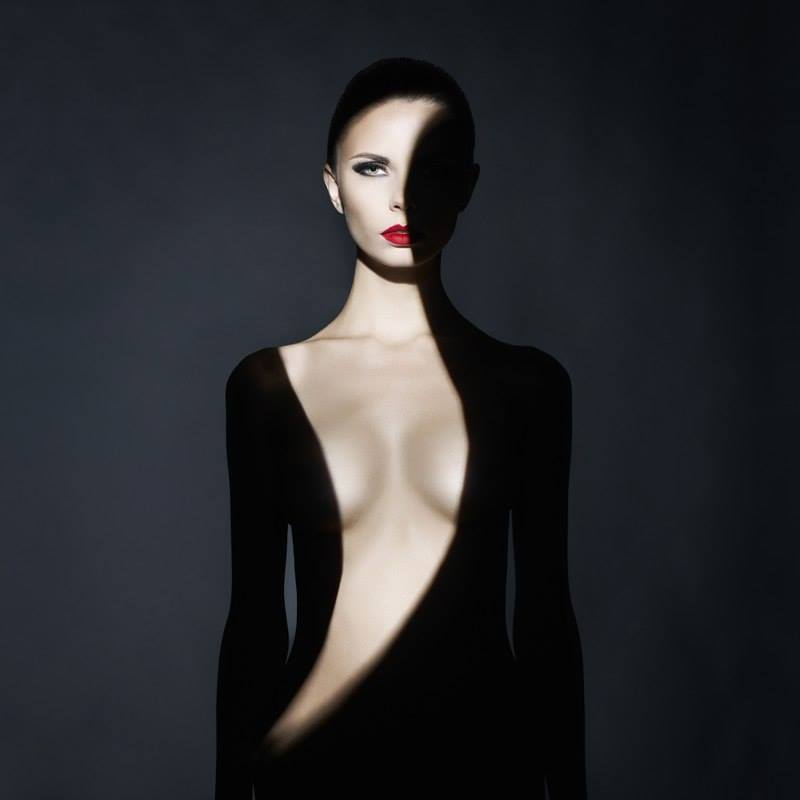
It started when a model posted the image below on Facebook from Mayer George and said that she would love to do something similar.
Image by Mayer George
I looked at it and thought that it would be relatively simple to replicate as I was sure that the photographer had used Gobo’s on his lights. A Gobo is simply a mask that you put in front of the light causing it to create patterns on the subject being illuminated.
So I set about trying to replicate it with the assistance of Sian. I produced a number of modifiers with varying size cuts in them that I planned to put in front of a single strobe fitted with a seven inch reflector.
I had thought that it would be a simple task but it turned out to be anything but. I am not sure whether it was a lack of distance to the subject, or something else but no matter how hard I tried I could not get clearly defined edges. I thought that maybe the light source was too big so change the reflector to a snoot with only a small opening.
This meant that I had to hold the gobo in place rather than tape it. As there was only Sian and I in the shoot it created a comical dance where I had to press the timer on the camera (which was on a tripod) and then quickly place the gobo.
It produced some interesting looks but again nothing sharp enough.
In the end we decided that maybe a different approach had been used and then I remember a shoot I had done two years before using a data projector, and how it had given me reasonable sharp lines.
The next post will cover the second attempt at the project.
I have often found that you only need to know a little bit more about a subject, and be able to deliver that information with confidence, then other people will regard you experience in that matter.
In this regard I firmly believe that if you are involving other people in your photographic ventures then it pays to practise what you are going to attempt to shoot before actually taking up their time. That way no one sees the mucking around that you have done and all they see is a confident photographer who comes in, sets up lights and nails the shot quickly.
A case in point was a recent entry for selection in the Wellington interclub on the topic “lets make music”.
The submitted image
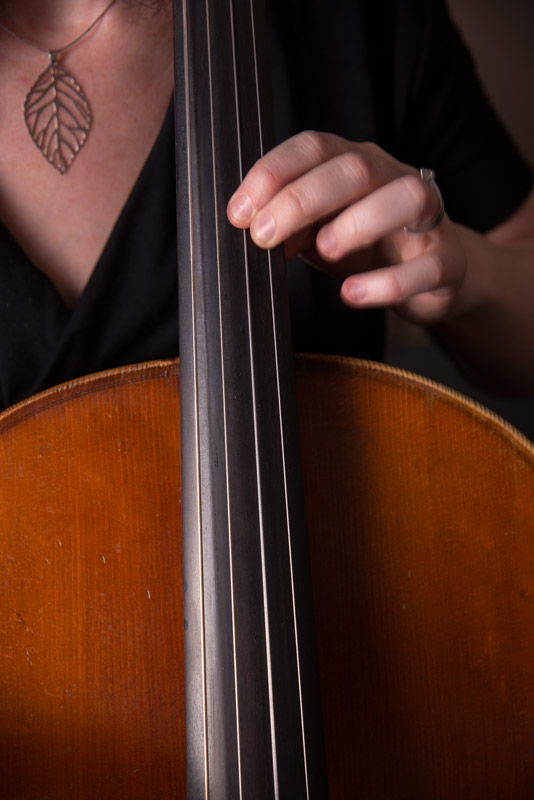
I knew that I wanted to shoot a cello, and for the lighting to be dramatic. Fortunately a friend of one of work colleagues plays in the New Zealand Symphony Orchestra and was willing to pose for me at her home.
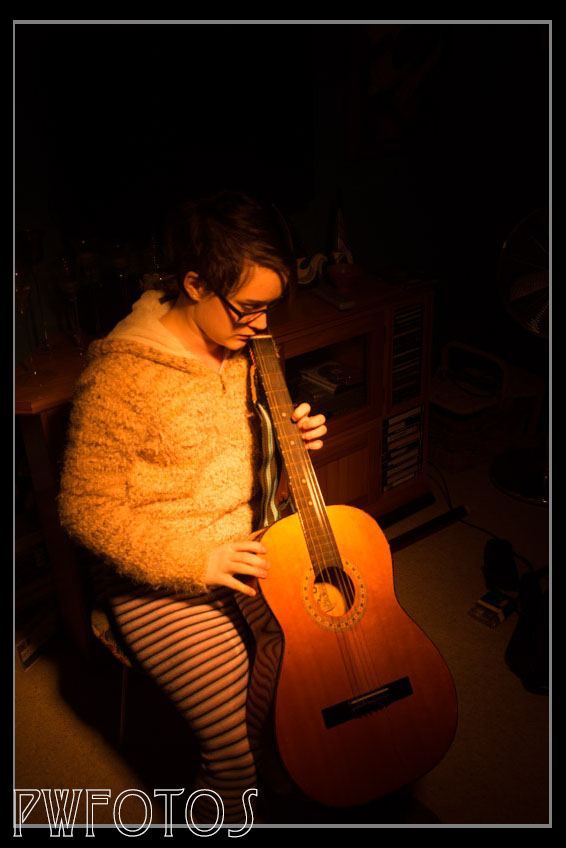
I had a pretty good idea what the light placement would be but I also wanted to pursue other options. I just did not want to waste Sally’s time as I worked through them. So the night before the shoot I enlisted the assistant of my daughter Samantha and dragged out an old guitar as a substitute cello and set up the lights.
I firstly tried a small reflector with a honeycomb grid and orange gell
It produced a very interesting light but was definitely not what I was looking for. I then fitted my large strip box with a grid and positioned it as a rim light and then moved it around until I ended up with something like I was after.
The practise session lasted around a hour but it was time well spent because it meant that the whole shoot with Sally took about 15 minutes. Other images from the shoot are shown below.
Finally for those who need an image to visualise things the lighting diagram. The strip box was actually vertical rather than the implied horizontal in the diagram.
I would like to say that the image was selected. It made it through to the final selection round but was then beaten by one vote from an image showing a rock band in concert.
Last Sunday I had a studio booked for an art project I am working on so as I was going to have all my lighting gear set up decided that I would run a lighting workshop as well.
Over the course of 4 hours I took the photographers through seven different lighting arrangements using the lights and then finished utilising natural light. I had booked an experienced model for the event but she contacted me the night before to say that she was ill and not able to make it. So my daughter ended up stepping in to help and she did quite a good job.
I wanted to emphasise that lighting is an art and not a science and that the process of working with lights was to add them one at a time. I was mindful that not everyone can afford expensive studio lights so we started with arrangements that could be replicated with off camera flash using speed lights.
As I was instructing the others what to do I did not have time to shoot example images with each arrangement.
These are the seven arrangements that I demonstrated:
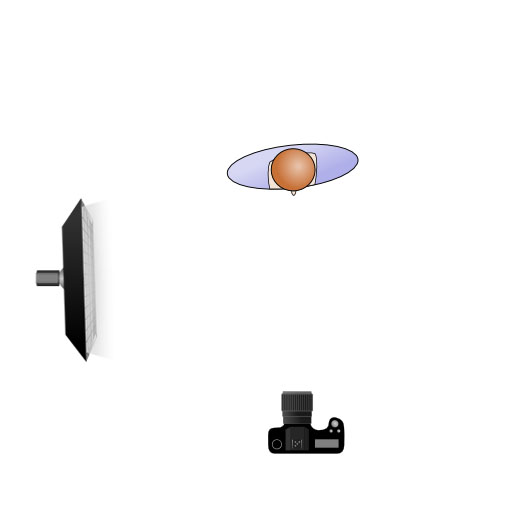
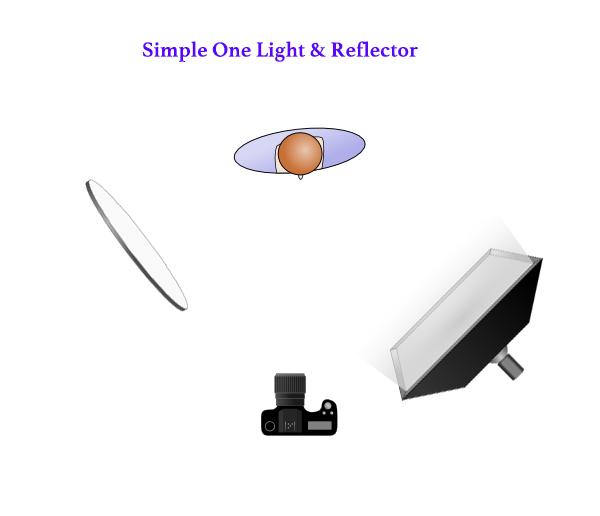
Using one light
One light with reflector (45degrees)
This is one of the simplest and most common lighting arrangement. A single light is set at a 45 degree angle to the subject and then a reflector is introduced on the other side at a similar angle to bounce some light into the shadows. In this and the next arrangement the main light was in a 1 meter softbox.
One light at 45 degrees with reflector
One light with reflector (rim)
This lighting arrangement is similar to the first however the main light is brought alongside the subject. This produces a must stronger ratio of the light between the two sides of the face.
One light set as full rim
Clamshell
This lighting involves a single light mounted above the camera aiming down at the subject and a reflector positioned below to fill in the shadows. The arrangement produces butterfly lighting with a shadow below the nose. For the clamshell the main light used a beauty dish.
Clamshell
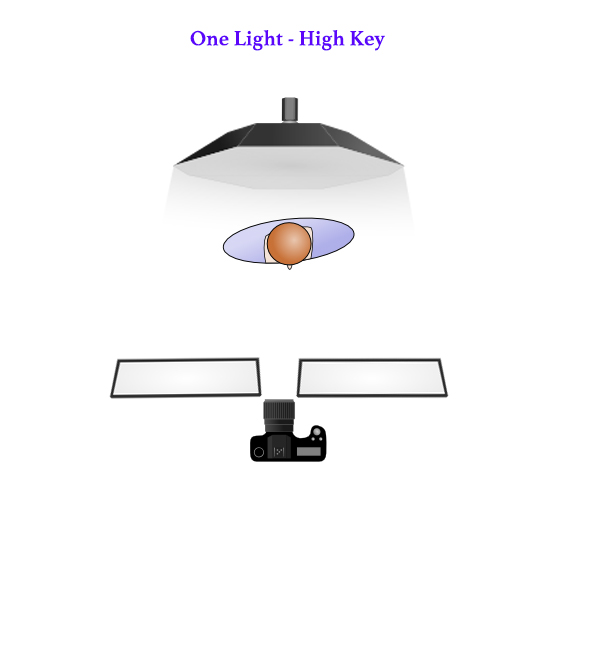
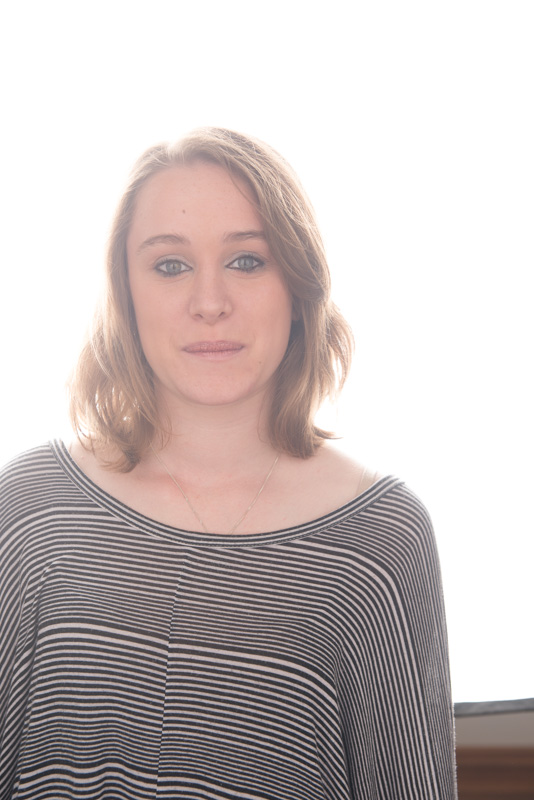
Single Light Highkey
Normally when you think of highkey lighting you would think that it involves multiple lights. It can be produced with a single light and a couple of reflectors. In this case the single light is placed behind the subject and essentially becomes both the light and the backdrop.
In front of the subject two large white reflectors are placed and you shoot between them. The light is metered for the front of the subject resulting in a background blowing out.
The arrangement
For the shot ideally I would have liked to use my 1.5 meter October but I forgot to pack the adapter ring that allowed the Bowen mount to fit my Elinchrom lights so instead had to use a 1m softbox.
Two Light arrangements
Two light axis lighting
An axis lighting arrangement has the subject standing in the middle of two lights aimed on the same axis. I demonstrated two arrangements. In the first both lights have the same modifiers. In the second arrangement the rear modifier was fitted with a small honeycomb grid. In this case its was much more of a hair light.
Equal front and rear lights
Second light was now solely set up as a hair light
Production
The final arrangement show was what a referred to as “production lighting”. This is used when you wish to shoot a large number of subjects quickly and the aim is to have well lit rather than dramatic lighting on the subjects.
In this arrangement both lights are set to the same power.
No Lights
As the studio we were using had large north facing windows at the end of session we simply used the window and reflector to produce images like this one, proving that you don’t need to spend much money at all.
There are literally hundreds of articles and tutorials on the internet about how to use light to achieve various looks. If you have been studying lighting then you should be familiar with such terms as “hard vs soft light’, butterfly lighting, Rembrandt lighting and a host of other styles and approaches.
Now most of the articles focus on helping the photographer achieve high quality images in an environment where you have time to achieve the look you want. What these articles don’t tell you is how do you set the lighting to meet the requirements of the client. While you may think that they will both be the same, in reality there can be quite a difference.
In this article I am going to look at the lighting choices that I made for the Body Art Rocks Conference and explain why I made them.
With the conference I was shooting two quite different types of images namely:
Ones documenting the event as it unfolded, and
A series of images of the final creations suitable for the artists and models to display in their portfolios.
Once I knew what I was shooting I then could look at what key factors I would need to consider, which turned out to be quite different.
Documentary Shots
The essential element in documenting the event was ensuring that I had sufficient images to clearly showed what had happened over the three days. The reality in capturing images that are intended to document something is that even a poor image is better than none, however you do want to try to get as good an image as possible.
Knowing that I would be moving from room to room and encountering different ambient lighting conditions, and I would be shooting subjects from a range of distances and focal lengths. This meant that the only lighting that would be of any practical use was on-camera flash.
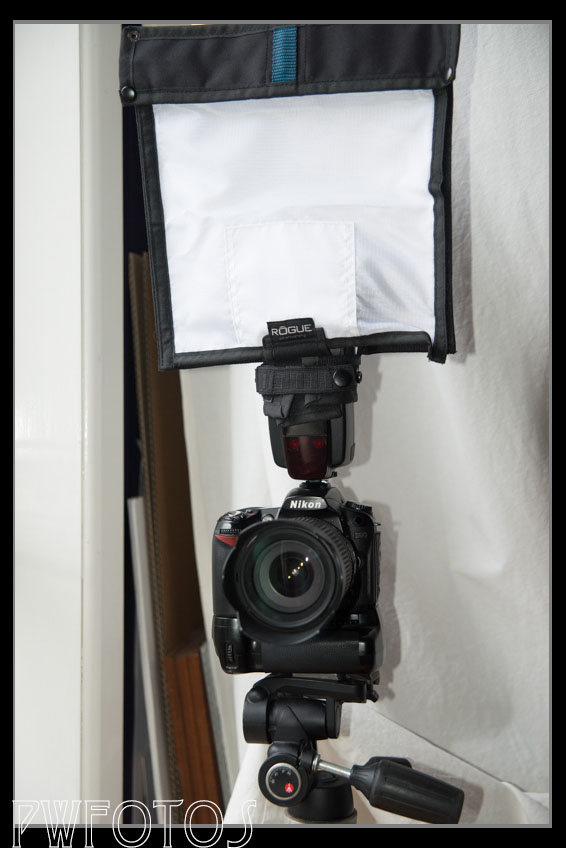
The rogue flash bender and diffusion panel fits over the camera mounted speedlight
Now on-camera flash is generally one to avoid if possible as it is a very harsh light and not the most flattering. You need to soften the light in some way. Generally to soften the light you need to increase the size of it relative to the subject. To do this I used a Rogue flash bender and diffusion panel. This fits over the speed light and spreads the light out resulting in a softer light.
It does reduce the amount of light that the flash generates slightly and this can muck up trying to get the camera to handle the setting. I generally do not like shooting TTL when I have flash and so shot the whole weekend in manual mode.
Initially this did require some trial and error to determine what was the best setting for each of the rooms as well as for shots taken close up as opposed from afar.
For the close up’s the most important thing was ensuring that the image did not over expose the subject and at the same time the flash did not wash out the colours that the artist was painting.
The lighting in this image is quite even and the colours have been maintained. As this was shot in a dark room the ISO was high (f5.6 1/100 ISO 800)
Despite the fact that the zombie is quite close to the wall the diffusion panel had softened the light so that strong shadows are not generated. To ensure that the image was not blown out the iso was quite low (f5.6 1/100 ISO 100)
Final Images
The final images were intended to be used by the artists and models in their portfolios. The key to producing images for the artists lay in ensuring that their work was presented in the best possible way. As the model had essentially become their canvas it was more important to bring out the colours.
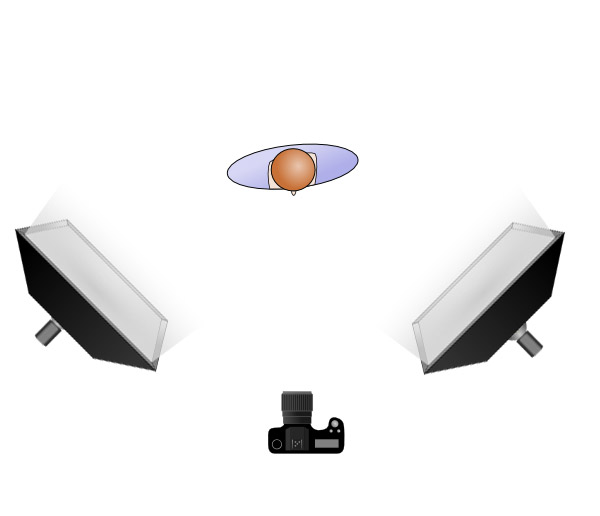
These images were going to be shot in one location and that meant that we could set up studio lights with big soft boxes on them. However we had to fit the shots into the conference programme which meant that we could not muck with the lighting on each subject. Essentially you have to set up a “production line” environment where the subject comes in, you take the image, and then move onto the next subject with the minimum amount of effort.
To do this you create a lighting zone and shoot everyone on the same setting. This was achieved with two strobes set to the same power and positioned on both sides of the camera as shown below.
This essentially creates the light zone which was metered at f7.1 1/100 and ISO 100. It means that the model would be correctly exposed no matter where they stood in the zone.
With this lighting arrangement in place it was a very quick routine to move the model on stage and then take the photos without any mucking around between models. When you have 17 models to shoot in 15 minutes this is essential.
The big disadvantage of this approach is that you don’t get the shading in the light that eliminates it being called “flat” lighting. In this case I was not actually worried about that though because as I have already said, the purpose of the photos is to more to record the art than the canvas.
Ideally the areas chosen to take these images would not be used for other things but that was not the case and at other times it was used as one of the workshop areas. This meant that we were relying on the white wall to be the backdrop rather than putting up a backdrop.
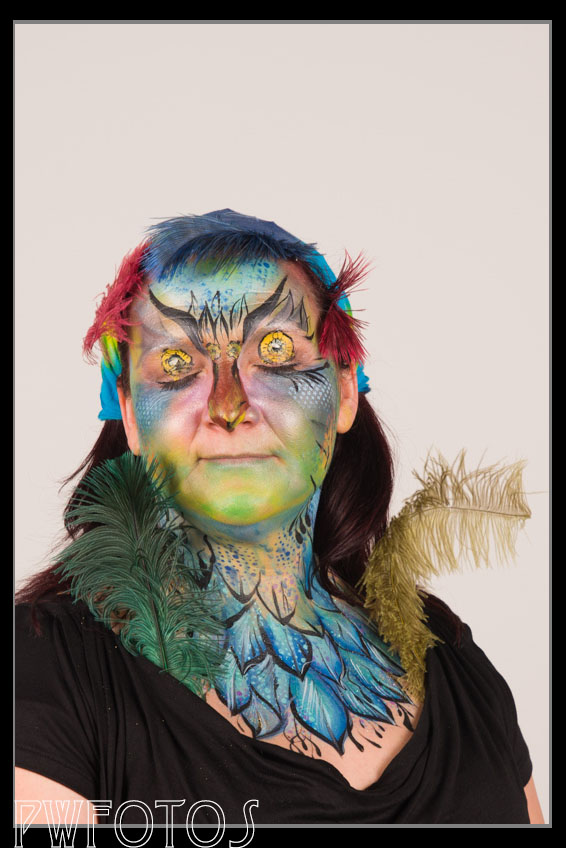
For the most part this work however we did run into an issue of getting separation when the model had light coloured hair.
While the image is fine with regard to the painting the overall effect also employed the hair and we are losing detail as it is blending with the background.
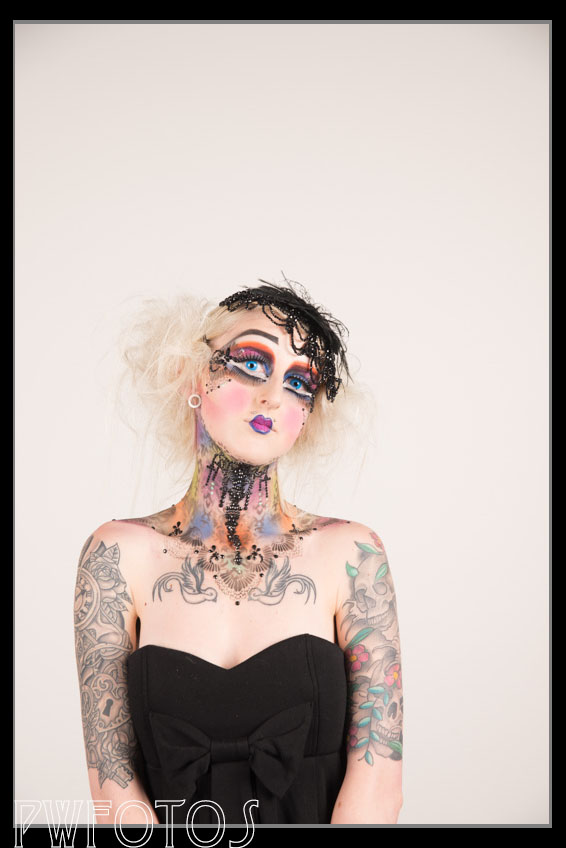
Now while shooting on the Saturday I had not realised the extent of this issue, and therefore had to correct it in post. But on the Sunday I anticipated it and handle it in a simple way. Firstly I told the two models that had blond hair that we were going to shoot them last, and then once we had shot them both on the white, I turned one of the lights around and shot them against the black panels that made up the side wall.
This shot against the black panel provide good separation of model to background. The lighting is more dramatic because it uses a single light camera right and a silver reflector on the left.
Had I been using a backdrop then I would have mounted a darker colour and had it sitting at the back so that it would have been a very quick job to change it over.


 The results this time were much better than the first attempt however we still had the issue that the image was spilling from the model onto the backdrop. This does not occur in the ones that I was trying to replicate.
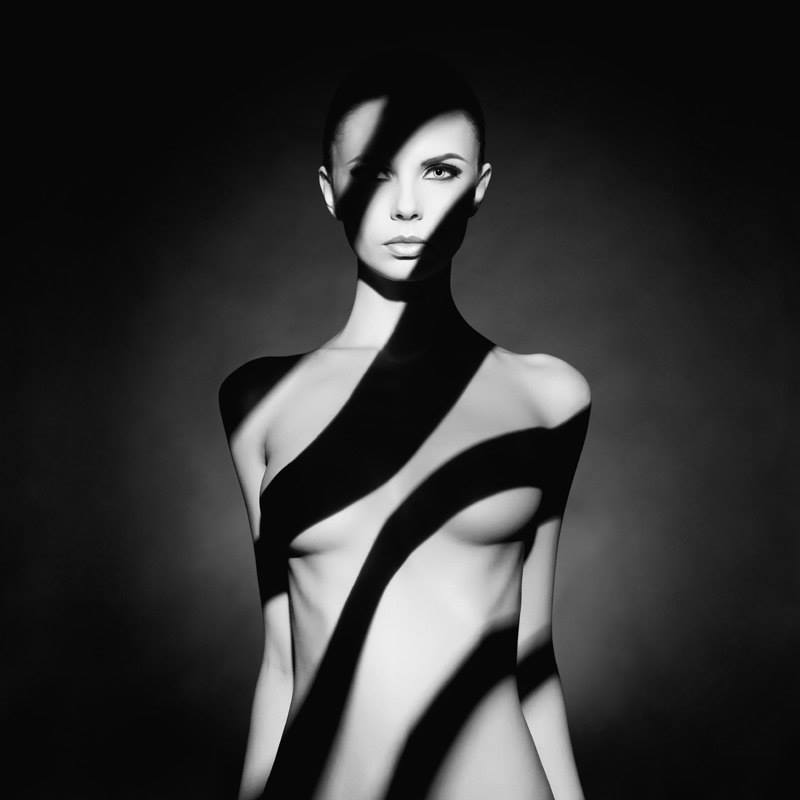
 In the end we decided that maybe a different approach had been used and then I remember a shoot I had done two years before using a data projector, and how it had given me reasonable sharp lines.