There are literally hundreds of articles and tutorials on the internet about how to use light to achieve various looks. If you have been studying lighting then you should be familiar with such terms as “hard vs soft light’, butterfly lighting, Rembrandt lighting and a host of other styles and approaches.
Now most of the articles focus on helping the photographer achieve high quality images in an environment where you have time to achieve the look you want. What these articles don’t tell you is how do you set the lighting to meet the requirements of the client. While you may think that they will both be the same, in reality there can be quite a difference.
In this article I am going to look at the lighting choices that I made for the Body Art Rocks Conference and explain why I made them.
With the conference I was shooting two quite different types of images namely:
- Ones documenting the event as it unfolded, and
- A series of images of the final creations suitable for the artists and models to display in their portfolios.
Once I knew what I was shooting I then could look at what key factors I would need to consider, which turned out to be quite different.
Documentary Shots
The essential element in documenting the event was ensuring that I had sufficient images to clearly showed what had happened over the three days. The reality in capturing images that are intended to document something is that even a poor image is better than none, however you do want to try to get as good an image as possible.
Knowing that I would be moving from room to room and encountering different ambient lighting conditions, and I would be shooting subjects from a range of distances and focal lengths. This meant that the only lighting that would be of any practical use was on-camera flash.
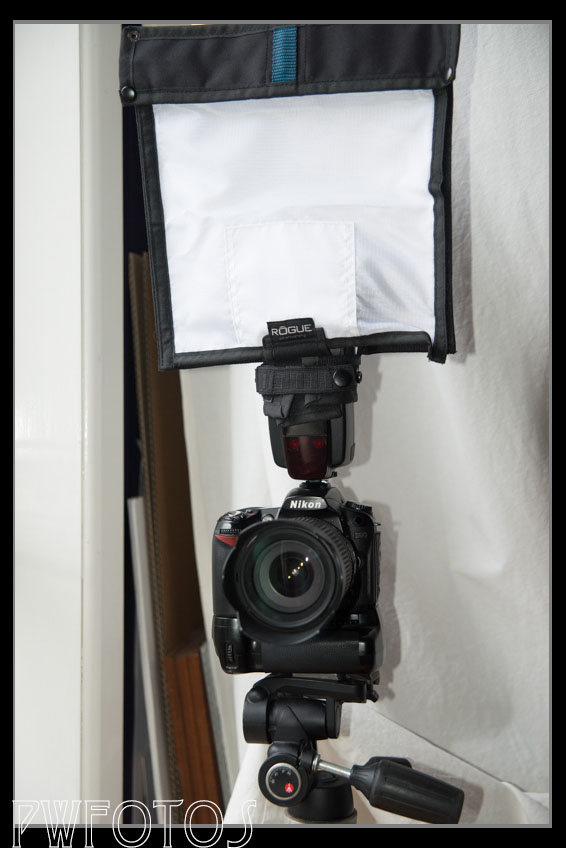
Now on-camera flash is generally one to avoid if possible as it is a very harsh light and not the most flattering. You need to soften the light in some way. Generally to soften the light you need to increase the size of it relative to the subject. To do this I used a Rogue flash bender and diffusion panel. This fits over the speed light and spreads the light out resulting in a softer light.
It does reduce the amount of light that the flash generates slightly and this can muck up trying to get the camera to handle the setting. I generally do not like shooting TTL when I have flash and so shot the whole weekend in manual mode.
Initially this did require some trial and error to determine what was the best setting for each of the rooms as well as for shots taken close up as opposed from afar.
For the close up’s the most important thing was ensuring that the image did not over expose the subject and at the same time the flash did not wash out the colours that the artist was painting.


Final Images
The final images were intended to be used by the artists and models in their portfolios. The key to producing images for the artists lay in ensuring that their work was presented in the best possible way. As the model had essentially become their canvas it was more important to bring out the colours.
These images were going to be shot in one location and that meant that we could set up studio lights with big soft boxes on them. However we had to fit the shots into the conference programme which meant that we could not muck with the lighting on each subject. Essentially you have to set up a “production line” environment where the subject comes in, you take the image, and then move onto the next subject with the minimum amount of effort.
To do this you create a lighting zone and shoot everyone on the same setting. This was achieved with two strobes set to the same power and positioned on both sides of the camera as shown below.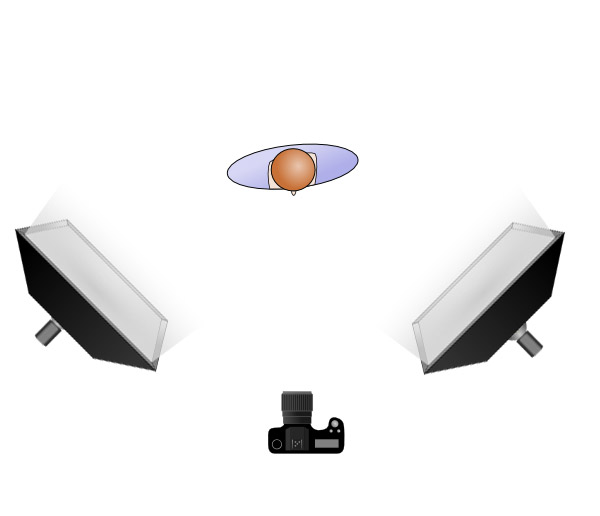
This essentially creates the light zone which was metered at f7.1 1/100 and ISO 100. It means that the model would be correctly exposed no matter where they stood in the zone.
With this lighting arrangement in place it was a very quick routine to move the model on stage and then take the photos without any mucking around between models. When you have 17 models to shoot in 15 minutes this is essential.
The big disadvantage of this approach is that you don’t get the shading in the light that eliminates it being called “flat” lighting. In this case I was not actually worried about that though because as I have already said, the purpose of the photos is to more to record the art than the canvas.
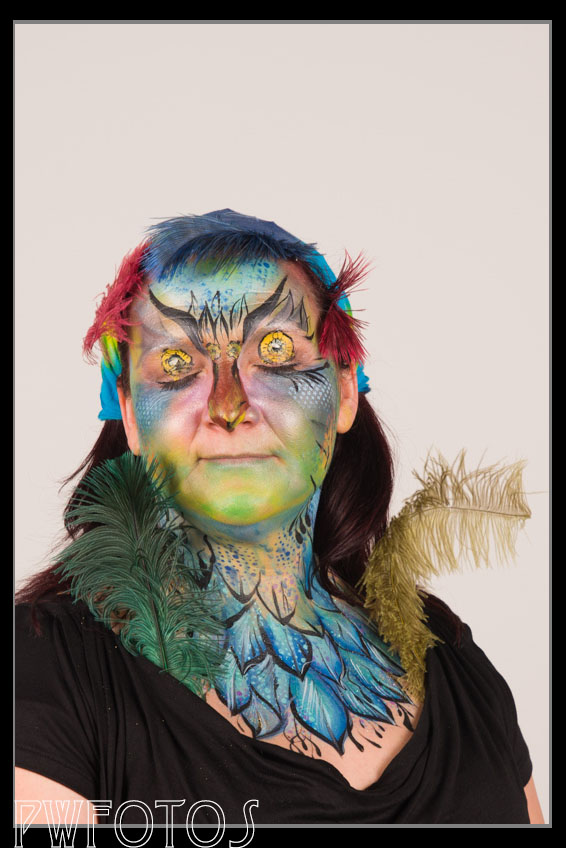
Ideally the areas chosen to take these images would not be used for other things but that was not the case and at other times it was used as one of the workshop areas. This meant that we were relying on the white wall to be the backdrop rather than putting up a backdrop.
For the most part this work however we did run into an issue of getting separation when the model had light coloured hair.
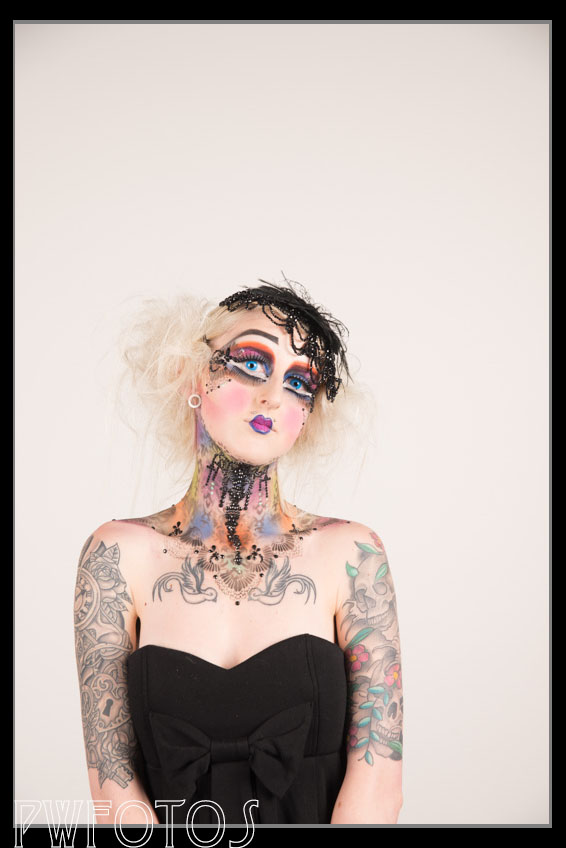
Now while shooting on the Saturday I had not realised the extent of this issue, and therefore had to correct it in post. But on the Sunday I anticipated it and handle it in a simple way. Firstly I told the two models that had blond hair that we were going to shoot them last, and then once we had shot them both on the white, I turned one of the lights around and shot them against the black panels that made up the side wall.

Had I been using a backdrop then I would have mounted a darker colour and had it sitting at the back so that it would have been a very quick job to change it over.
