The Central Region of the Photographic Society of New Zealand (PSNZ) basically covers the Lower half of the north island. I believe that the boundary is just below Taupo but it does include the East Coast city of Gisborne.
This year I entered both a print and a digital image into the Open Category of the salon, and had another image included in the Hutt Camera Club’s print set. I am really stoked with the results.
Because my Club was hosting the conference I actually got to help out with the judging session so was on hand to hear the comments of the judges who actually had no idea who had shot the images.
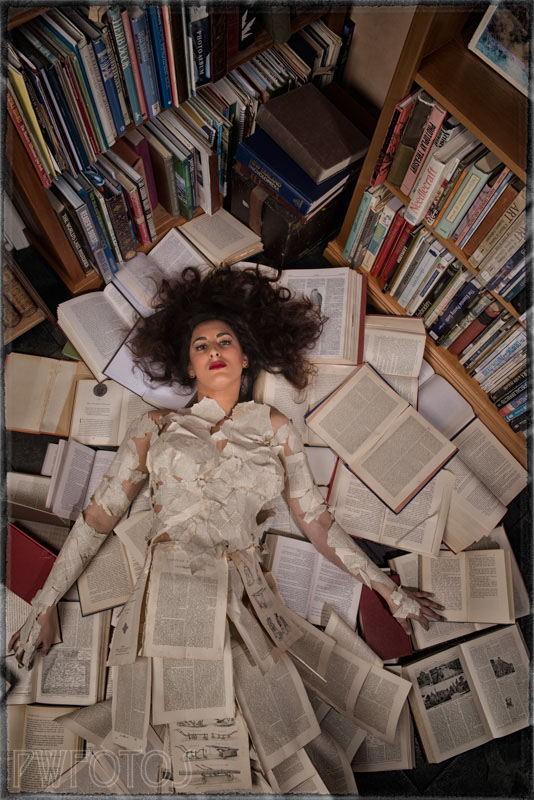
My print of the “Late for the Ball” image really resonated with the judges and it scores a merit and came third in the competition.
The print of this image actually looks better than the digital version
The story behind the image can be found on this blog post.
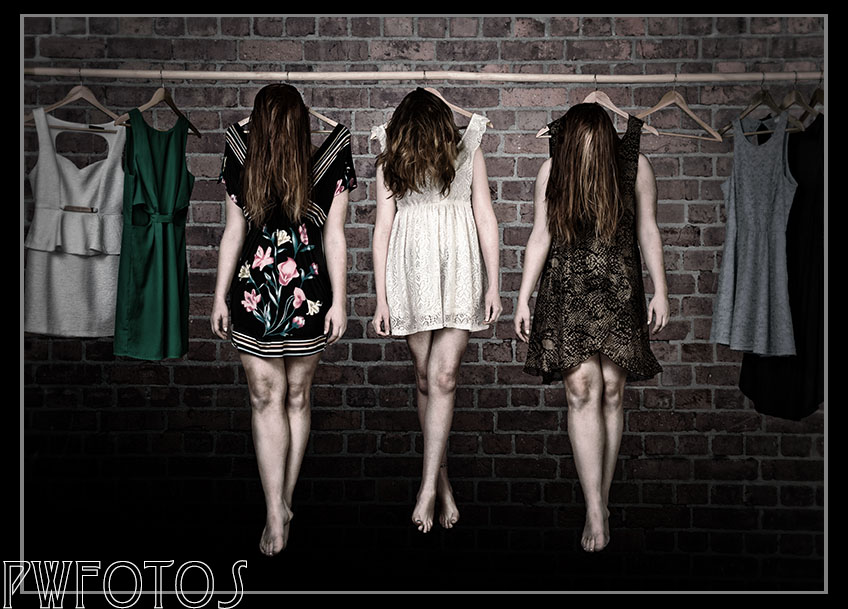
My “Waiting for the model call” image was included in the Club set with the overall set coming second in the category. The story behind this image can be found on this link.
The final hanger shot is quite different from the earlier version
Finally my image entitled “The Fall” got an “Acceptance” in the Digital Category. Not as high as I would have liked but the standard of the images in the section was very high.
The fall
This image was actually a late substitution. I had intended to enter the hanger shot into the category but when it was selected for the Club entry I was under the impression that it could not go into an individual competition. Unfortunately by the time that it was discovered that this was allowed, it was too late.
The success has spurred me on to enter the images into consideration for NZ Camera which is the actual print publication of PSNZ.
Last Tuesday was the final judging of the 2014 Ladder competition and I had two images entered. I was very pleased with the results as both images received “Merits” (which is the second to top score an image can achieve).
The set topic for the round was “From beneath” and I submitted this image taken at the old brickworks in Melbourne.
For the second image I decided to enter my “Late for the Ball” into the Open category.
Very pleased with the overall results, however they were not good enough to actually win the competition.
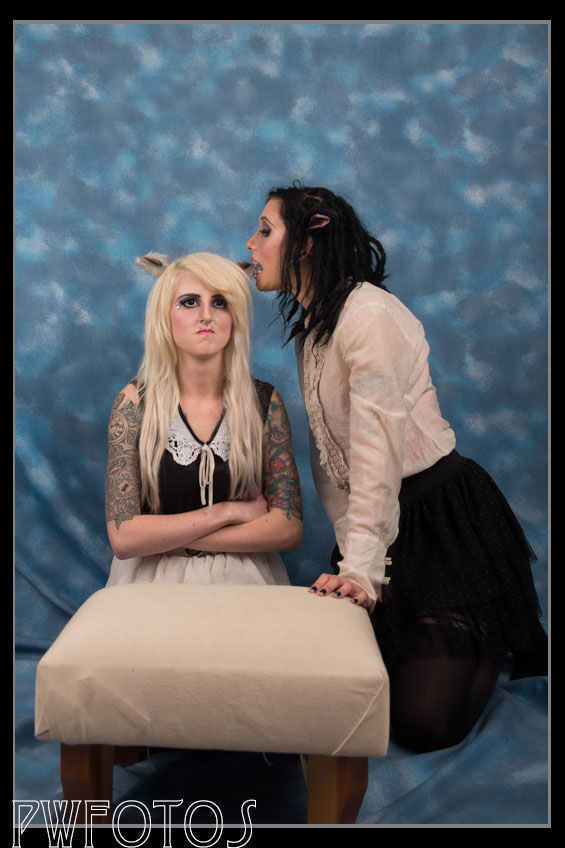
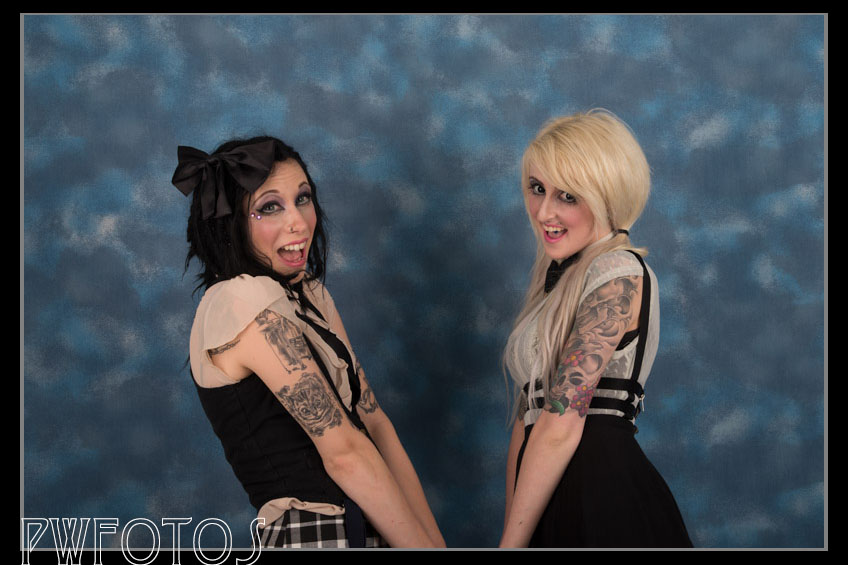
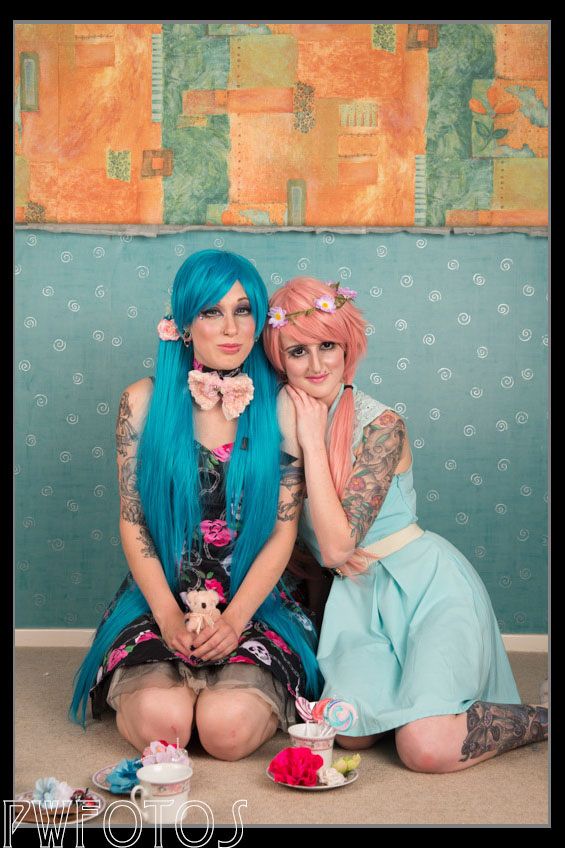
I was approached by Angie to see if I was willing to shoot her and a friend in various cosplay outfits as they wanted to have some fun together. It turned out the friend was Kristara who I had shot previously.
They had originally wanted a garden location so we arranged a time for them to come to my place as we have a large and very private section. Unfortunately on the day of the shoot the weather packed in and so we ended up shooting in my studio. It can get cosy in there when you have a number of people and all the lighting gear.
We ended up shooting later than planned due to makeup taking longer than planned and a muck up in communication as to where my place was, however once everyone was here the whole shoot took 90 minutes. I did not consider this too bad as they changed twice into different outfits.
Lighting for the shoot was two elinchroms in the large square soft boxes.
The first look was relative simple however it included earsThe second look was schoolgirlGlasses were added for effectThe final look was very elaborate including coloured wigsBalloons added an extra effect to the tea party being held
Scott Kelby is a Photoshop expert from the United States who runs a very successful training operation. If you are serious about Photoshop and photography then it is likely that you will have come across one of his books or videos. A number of years ago (7 in fact) he came up with the idea of getting photographers in groups, worldwide together on one day and encourage them to walk along a pre-planned route and take images and then share the results.
This year the 7th Photowalk occurred on October 11 in 1,052 locations around the globe with some 20,164 registered to take part. In reality that number was probably a lot larger as people showed up without registering.
The Wellington walk was organised by Hutt Camera President Brian Harmer and covered some of the alleyways and lesser travelled lanes in central Wellington, and the up an over the lower slopes of Mount Victoria, around the inner harbour finishing for a drink and snack at Mac’s Brewbar.
Now there is a saying “that you can’t beat Wellington on a good day” which is quite true, however the reality is that those days can be limited. Fortunately we struck the jackpot at the day was brilliantly fine and with next to no wind.
The walk was scheduled to start at 5.00pm and run through to 7:00pm so we ended up shooting in almost perfect light. All up there were around 35 people gathered at the starting location. It had originally been just me joining the group but I managed to convince my wife to come along.
While we started off all together it did not take too long for the group to spread out and by the end the stragglers came in nearly 45 minutes after the first group. They all seemed to have really enjoyed themselves.
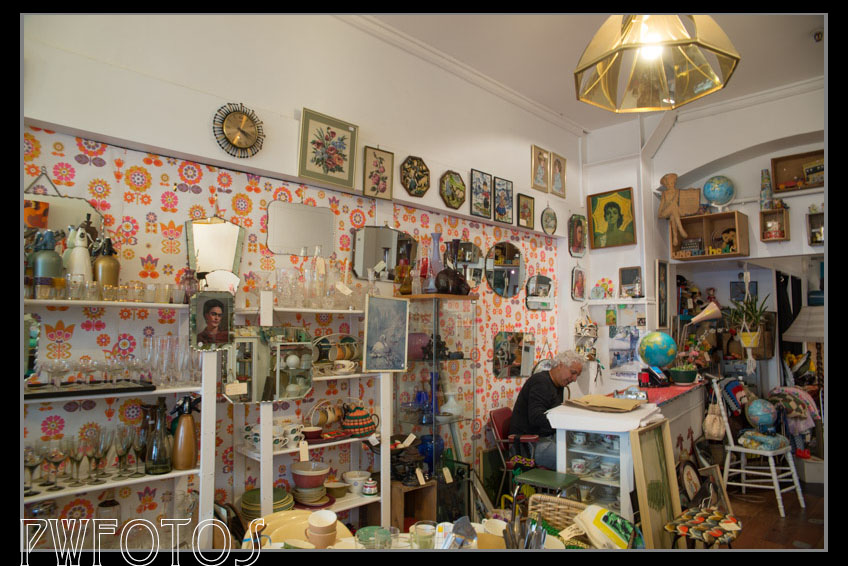
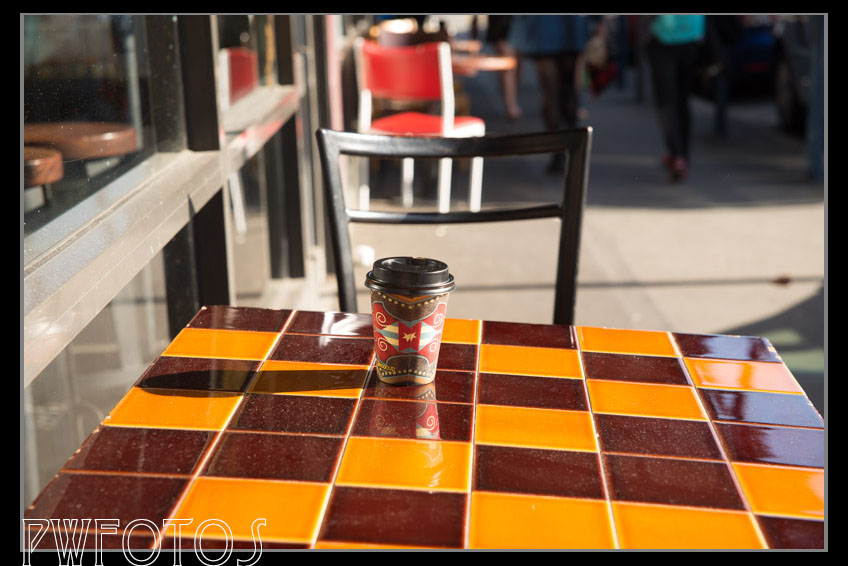
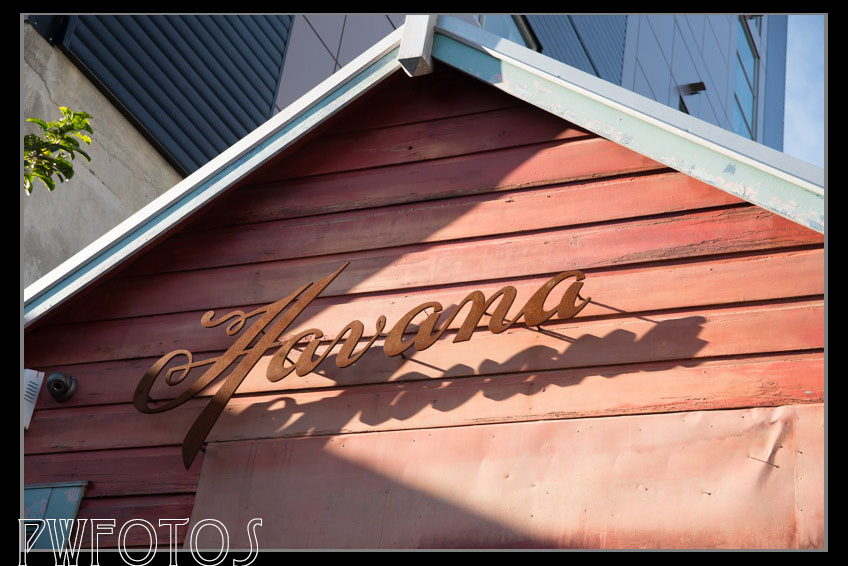
Below is a sample of the images that I ended up taking. It was quite amazing how much diversity there was in quite a small location within the city.
At the start of the walk the alleyway is lined with old brick buildingModern high rise apartmentsOld suitcase outside a junk shop in Dixon streetRetro is very much in fashion in Cuba streetThe cafe culture in Cuba street is very much aliveThe Havana coffee shop in Wigan Street.The late afternoon lights creates pattern on this apartment blockIn need of some TLC is this house in Elizabeth StreetThe early evening light and conditions were perfect
Generally speaking when I go to a shoot I have a pretty good idea what I am going to be dealing with. Last Sunday turned out to be the complete opposite to norm.
I have been asked by a model to help out by shooting her in some clothes that had been designed. She arranged the “studio” and I arranged to meet her there. When I arrived there was no sign of her and the studio turned out to be room in a hall. Shortly after the designated time the designers, who turned out to be four third year Massey university fashion students, showed up. As part of their degree they had to design a collection of clothes in the style of a well known designer. In this case it was Andrea Moore.
They had been told that the room we had booked had white walls and wooden floors. The room we were shown into had green walls and a maroon carpet. I had been told that we were shooting in a studio so had left my backdrops at home.
Eventually we managed to secure a better location at the same time as the model showed up.
They had sent the model some mood board images to pass onto me which she had not. Fortunately they had examples on their phones for me to see.
They had a range of outfits and wanted to have simple “look book” images, then some to use as campaign images and then to go outside and shoot more campaign images in the city.
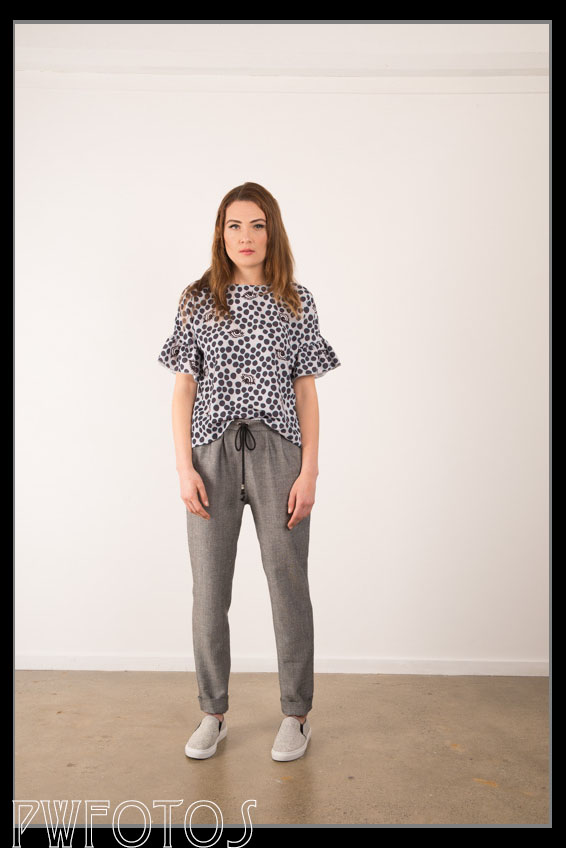
As they wanted bright images for the look book I chose a simple two light arrangement as shown in the diagram below.
The soft box to camera right is the main light for the subject. The second soft box is there to light up the background. Both lights were set to f7.1.
The idea in a look look is to maintain consistency in the set so that the clothes are the focus. To help with this the camera was sat on a tripod and the model did not move much relative to it.
Example of a Look Book image
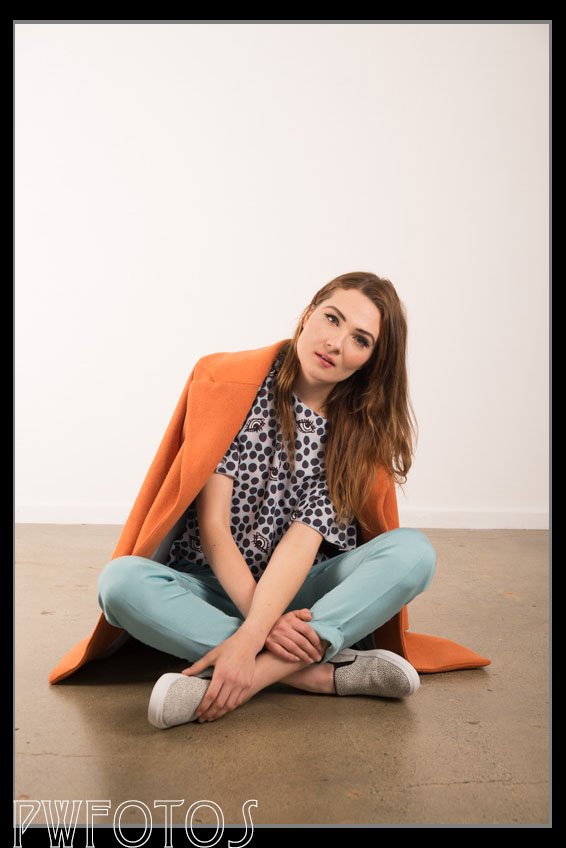
Once we had a good series of images we then moved on the campaign images that were allowed to be a lot more lively. The girls had brought in a number of props and I say the possibility of a fun shot using them.
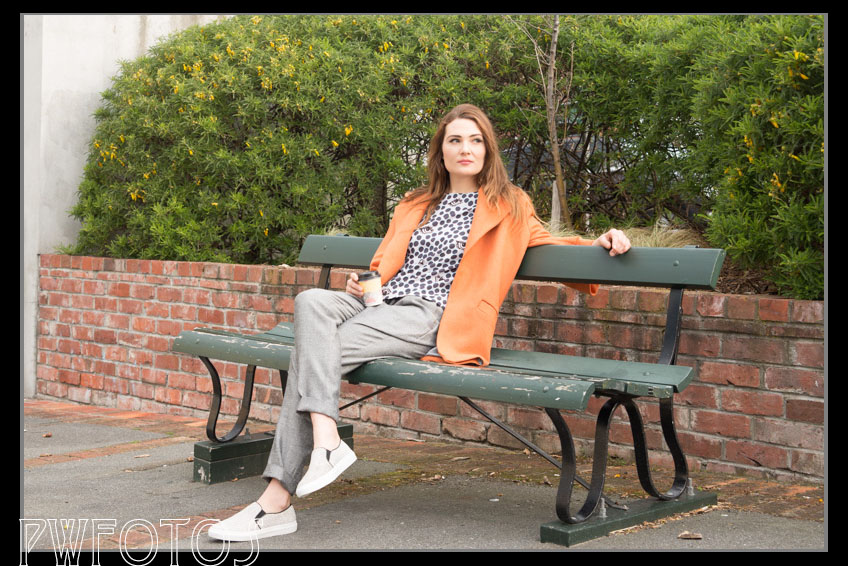
We then moved outside. My daughter was assisting me and she noticed that the pattern on the hood of one of the outfit lined up rather neatly with Emily’s face so we took the following image.
Not to far away from the building was a park bench that I thought suited the theme. We then moved down to Caro Drive to shoot around a pedestrian crossing. I decided to use a little selective colour with this image to make it pop.
Break out of the gray
I ended up shooting 360 images in the 3 hour session. These were put up in a gallery for the girls to decide which images they wanted to edit further. They chose around 40 which were delivered to them.
A chaotic start but a good session non the less. To Jess, Amelia, Rosie and Miriam all the best.
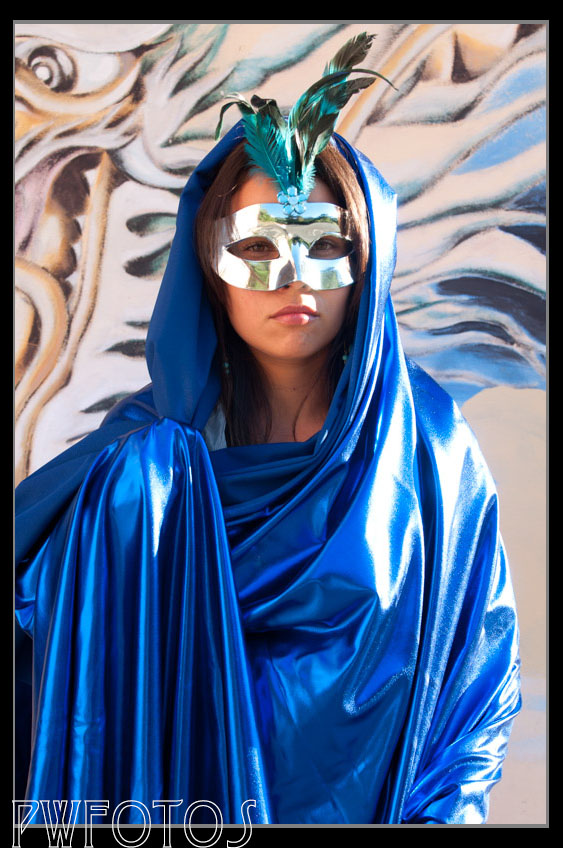
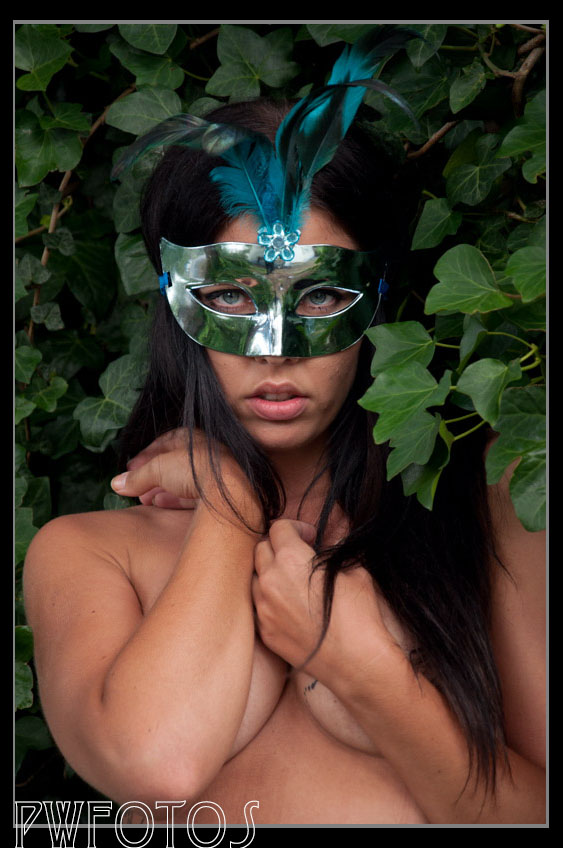
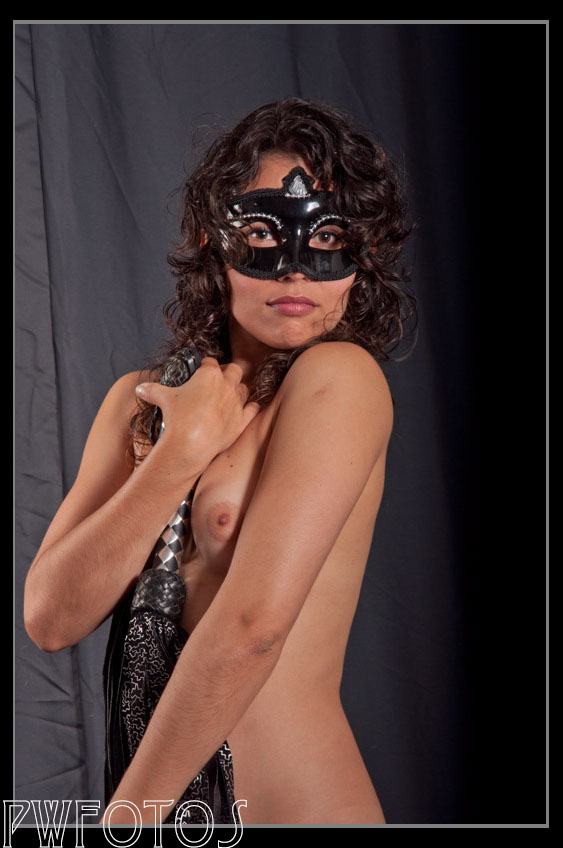
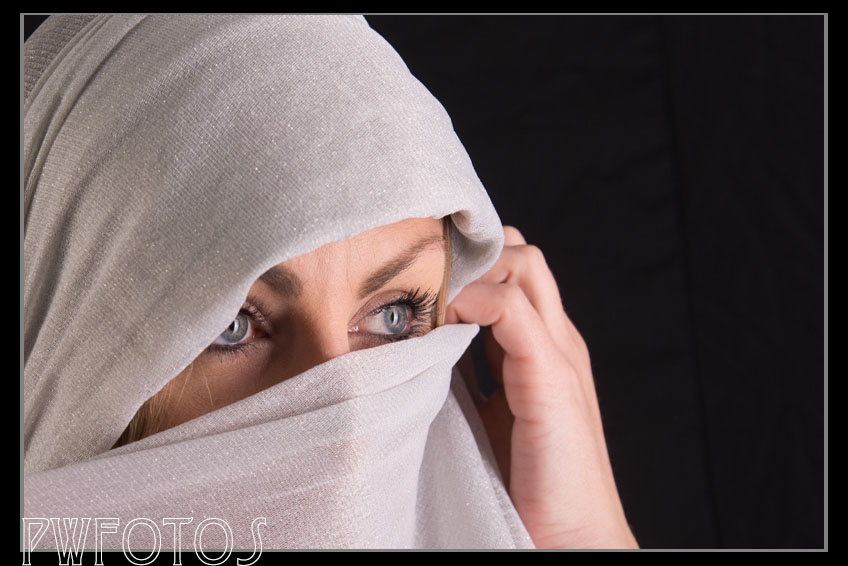
They say that the eyes are the windows to the soul, and it is true that if you can capture catchlights in the image, and the eyes are sharp then people will connect.
A number of years ago the family spent some time in Egypt and it was really the first time that I encountered women wearing the full burqha with only there eyes showing. It was amazing how good looking quite a lot of eyes appeared.
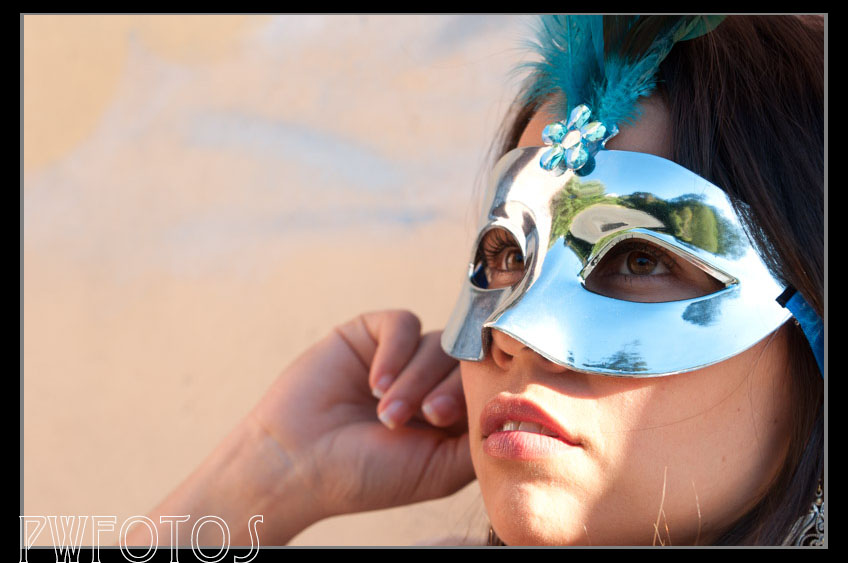
Then a couple of years later we had a secret Santa at the work Christmas party and I was given a blue plastic mask. I instantly knew what I was going to do with it, and it has been used in quite a number of shoots since.
Over the years I have collected quite a range of masks, and I really enjoy using them in shoots. In most cases the mask actually focuses attention on the eyes while at the same time adding a little element of mystery to the image.
Most masks have been very successful apart from one. It is a replica of a full faced venetian mask that I have used in two shoots. The shots are good but to me there is something that I am not quite getting. I suspect that the mask actually needs a very elaborate outfit to set it off.
This was the first shoot using a mask, and still one of my most favourite shots.
Using the same model as the original blue mask, but this time with a small black oneA simple mask with contrasting colours of the drapeThis full face white mask unnerves a lot of people due to its lack of featuresThis is the first shoot using the full faced venetian maskThe most recent shot with the venetian mask
Last year I was invited to submit images for an exhibition at the Hutt Art Society that combined paintings, drawing and photographs of the naked body. It is intended to be run every two years and so I have started making images for the next one.
I really like producing bodyscapes so I approached Jaimee via Model Mayhem to see if she was interested to assist. We met some months ago and I went through what I was looking forward. She was willing to take part but with other commitments it was not until last Sunday that we finally managed to get together to do the shoot.
Tight underwear leaves marks.
When she arrived Jaimee admitted that she had been wearing her bra all day and that it was likely to have caused marks in her skin.
Normally I would request a model remove any tight clothing at least an hour before a shoot starts so that such marks have time to fade. I had forgotten to do this with Jaimee which was a big oversight on my part. While you can easily remove the marks in Photoshop, it does slow down the overall processing as so I generally try to ensure to limit the effect.
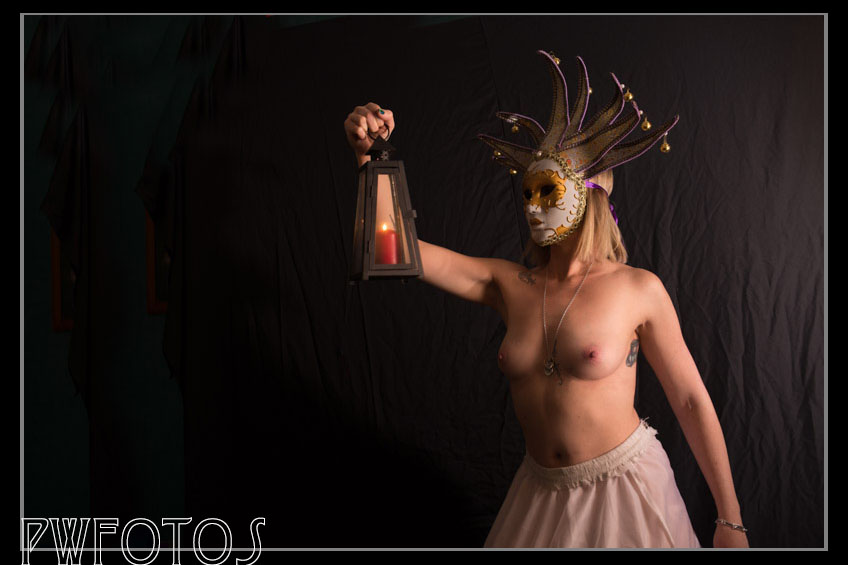
While the intention was to shoot bodyscapes I also wanted to try some other images so actually started the evening with a mask and petticoat. We then moved onto using lengths of fabric.
Doing the shoot in this way where we moved from essentially clothed to fully nude has the advantage that it gives time for the model to get comfortable with the session. It is very important in the bodyscape shots because quite often you are shooting close to your model. It also had the advantage in this case because it allowed time for the marks to fade.
When it came time to do the bodyscapes I was using a large stripbox as the main light positioned to the side of the model. A second light with a small honeycombed grid acted as a fill light.
Towards the end of the session I had Jaimee apply oil to her body and we then sprayed her with water. It creates a really neat effect.
Jaimee was a real champion because the evening was not that warm but she did not complain.
I have never been a fan of hanging a camera around my neck, and have always simply wrapped the strap around my wrist. As I moved up in gear the desire to use the neckstrap diminished further.
If you look at the following table you can see how the weight of the gear I am using has increased dramatically. The first column is the weight in grams of my original digital camera and second is my current camera.
D90
D600
Body with kit lens
520g
Replace lens with 24-70 f2.8
660g
940g
Add Battery Grip
1,020g
1,220g
Replace lens with 70-200 f2.8
1,940g
2,140g
As you will appreciate lugging a 2kg weight around your neck tends to get fairly uncomfortable.
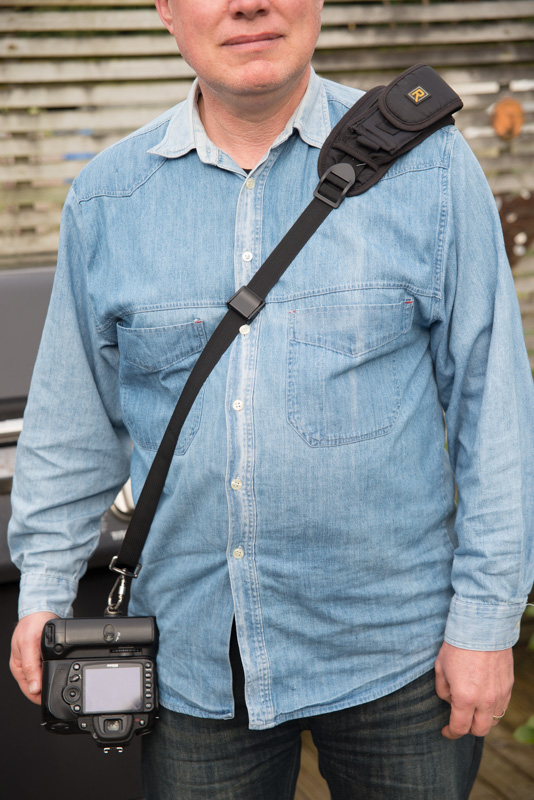
Black Rapid sling
Some years ago I attended a workshop in Auckland and one of the tutors was using a Blackrapid strap. This goes over one shoulder with the camera hanging at the waist on the opposite side of the body. The camera is attached to the strap via a clip that screws into the tripod screw on the bottom of the camera.
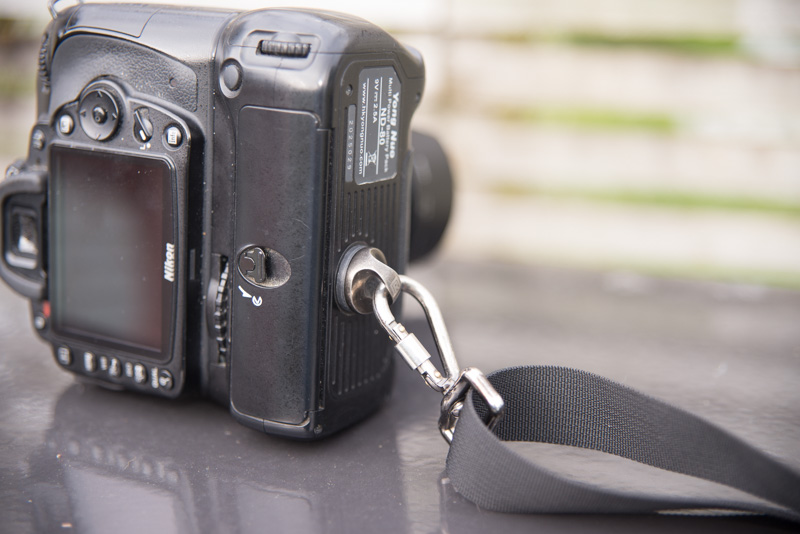
I thought that this was a great idea, however I considered that the price of the strap in NZ was too high. After showing it to my wife she said that she could make something similar which she did. We used the quick release plate from my monopod to attach the camera to the strap.
The strap attaches via the camera’s tripod screw
This arrangement seemed to work for a while until I noticed that the hoop that I was using was starting to bend. Fortunately this coincided with receiving birthday vouchers and so I bought the Blackrapid strap.
The strap worked very well while I was using the D90 but when I got the D600 I started to have a number of issues with it. The first was that the extra weight appeared to result in the length adjusters not working properly which was more of the an annoyance than an issue. A more serious issue was that while the camera was in a good place while you were standing upright, if you leaned over the camera swung round, and you had to have good reactions to catch it before it hit something.
The second real drawback of the design is that if you were using the camera on a tripod then you could not have the strap and a quick release attached at the same time, as the camera only has one place to attach them.
As a result of the two issues I was carrying the camera more than I wanted to.
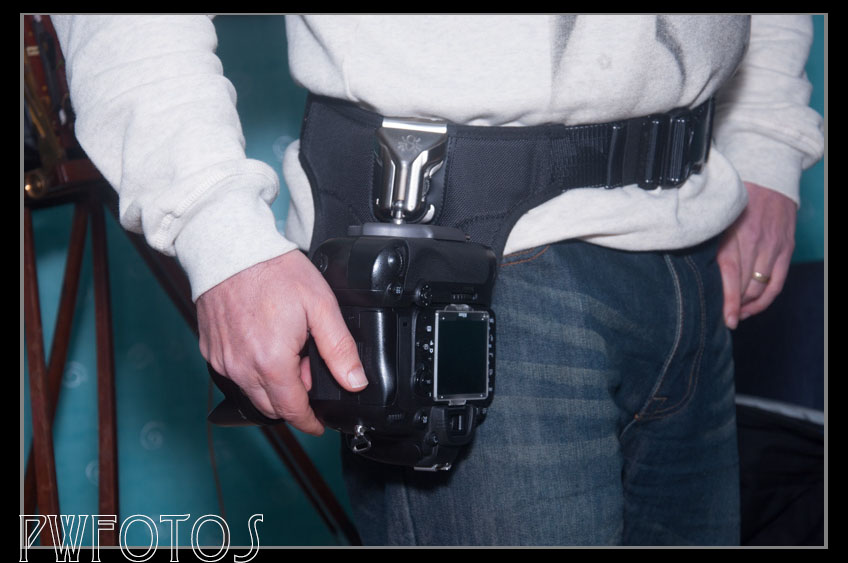
Then a couple of month ago I was watching a Lindsay Adler workshop on CreativeLive.com and she had her camera mounted at her hip using a device called a spider holster. I discovered that there were agents for it in New Zealand and that I could buy it from them at the same price as B&H would in New York without the additional freight charges.
So while I was in Auckland visiting family we drove over to Photogear on the North Shore and they let me try one for about 20 minutes. That was enough to convince me that it was the solution to the issues I was having so I bought one.
I got to really put it through its paces over the three days shooting the Body Arts Rocks Conference and it really worked out great. You do have to position to belt carefully with your jeans so that once you add the 2kg camera to it, you do not feel like your pants are going to fall down. My wife expressed the concern that having a 2kg weight on one side of the body would cause issues with my back, but I actually did not encounter any such issues over the 3 days.
Now I will admit that at $199 it is not a cheap items but it enabled me to feel fully in control knowing that the camera was not going to move regardless of how I altered my upper body.
They have also fixed the tripod issue as the plate that attaches to the camera has two screw mounts in the bottom so you can attach a quick release plate and still use the holster.
If you are looking at a way to manage a camera while out on location then I would strongly recommend that your look at this option.
The Creative Focus Competition is a nationwide competition organised by the Pukekohe Camera club that has an aim of promoting photography that pushes the boundaries of traditional images both in terms of in camera techniques as well as post processing. The competition is in its second year.
Last year I entered four images and all four received acceptances, so i had high hopes of being able to repeat that process again. I entered four image again in a category they referred to as “fusion” however the more common term that should have used was composites.
This year I was not as successful having only two images (shown below) being successful. At first I was disappointed by this but then I learned that they had received twice as many images as the previous year. This meant that their rejection rate had to considerably higher as all the successful images are printed in a book after the competition.
There are literally hundreds of articles and tutorials on the internet about how to use light to achieve various looks. If you have been studying lighting then you should be familiar with such terms as “hard vs soft light’, butterfly lighting, Rembrandt lighting and a host of other styles and approaches.
Now most of the articles focus on helping the photographer achieve high quality images in an environment where you have time to achieve the look you want. What these articles don’t tell you is how do you set the lighting to meet the requirements of the client. While you may think that they will both be the same, in reality there can be quite a difference.
In this article I am going to look at the lighting choices that I made for the Body Art Rocks Conference and explain why I made them.
With the conference I was shooting two quite different types of images namely:
Ones documenting the event as it unfolded, and
A series of images of the final creations suitable for the artists and models to display in their portfolios.
Once I knew what I was shooting I then could look at what key factors I would need to consider, which turned out to be quite different.
Documentary Shots
The essential element in documenting the event was ensuring that I had sufficient images to clearly showed what had happened over the three days. The reality in capturing images that are intended to document something is that even a poor image is better than none, however you do want to try to get as good an image as possible.
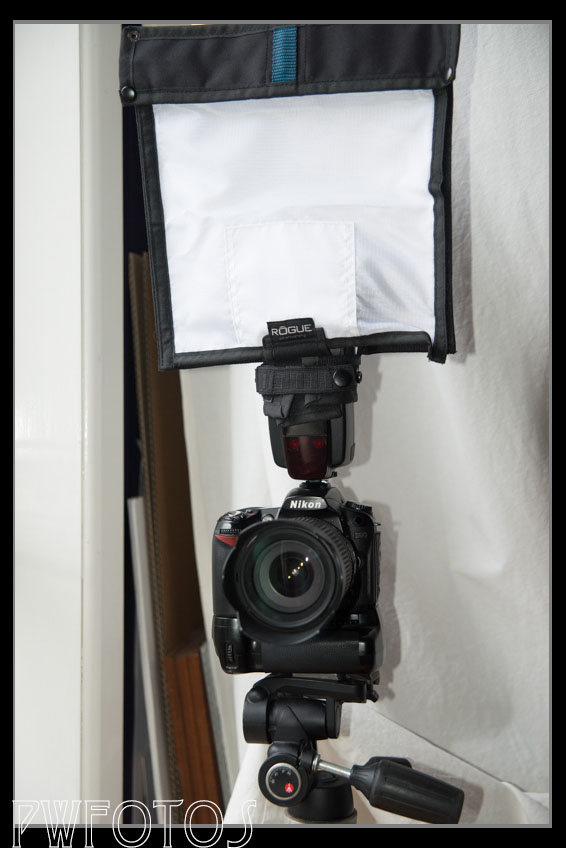
Knowing that I would be moving from room to room and encountering different ambient lighting conditions, and I would be shooting subjects from a range of distances and focal lengths. This meant that the only lighting that would be of any practical use was on-camera flash.
The rogue flash bender and diffusion panel fits over the camera mounted speedlight
Now on-camera flash is generally one to avoid if possible as it is a very harsh light and not the most flattering. You need to soften the light in some way. Generally to soften the light you need to increase the size of it relative to the subject. To do this I used a Rogue flash bender and diffusion panel. This fits over the speed light and spreads the light out resulting in a softer light.
It does reduce the amount of light that the flash generates slightly and this can muck up trying to get the camera to handle the setting. I generally do not like shooting TTL when I have flash and so shot the whole weekend in manual mode.
Initially this did require some trial and error to determine what was the best setting for each of the rooms as well as for shots taken close up as opposed from afar.
For the close up’s the most important thing was ensuring that the image did not over expose the subject and at the same time the flash did not wash out the colours that the artist was painting.
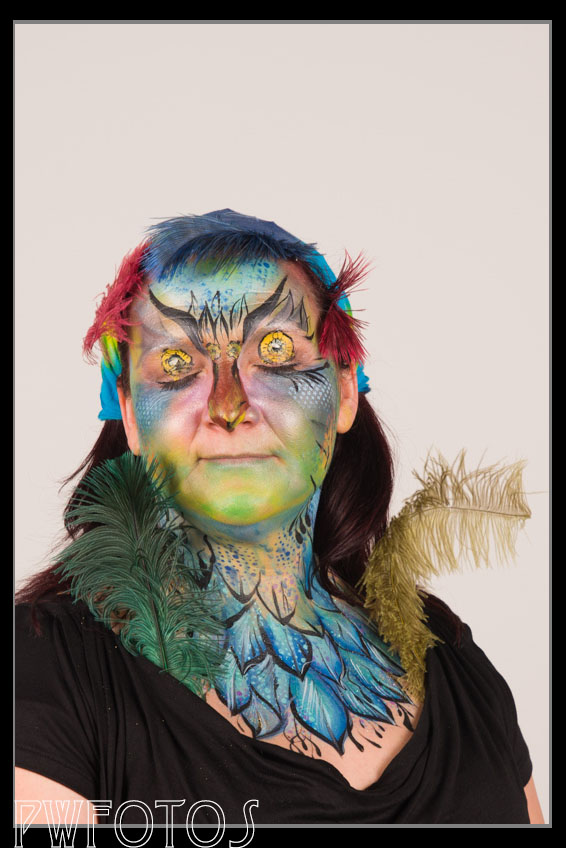
The lighting in this image is quite even and the colours have been maintained. As this was shot in a dark room the ISO was high (f5.6 1/100 ISO 800)Despite the fact that the zombie is quite close to the wall the diffusion panel had softened the light so that strong shadows are not generated. To ensure that the image was not blown out the iso was quite low (f5.6 1/100 ISO 100)
Final Images
The final images were intended to be used by the artists and models in their portfolios. The key to producing images for the artists lay in ensuring that their work was presented in the best possible way. As the model had essentially become their canvas it was more important to bring out the colours.
These images were going to be shot in one location and that meant that we could set up studio lights with big soft boxes on them. However we had to fit the shots into the conference programme which meant that we could not muck with the lighting on each subject. Essentially you have to set up a “production line” environment where the subject comes in, you take the image, and then move onto the next subject with the minimum amount of effort.
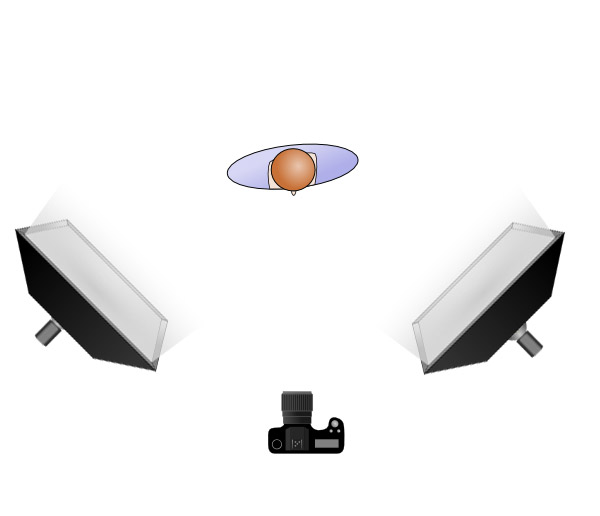
To do this you create a lighting zone and shoot everyone on the same setting. This was achieved with two strobes set to the same power and positioned on both sides of the camera as shown below.
This essentially creates the light zone which was metered at f7.1 1/100 and ISO 100. It means that the model would be correctly exposed no matter where they stood in the zone.
With this lighting arrangement in place it was a very quick routine to move the model on stage and then take the photos without any mucking around between models. When you have 17 models to shoot in 15 minutes this is essential.
The big disadvantage of this approach is that you don’t get the shading in the light that eliminates it being called “flat” lighting. In this case I was not actually worried about that though because as I have already said, the purpose of the photos is to more to record the art than the canvas.
Ideally the areas chosen to take these images would not be used for other things but that was not the case and at other times it was used as one of the workshop areas. This meant that we were relying on the white wall to be the backdrop rather than putting up a backdrop.
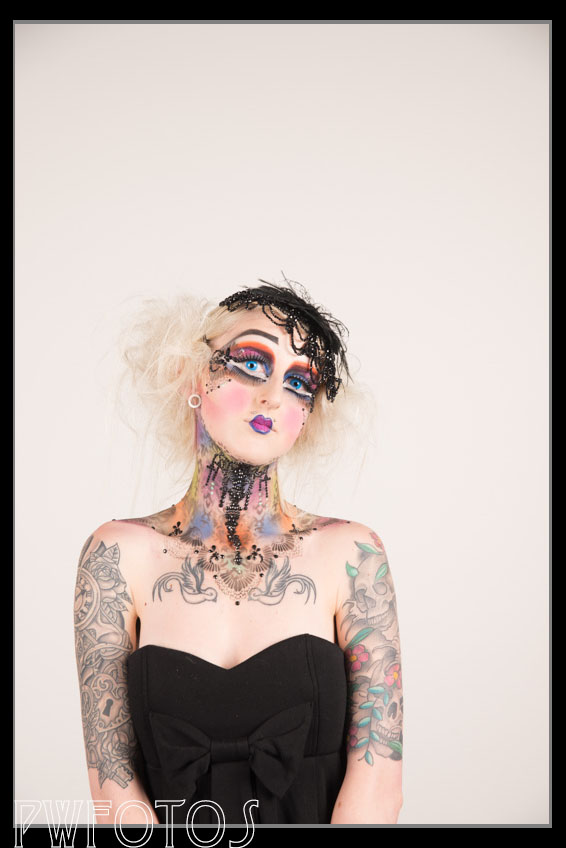
For the most part this work however we did run into an issue of getting separation when the model had light coloured hair.
While the image is fine with regard to the painting the overall effect also employed the hair and we are losing detail as it is blending with the background.
Now while shooting on the Saturday I had not realised the extent of this issue, and therefore had to correct it in post. But on the Sunday I anticipated it and handle it in a simple way. Firstly I told the two models that had blond hair that we were going to shoot them last, and then once we had shot them both on the white, I turned one of the lights around and shot them against the black panels that made up the side wall.
This shot against the black panel provide good separation of model to background. The lighting is more dramatic because it uses a single light camera right and a silver reflector on the left.
Had I been using a backdrop then I would have mounted a darker colour and had it sitting at the back so that it would have been a very quick job to change it over.