Category Archives: Concept Images

Movement in dance

LR_Kasia_Dance-9 
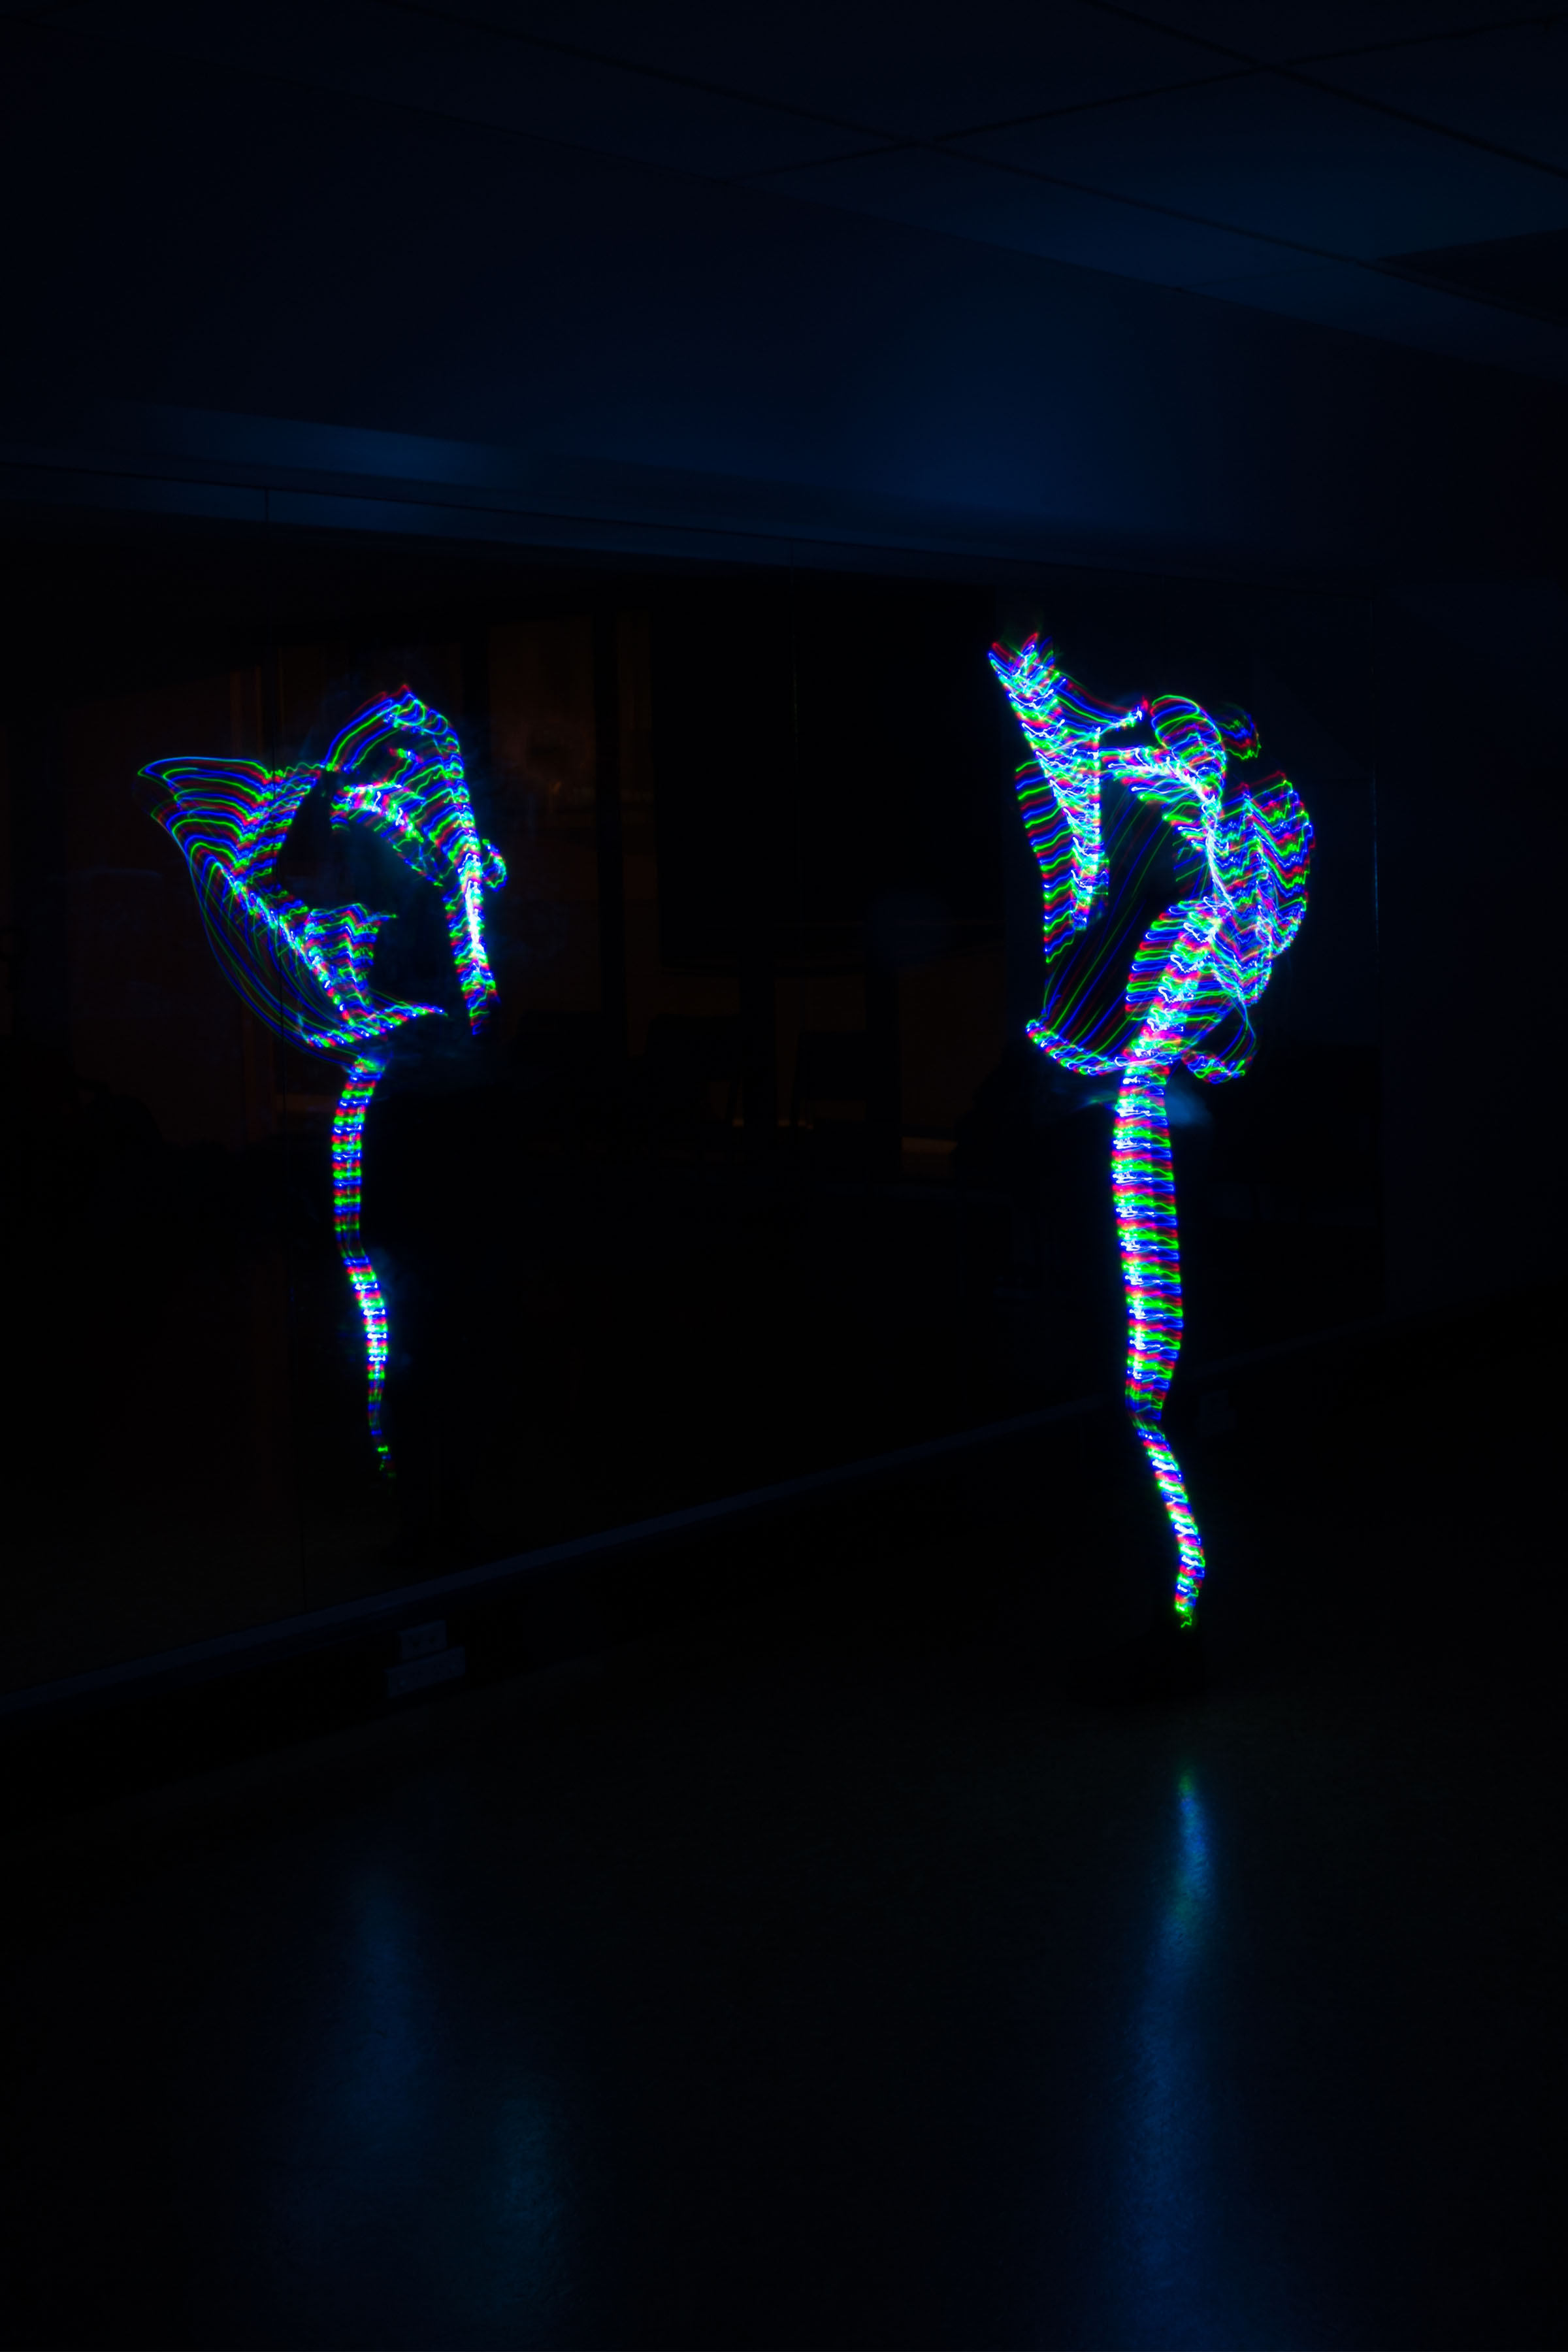
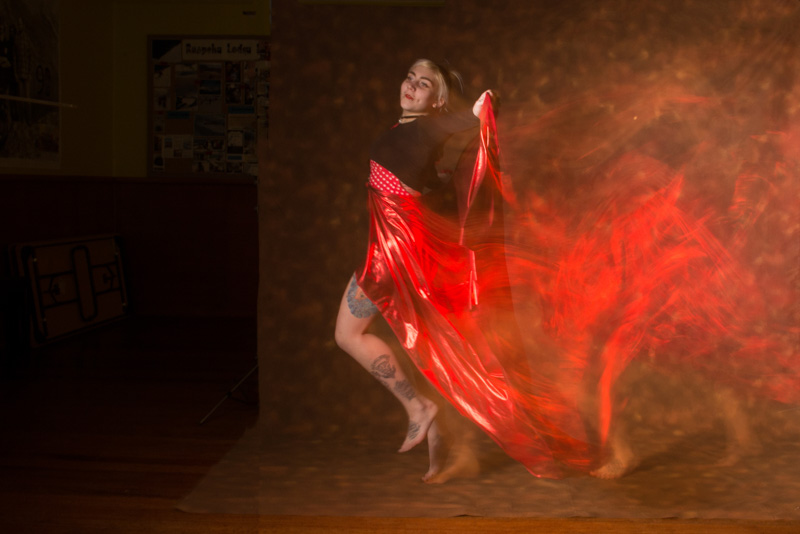
Some weeks ago I came across a Youtube clip in which the photographer used long exposure and flash together the create images of movement. The flat essentially froze the action at that point whereas the log exposure created the movement.

I decided that this fitted in nicely with my earlier session using the LED lights and dancers which you can read about here. I had a large hall available and Kasia agreed to be my dancer.

The key to the shot is getting a sufficient long exposure to allow enough light in to capture the movement, and the flash set to fire right at the end. I knew that I had to have a very wide depth of field as Kasia would be ranging over quite a large area. Therefore the camera was on a tripod and set at f20, with manual focus set with a test shot.

We initially started with a 1/3 second exposure but that didn’t generate enough movement so we extended that to 1 second. The ambient light was provided by the room lights, and my main flash was set to camera left using the 7 foot parabolic umbrella. I positioned a second light camera right with a small gridded reflector aimed at the backdrop to try to add some more separate.

I had planned to bring in a constant light but in packing the car that got left behind.

LR_Kasia_Dance-30 LR_Kasia_Dance-18 LR_Kasia_Dance-7

While I am reasonably happy with the end results I think that there were some definite  things that I would change for the next shot.

  1. The first was to use a much bigger backdrop. I was using a very old support system and it is not that wide or tall. That meant that a number of great looking shots were not useable because Kasia had moved off the backdrop.
  2. I would remember to bring in all of the lights that i needed because the final image is well lit, the movement is a little dull.
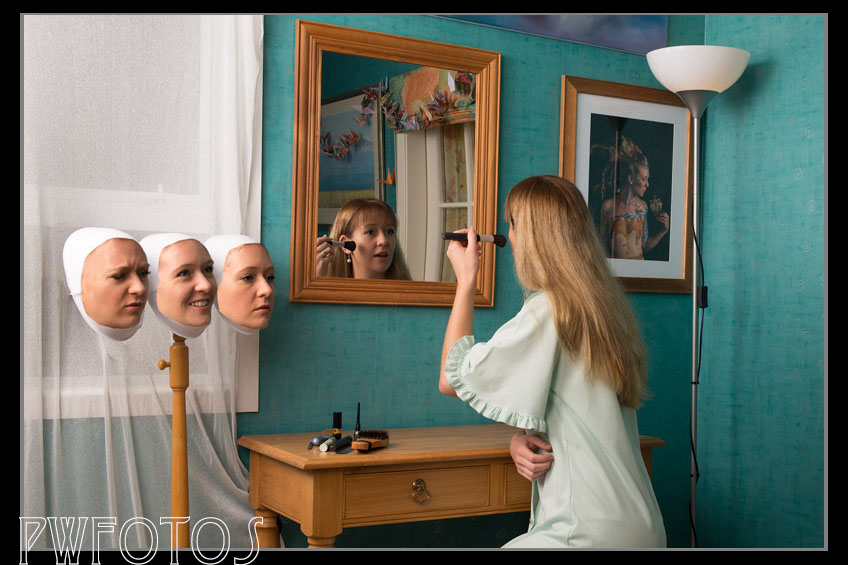
  3. Timing is everything. Trying to start the movement with the press of the shutter is quite hard. As shown in the image below if Kasia held her initial position for two long we ended up with a double exposure.

LR_Kasia_Dance-3I am trying to arrange a time with a ballet dancer in the next month and hope to take this series further.

Success with Reflections

Each year the six photographic clubs in the Wellington area have a print competition. The host club sets 10 topics and each club submits a single image. I have entered images for selection in most years, and have normally had at least one selected by the Hutt Camera Club. This year was no different and I submitted images in two categories.

The judging was held last night and I was thrilled when my entry in the “reflections” category won, with the judge raving about the image.Reflections

Afterwards the images attracted a lot of attention and I received a lot of questions about how it had been produced.

When I had seen the category “reflections” I knew that I wanted to create something quite different. A very similar  topic was used in 2011 and that time I used a mirror as well. (you can read about that one on this link).

Fortunately just down the road from work is an unusual shop selling a wide of mirrors. It is set out more like an old curiosity shop, and so i knew that it would make a great location. The shop describes itself as a gentleman’s destination shop so I knew that I wanted a particular look for the person. Fortunately I knew that Wellington wedding photographer Jason Naylor fitted that bill, and he agreed to take part.

We had to wait a couple of months to get a time that was not so chaotic for him and the shop owner. We will given full run of the shop after it closed to the public. My daughter assisted with helping set up the mirrors.

The image was lit with a single strobe placed immediately in front of Jason firing into my 7 foot parabolic umbrella. A Lumecube was placed on a light stand just behind him (camera left) to add a little separation.

The shot as presented is pretty much straight out of camera. Photoshop was used to set the tone of the image along with a little dodging. The fifth mirror was a little bit of a mistake however I quite like how it adds a little bit to the image.

Kat Pool Shoot (NSFW)

LR_Kat_133032016-1During the warmer summer months I just love to do shoots that involve water. Unfortunately this year my usual spot has been a little inaccessible, and we were away for a good part of summer, so I decided to utilise a padding pool that I both late in 2014.

I have shot with Kat a number of times and I know that she is a very reliable model and great to work with. So when she answered by casting call there was no doubt I was going to use her.

The pool is about 2 metres long, 600mm wide and 300mm deep. As it is bright blue which would not fit with the shoot I used a number of my fabric lengths to line it using rocks from the garden to weigh the fabric down. A large rock was placed at the end of the pool that Kat could rest her head on.

LR_Kat_133032016-9As often happens with outdoor shoots the weather gods decided to exert the influence. On the weekend I had initially hoped to shoot the skies were clear and the weather really warm (28C/88F) so it would have been a very pleasant experience in the water. However the weekend I ended up shooting it was cloudy for most of the time and the temperature didn’t climb much above (20C/72F). This meant that the water in the pool did not heat up in any way and was quite cold.

LR_Kat_133032016-11

Kat is a real trooper, but as goosebumps are a real bitch to photoshop we shot very quickly so that we minimised the time in the water. I am really pleased with the results.

LR_Kat_133032016-13

Getting the light right (Sort of)- NSFW

In an earlier post I wrote the failed attempt with Sian to recreate the images of Mayer George that involved shadows and light on models. By the end of the shoot we had concluded that the shapes had been projected onto the model using a data projector rather than a gobo on the studio lights.

12006357_808194935969549_2561422507514538998_n
Image by Mayer George

Sian was willing to give it a second go so I designed a series of shapes in photoshop. We had a lot of fun with the shoot along with a few challenges, with the first of them getting the images to display.

I work on a Mac but have an older laptop that I recently updated to Windows 10. That was the one to be connected to the data projector. I do not know why Microsoft insist on making things harder to do when they update their software, but that is exactly what they. Try as we may we could not get the screen to display the image full screen without toolbars. In the end I went back to the mac and using Fotomajico created a quicktime movie of the images. That at least I could display as I wanted it.

The second challenge was to get the image into a portrait orientation rather the natural landscape. The answer was to put the projector on its side but this meant holding it rather than having it on a stand. So once again I was like a one-armed paperhanger with the projector in my right arm and firing the camera with my left.

LR_SHadow-4LR_SHadow-2LR_SHadow-3
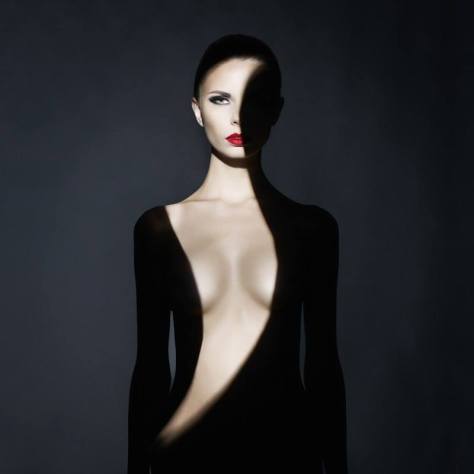
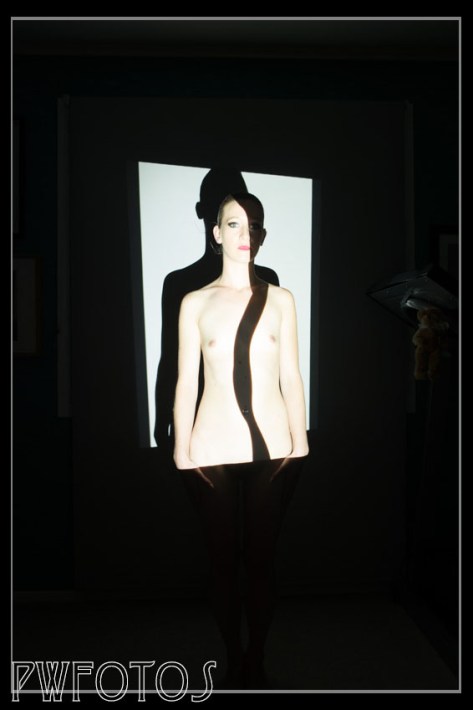
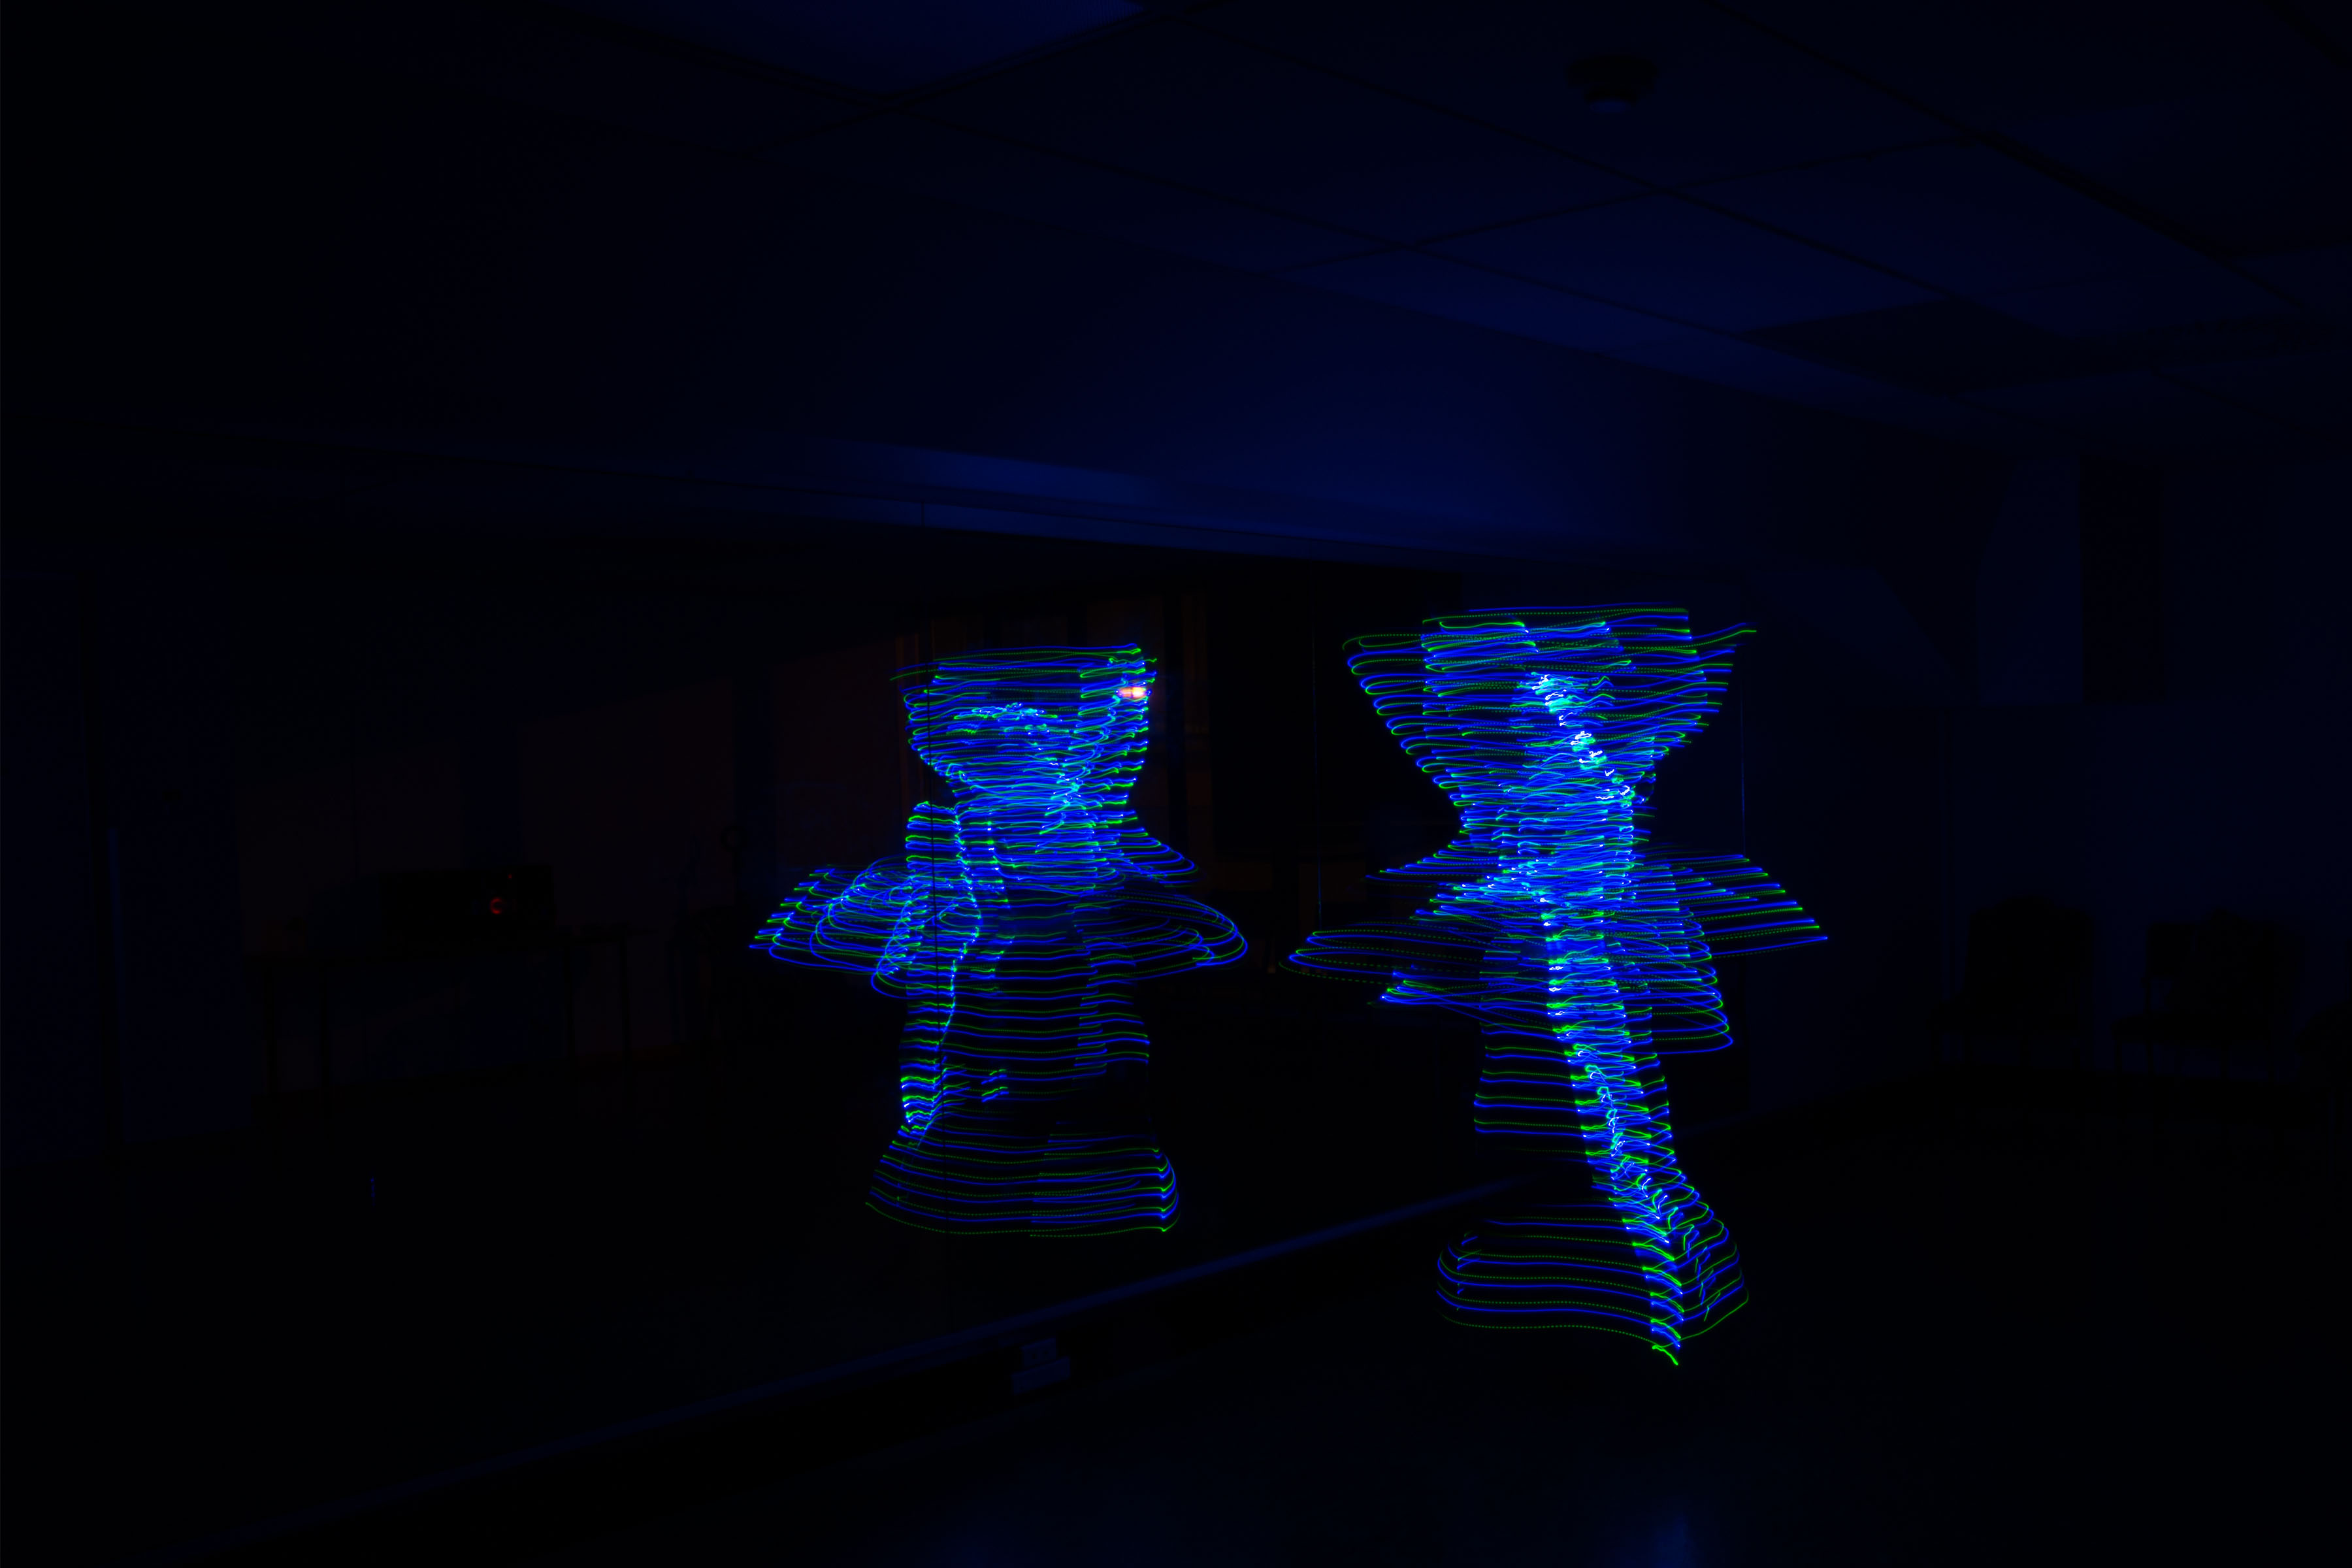
The results this time were much better than the first attempt however we still had the issue that the image was spilling from the model onto the backdrop. This does not occur in the ones that I was trying to replicate.

I have therefore come to the conclusion that images were produced by having the model go into a position in front of the projector and then the shadows are drawn so that they only fall on the model.

Maybe next time I will give that a go.

Trial, Error and Failure (NSFW)

Sometimes you think you know how something is done and then discover that you are completely wrong. This was certainly the case with a photoshoot that happened a couple of weeks ago.

It started when a model posted the image below on Facebook  from Mayer George and said that she would love to do something similar.

12003397_808194925969550_295897261149477314_n
Image by Mayer George

I looked at it and thought that it would be relatively simple to replicate as I was sure that the photographer had used Gobo’s on his lights. A Gobo is simply a mask that you put in front of the light causing it to create patterns on the subject being illuminated.

So I set about trying to replicate it with the assistance of Sian. I produced a number of modifiers with varying size cuts in them that I planned to put in front of a single strobe fitted with a seven inch reflector.

I had thought that it would be a simple task but it turned out to be anything but. I am not sure whether it was a lack of distance to the subject, or something else but no matter how hard I tried I could not get clearly defined edges. I thought that maybe the light source was too big so change the reflector to a snoot with only a small opening.

This meant that I had to hold the gobo in place rather than tape it. As there was only Sian and I in the shoot it created a comical dance where I had to press the timer on the camera (which was on a tripod) and then quickly place the gobo.

It produced some interesting looks but again nothing sharp enough.

20151019
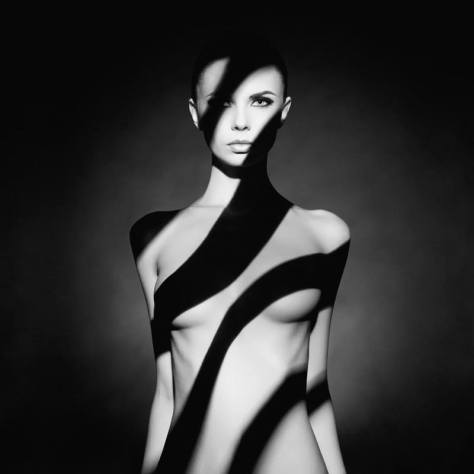
In the end we decided that maybe a different approach had been used and then I remember a shoot I had done two years before using a data projector, and how it had given me reasonable sharp lines.

The next post will cover the second attempt at the project.

Kowhai girl

LR20150926-12When I am shooting with models for the first time I have absolutely no problem if they bring along a girlfriend for support. I find that it makes them more at ease and therefore the shots are better. It is on the condition that the friend is prepared to help out. There has been the occasion that I have even encouraged the friend in front of the camera as well.

This was the case when Emma arrived for the Spring Goddess shoot with Josephine along for the ride. Josephine is an exchange student from Denmark. When I saw her I instantly wanted to shoot her, and I knew what I wanted.

In preparing for the shoot we had gathered some yellow Kowhai flowers but had not incorporated them (as the colours did not work together). They would work brilliantly with Josephine.

In addition Josephine had a natural beauty that really didn’t need any additional makeup so it meant that there was no additional work required by the makeup artist I was using on the day.LR20150926-13Lighting for the shot was a single light camera right in a white shoot through umbrella with a silver reflector placed camera left.

The Spring Goddess Shoot – Emma

The spring goddess on natures floral mattress

Last year I took a series of images in the Autumn leaves that you can find on this link. At the time it was intended to be a single image, but as I looked around at all of the spring blossom I decided that maybe I should make it a series. So that is what is happening and I will schedule a shoot in each season.

I posted a facebook casting call and Emma agreed to take part and Anahera agreed to be the makeup artist (MUA). I firmly believe that in a collaborative shoot each person should be allowed to bring their own skills and contribute equally. For this reason I never tell the MUA’s exactly how I want the makeup done. Rather I tell them the overall concept and let them bring out their own creativity.

Anahera applies the finishing touches

In the morning my daughter and I went round the neighbour and did some very selective pruning off the trees in blossom. Now I am no vandal so I ensure that I only removed small sections from branches that were in public areas, and also had grown to a point that the council would trim them anyway.

I had planned to use the bed of flowers that our camellia usually produces but in the week before the shoot it had produced very little so we had to go down the street and collect magnolia petals that had fallen from the trees.

As with the Autumn shoot the dress that Emma was wearing was largely constructed from lengths of material over a hooped petticoat. Lengths of the blossom were then placed over it.

LR20150926-3Now planning an outdoor shoot is always frought with issues and this one was no different. The biggest factor is the weather, and being spring it could not make up its mind what it wanted to do. As the shoot time approached it kept alternating between light rain and sun. As Emma was coming from an hour away I had to make a call at 11:00am and decided to do it regardless. I decided to set up a set in my garage studio and if it rained use that one instead. That is indeed what happened.

The studio setup
The studio setup

We ended up shooting inside which has meant a little bit more work in post than perhaps I originally envisaged.

LR20150926-10 DSC_4708

Playing with lights

The essence of dance. A composite of several shots

Some time ago i saw some amazing images where a photographer had attached led lights to a canoeist paddles and recorded the movement. I knew that I wanted to the same but instead wanted to attach them to a dancers body and record the movement of the dance.

I bought a 5 meter string of lights at the end of last year but it has taken quite some time to find a dancer willing to take part. Margarita is a model as well as a champion ballroom dancer, so when she agreed to help out I was really happened.

The lights were wired to be powered from the mains, which was never going to work so I got a battery pack that could be connected to them. My daughter helped my by sewing some together some fabric into a belt containing a pocket for the batteries.

We has intended to use double-sided tape to attach the lights but this did not work to well so ended up trying them on with lengths of string.

We shot in a dance studio that has the advantage of a full length mirror. I set the camera on a tripod at f22 and shot 10 second exposures.Dancer-31 Dancer-20 Dancer-15 Dancer-1

At the end of the shot Margarita partner Erik joined and we changed the lights so they went around both of them.

Margarita & Erik
Margarita & Erik

I have now have other ideas to do in the future so stay tuned.

Putting on your face

Putting on your face - the final image
Putting on your face – the final image

Each year the Heretaunga Rotary Club runs a major book sale and my wife is one of the volunteers that help sort the donated books as they come in. A number of weeks ago she brought home a collection of photographic magazines for me to look through. They were mainly out of date, however I do like looking for images that may provide inspiration for shots.

I came across an image is an old issue of Photo Review Australia in a section called “Emerging Talent” by Samantha Everton that I really liked.

Charade - Samantha Everton (www.samanthaeverton.com)
Charade – Samantha Everton (www.samanthaeverton.com)

The expression “Putting on your face” immediately sprang to mind and so when I was doing the Getting Ready image in the model series I asked Sian would she like to help me create something.

BTS-PuttingOnFace-1

I set up a small area of my studio to resemble a makeup area and has Sian sit an pretend to put makeup on. I had purchased three paper mache masks and attached them to a length of dowel that was sitting on a stand uses for needlework. The camera was mounted on a tripod so that all of the angles would stay consistent to make the compositing a little easier.

BTS-PuttingOnFace-2

We tried a number of angles and poses to see which one would work before finally settling on one.

I then moved the masks out of the way and Sian positioned herself roughly where each had been and did a different facial expression at the three positions. Shooting in this way meant that the lighting was consistent across the whole image.BTS-PuttingOnFace-3

Lighting for the image was two soft boxes. The main one was set camera left and up high. (You can just see the edge of it is the top lefthand corner). The second light was camera right and lower down to add some fill. This light had to be carefully placed to ensure that it did not appear in the mirror.

The composite in Photoshop was fairly simple although given that Sian’s face and the masks are different I did have to use the liquify tool a bit.


The Model Series – Getting ready

The latest image in the model series is entitled “Getting Ready” and continues with the theme that models and the clothes are connected to a point that while getting ready the model would already be in them.

20150530

For the shoot I was joined by two models that I have shot on a number of times before namely Renee (pink) and Sian (green). My home studio was set up like the dressing area of a show and we played with a number of different posing options before shooting the final image shown above.

Hair-1

Hair-5 Hair-4 Hair-3 Hair-2

The shoot was done in really high spirits and the girls had a great time ironing each other.

For the final shot we carefully positioned Sian onto the ironing board and very quickly took several shots. While it was a reasonably study board I was not sure how well it would last given that it was not designed to hold as much weight as was on it.

Fortunately it lasted the distance and it was only as Sian was getting off it that the bracket gave way. As I had it set at a height that we do not normally use I doubt that I will get in too much trouble with my wife.