Category Archives: Competition Entries

Lady of the Lake

Regular readers of this blog will know that through this year I have been shooting images for a competition based on recreating Fairy stories and legends. While I already had done one image from the tales of King Arthur, I still wanted to do one around the character of the lady of the lake.

Megan agreed to help out to produce the image below

Lady-1
While it looks a very simple image, the actual execution was somewhat difficult. As it was still winter we decided to shoot inside in my bathroom. This is not a very large room and in fact the bath itself is not full size so getting Megan under the water proved an interesting challenge (as she is quite tall).

Lighting was also a challenge. My main light was a beauty dish boomed out over the water. Despite the fact that I had a polarising filter on in the first shot this was still producing too distinct a reflection. The answer was to turn the light over and bounce it off the ceiling.

The blue in the image was achieved by lining the white bath with a blue tarpaulin.

The final image

Over the last three posts I have been outlining the steps that I went through to put together a composite image based around the story of paper cranes. Having shot the cranes as outlined in the last post I was ready to out the image together.

When I had laid out the test composite I had started with the front image and worked backwards. This was a serious mistake as it meant that I was having to mask out very large areas of the image. I was also discovering that the tree I had shot against was not actually working in the image.

The answer was simple. Start with my background image first and move forwards, and in fact forget about the tree.

The first two layers of Megan and the background went together relatively easily although something was nagging me about the lighting as it seemed to not be consistent. But I couldn’t out my finger on the issue because as far as I was concerned I had been very careful in what I shot. Then when I was re-reading my earlier blog post I realised what the issue was. I had chosen a tree that was taken with the sun immediately behind me when in fact the correct location for the other images was with the sun to the left of the image. Once I swapped out the image the level of lighting in the two images matched up much better.

Megan had actually changed positions slightly with the two books but I was able to pick up her face from the lit shot and mask it over the original one. I then used a “clouds” filter to put in an effect for the cranes coming out of the book.

The cranes were brought in one at a time and their background was masked. To get a great variety of colours a number had a hue/saturation adjustment applied before being copied in.

Finally it was a simple matter of rearranging them to in the final image as shown below. There is a still a couple of weeks to go before it has to be entered into the competition so I may still do some more tweaks to it.

Birds#1_Small

Composite Image – Shoot Days

This is the third instalment in the process behind a composite image. The first part “Getting set up” can be found here and the second instalment “Shooting the background” is found here. The actual shoot took place on August 25th but other commitments have not allowed an earlier post.

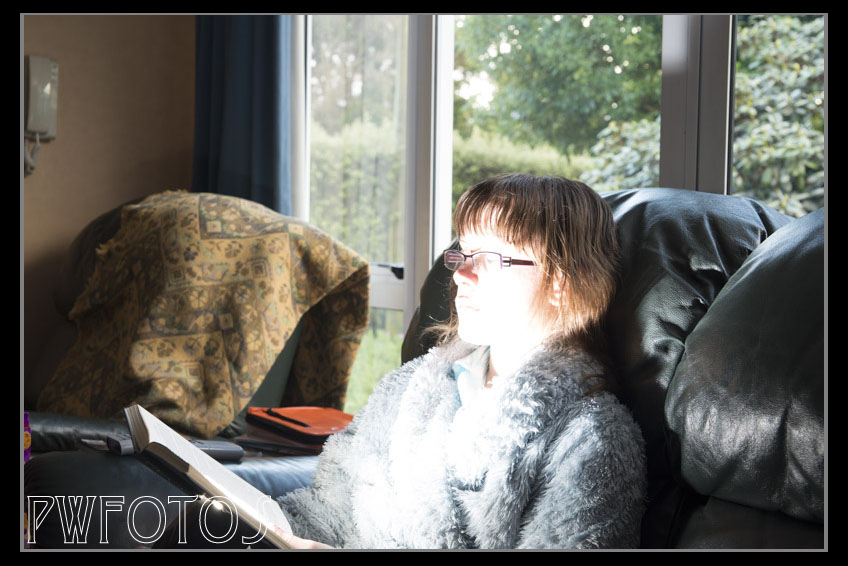
The shoot involved Megan as my willing model and also my daughter Samantha acting as assistant (and behind the scenes photographer). Despite the fact that this was to be a composite image I was actually trying to achieve as much as possible in camera. There were basically three shots to be done on the day namely.

  1. Model reading a normal book
  2. Model reading the book with the flash gun (as detailed in the first post of the series)
  3. Model and paper cranes.

Because I was not sure what would be the best angle to shoot from we were going to recreate the shots twice. I had factored this into the shots I had taken earlier with backgrounds.

As I knew that I was not going to be using the actual background I set up a large blue tarpaulin to act as a blue screen for me. This was to make the process of cutting the subject out easier but it does rely on having a reasonable consistent colour. Because the area was actually in shade I knew that this was not going to be the case so I place one of my lights to light this background. It was angled so that it would not spill light onto my model.

BTS-1My main light was used a beauty dish over which I had placed a yellow gell to give me a warmer light. I placed this light directly in line with the sun so that the images had the same lighting location as the backgrounds I had shot previously. For the second shot I had hoped to trigger both the main lights and the speedlight at the same time but unfortunately one of my triggers refused to work so they had to be fired separately.

For all these shots the camera was set on a tripod which was set at exactly the same height as the park backgrounds had been shot at. This would ensure that all the angles would be consistent.

Fortunately this was the only technical issue that we ran into on the day. The biggest challenge that we had to face came with shot three. The paper cranes had been strung together on a single wire and though we tried several approaches to attach them to the book and various light stands they proved difficult to handle, and the results were not exactly what I was looking for, but there was the hope that it would work in post.

BTS-2
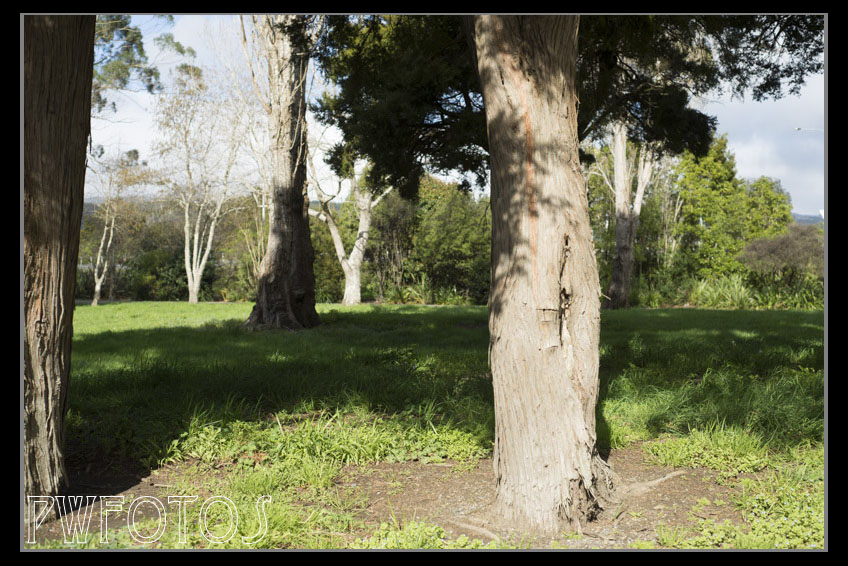
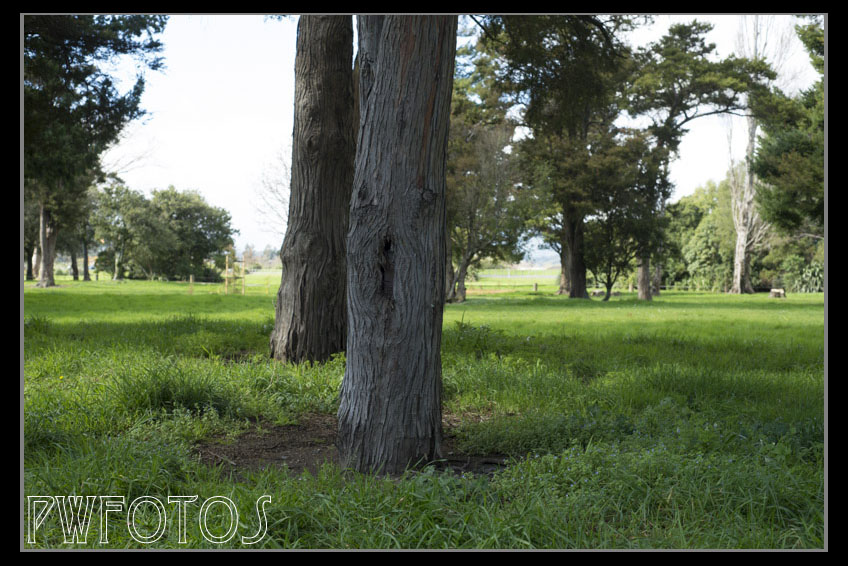
Later that night I downloaded the images, chose what I considered to be the best and started to prepare a rough composition. I think that this was a bad move because I was too tired and so I made mistakes that meant that two days later I essentially started again. What was confirmed though was that the head on angle was the best for the images, that the tree in my garden was not working and that I would use all of the backgrounds trees, and that the cranes had not photographed well at all.

The conclusion was that the process needed more image and that I needed to shoot individual paper cranes and composite them.

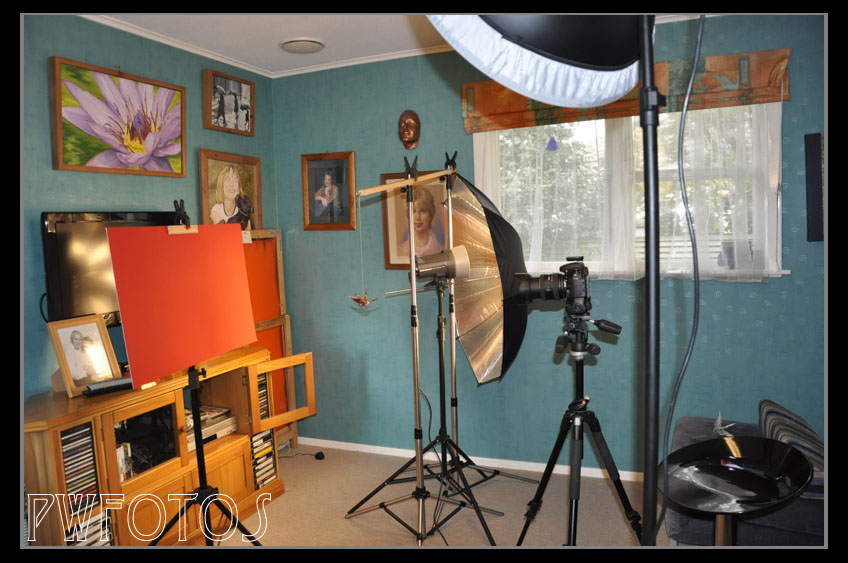
So yesterday I set up to shoot the cranes. I used two background supports and balanced a length of wood on it from which I which I could hang a crane. Again the main light was a beauty dish positioned in roughly the same direction as the week before. This time I used a piece of red card as the background which was light with a second light with a bounce umbrella. The camera was set on tripod at roundly the same height as the weekend. I allowed the crane to rotate on their strings and also swung them a little. That way I would get different angles to use with the same lighting.

BTS-3Finally I felt that I have all the elements for the final image to be built.

Capturing the background

This is the second post that is going behind a composite image that I will be shooting next weekend. The first part can be found in this post. Due to the earthquake that Wellington had on Friday I had an unexpected day of work so it provided me with the perfect opportunity to sort out the background for my image.

No ideally the whole image would be shot on location but as I will be using gelled strobes as the main light, and I don’t have a portable power pack, I am somewhat limited to a location within reach of an extension lead and power socket.

I have decided that a tree at the bottom of our garden would be a base but as you can see the background is not that attractive.20130819-1

We do live close to a park and so that enabled me to locate a suitable background. In order to try to replicate the light conditions I went out at the exactly the same time as the shoot will be.

Now the key to a good composite is consistency so I put a 50mm on the camera and found the distance from the tree that I thought would best frame the subject. I did this from two locations as I am not sure at this whether a head one or a side image is going to give me the best result.

I noted that when I was head on to the tree that the Sun was directly overly my left shoulder and when I was lined up for the side view it was directly behind me. This will be useful for Sunday should the day prove to be cloudy, as it will give a direction to place the main light.

Once I got to park I tried to locate a suitable tree that would be the base of the background and then angled myself to it based on the Sun. The first two were not ideal as there were distracting items in the background.

I eventually settled on a suitable tree, and measured out the desired distance and set the camera on the tripod. I was using the tripod because this meant that the angles that I would be shooting would be consistent.

The test shot revealed a problem with a road behind, in that cars were appearing in the shot. I therefore had to make sure that I could see gaps in the traffic before clicking the shutter.

When I am shooting with lights I tend to shoot around F9 but as I am not sure what setting I will be using on Sunday I set the camera in Aperture priority and I took a range of shots at different f-stops from 5.6 to 9. I also rotated the camera and took a similar range in portrait mode. This means that I can match the focal lengths between the ones shot with the model and my replacement backgrounds.

With the sun directly behind me. The tree is this image is actually brighter than the real location but this is not so much of an issue as it is the background I am really interested in.
The tree with the sun over my left shoulder. The light on this shot is very similar to the real location.

Getting set up – a lighted book

Next weekend I am going to be shooting the final images for a competition in October and while I will show you the final result once it was finished, I thought I would also share some of the pre-shoot preparation.

In my final image elements will be flying out of a book and I wanted a burst of light to accompany them. This will be done using a speedlight to provide that part of the light and Cokin filters to colour it. My daughter was roped in to be my model for the day.

In order to create a gap through the whole book the easiest approach was to clamp the book shut and use my jigsaw to cut a section out.
I found a couple of old books that no one wanted as I was going to destroy one in the process. In order to create a gap through the whole book the easiest approach was to clamp the book shut and use my jigsaw to cut a section out.
Gaffa tape was then used to secure the speedlight to the book.
The speedlight was set on 1/32 power and a test show was taken. The result was an overblown image
I knew that full power would be way too strong at the range so the speedlight was set on 1/32 power and a test show was taken. The result was an overblown image so it was obvious that I needed to dial it down further.
The power of the light was reduced to 1/64 and this time the light output was still hot but we were getting there.
The power of the light was reduced to 1/64 and while this time the light output was still hot but we were getting there. I knew that adding the filter would have the effect of reducing the light.
A Cokin Blue filter was placed over the hole on the inside of the book. This tinted the light but was still not exactly what I was looking for.
I added a Cokin Red filter knowing that the combination should produce a purple light which is exactly what it did.

The final results are still a little hot but I was not worried about that. I now have a good starting point to tweak them on the day of the shoot. Plus these shots were taken inside on a dull day, when the actual shoot will be outside so the natural light will have a greater influence as well.


Success in 2013 Wellington Interclub Competition

Last night saw the final of the Wellington Interclub Photographic Competition. Each of the six clubs in the Wellington region submits an image into each of the ten categories that have been chosen by the hosting club.

I am always very keen on this competition and I take entry fairly seriously. As a result the Hutt Club selected my images to represent it in 5 categories (Contained, Eggs, Mysterious, Reaching and Terraced).

I was quite pleased that my image in “Reaching” won it’s category, especially as this was the only one of the five images that had been shot specifically for the 2013 competition.

First place in its category
First place in the Reaching category

The image was shot in a friends garage with a single gridded strobe boomed out from a mezzanine floor.

My image in the “contained’ section came second in its category with the judge commentating that he wondered how our minds worked.

Second in its category
Second in the Contained category

My other three images performed much worse than I would have liked but the competition was of a very high standard.

A little selective colour for effect
A little selective colour for effect in the Terraced category
Lit with a single strobe
Lit with a single strobe in Mysterious
A little humour in the competition
A little humour in Eggs

In search of Arthur

Later this year I am submitting images for a club competition on the theme of “once upon a time”. You are expecting to stage a shoot rather than simply finding an object and shooting that.

One of my favourite stories is King Arthur so I wanted to recreate the sword in the stone which is fairly integral to the whole story.

For those who don’t know the story there was a magic sword embeded into a rock and only the true king of England was able to remove. Of course Arthur managed the feat and became king.

I had thought to borrow a sword from a local medieval group but when I told them that it would involve water no one was interested. Turns out that authentic swords and water don’t mix.

Anyway TradeMe was you friend and I sourced on there. On last Sunday I decided that the area below the old Birchville dam would be ideal so with my daughter as assistant we set off up the trail to the dam.

Unfortunately the light was not ideal and we had to resort to flash to boost the image. Shooting on slippery rocks below a waterfall is quite tricky especially as recent rain meant there is was a lot more water. The spray was a major issue as the lens got coated very quickly.

I got the image that I wanted although I suspect that I will probably tweak it some more before it is submitted in October.

The sword in the stone

Acceptance at North Shore Salon

The North Shore Salon is a nationwide photographic competition organised by the North Shore Camera Club. All of the images that are “accepted” in it appear in a book that is published so there is quite a lot of interest in taking part and the judging selection is tough.

For the first time I entered four images in the digital set category of “imagine”, and was successful in receiving an acceptance for the image below. This is the second award for this image.

Acceptance in the "Imagination" category
Acceptance in the “Imagination” category

Sand, Wind & Mermaids

The second shoot in the “Once Upon A Time” series called for a mermaid and was originally envisaged to be on the rocks on the south coast. This ended up being changed when I was approached by Peri who lived in New Plymouth who was very keen to take part in the shoot. She even offered to drag in 19her friend Ella (who is a very talented makeup artist). They were willing to drive the 4 hours down to Wellington, but when I told them that I was going to be in Wanganui on the weekend of March 2-3 they were happy not to have to travel so far and we arranged to meet and do the shoot there.

Now shooting away from home base always presents issues as you need to ensure that you don’t leave anything behind. It is also complicated when you don’t know the locations that may be available. The former is sorted through careful planning while Facebook can come to your aid with the later. On a photographic Facebook group I asked for ideas and was told roughly where to look, so on the Saturday I set off to look at the suggested beaches.

The first location was not promising especially with two drunks sprawled out on the sand, but further along the road we found the exact location I was looking for. The only problem was that the gear all had to be lugged over a very large sanddune.

The next day we met up with Peri and Ella and headed for the beach. Unfortunately when we got there we discovered that the “ideal” spot was being used by a couple of fishermen. Fortunately a 100m down the beach was another suitable location. So after Ella finished with the makeup we headed down there.

I had anticipated sun as an issue but what turned out to be a bigger one was wind. Although it was not that strong it threatened to turn the reflector into a kite making it very difficult to use. Still I managed to get the shots that I wanted and a few more.

A friend is a keen fishermen so getting a good image of a fish was not that difficult. Several hours of photoshop work and we have a couple of images that are not too bad.

Mermaid-1-small Mermaid-2_Small

Red

This year the last round of the Hutt Camera Club Ladder competition has the theme “Once Upon A Time” in which we are challenged to create an image that represented a fairy tale. It is called “conceptual photographer” where the photographer gathers together a significant amount of the elements that end up in the final image. Now those that have read this blog will know that it is a style of photography that I really like.

I decided on a number of ideas that I would progress and just before Christmas 2012 made a casting call on Model Mayhem for models and makeup artists who were interested in taking part in the project.

As it turned out the first shoot ended up being “little red riding hood”. However I wanted to do this with the twist that the recent television series had introduced where Red and the wolf were actually the same individual. To represent this I wanted a model to be face painted on half her face as a wold while the other side remained normal. Rachel agreed to the shoot and my wife Vicky agreed to do the facepainting. Lower Hutt photographer Mandi Lynn kindly loaned us a cape from her wardrobe.

We shot late on a Sunday evening in a park not too far from home and I am really pleased with the early results. The final images may be tweaked even more in photoshop before being entered into the competition later in the year.

LR_red-30 LR_red-31 LR_red-32