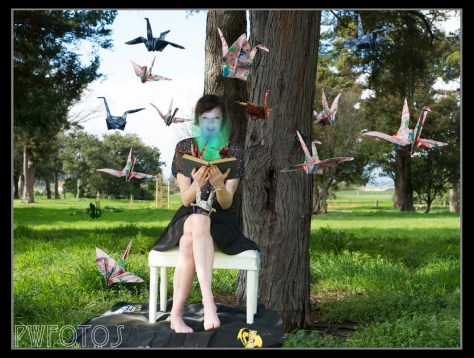
Over the last three posts I have been outlining the steps that I went through to put together a composite image based around the story of paper cranes. Having shot the cranes as outlined in the last post I was ready to out the image together.
When I had laid out the test composite I had started with the front image and worked backwards. This was a serious mistake as it meant that I was having to mask out very large areas of the image. I was also discovering that the tree I had shot against was not actually working in the image.
The answer was simple. Start with my background image first and move forwards, and in fact forget about the tree.
The first two layers of Megan and the background went together relatively easily although something was nagging me about the lighting as it seemed to not be consistent. But I couldn’t out my finger on the issue because as far as I was concerned I had been very careful in what I shot. Then when I was re-reading my earlier blog post I realised what the issue was. I had chosen a tree that was taken with the sun immediately behind me when in fact the correct location for the other images was with the sun to the left of the image. Once I swapped out the image the level of lighting in the two images matched up much better.
Megan had actually changed positions slightly with the two books but I was able to pick up her face from the lit shot and mask it over the original one. I then used a “clouds” filter to put in an effect for the cranes coming out of the book.
The cranes were brought in one at a time and their background was masked. To get a great variety of colours a number had a hue/saturation adjustment applied before being copied in.
Finally it was a simple matter of rearranging them to in the final image as shown below. There is a still a couple of weeks to go before it has to be entered into the competition so I may still do some more tweaks to it.
