In previous posts I have told you how I went about planning for the Pisces shoot which would turn out to be the final shoot in the zodiac series. As it turned out while finding models of the Pisces was relatively easy, getting them to commit to a shoot day proved to more difficult.
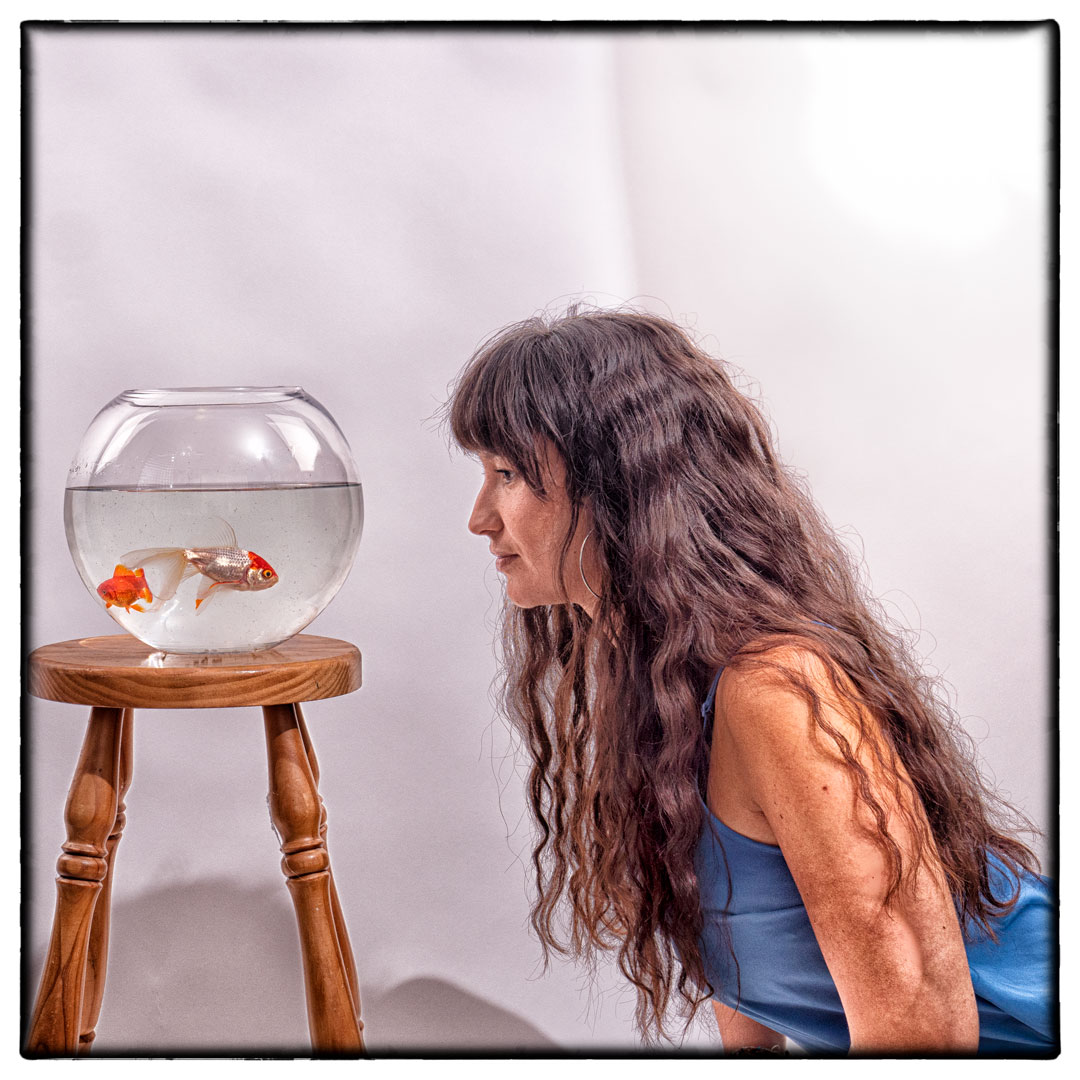
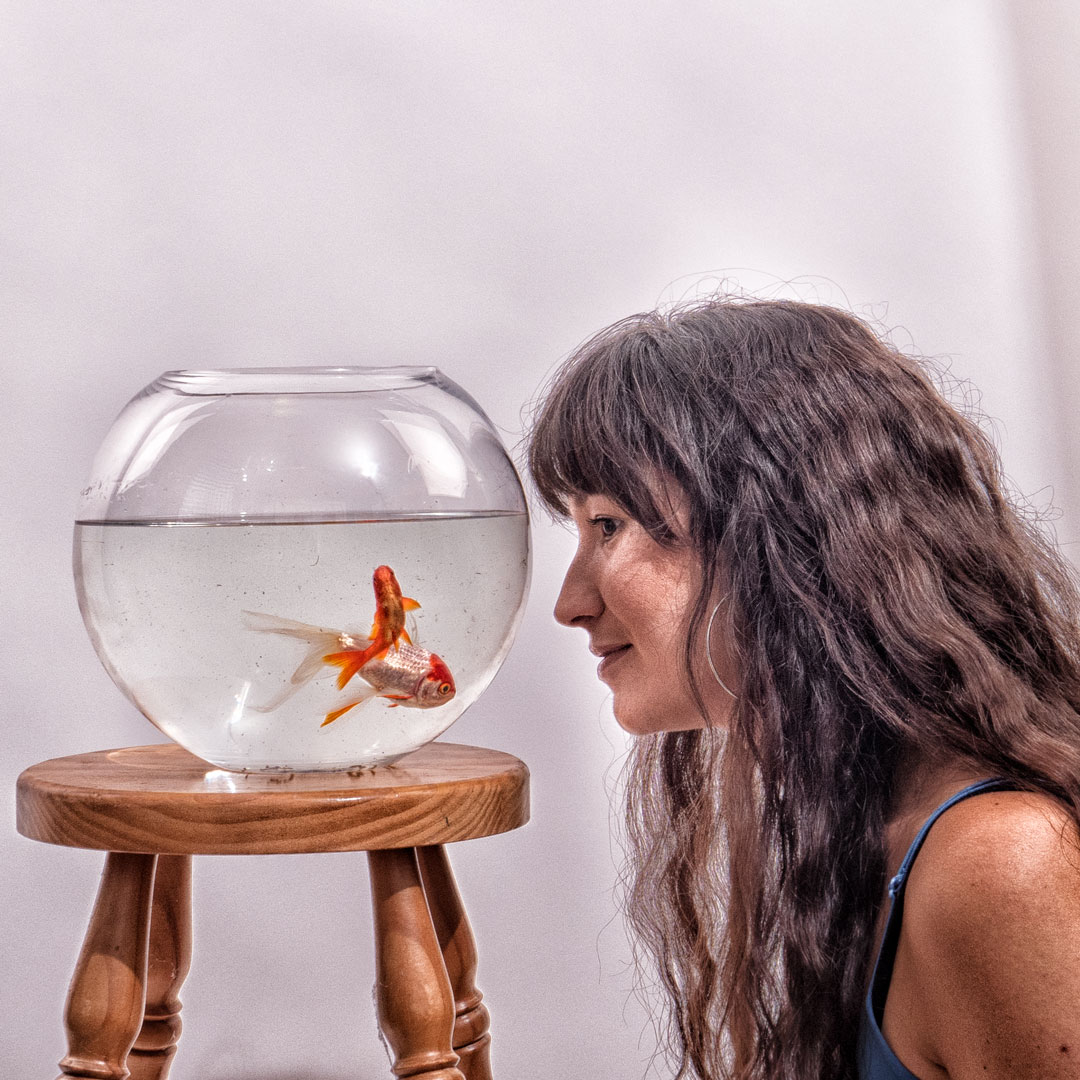
A month nearly past between the test shoot and when Marianne arrived to do the final one. In that time I had also managed to acquire a fishbowl that better resembled what I had envisaged.
The bowl was actually larger than the one that I had tested and therefore heavier. I therefore decided against getting Marianne to lift it even though that is what we have practised. The goldfish had also become better at avoiding me so I ended up not being able to catch the large gold one that I was after, and instead had to settle with a much smaller one.
In my test shots there were two lights aimed solely at the background. However when I started to shoot I realised that if I pulled them further away that the scene was much more evenly lit. To get light on the front of both the bowl and Marianne I positioned my strobe camera right with it being bare bulbed and pointed at the ceiling. Essentially this created a large light source above her.
Although the light positions did result in reflections in the glass I was not worried about that as it did add dimension to the image.
Although I knew fundamentally how this image would fit into the set I wanted to ensure that I had a variety of images with different focal lengths and angles.
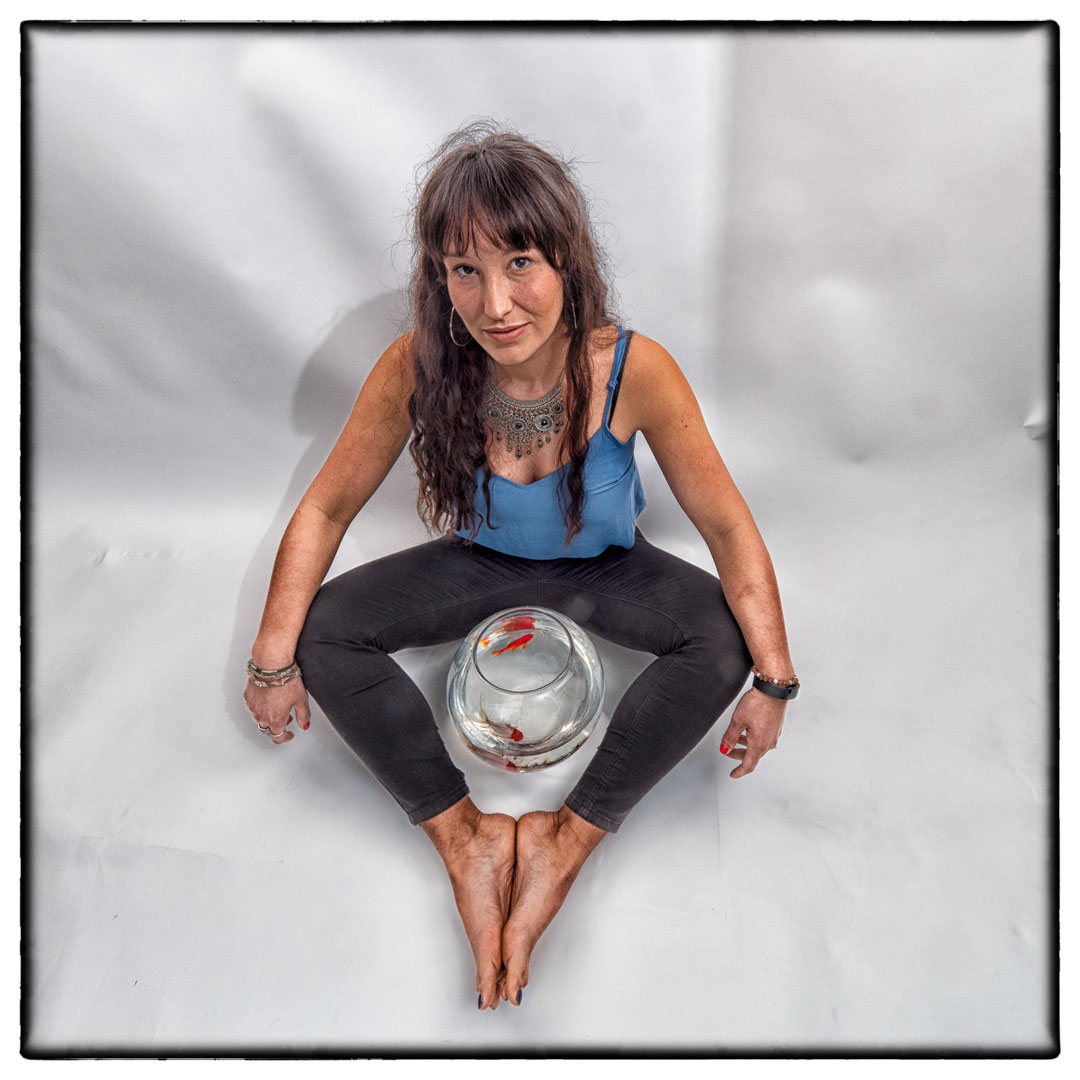
This included having Marianne holding the fish, as well as ones where she was sitting on the ground. Ultimately it was one of her lying on the ground that was selected to be the chosen image.
With Pisces finally shot I now had a complete set of the twelve signs, even though if I was to submit them both Cancer and Virgo needed to be reshot to fit with how the set was now looking.
The level that I am going for the Photographic Society of New Zealand honours has a very low success rate and part of that is the Honours Board’s desire to see a level of diversity in the images submitted. I started to think that the set was not diverse enough and this was confirmed when I took it to one of the members of the board who had just stepped down.
While it did not end up being a submitted set, the process of shooting the twelve image was very enjoyable and worthwhile.
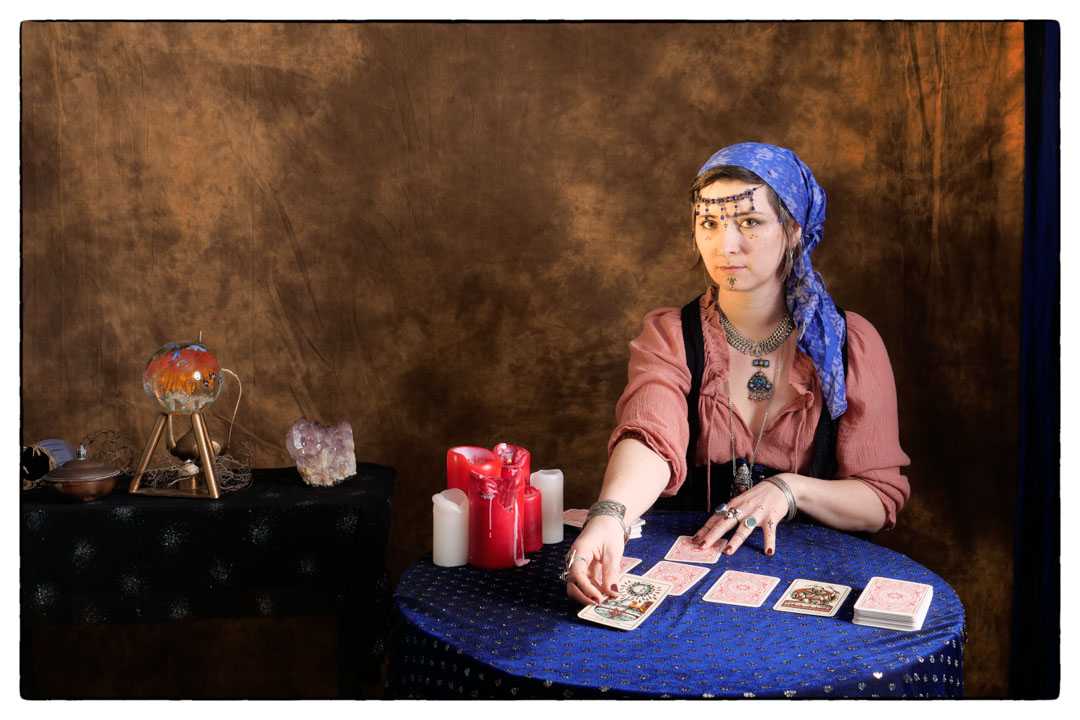
Generally speaking if I go to the effort to build a set and arrange a model, I will try to get more than one look out of the shoot. So when Neena came out for the Fortune Teller we decided to not only do a series with the crystal ball, but also ones with tarot cards. These I had borrowed from my daughter.
The lighting for the shoot was very similar to the first part, with the large octobox providing Rembrant lighting.
The difference with these sets of images was that I was free to move around and try different angles rather than being locked onto the tripod.
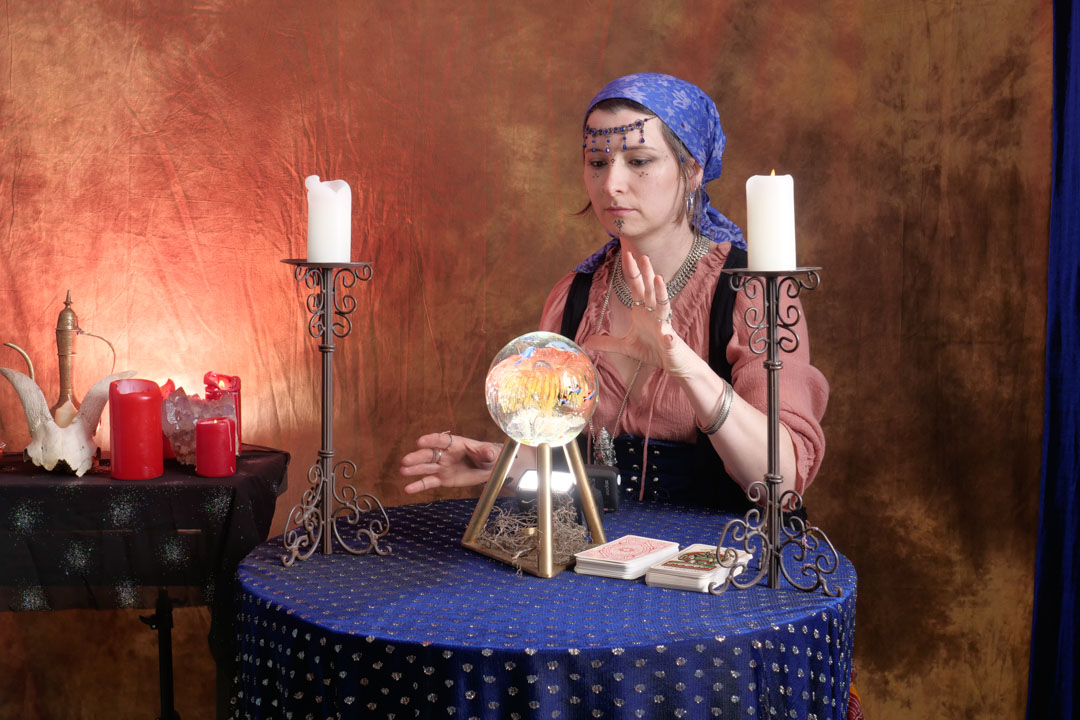
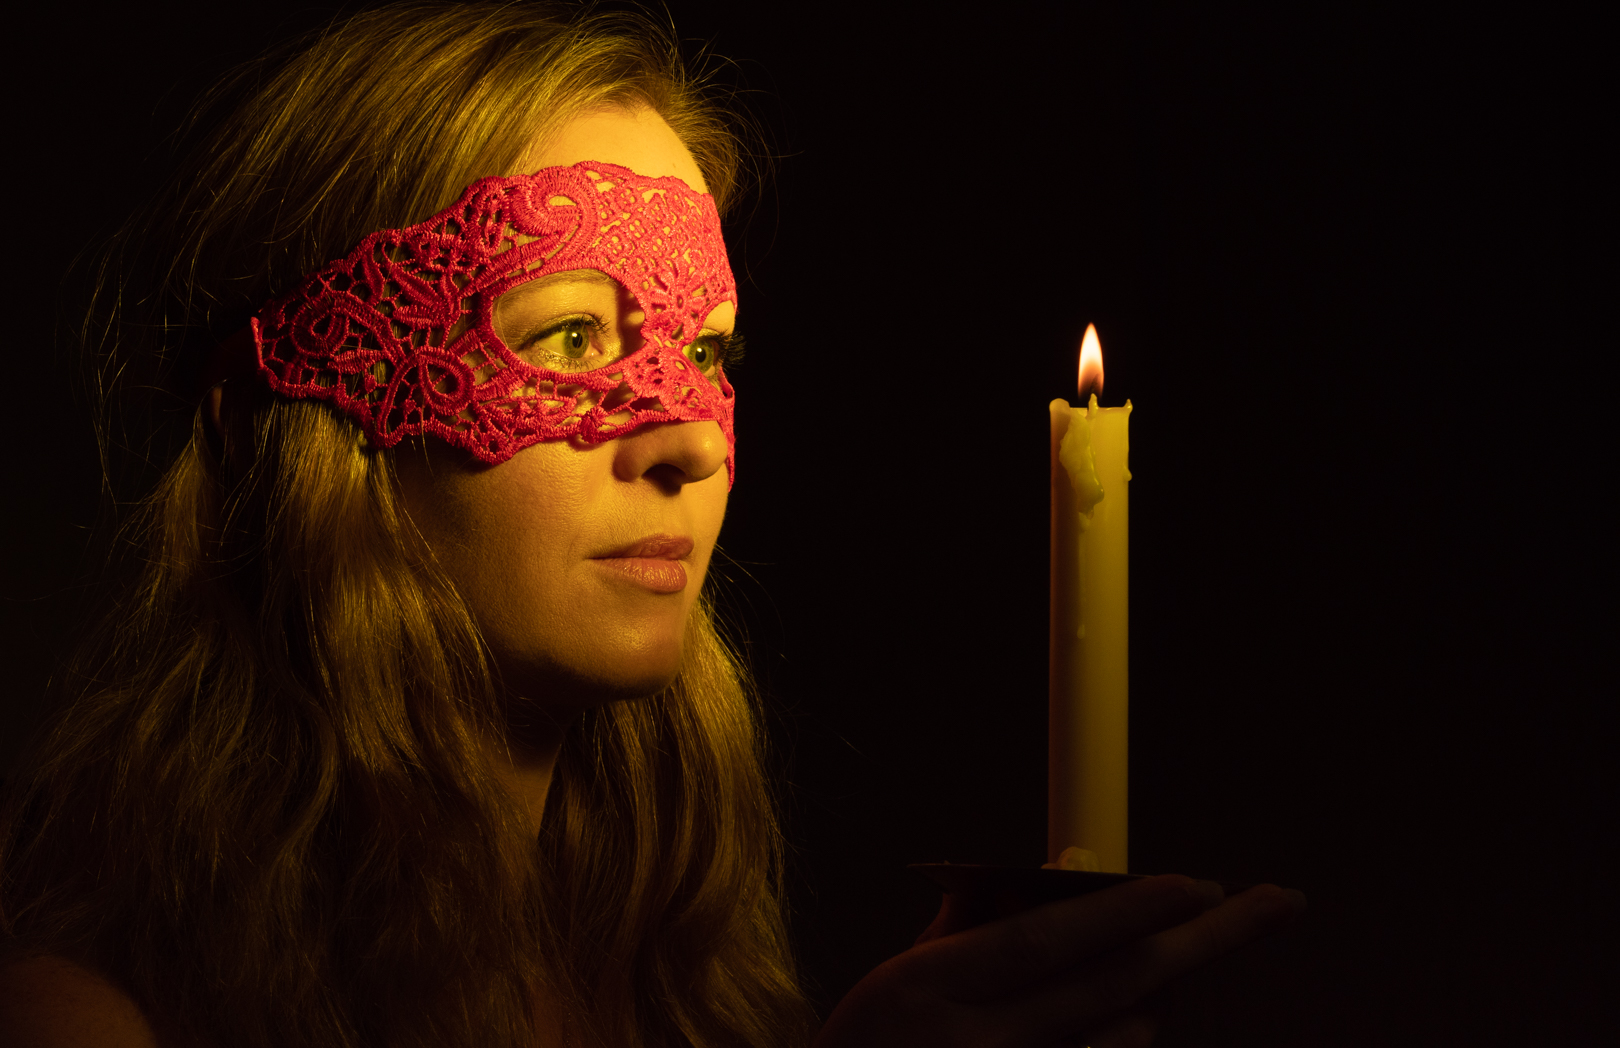
I have placed quite a number of candles on the table and so to replicate a glow that would come from them I positioned a gridded speed light that was gelled orange on the floor on a very low power and aimed at Neena’s face.
Although a lot of the candles were that there is very little light actually coming from them. I now realise that I should have added some flame in post.
I made one really big mistake with this shoot, and tat was not checking my camera setting properly before starting. For some reason the camera was set to JPG and not RAW so the amount of adjustments I would do in post was considerable less than what I would have normally done.
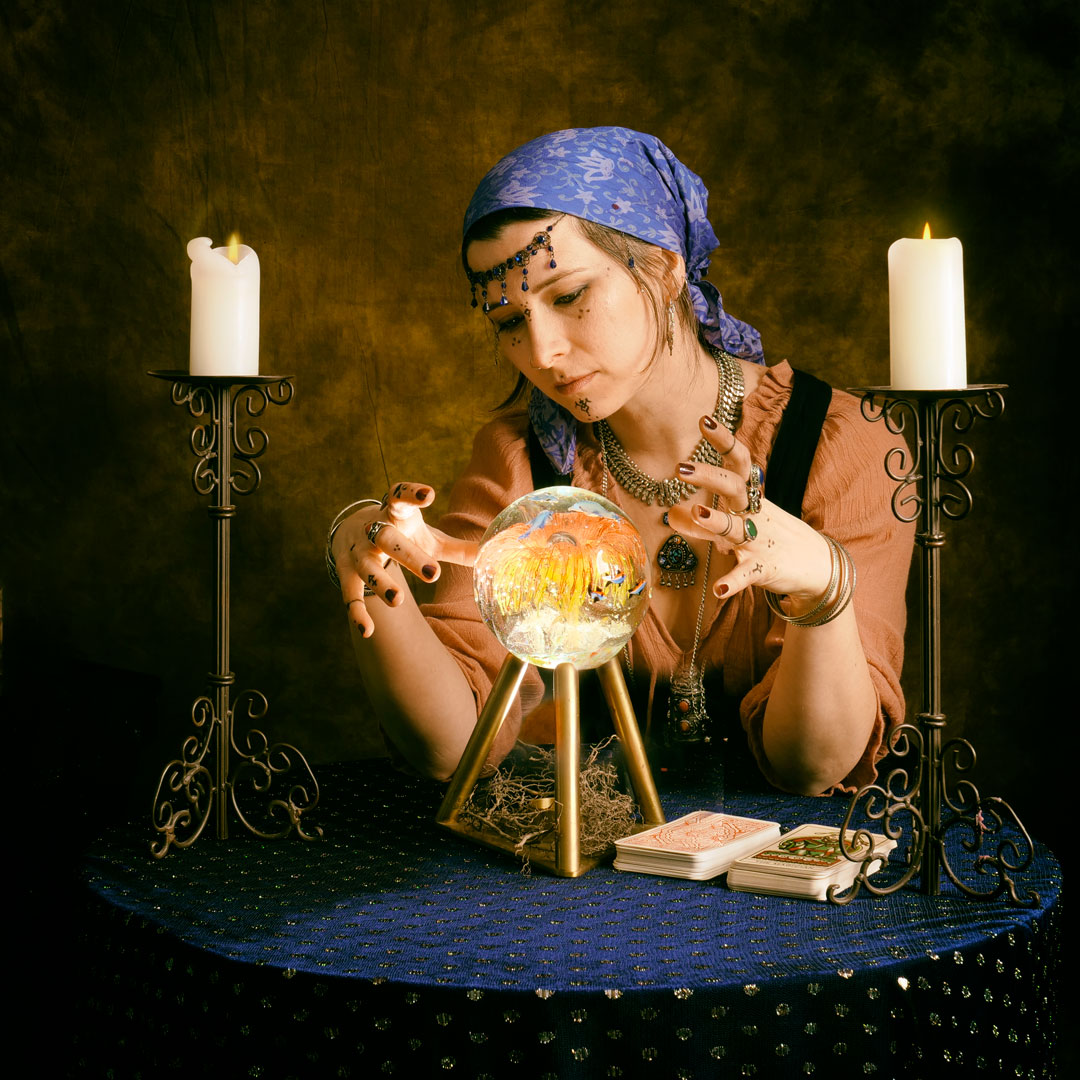
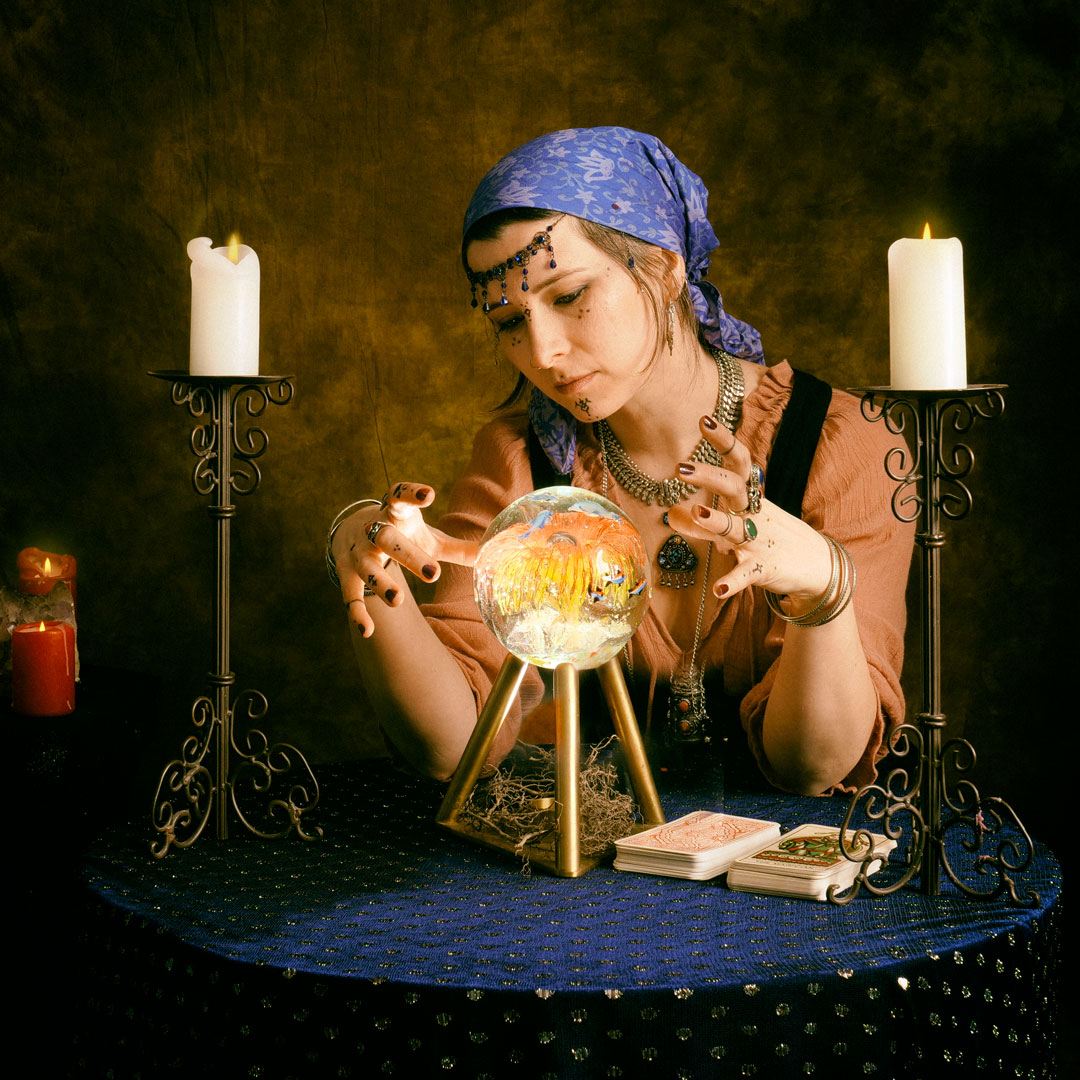
One of the topics in the 2020 Wellington interclub print competition was “illusion”. When I started to think about it the notion of a fortune teller came to mind especially one using a crystal ball.
Neena is a fashion/costume designer who I had met through the Fashion Collective. When I took part in the shot at Staglands in 2019, Neena had arrived in a gypsy style outfit which was exactly the look I was going for. So I reached out to her to see if she would recreate it for me. She agreed and we set up a date for the shoot.
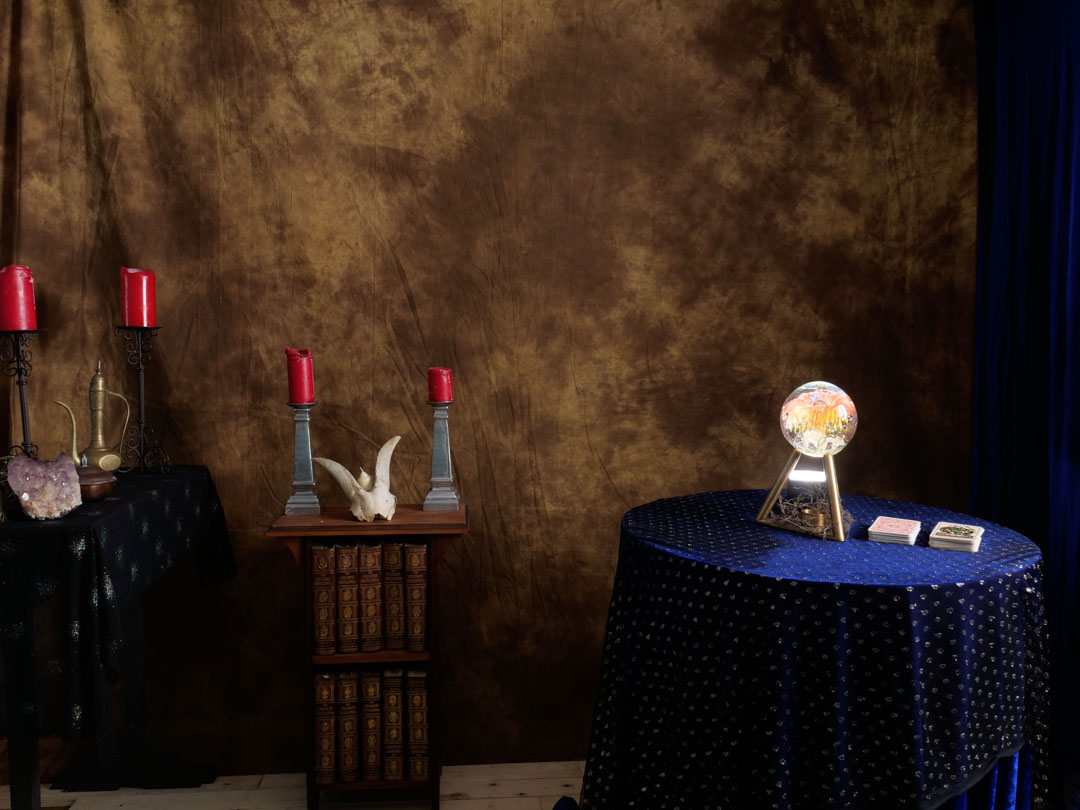
I built a set in my studio so that we could cover any angles that I wanted.
I had decided to use a simple Rembrandt lighting for the main character. The studio is not wide enough to do this effectively however the room has a window in the right location. So i simply fitted a large October to my strobe and shot in from outside.
In addition to the main light I wanted the crystal ball to be omitting light and therefore I decided to position a speed light below it.
I wanted to have a circular table, which we didn’t have so I cut a sheet of plywood into a circle. This then let me drill some holes in the middle under which I then placed to lengths of timber below so that the speed light could fit between them.
I tested this will the stand I had for the ball and it seemed to work okay, although it was not as strong as I would have liked. The advantage of having the light hidden would have been that I could have produced the images in a single take and not had to composite anything.
As it turned out when Neena arrived she had a brass stand with her that looked perfect. The only problem was that the triangular base was solid. This mean that the light had to be positioned on the table rather than below it.
When I am working with multiple lights I always introduce them in the scene one at a time.
I then brought in the main light and played around with the staging of the set.
While originally there was quite a lot of items in the background I decided to simplify them as I would be coming in much tighter on my main character.
To get some extra impact from the candles on the rear table, I positioned another speedlight behind them which was gelled orange.
It was then a matter of taking a series of images with the light on the table aimed at the ball, and then a series where the speed light was removed.
Then in Photoshop the two images were brought together and the speedlight was masked out. Although the candles were lit the glow from them was a little dull so i gave it a little boost.
I then went into Nik software and added a old film simulation to it.
I was quite happy with the results but when I showed the image to some other people, the comment came back that the red candles on the right of the image were distracting. So in the final version they have been removed.
As it turned out it did not get selected for the category but I have no regrets as it was a fun shoot.
In a previous post I told you how I realised that I had an image that could work for Pisces, and that post centered around embellishing the image.
However as the set developed it became obvious that the image didn’t fit in with the others and that I needed to reshoot it. I therefore decided that I would have a model holding a bowl containing the fish.
My wife found a rather elaborate bowl and when she brought it home I decided to see how we would go about lighting it.
Shooting very reflective surfaces aways presents a challenge especially when you want to avoid the lights appearing in the image. When the surface is flat you can work out the angle of refraction and position the camera or light in such a way that it does not come into the lens. When the surface is curved it becomes a lot more difficult.
As I didn’t want to be mucking around when the model was there I set out to try various lighting patterns and see how they would work. I managed to get my wife to assist me which was a very rare occurrence.
My initial thought was to use the largest possible light source that I could so I put up the seven foot umbrella and boomed it out over top.
While this sort of worked, you could clearly see the inside of the umbrella shape in the glass, which was more dominant when the post process treatment was run over it. This arrangement was clearly not going to work.
Then later in the evening I had an idea and headed into the studio to try it out. By this stage I could not convince my wife to help so it was up to me with the camera on a tripod and a self timer. To ensure that I was going to the same position each time I placed a stool on the set. The glass bowl was placed on the stool and I lifted straight up from it.
I took the umbrella off and replaced with a speedlight in a gridded reflector aiming straight down into the glass. I initially tried it with just the single light and was reasonable happy that there was no reflection on the glass.
I then brought in two soft boxes to light the background. While this produced a good look I felt that there was not enough light on me.
To solve that problem I brought in another light in a gridded softbox and aimed it directly at me making sure that is did not fall on the glass.
The background light did catch in the edge of the bowl but I decided that I was ok with that as it added dimension to the image.
It was no time to find my new Pisces model, which turned out to be more difficult that I thought it would.
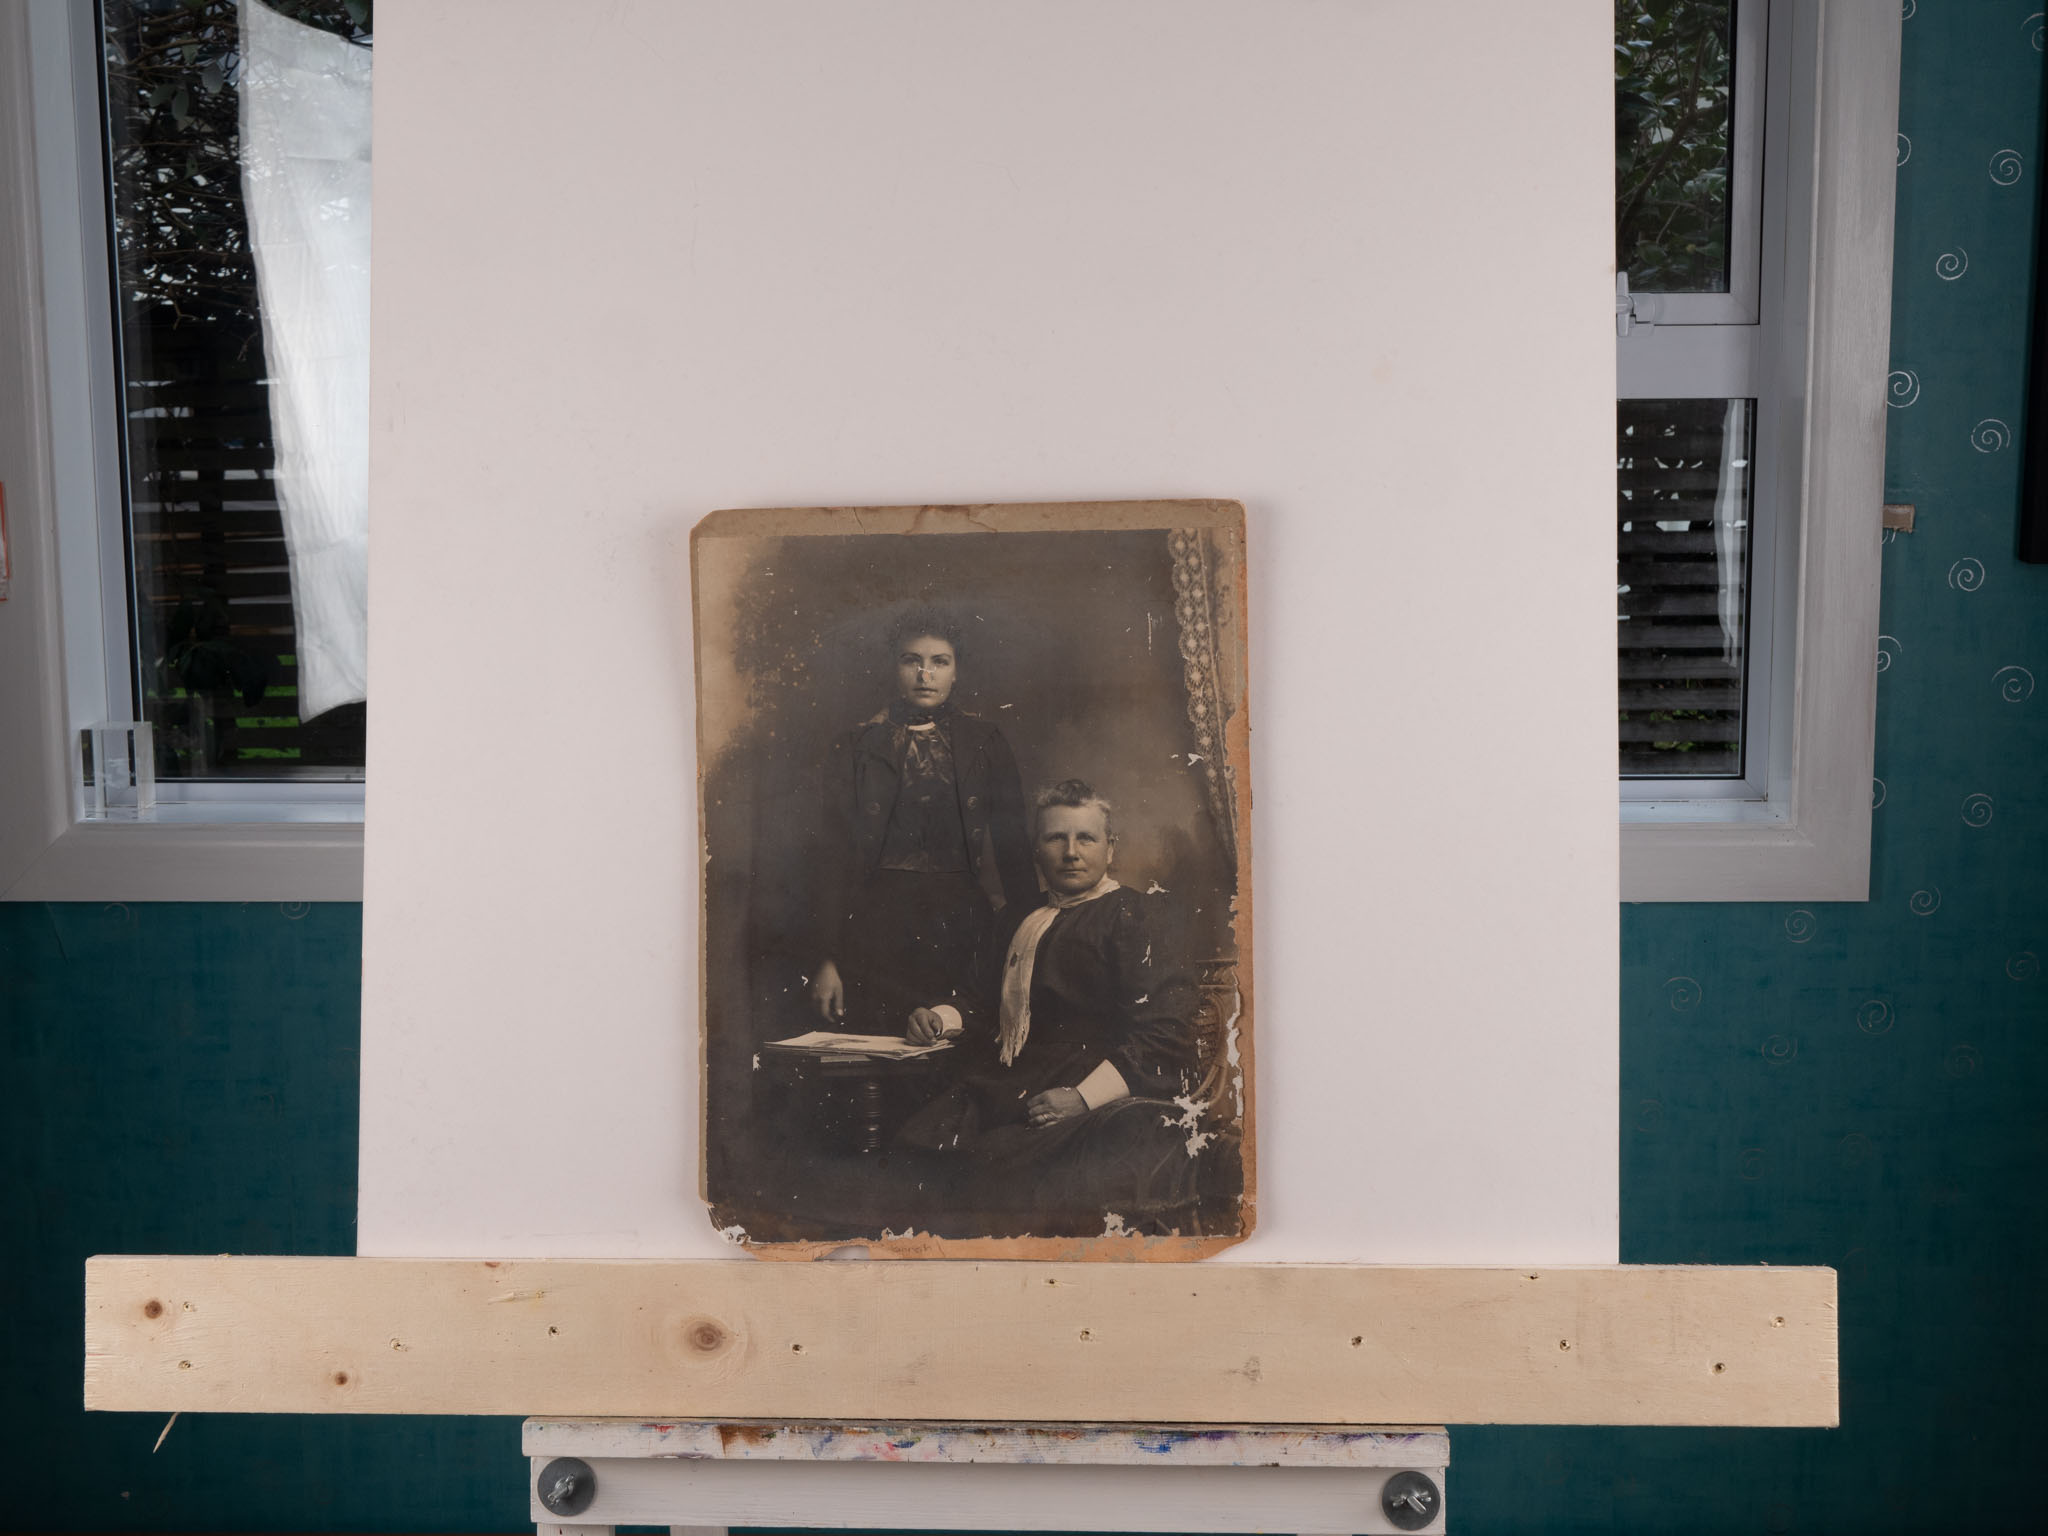
After the successful restoration of the image from my wife’s fathers side of the family I turned my attention to a much older image for my maternal great grandmother Hannah (standing) and great great grandmother Ann (seated). We believe that this image was taken between 1900 and 1910, and it was in a much worse condition than the other image.
Given the amount of damage to the image I employed a slightly different approach in that I took three images at slightly different exposures and then merged them as a HDR in Lightroom before moving across to Photoshop.
There were two major areas of damage that I knew would need special attention and could not be done using the simple tools. The most significant was that a good chunk of Hannah’s nose was missing. I knew that getting this right was crucial to the whole image so it was the first thing I tackled.
I decided that the simplest way to deal with this was to assume that there was sufficient similarities with her mother that a copied Ann’s nose and then placed it on Hannah. I used the existing part of her nose to warp the replacement into a similar shape.
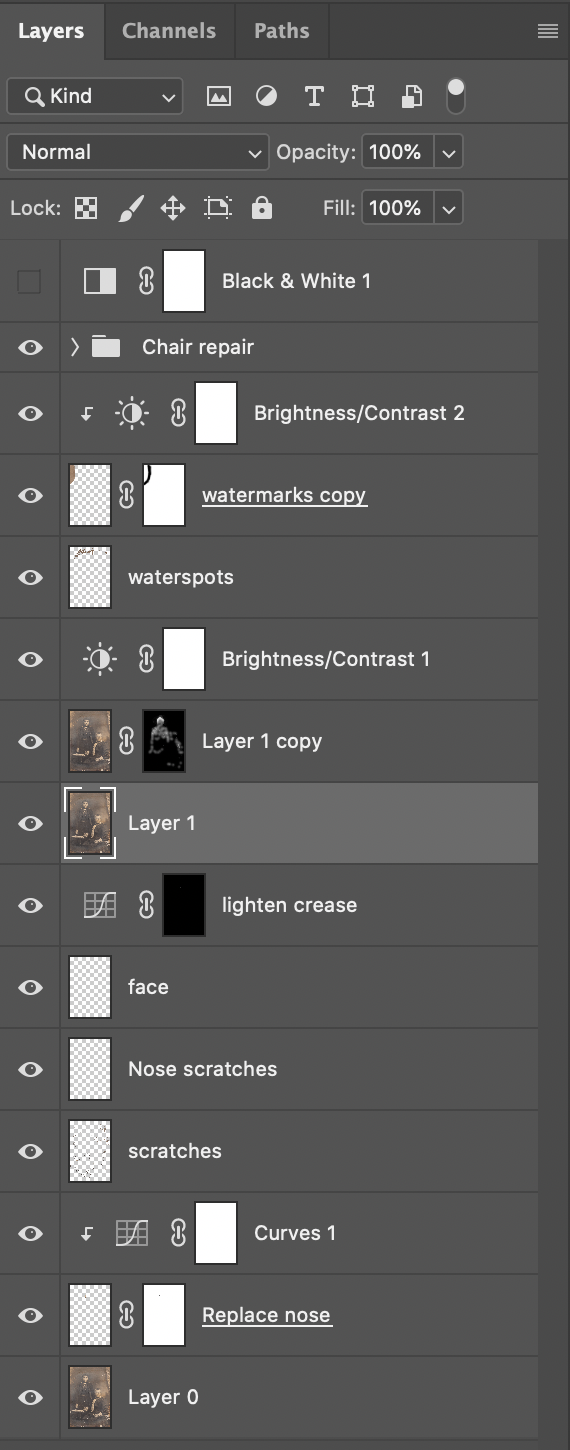
I then moved on and worked around the image using a variety of tools to fix the problems. The layer stack is shown below. What is hidden was the repair to the chair arm which was done as a group of none layers in it own. This involved using the pen tool to define the shape and the using the Clone Stamp to copy content.
Once I was happy with all of the fixes I applied a black & white layer in the same way as I did with the first image I had worked on.
I ended up not using the layer in the end as I felt that the sepia toning fitted in better with the age and setting of the image. I printed the image up large and now it sits proudly with the other images from my wife’s ancestors.
After I have successfully taken the images of Bills that I realised that the setup could be used in other ways. My wife had some old family photos that were not in the best conditions and so I decided to see whether I could improve them, and surprise her with a restored image.
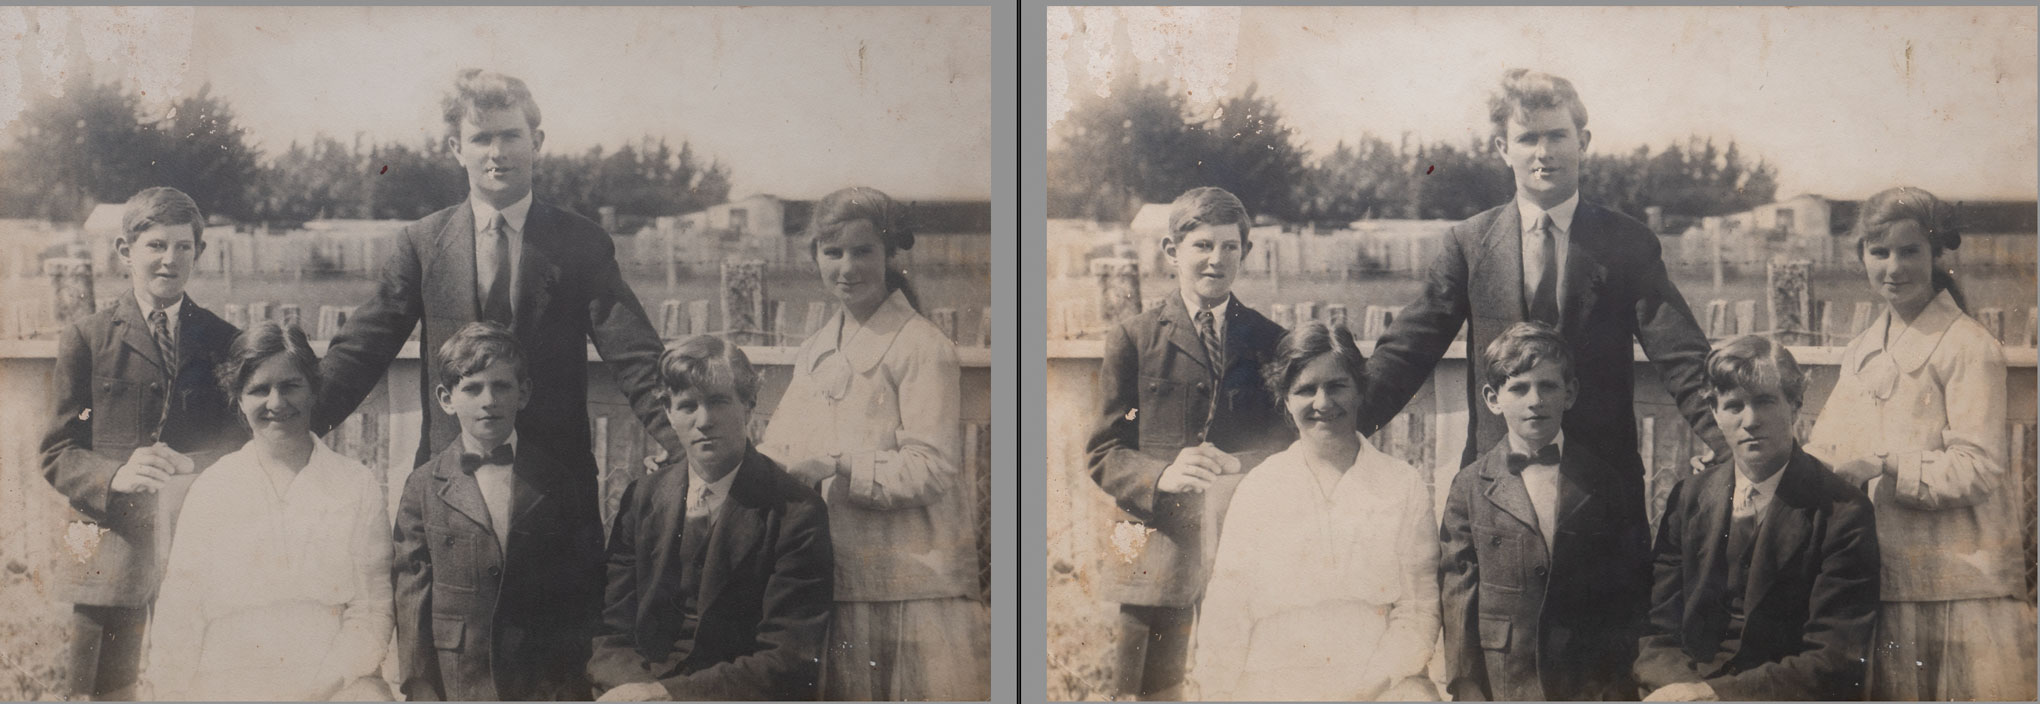
Considering that the original image was taken in the 1920’s it was not in too bad of shape. Having said that it was discoloured and there were a number of scratches across it. The worst part was on the left of the image with water damage at the top and the pocket was missing on the boy on the very left of the picture.
I brought the image into Lightroom and applied some general adjustments (above) before taking it into Photoshop starting with a curves adjustment to boost the overall contrast (below).
Once I had the overall look how I wanted it it was now time to fix various problems with the image. I used a number of layers so that I could isolate each major issue. The Spot Healing Brush was excellent to deal with the small issues while the Clone Stamp and Brush were used for the larger areas.
Once I was happy with all of the fixes I then sharpened the image and them adjusted the exposure on the white dress in front as it was still a little blown out.
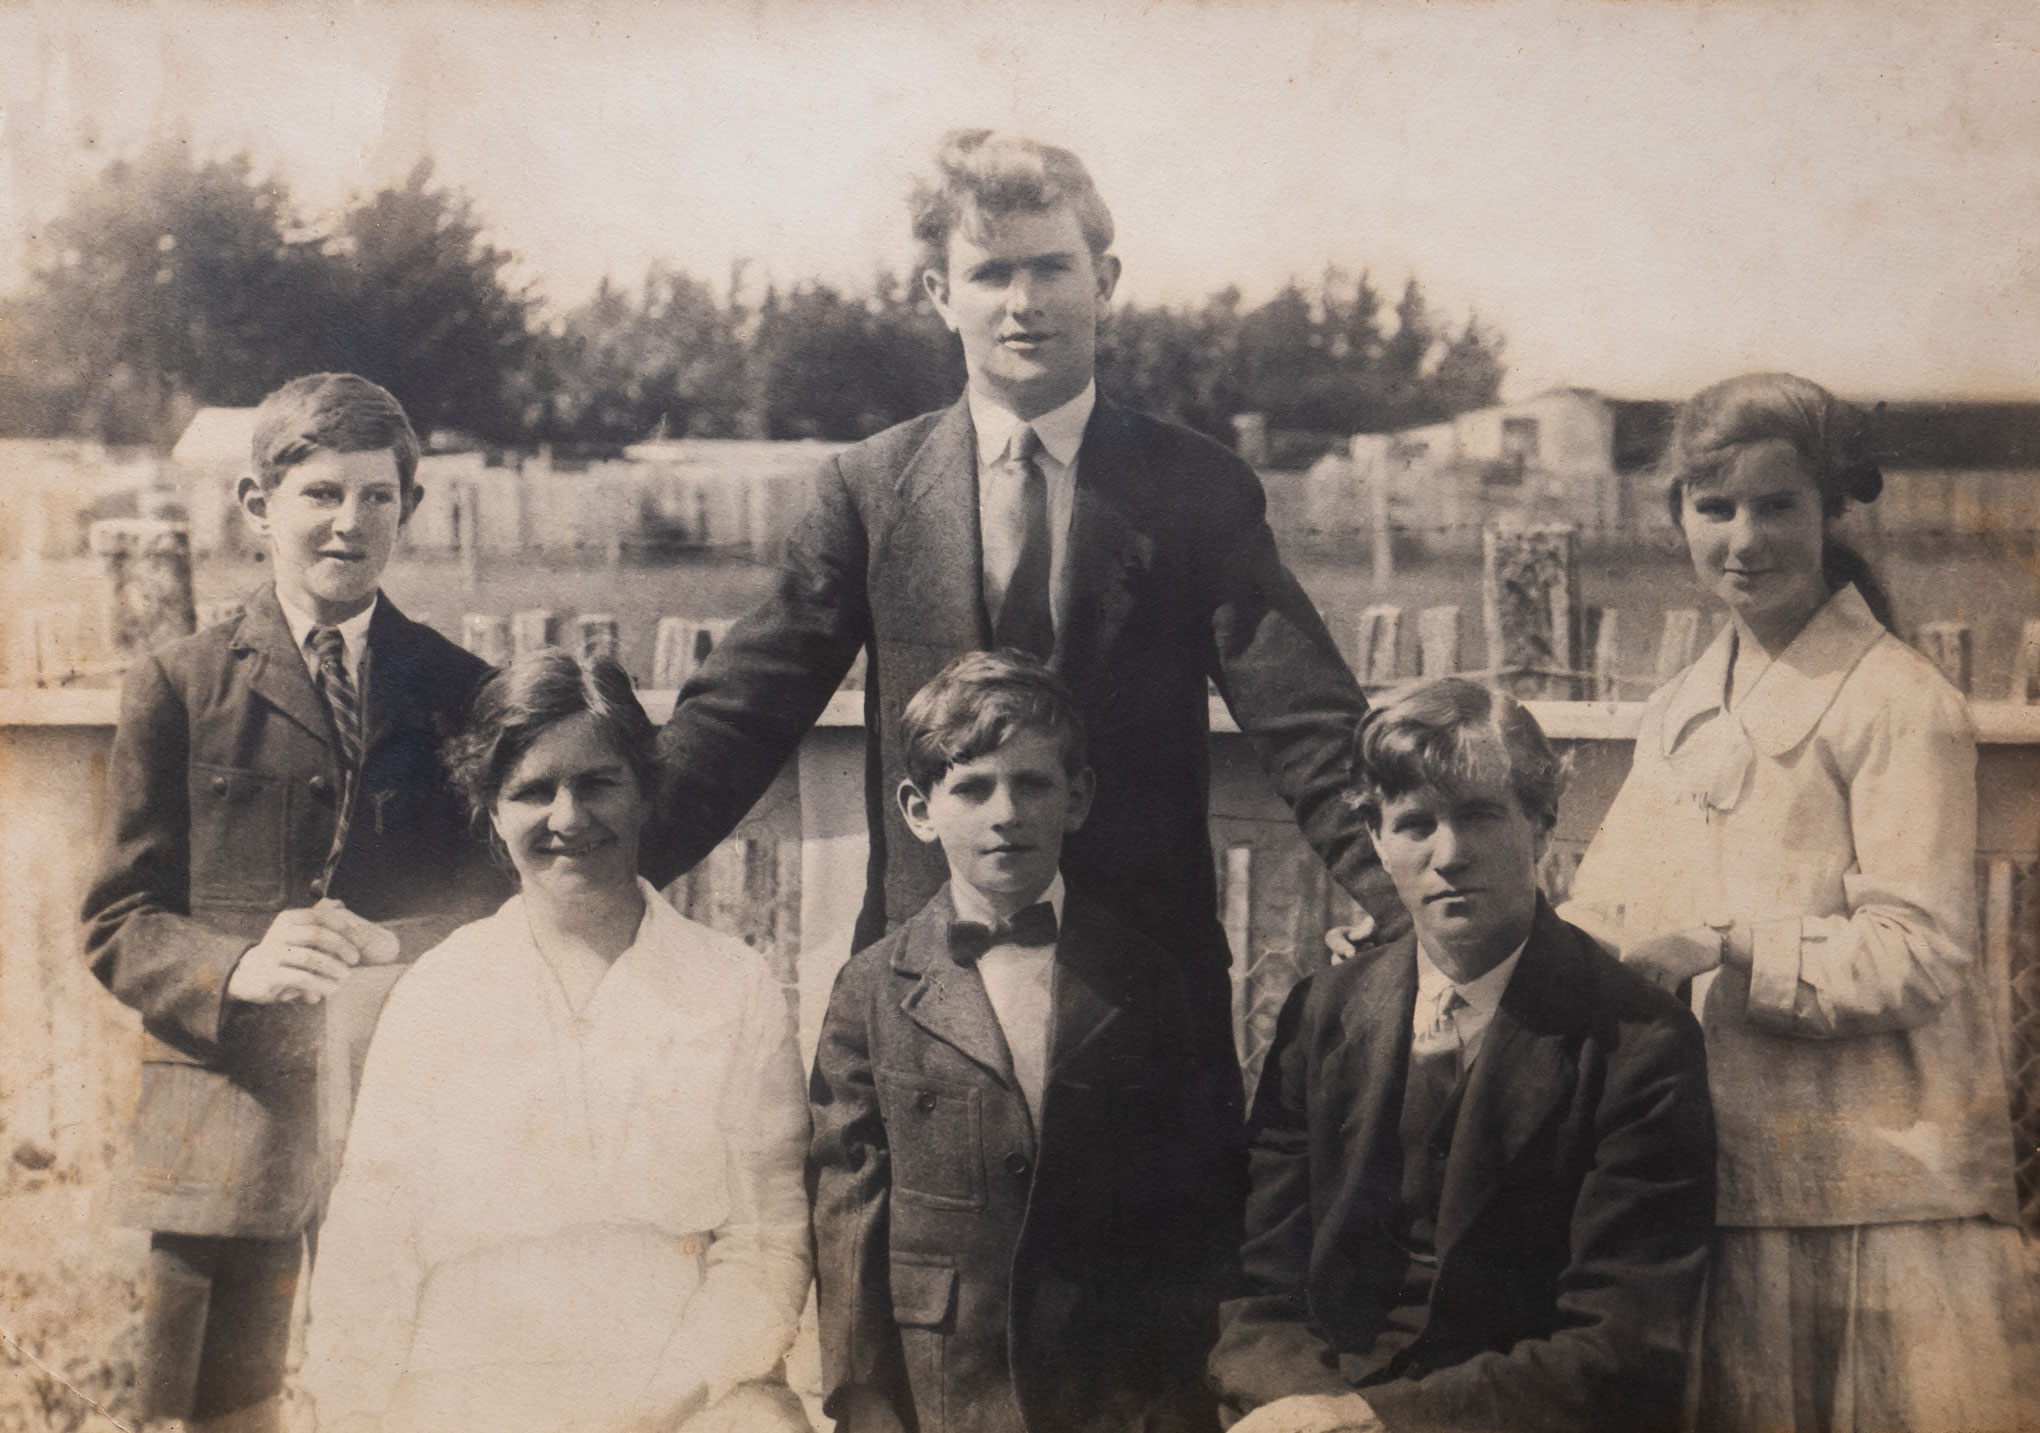
The final adjustment was to apply a Black & White layer to the image as I wanted to remove the Sepia tone. I then got the image printed before presenting it to my wife.
She was thrilled with the result. Of course she then said that I could tackle some of the other older images.
I was just presented with the trophy of the winner of Hutt Camera Club Advanced Grade Digital Ladder competition for 2020. This was the result of scoring the most points from the eight images submitted during the year.
In for a Landing – Honours in Round 3
Of the eight images submitted throughout the year only one received the lowest ranking of “accepted”.
Candlelit – Honours in Round 2
With the others I totalled four Honours, one Merit and two Commended.
Need a cuppa – Merit in round 2
This is the second year in a row that I have won the grade, and in fact I have won it four out of the last five years.
Water nymph – Honours in Round 1
There will not be an opportunity to defend the title in 2021 as the club committee has decided to only concentrate on critiques over the four rounds, rather than there being a competition as well.
One of the advantages of being part of the photographic community is that occasionally you get offered work from other photographers, when they don’t feel comfortable undertaking it themselves. This is exactly what happened when a friend contacted me to see whether I was willing to produce digital versions of the artwork that a local artist Bill Hunt was producing.
I have actually been photographing art works since 2011 when my wife started an arts diploma at the Learning Connexion in tighter lower Hutt. As part of her diploma she needed to document the work she had produced and she did this by way of a blog. That meant I was taking images of the various pieces she was producing.
As these images were largely for documentary, and not for sale, we did not have to worry too much about the final product being exact replica of the original. The pieces came in all shapes and sizes and on various materials which also created challenges in the photography. The set up for most shoot was simple in that we would take an easel onto the front deck and I would stand on a small stool to try to get the right angle. We shot outside so as to use natural light as this created a much even light across the whole image.
The major challenge that you face when photographing an art work on an easel is making sure that the camera is square on to the front of the piece. Otherwise you end up with distortion which has to be fixed in post. Some people attempt to deal with this by hanging the art work on the wall however even then you face the same issue as the hanging line will generally result in the painting being further away from the wall at the top than the bottom.
In 2018 my wife donated a piece of her art to a charity auction and then told the organisers that I could be available to photograph all of the donated pieces so that they could put them into the catalogue. This meant that the images had to be of a higher standard than what I have previously dealt with.
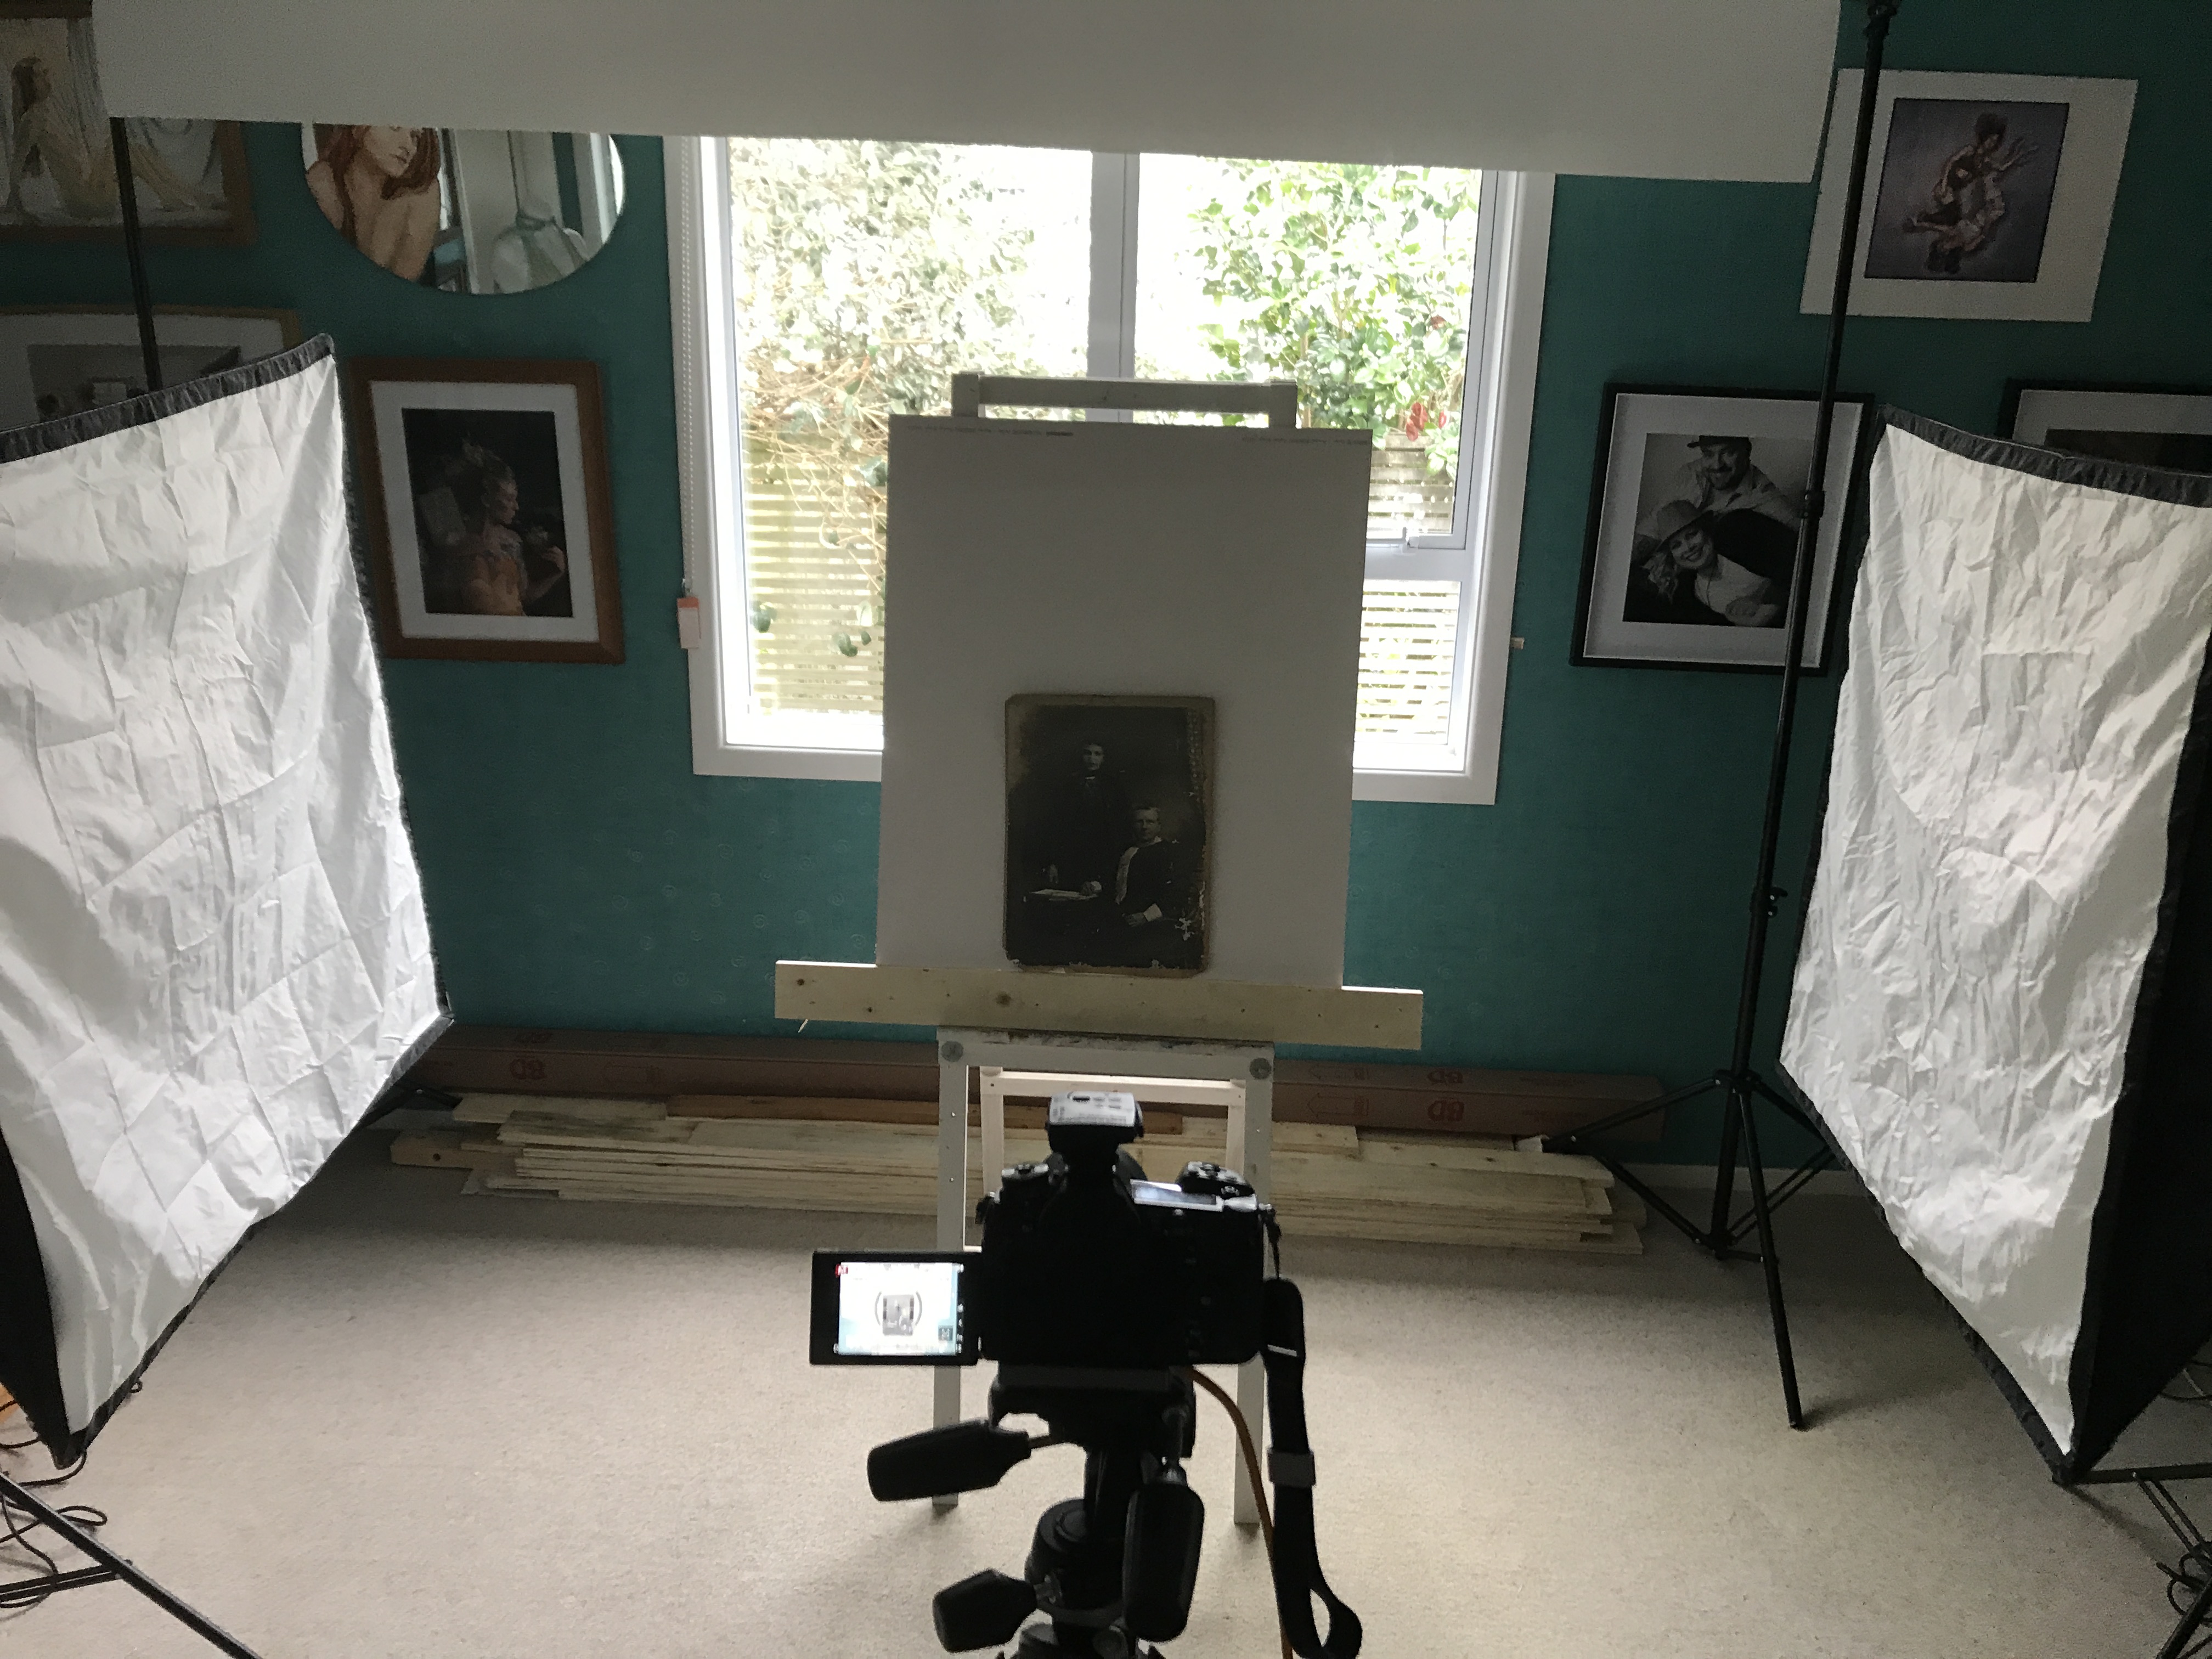
When art work is photographed by professionals they generally use a rig that holds the camera absolutely square to the image. For the auction catalogue I recreated such a rig by putting the camera on the boom arm and using the Panasonic image app to see the image and control the camera. The paintings were laid on top of the white sheet on the floor in the doorway of a garage where they were being stored.
I had placed a level on the floor and got that reasonable straight in camera. That was then used to position the various pieces, and meant that I did not have to play around with each image. That saved a lot of time especially as there were over 30 pieces to photograph.
While the camera/lighting arrangements meant that I could shoot fairly fast and that the paintings did not have distortion, I did face a problem that the light was coming from one direction. This was particularly in an issue on the number of pieces that were behind glass or had a highly reflective surface. These images had to be corrected in post.
Fast forward to 2020 and the request to reproduce Bills work, which I know were acrylics painted on canvas. This was going to be a completely different requirement because the end product needed to be exact copy of the original because it was intended for sale. I also wanted to create a setup that was easy to put together and take down so that I could replicate the process, assuming that the first shoot would end up with further work.
I looked at a number of YouTube clips and settled on an arrangement using two large square soft boxes placed at 90° angles to where the canvas would be seated. Both boxes were at the same power and positioned at the same angle and distance from the centre of the easel support. To make sure that the light settings were identical I metered across the board placed on the easel and confirmed that I was getting a consistent f9.
The camera was placed on a tripod and tethered into my computer using the Panasonic tethering app. This meant that I was seeing the images come up at 27inch and not the back of the camera. This mean that I could really nail the focus.
The app has a really great features that make this sort of work a lot easier. Within the live view (which lets you see exactly what the camera is seeing) you have grid lines but also the ability to place guidelines.
We would position the first piece of artwork on the easel and then drag out a vertical and horizontal lines on the canvas. We would then tweak the angle to the camera, or the easel, to the get the image as straight as possible. Once we had that as close as we could then each of the art pieces at that size would be photographed.
We would adjust the guides only when we were moving to a different size piece.
This worked out really well. We did face an issue that not all of the canvases were actually square at the corners and so on some images did need some fine tuning in Photoshop.
As it turned out Bill was pleased with the first session and I have done two further sessions with his work.
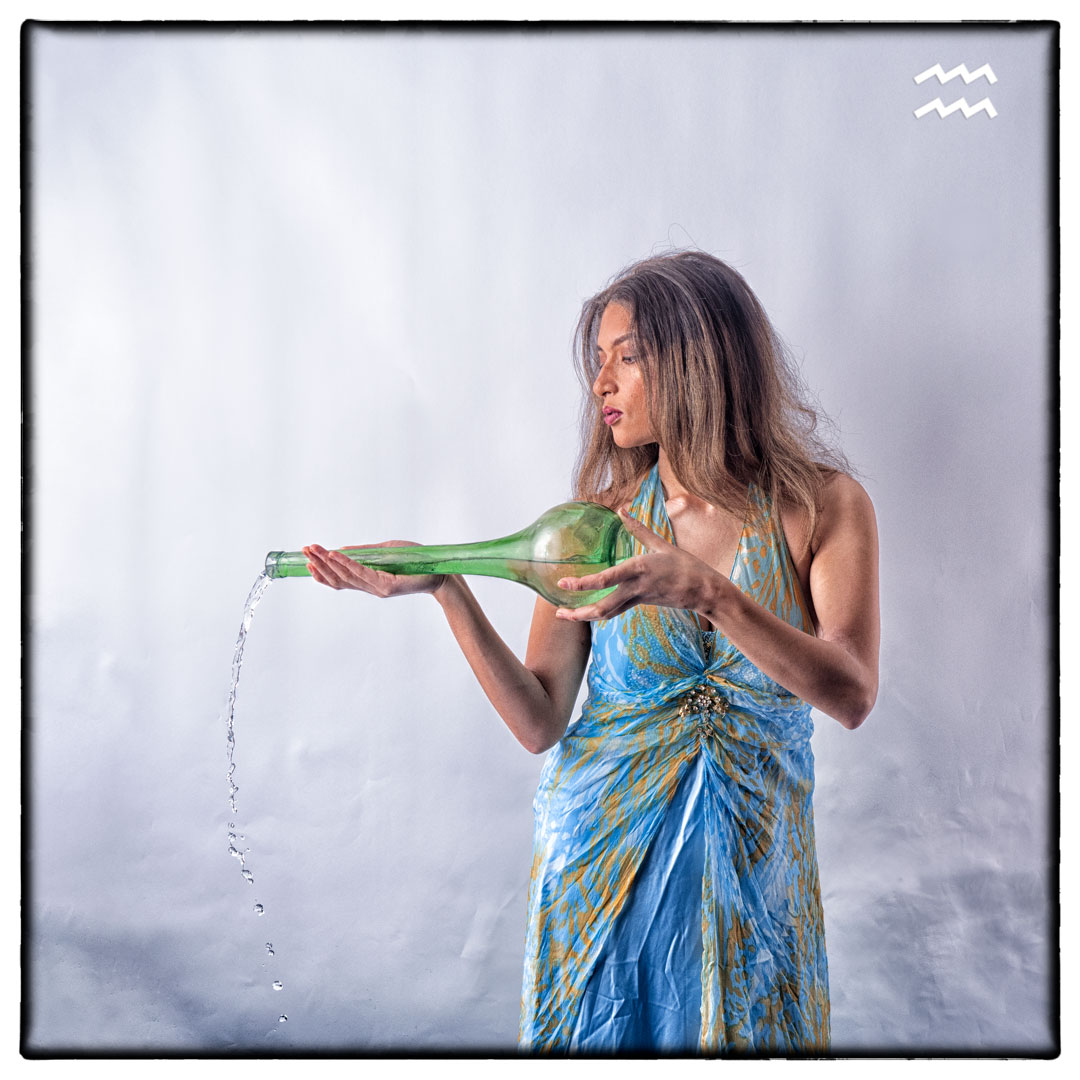
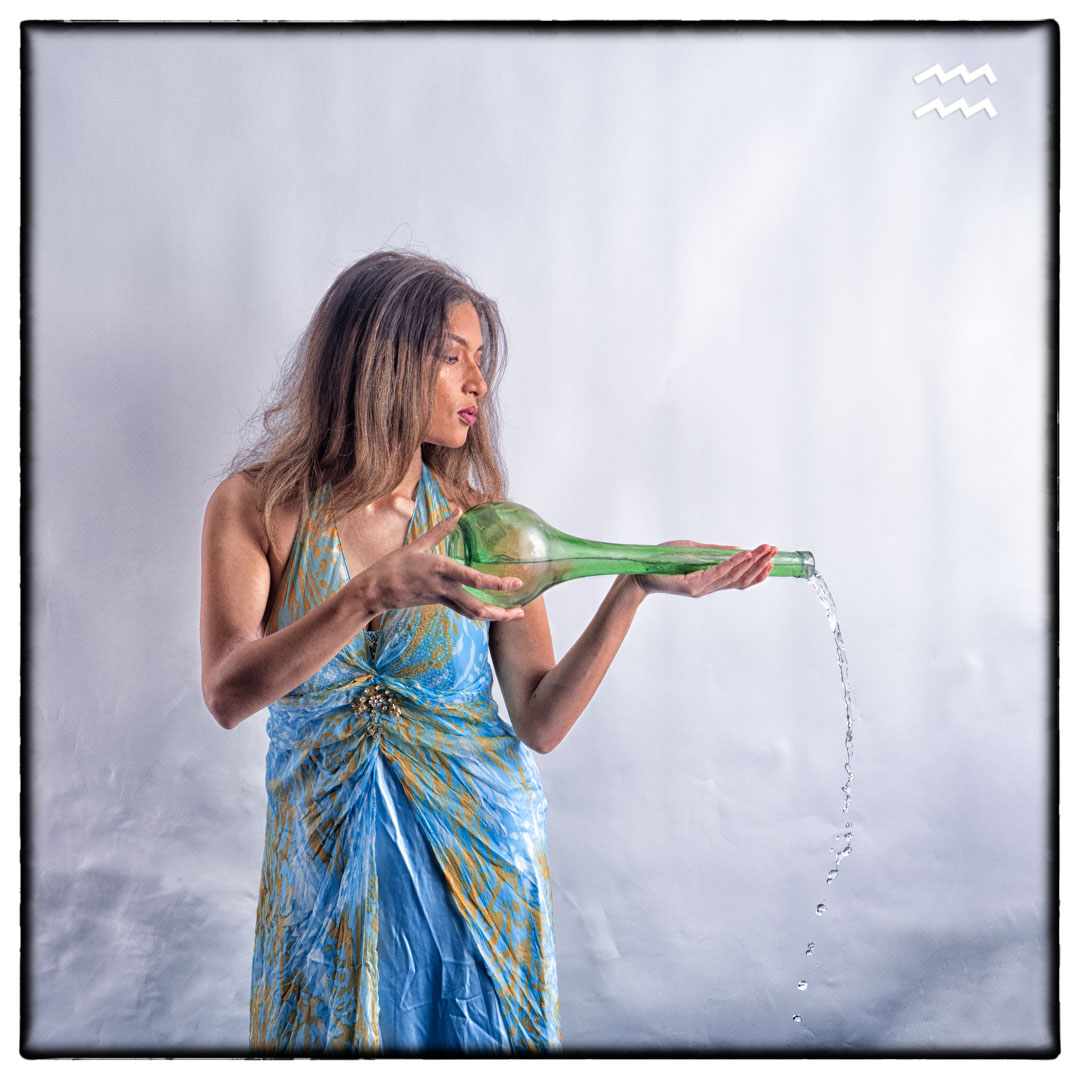
Aquarius is a somewhat unusual Starsign and that it is normally depicted as the water carrier despite the fact that it is one of the air signs along with Gemini and Libra.
As I have simplified the backgrounds significantly it made perfect sense to shoot it as most people would visualise it. I had purchased the dress for the shoot over 12 months before when I saw it on thrift shop and instantly said it fitted Aquarius. I actually used it in the Cancer shoot as well however I changed the colours of it slightly in post.
When I started casting two years ago Manuella approached me to take part of Aquarius so it was natural that I reached out for her again. The only uncertainly was whether the dress would fit. Fortunately, she does not live too far from me so I called around and as it turned out the dress fitting perfectly.
The final piece to the image was the water pitcher that I found in a thrift shop in Petone.
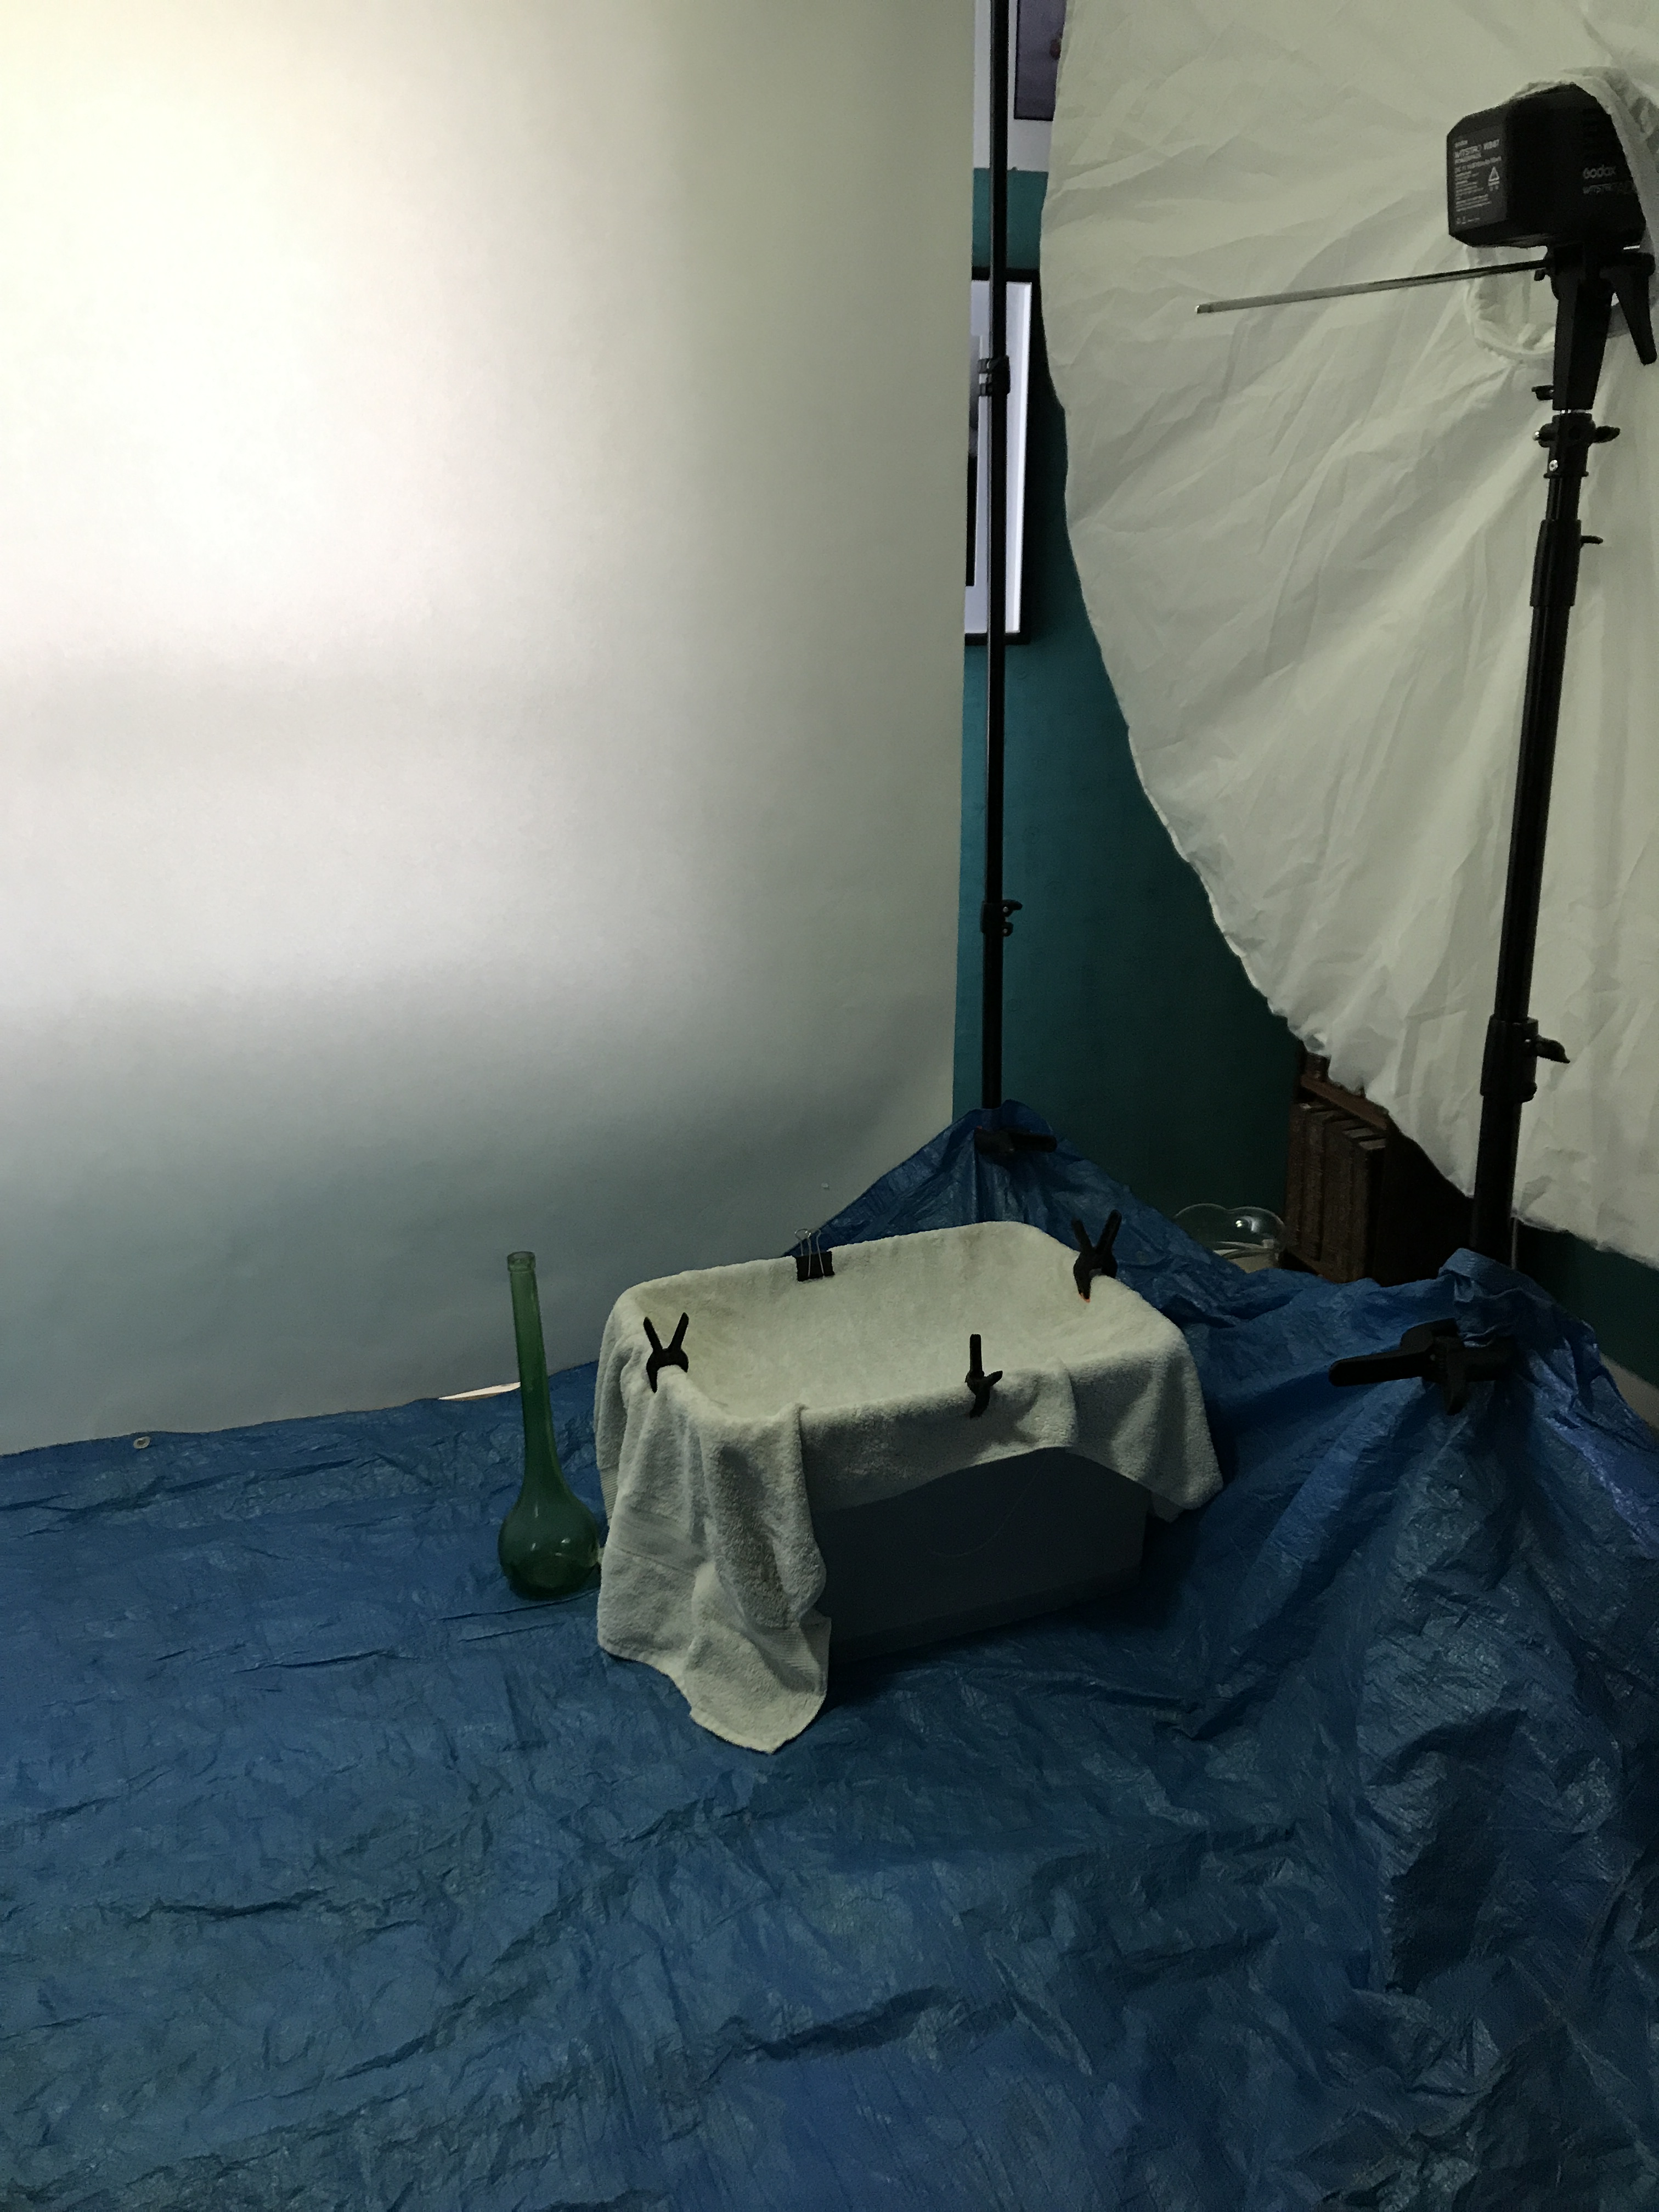
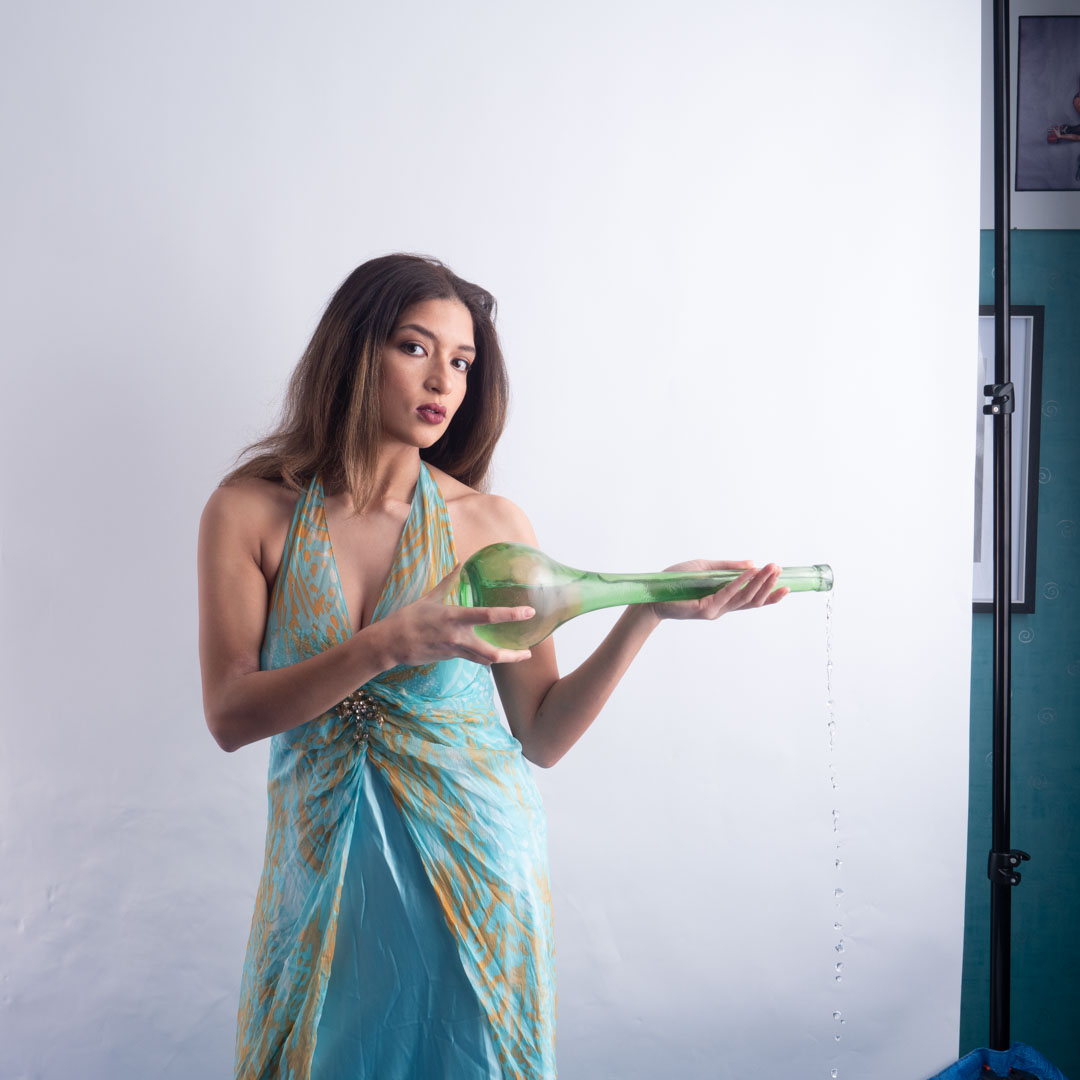
We tried various shots of Manuella holding the bottle but I was also determined to get a shot of water pouring out of it. I wanted to ensure that we would make as little mess as possible so the floor was covered with a tarpaulin and then I placed a towel across the top of a large tub. This meant that she had a large area to pour into and the towel would present any splashes.
I knew that the lighting would freeze the water and that is exactly what it did.
The lighting for the shoot was the same as for both Aries & Capricorn. The Westcott Seven foot umbrella to Manuella’s side and a small softbox lighting the background on the other side.
The shoot ran very smoothly and we got a series of looks to work on very quickly. Each was then taken through the Photoshop recipe to see which one I like. In the end I flipped the image to make the final one for the set as it was felt that the direction better worked in its position.
As I mentioned in my previous post finding male models for subjects is a lot harder than female models. Therefore I was delighted when Slaine approached me to be part of the Zodiac series has Capricorn.
By the time we arranged the shoot, I settled on simple backgrounds for all of the zodiac elements. In the order of the Zodiac, Capricorn is one of the earth elements along with Taurus, so it made sense to have it consistent with the way that Taurus had been shot.
Aries
Taurus
Gemini
Cancer
Leo
Virgo
Libra
Scorpio
Sagittarius
Capricorn
Aquarius
Pisces
On the trip to Glenburn station earlier in the year I had found a goat skull on the beach and had brought it home to use. It did have a number of sharp edges on the underside so prior to the shoot I had smoothed them off.
Slaine is an actor so it was a simple matter of handing him the prop, and letting him go.
I really enjoy this sort of free flow photography as it produces quite dramatic images. It also meant that Slaine could use the images in his acting portfolio.
We then attached some foam to the bottom of the skull and using bands attached it to Slaine’s head. This enabled us to create a shot very similar to the Taurus on.
I ran this one through the full post process to see what it will look at. The backdrop was not extended onto the floor and the detail enhancer in the post process picked up all of the creases in it. You will see from the original image below that they are not all that prominent.
The lighting for the shoot was very simple with the Westcott Seven foot umbrella to Slaine’s side and a small softbox lighting the background on the other side. This is same lighting as used in the Aries shoot however the camera angle was different.
With a clear idea, and an able model, this was a very simple and quick shoot, which produced exactly what I wanted. In the end I decided to go with the image of Slaine holding the skull, as it added a variety to the set. It also reminded me of the “poor Yorick” scene from William Shakespeares Hamlet.