
One of the advantages of being part of the photographic community is that occasionally you get offered work from other photographers, when they don’t feel comfortable undertaking it themselves. This is exactly what happened when a friend contacted me to see whether I was willing to produce digital versions of the artwork that a local artist Bill Hunt was producing.

I have actually been photographing art works since 2011 when my wife started an arts diploma at the Learning Connexion in tighter lower Hutt. As part of her diploma she needed to document the work she had produced and she did this by way of a blog. That meant I was taking images of the various pieces she was producing.

As these images were largely for documentary, and not for sale, we did not have to worry too much about the final product being exact replica of the original. The pieces came in all shapes and sizes and on various materials which also created challenges in the photography. The set up for most shoot was simple in that we would take an easel onto the front deck and I would stand on a small stool to try to get the right angle. We shot outside so as to use natural light as this created a much even light across the whole image.
The major challenge that you face when photographing an art work on an easel is making sure that the camera is square on to the front of the piece. Otherwise you end up with distortion which has to be fixed in post. Some people attempt to deal with this by hanging the art work on the wall however even then you face the same issue as the hanging line will generally result in the painting being further away from the wall at the top than the bottom.
In 2018 my wife donated a piece of her art to a charity auction and then told the organisers that I could be available to photograph all of the donated pieces so that they could put them into the catalogue. This meant that the images had to be of a higher standard than what I have previously dealt with.

When art work is photographed by professionals they generally use a rig that holds the camera absolutely square to the image. For the auction catalogue I recreated such a rig by putting the camera on the boom arm and using the Panasonic image app to see the image and control the camera. The paintings were laid on top of the white sheet on the floor in the doorway of a garage where they were being stored.

I had placed a level on the floor and got that reasonable straight in camera. That was then used to position the various pieces, and meant that I did not have to play around with each image. That saved a lot of time especially as there were over 30 pieces to photograph.

While the camera/lighting arrangements meant that I could shoot fairly fast and that the paintings did not have distortion, I did face a problem that the light was coming from one direction. This was particularly in an issue on the number of pieces that were behind glass or had a highly reflective surface. These images had to be corrected in post.
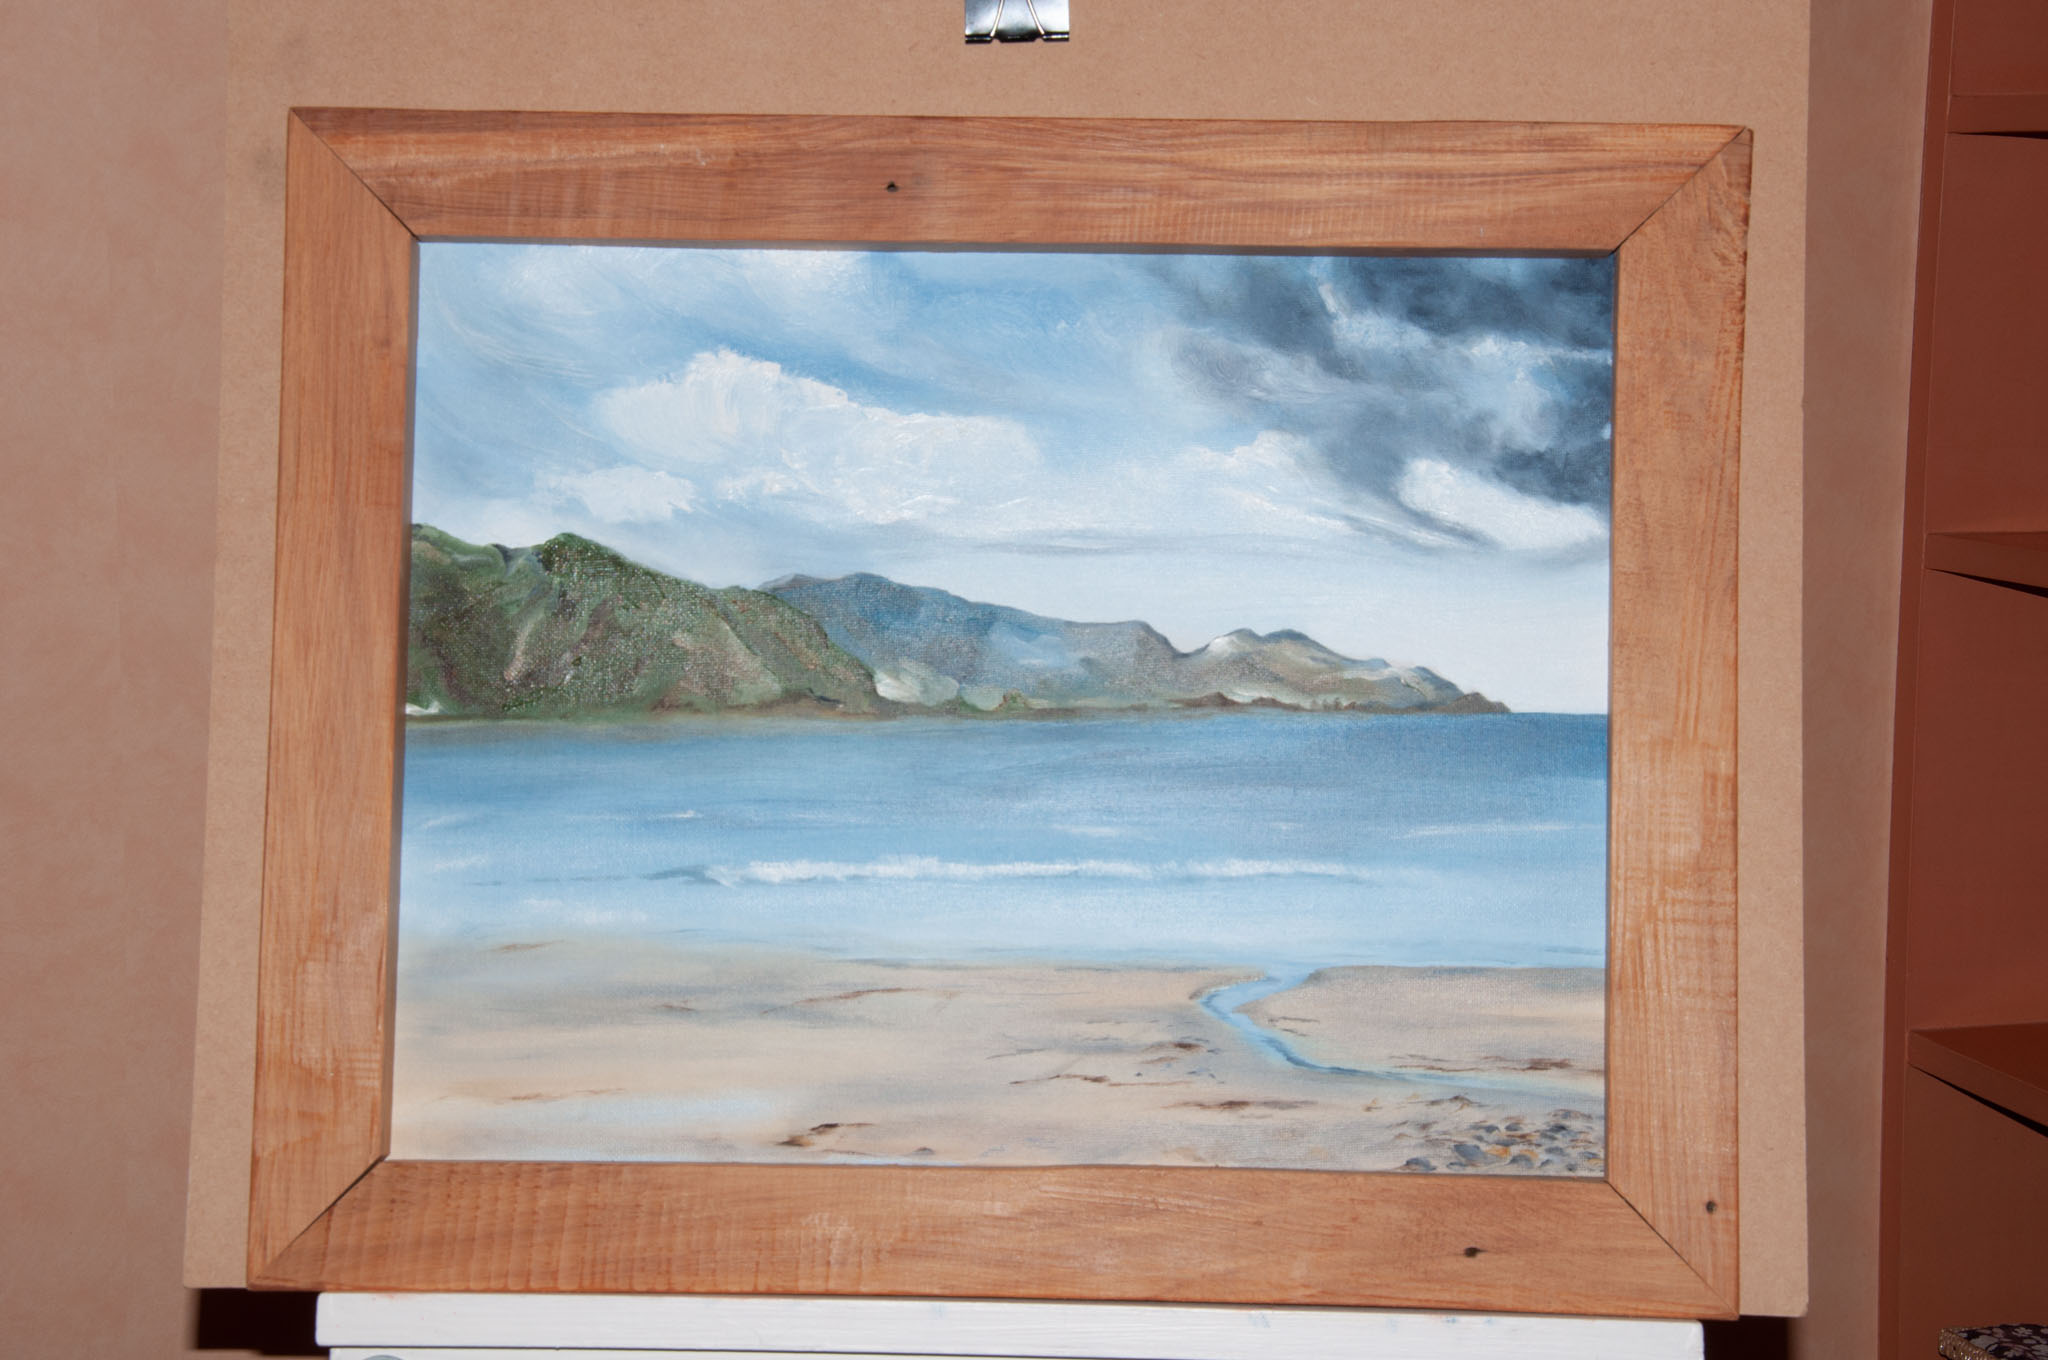
Fast forward to 2020 and the request to reproduce Bills work, which I know were acrylics painted on canvas. This was going to be a completely different requirement because the end product needed to be exact copy of the original because it was intended for sale. I also wanted to create a setup that was easy to put together and take down so that I could replicate the process, assuming that the first shoot would end up with further work.

I looked at a number of YouTube clips and settled on an arrangement using two large square soft boxes placed at 90° angles to where the canvas would be seated. Both boxes were at the same power and positioned at the same angle and distance from the centre of the easel support. To make sure that the light settings were identical I metered across the board placed on the easel and confirmed that I was getting a consistent f9.
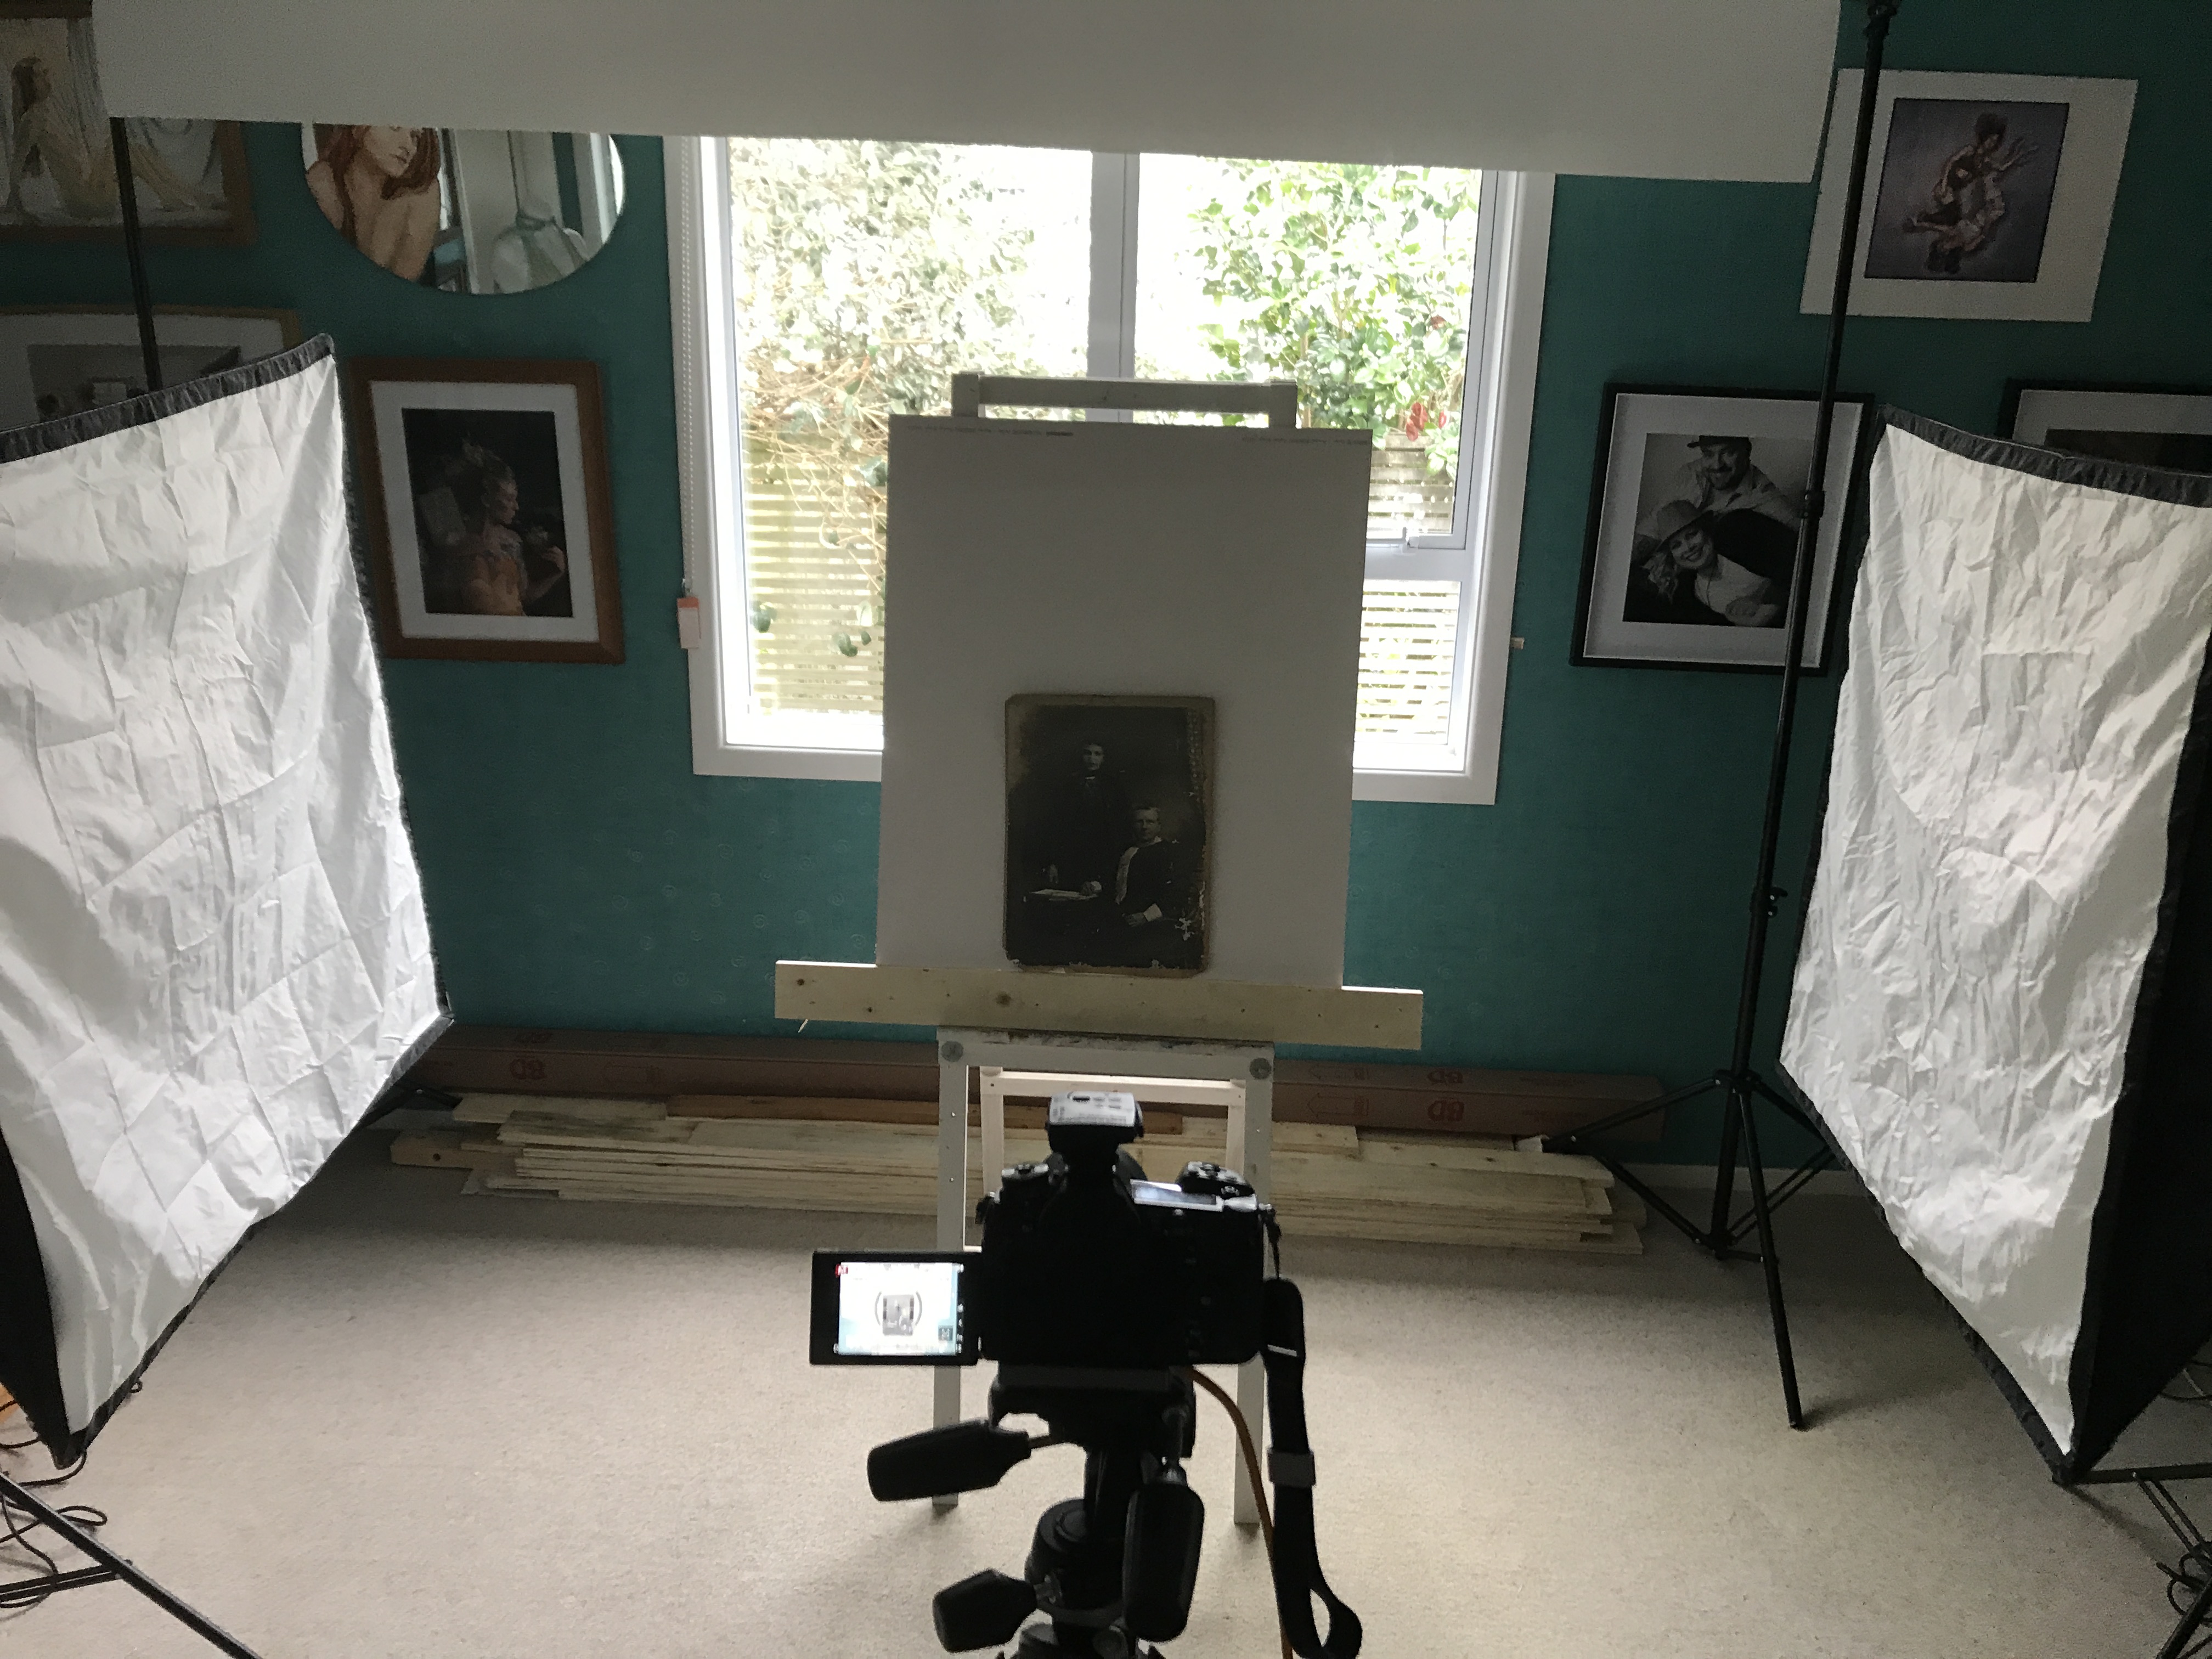
The camera was placed on a tripod and tethered into my computer using the Panasonic tethering app. This meant that I was seeing the images come up at 27inch and not the back of the camera. This mean that I could really nail the focus.
The app has a really great features that make this sort of work a lot easier. Within the live view (which lets you see exactly what the camera is seeing) you have grid lines but also the ability to place guidelines.

We would position the first piece of artwork on the easel and then drag out a vertical and horizontal lines on the canvas. We would then tweak the angle to the camera, or the easel, to the get the image as straight as possible. Once we had that as close as we could then each of the art pieces at that size would be photographed.
We would adjust the guides only when we were moving to a different size piece.
This worked out really well. We did face an issue that not all of the canvases were actually square at the corners and so on some images did need some fine tuning in Photoshop.
As it turned out Bill was pleased with the first session and I have done two further sessions with his work.
