Zodiac series – Cancer

My previous post went into the setting up of the foil shoot so in this one I will only concentrate on the image itself. For the shoot I had decided that I want to incorporate an actual crab. Buying one was out of the question cost wise, however my wife mentioned that she thought her Aunt had a brass one. Turns out she was right and we picked up a very ornate brass crab that actually was a long unused ash tray.

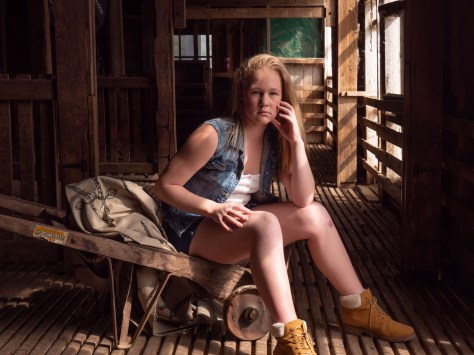
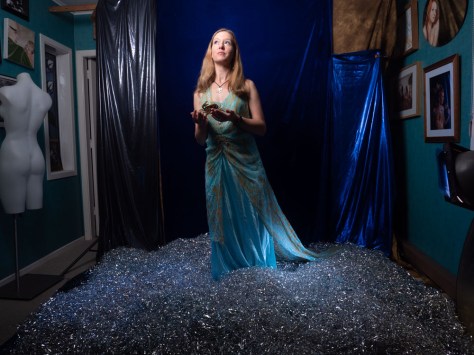
For the set I needed to have several shot options available. While I had envisaged that it would be a landscape oriented image, I also shot several images portrait oriented with Sian both standing and kneeling. For these we didn’t need to modify the lighting in any way.

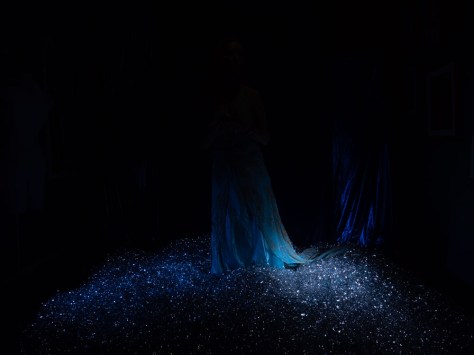
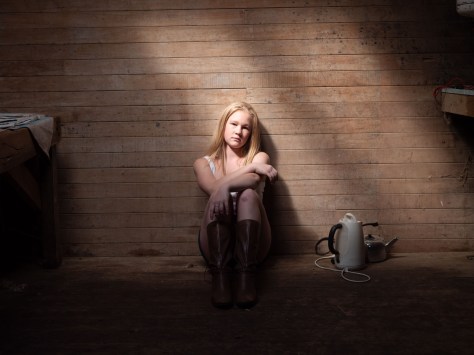
We then moved into the main shoot where I had envisaged Sian being covered by the crabs. The first step was to get her in position and then adjust the main light as she was now much lower than before. I also had to change my shooting angle to be much lower as well. As the final shot was to be composited together the camera was locked onto my tripod.

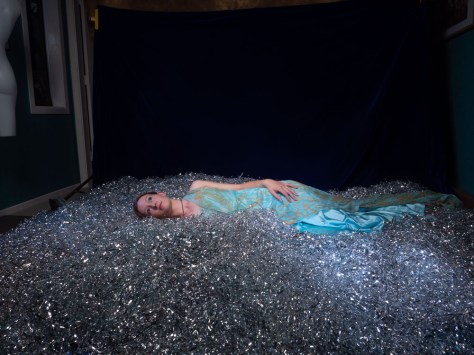
We stared with a shot with Sian with no crab on her, and then I took a number of images moving the crab around her.

Having all of the shots I now selected the ones that I wanted and loaded them as layers in Photoshop and then masked each layer so only the crab came through.

The star sign Cancer is governed by the moon so I went into the Lightroom catelogue and found some images I had taken of it. I then pulled some astro shots and put them all together. Because I had used a dark background and not lit it the masking between the foil and the stars was made somewhat easier. It was then a matter of changing the colours in the image to look like they were lit by the moon.

Overall I am really pleased with now the image came out as it was essentially how I have envisaged it. When I posted the image, I was expecting one my astro photographer friends to point out that you would not that level of stars on a moonlight night. Fortunately no one did.

Foil shoots with Sian (Setting up).

This will be a post in three parts. The first will go over the setup for the shoot ans the other two will cover the actual shoots. As such you will not see any finished images in this post. Rather the images will show the progress of the setup.

If you keep an eye out it is quite possible to acquire interesting props from the most unusual materials. What I was working for Whittaker’s Chocolate I visited Lamprint which in one of the companies that print the chocolate wrappers. 

Labels are printed on a large roll several across and then in the final part process they cut into secret rolls. At either side of the main roll there is an amount of silver left over. This was being cut off and put in a bag for dumping.

When I saw it I instantly thought it would be great to repeat my tape shoot but this time with reflective metal and coloured lights. So I asked if I could have some foil. 

The next day Shaun delivered a small bag to me. I said thanks, but told him that I was thinking of a much larger quantity. The next day he came back with the larger amount.  Now ideally I would have had a shoot sorted out straight away, but in reality the bag sat in the garage for quite a few months, until my wife got sick of it and told me I needed to use it and then get rid of it.

The full bag of foil spread across the floor.

So I when Sian came round for the Dressmaker shoot I asked if she would like to do a shoot using the foil and she agreed.  I also found out that her star sign was cancer, which is one of the water signs so I knew that I could make the foil look like water with the right lighting. 

When my daughter left home, I claimed the family room back as my studio. The great advantage of this was that I could set it up over a number of days rather than trying to do everything in one go. It also means that I can take my time setting lights and trying different combinations before the model actually comes. In this respect my dress dummy is quite useful, although I have to be careful as it is shorter than a regular person.

As I knew we were going to be shooting two different concepts in the same session, I want to minimise changeover so I hung the backdrop for the second session and then placed a blue fabric over it for the first. I needed three pieces of fabric to do this and while they did not match that didn’t matter as the background would be fairly dark anyone.

I also placed blue fabric on the floor before covering it with the foil. This is because I had planned to shoot from above at some stage and I wanted the flexibility. Having the blue meant that if it did show through it would fit with the theme rather than work against it.

It was now time to set the lighting. I had planned a three light setup and when I use such a combination I always add them one light at a time. I start with a setting and shutter speed that will eliminate all of the ambient light in the room. That ended up being 1/100 at f6.3.

The setting that removed all ambient light.

I has positioned two lights near the floor to light the foil and these were both covered with blue gels. There was no real metering to these lights. rather they were adjusted until I got a look I was going for.

Light left
Right light

The main light was my Godox AD600 in the 24″ softbox on a boom arm. During the testing it was positioned camera right. It was providing quite a nice light and was also picking up some of the background. This was not an issue as I was going to replace the background anyway.

All lights in play

The advantage of taking the time ahead of time was that when Sian arrived we were pretty much ready to shoot. In fact the only change was to reposition the main light from camera right to camera left.

In my next post I will cover the first shoot with Sian, which was for the Zodiac series.

In print again

2020 – The Dressmaker

Each year the Photographic Society of New Zealand (PSNZ) produce a 160 page coffee table book that includes images submitted from their members. You are allowed to enter two images for consideration but only one can be selected.

Each year around 350 photographers submit images so I was chuffed to have my image of the Dressmaker selected for the 2020 edition. This is currently being printed in Hong Kong and will be distributed in October.

This will be the fourth year in a row that I have had an image appear in the issue, and the fifth image published overall. I consider that a good result considering how tight competition is for space in the book.

I can’t wait until October to see the image on the pages.

2019 – Gemini
2018 – “Buzz at the Hive”
2017 – Reflections
2014 The role of the model

che in the woolshed

On the weekend away to the Glenburn Station, the organisers has arranged for Che to join again to model. After looking around the wool shed in the morning I knew that it would be a great location, so I arranged for Che to meet me before the others arrived. That way I was not competing with the other photographers, and I could help them if they needed it.

Despite the fact that I had brought lighting gear with me, I had worked out that there were pools of natural light in the building that could be used and we made the most of them.

Che bought a couple of outfits but I have chosen to only feature one here.

In the woolshed

This post is going to be very different from what the majority of posts in this blog are about and that there are no people in it.

Back in March I travelled to a farm named Glenburn Station, which is located on the coast in the Wairarapa, for a weekend trip organised by the Hutt Camera Club. The farm is located at the end of some 20km of gravel road, which I had not realised when we decided to go in the brand new car picked up the day before. My wife was not impressed with that fact.

This was the second year that the club organised a weekend, and while I did not go in 2019, I did have some idea of what was on offer from the photos I had seen.

While others on the trip were interested in the landscapes, I was more interested in the buildings particularly a large shearing shed that we ha been given access to.

So while the others went exploring the landscape, I took my time looking around the shed. I was particularly interested in where the light was falling, as I was planning to shoot a model in the afternoon. To be prepared I had taken my strobes ,light stands and tripod.

In some areas the light was low and the shots were taken with the camera on the tripod. For others, such as the machinery, I mounted the camera on top of the light stand and triggered it via the image app on my phone. This gave me the ability to go for different angles.

The farm had been shearing the week before and there was still plenty of materials around showing this.

It was a great location to shoot in and I used both my Lumix 25mm F1.7 and Olympus 7-14mm F2.8 lenses.

I will cover the shoot with Che is a latter post.