My last three posts have covered the wedding of Taylor and Kristi. I had envisaged that the story what stop with the ceremony, but as I was writing it, I realised that there was a fourth part. Namely how do you select and edit the images that she will present to the couple. This post specifically about that process as I hope it will be helpful to anybody who shoots a large number of images at an event.
Please note that this is my approach to culling and that other people have different techniques. I’m not saying that my way is any better than anybody else’s; it is just something that works for me.
It also based around the arrangement that we had with the couple for the delivery of images. The wedding was to be “unplugged” meaning that we were the only people there taking photos. We were also delivering the images electronically and then the couple would chose and print their own images. This meant that the couple were not involved in the selection process. Part of being unplugged though was a guarantee that we would deliver a “sneak-peak” set of images within a day so that the couple could share on social media.
As I mentioned in my previous post, we were using four cameras to cover the wedding so the first task was to download the images from each card, and then take a backup of it before the editing even started.
To download the cards I used the “get photos from camera” import option in Adobe Bridge. It was only after all cards had been transferred that I then switched to Adobe Lightroom and imported the RAW files into my wedding catalog. Doing this two step import resulted in all of the images being in the category of “Previous Import” in Lightroom. While it would have been possible to import directly from the card it would have meant that only the last card cards images fell into this category.
In total we had just under 3,000 images imported. Now to start the process of culling.
The first stage is to remove the absolute dud images that obviously have issues with them (such as way too dark, or out of focus). I do this quickly by scrolling through the images in the library and pressing the X key to indicate that the photo was rejected.
As we had promised to deliver the sneak peak on the day following the wedding, I was also on the look out for any stellar images that we could use in the sneak peaks. These were identified by giving them a rating of 2.
Once I had gone through all of the images I had about 200 rejected images that were then deleted, and around 30 images for the peak. I reduced that down to 26 which were then exported and delivered to the clients.
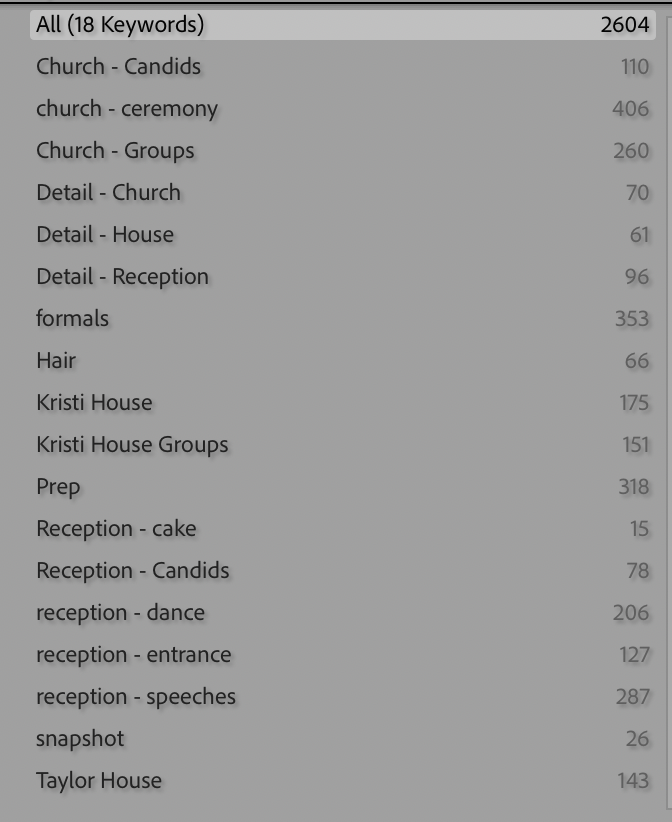
It was now time to cull the images and select those that would tell the story of the day. I created a set of keywords that would enable me to split the day into various activities and which would also be used in the export later on. These were then applied to all of the images.
The keywords were then used to filter all of the images, so that I was only concentrating on each section individually, rather then trying to handle the entire day in one go.
With documentary photography you are trying to tell the story of the day. I went through each of the keywords and rated them using the following scale:
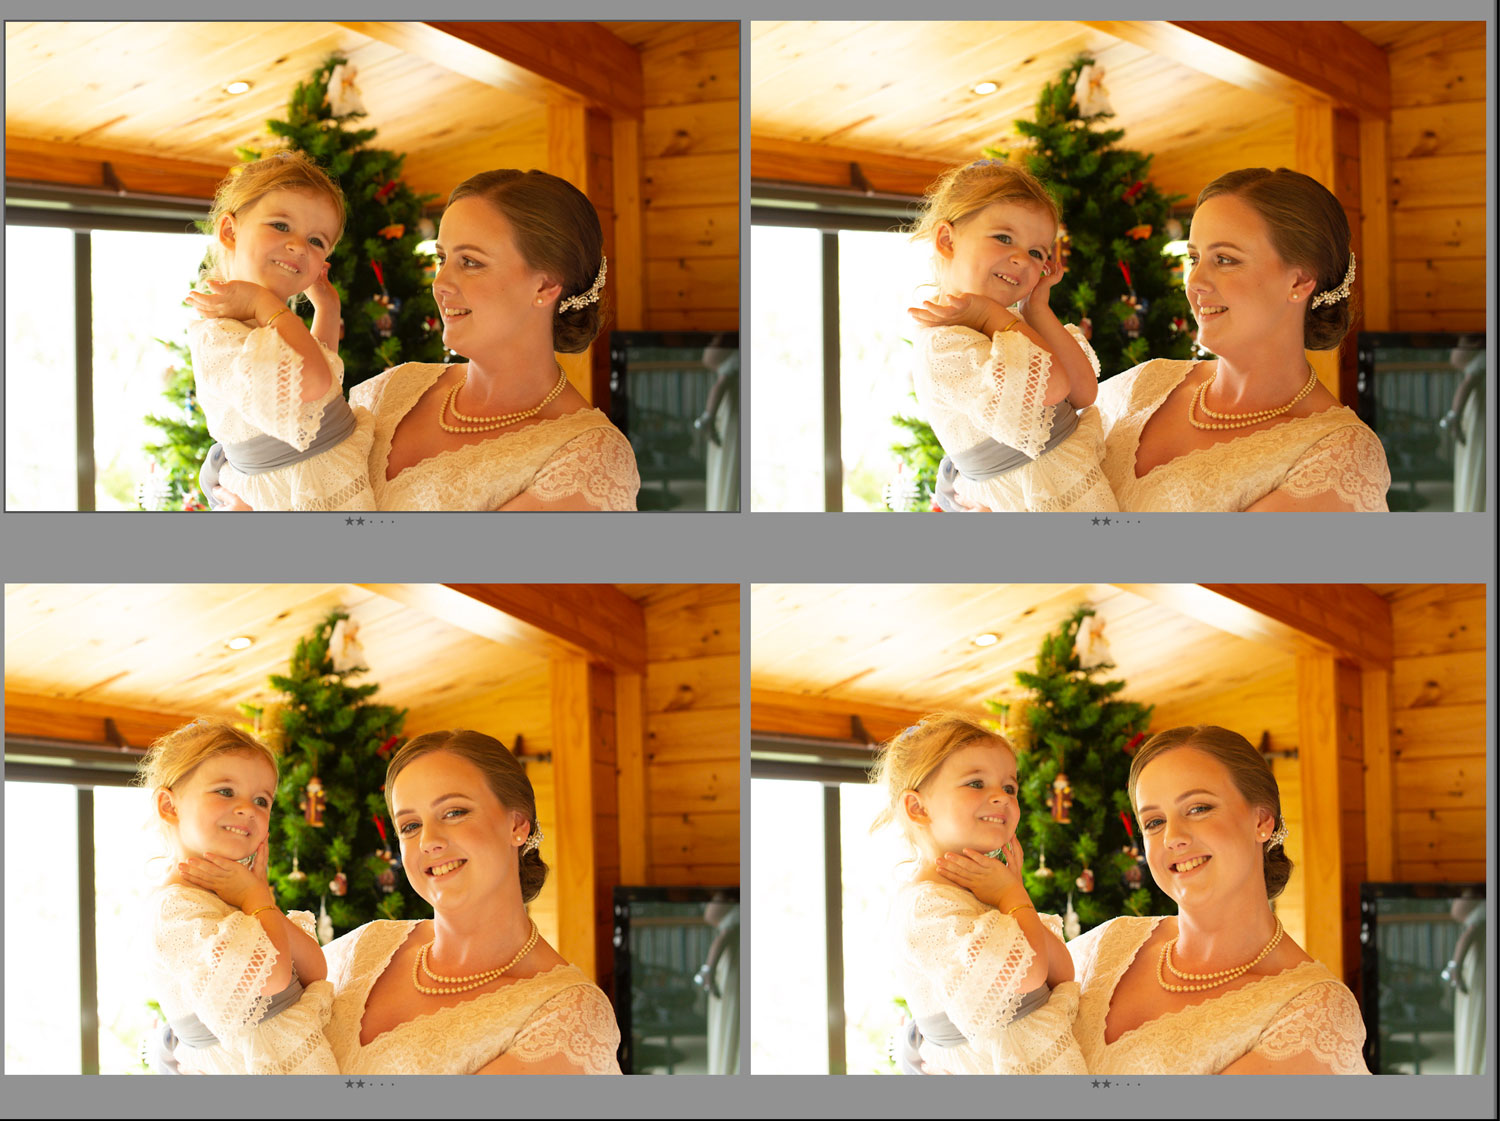
3 stars – An image that was a good candidate for the final set 2 stars – A duplicate image not strong enough on its own 1 star – Not suitable for delivery
Lightroom has two shortcuts that let you quickly view multiple images. Highlighting two images in the grid and then pressing C will bring them up side by side. Highlight more images and pressing N brings them all up. You can then select each individual image and rate it by simply pressing the appropriate number on the keyboard.
In addition to the keyword filter I was also filtering on “unrated” which gave me a clear indications of the ones that I had not looked at yet.
After all of the images had been rated, I then set the filter to only show those with a 3-star rating. I would then look through how the story flowed and if I felt that an area was light I would go back to a 2-Stars and change the rating on some of them.
Equally if I felt that there were two many images telling the same part of the story then I would downgrade some of them.
This is exactly the same process that I use on any of my model shoots and it has worked well.
This is a somewhat longer post that usual and it covers the actual wedding day of Kristi and Taylor. Given that it covers over 12 hours of shooting I make no apology for its length. You can read about the pre-shoot and rehearsal sessions in the previous two posts.
The actual ceremony was taking part at 3:00pm but as we were providing a full documentary coverage my shooting started at 9:00am with the bridal party starting at the hair dressers. We then moved back to Kristi’s parent’s house for the rest of day.
My daughter Samantha was shooting the grooms preparation so she didn’t start shooting until around 12:30 at the couples house. We were both carrying two cameras. I had the G9 as the main camera for the ceremony and used my older Nikon D600 to shoot the earlier events. For the shots at the house I fitted a 50mm f1.4 lens as this enabled me to shoot without needing flash. This just meant that I had to zoom using my feet.
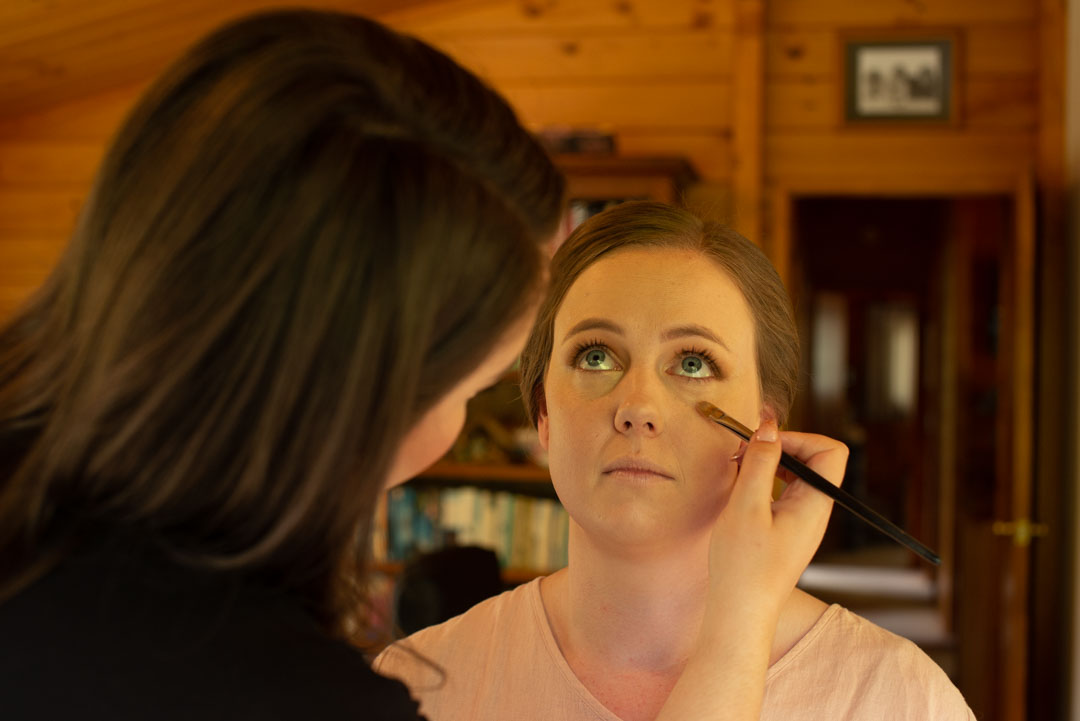
Even something as simple as the makeup being applied is worth capturing.
With documentary photography you are there to capture the day as it unfolds. I do this by basically blending into the background as much as possible but always keep an eye out for things happening. You also need to have discussions with the bride as to whether there are items that are particular meaningful to them.
Kristi was wearing a pearl neckless from her grandmother so we ensured that we got her captured in some way.
While the majority of time shooting at the houses was simply to capture what was happening, we both had a list of images that we wanted to take. While they represented things that would have happened anyway they were arranged so that we could get the best possible image.
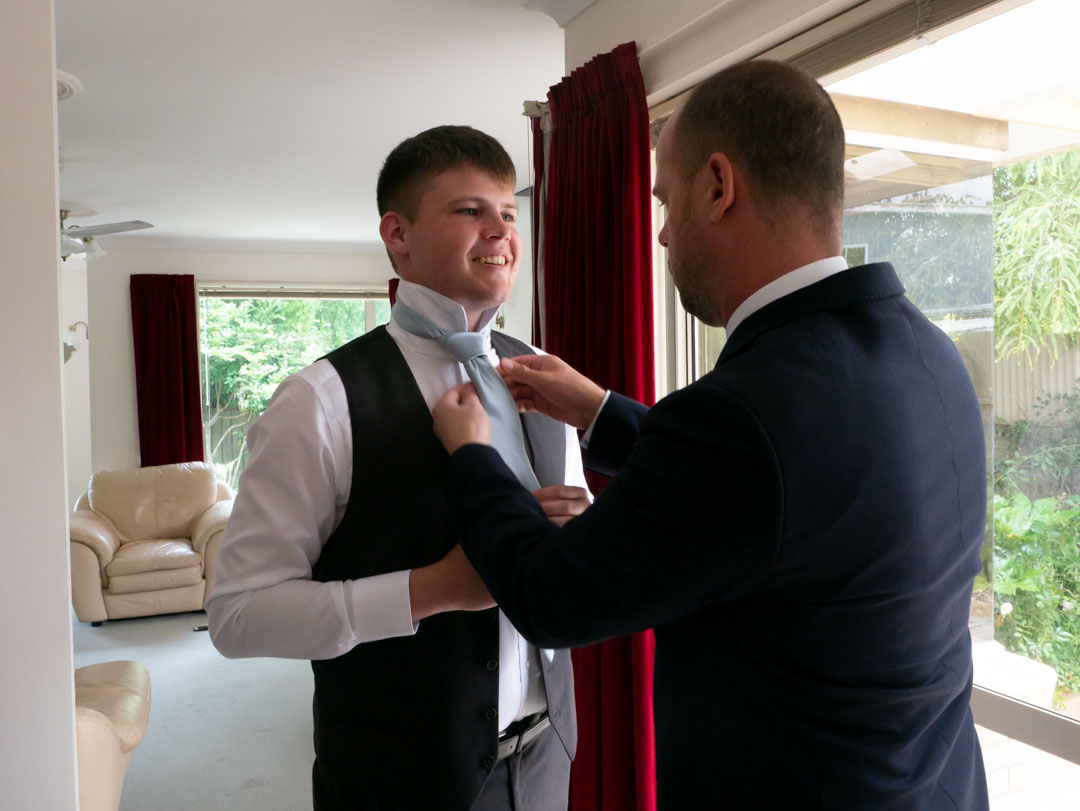
Taylor does not wear ties so there was quite a performance getting one tied right. In the end his brother Mark stepped in to help.
Putting the buttonholes on is another classic image. They proved quite tricky to attach. In this image Taylor pins one on his mother.
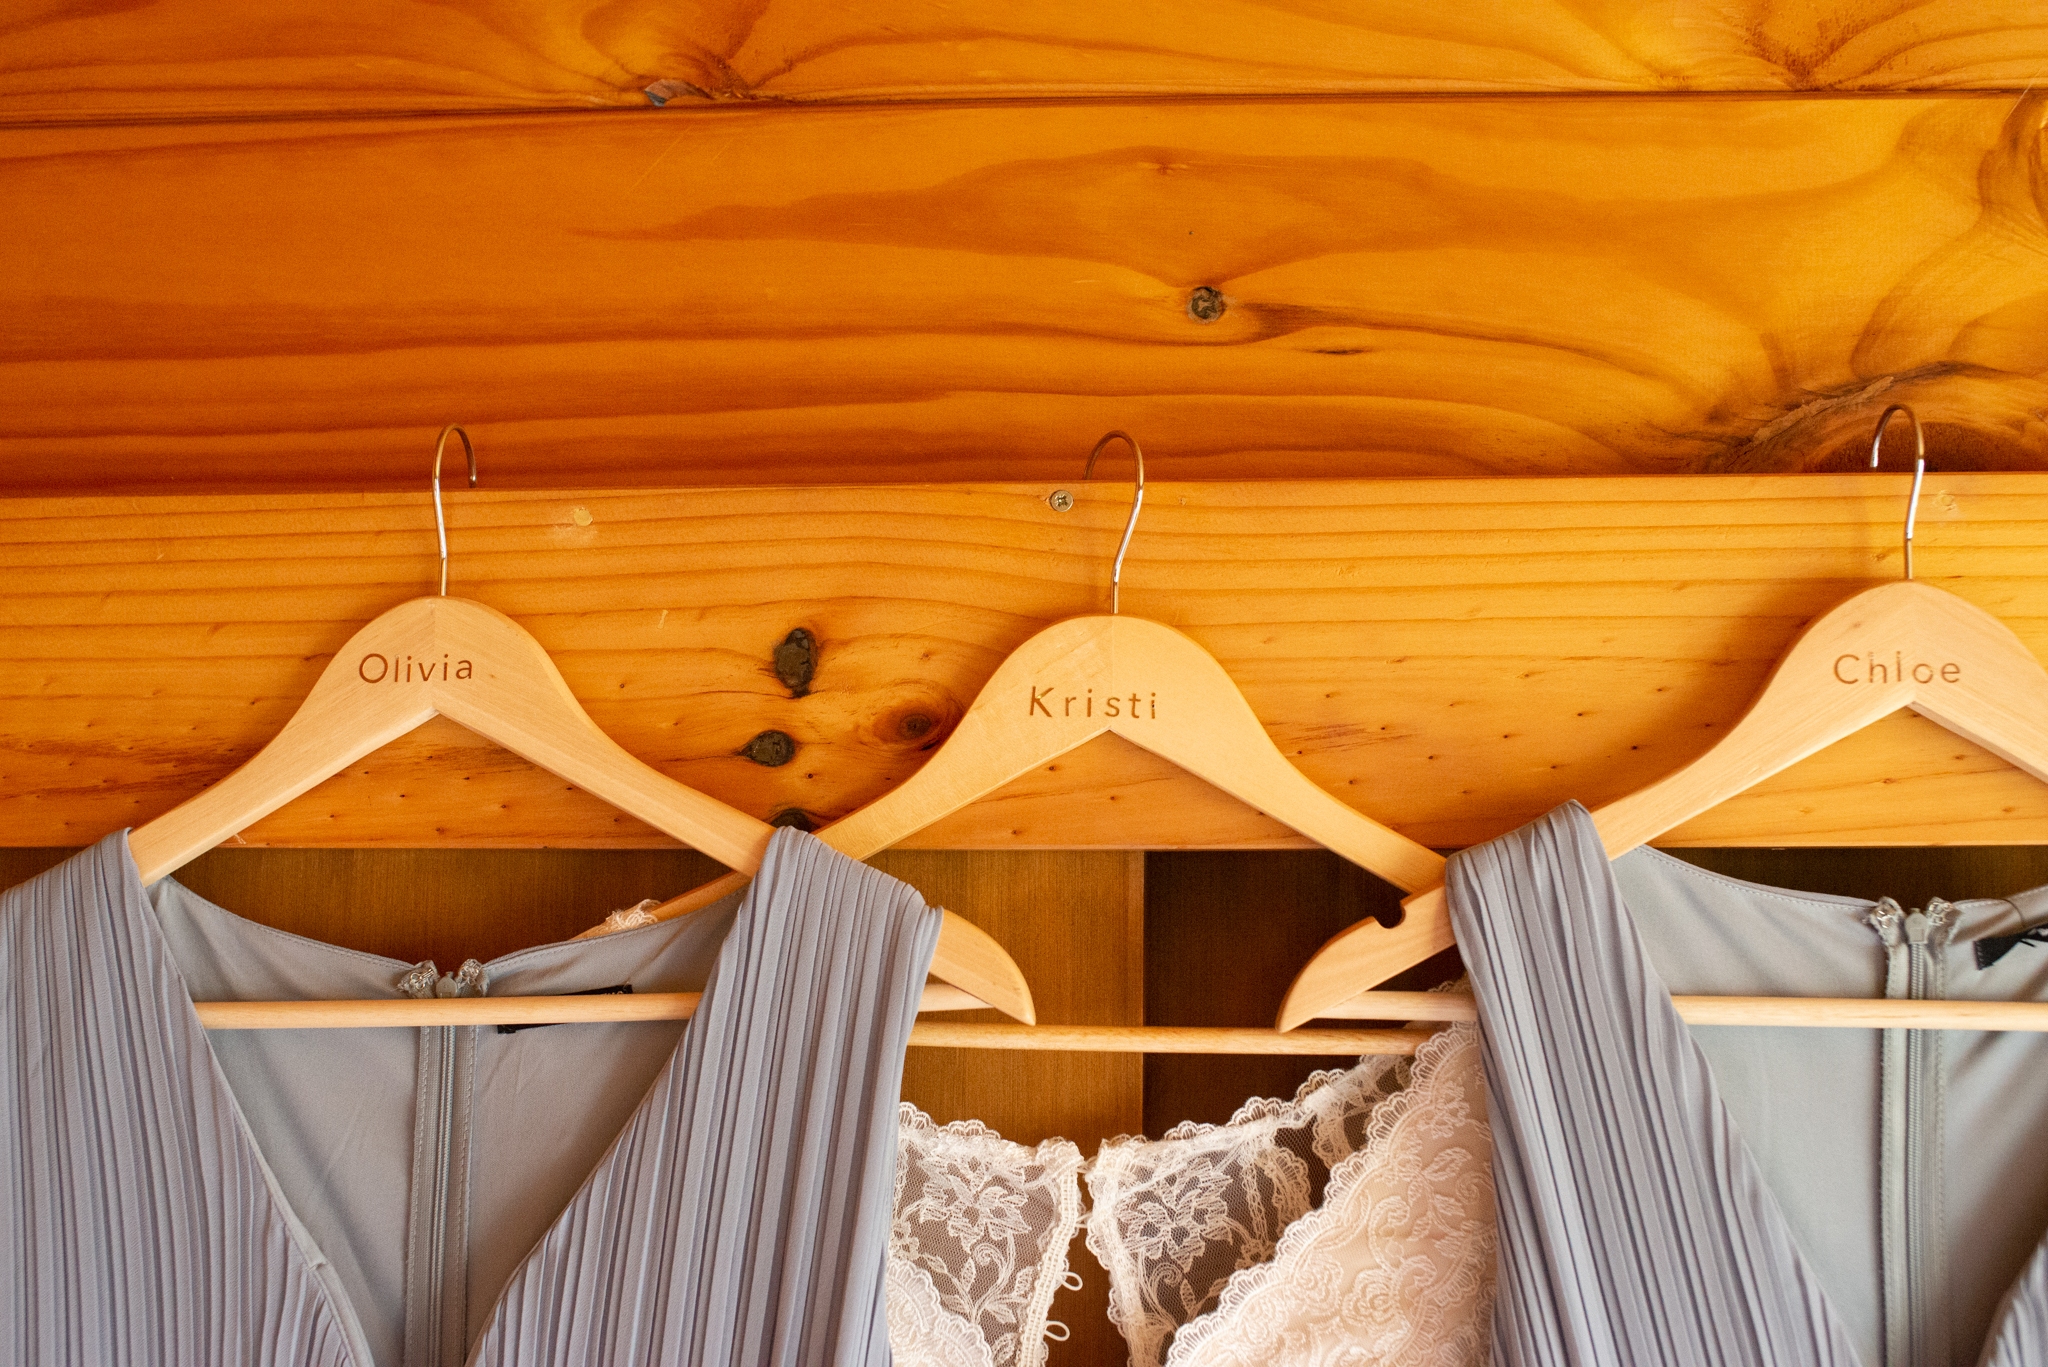
It is also important to capture details of the day. This cane include personalised items such as the named clothes hangers.
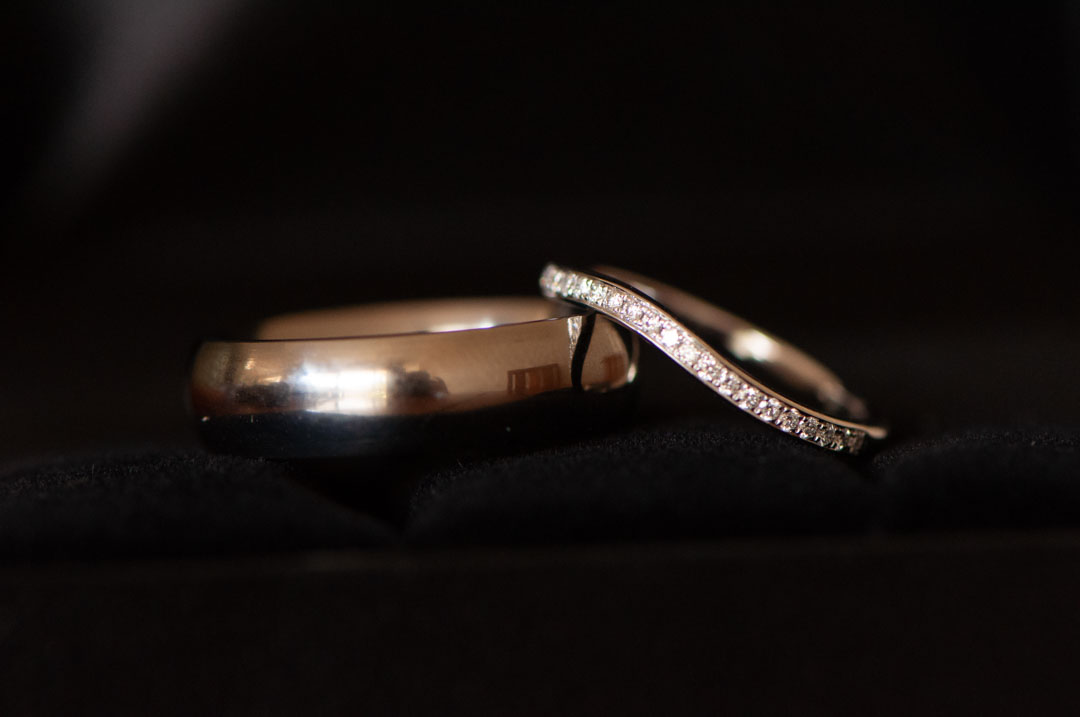
Samantha was given the task of shooting the rings and so she had my macro lens with her. The shallow depth of field that the macro lens has does make these tricky shots to capture.
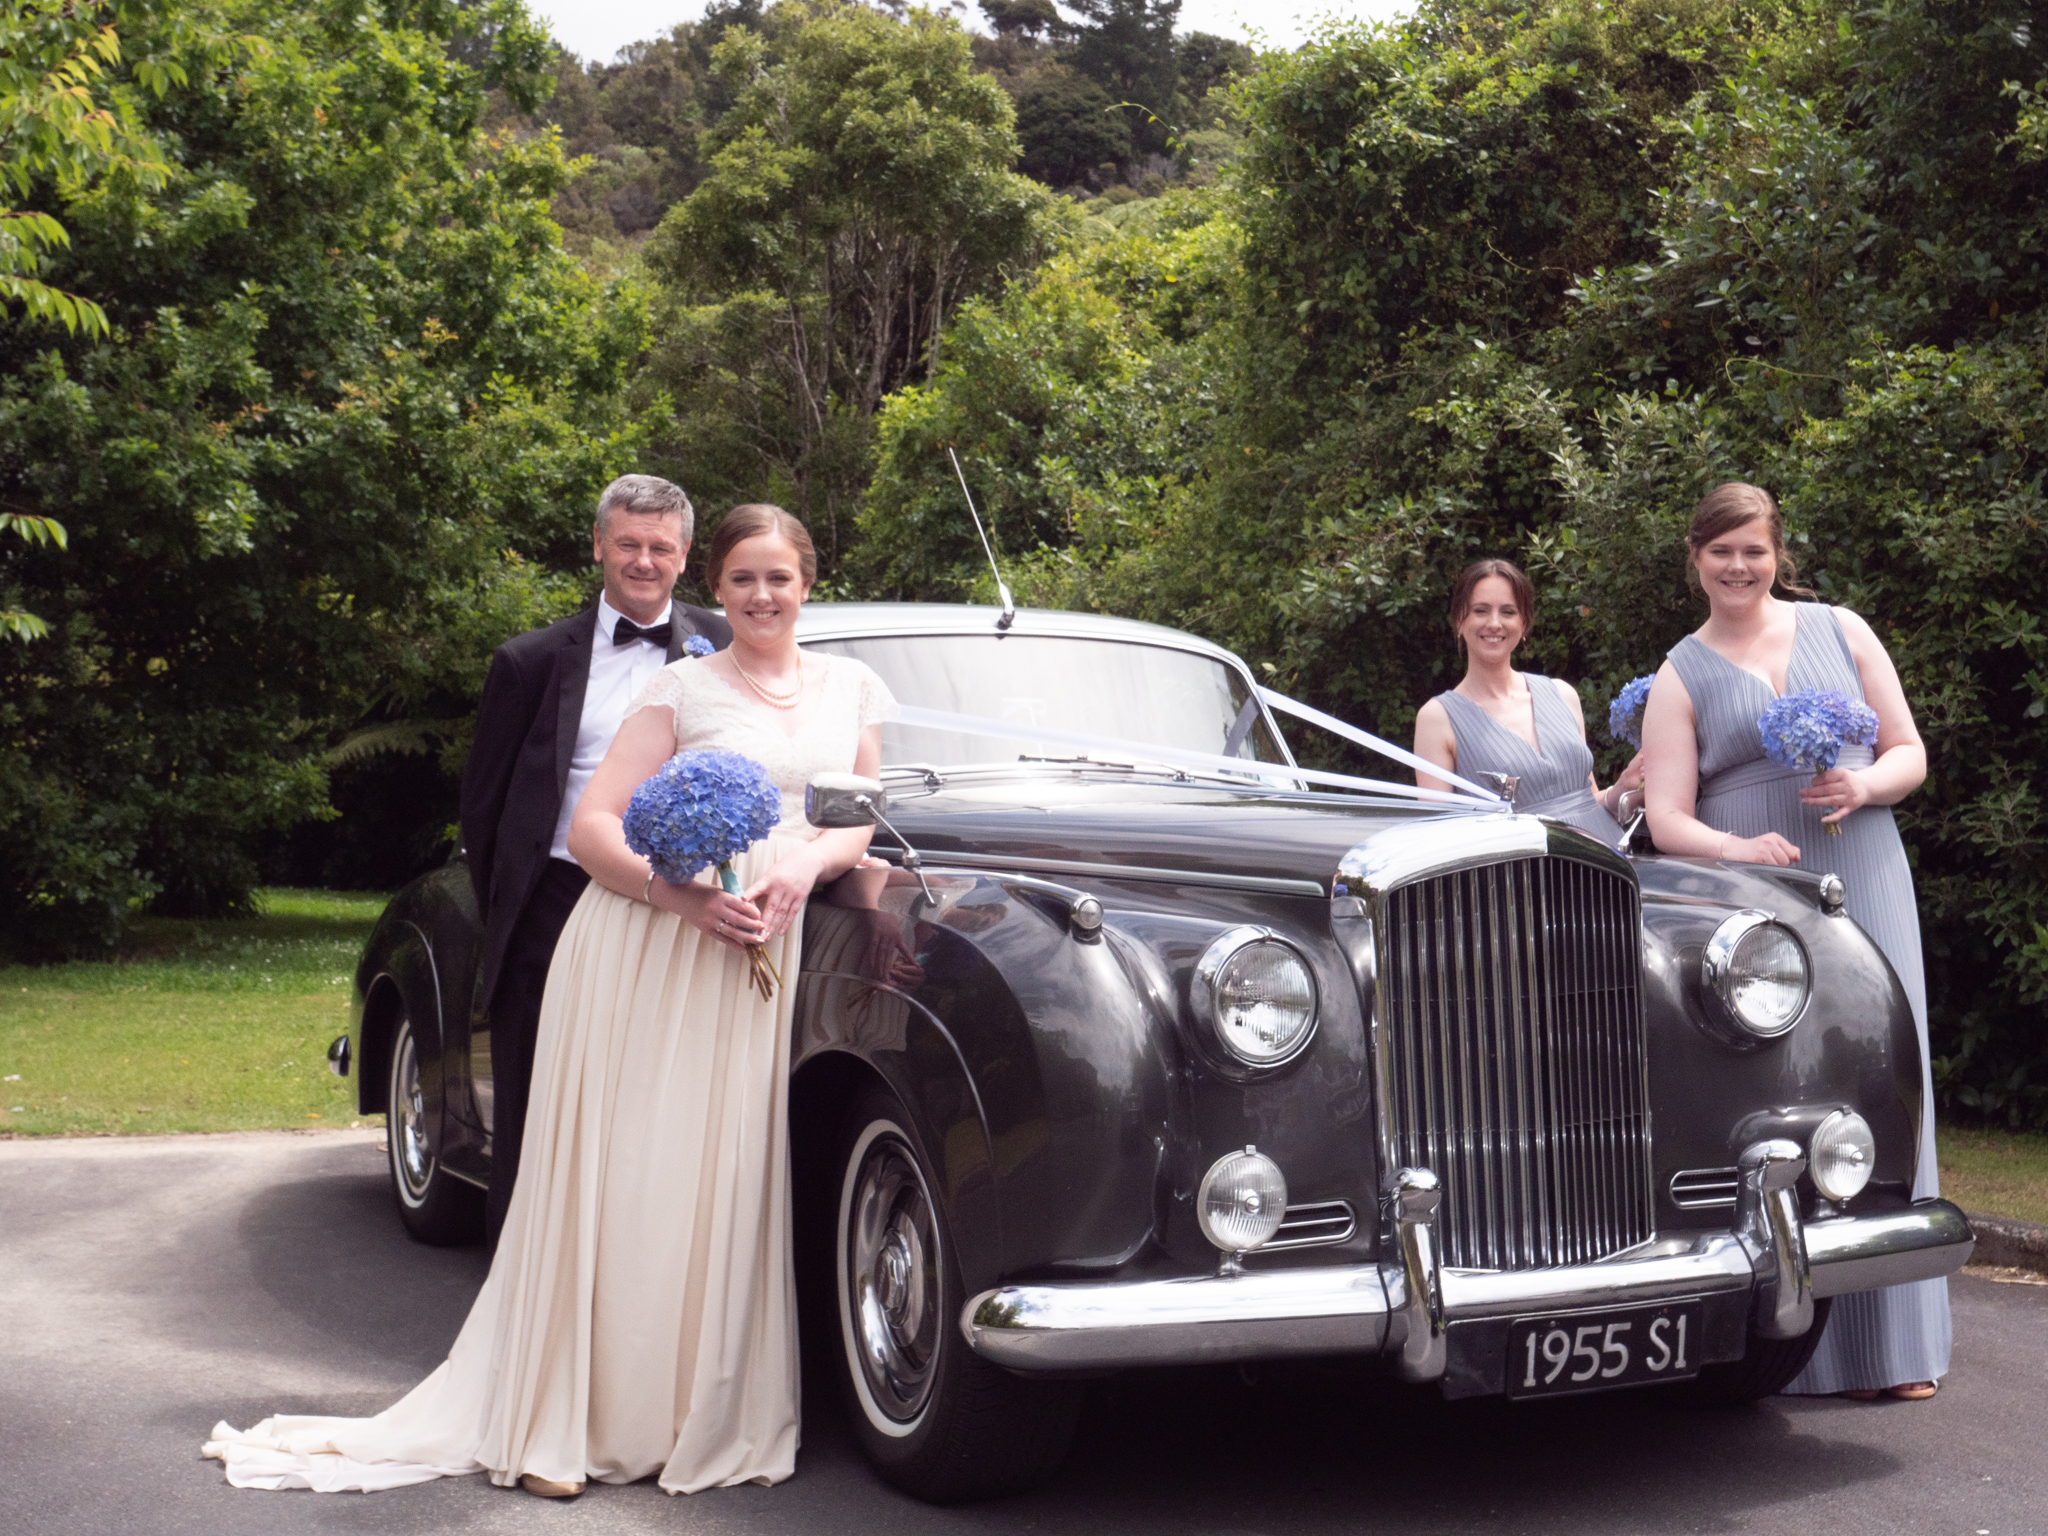
The whole day seem to move quite smoothly and by 2 o’clock everyone was ready and the cars had arrived. This gave me the opportunity to get some photos outside with the family and wedding party and not have to rush about it.
While the morning has been cloudy by this stage the cloud had started to break up and so I was dealing with bright sun. This presented some challenges in how to pose the group. When it was not possible, to angle them away from the sun I used the technique of getting them to close their eyes and then open them on my countdown. This meant that they weren’t squinting.
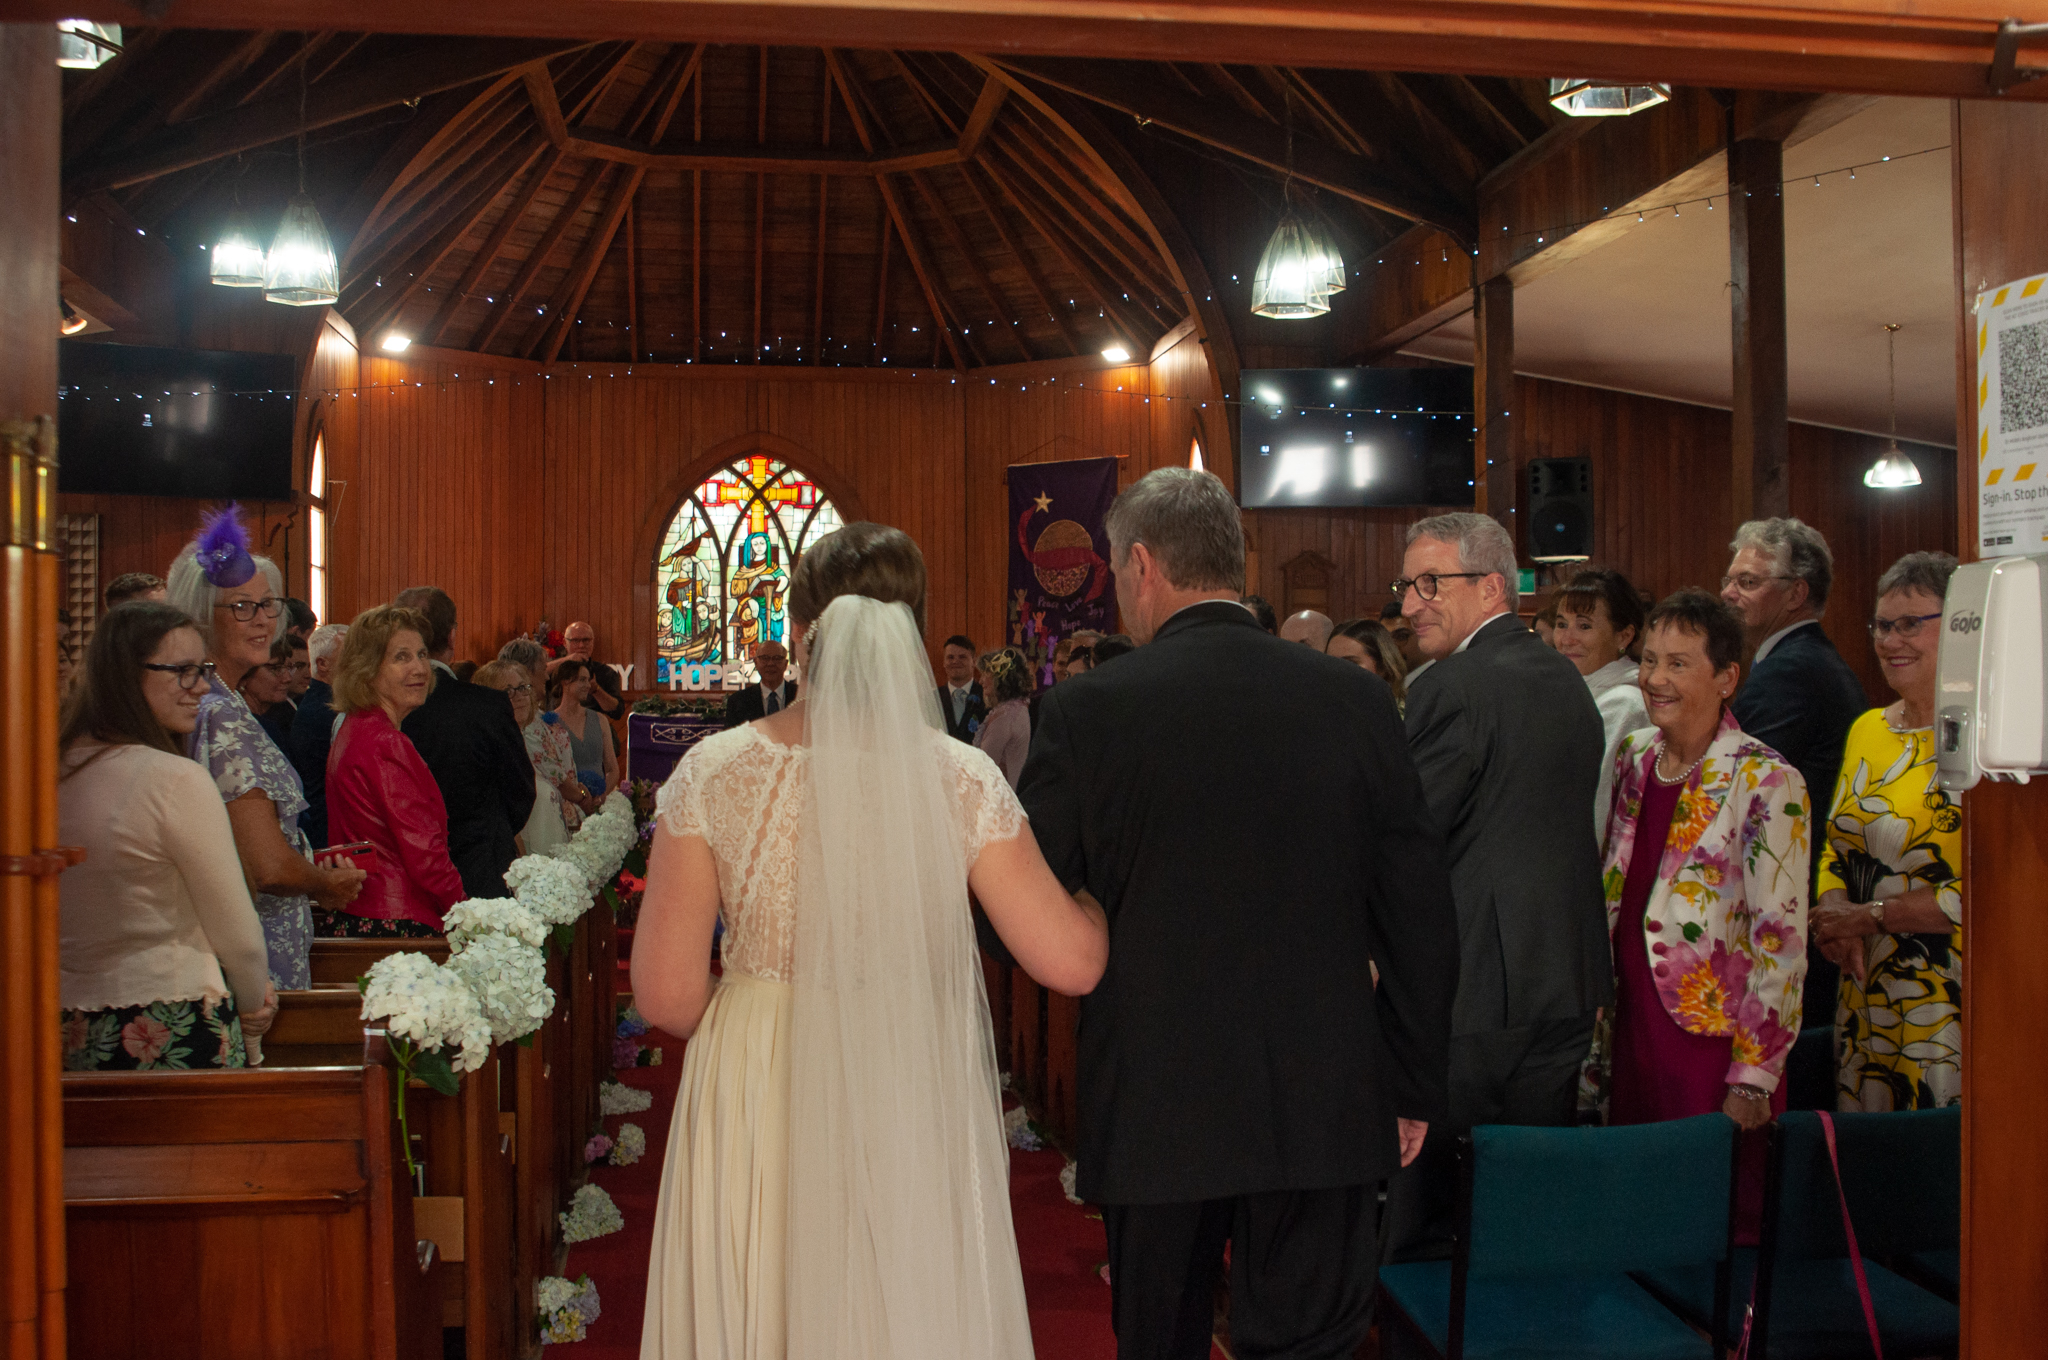
I headed off to the church just before them and positioned myself at the front as I had practised the night before. Samantha positioned herself at the rear so she could shoot as they came in and then down the aisle. She managed to capture Taylors look when she first saw Kristi.
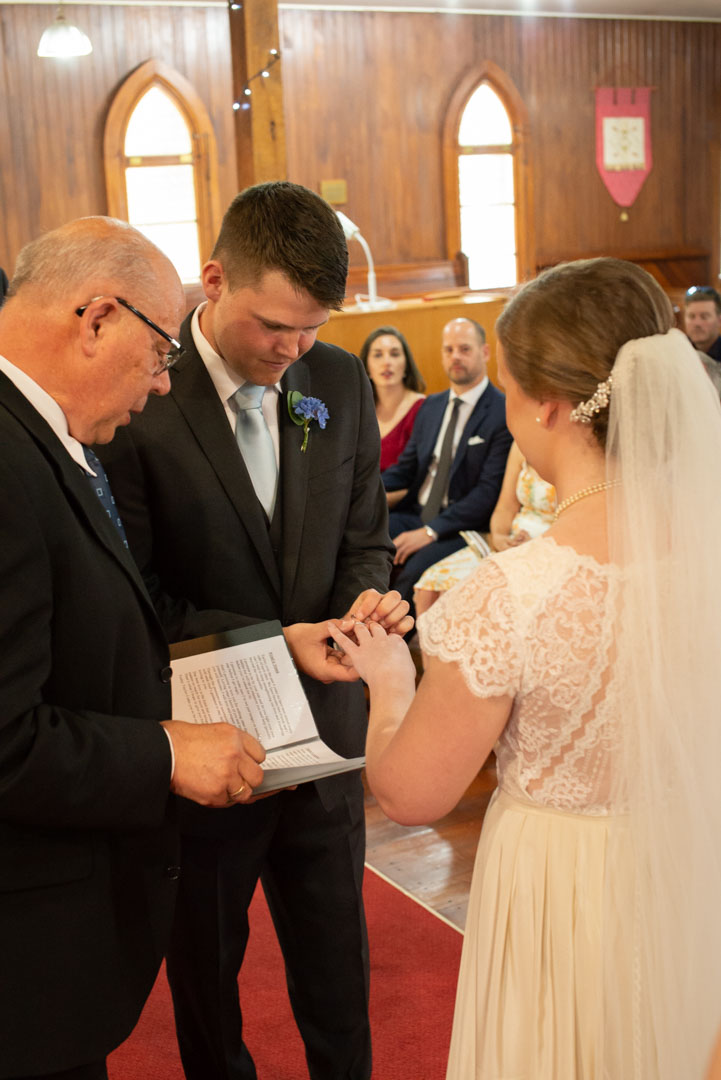
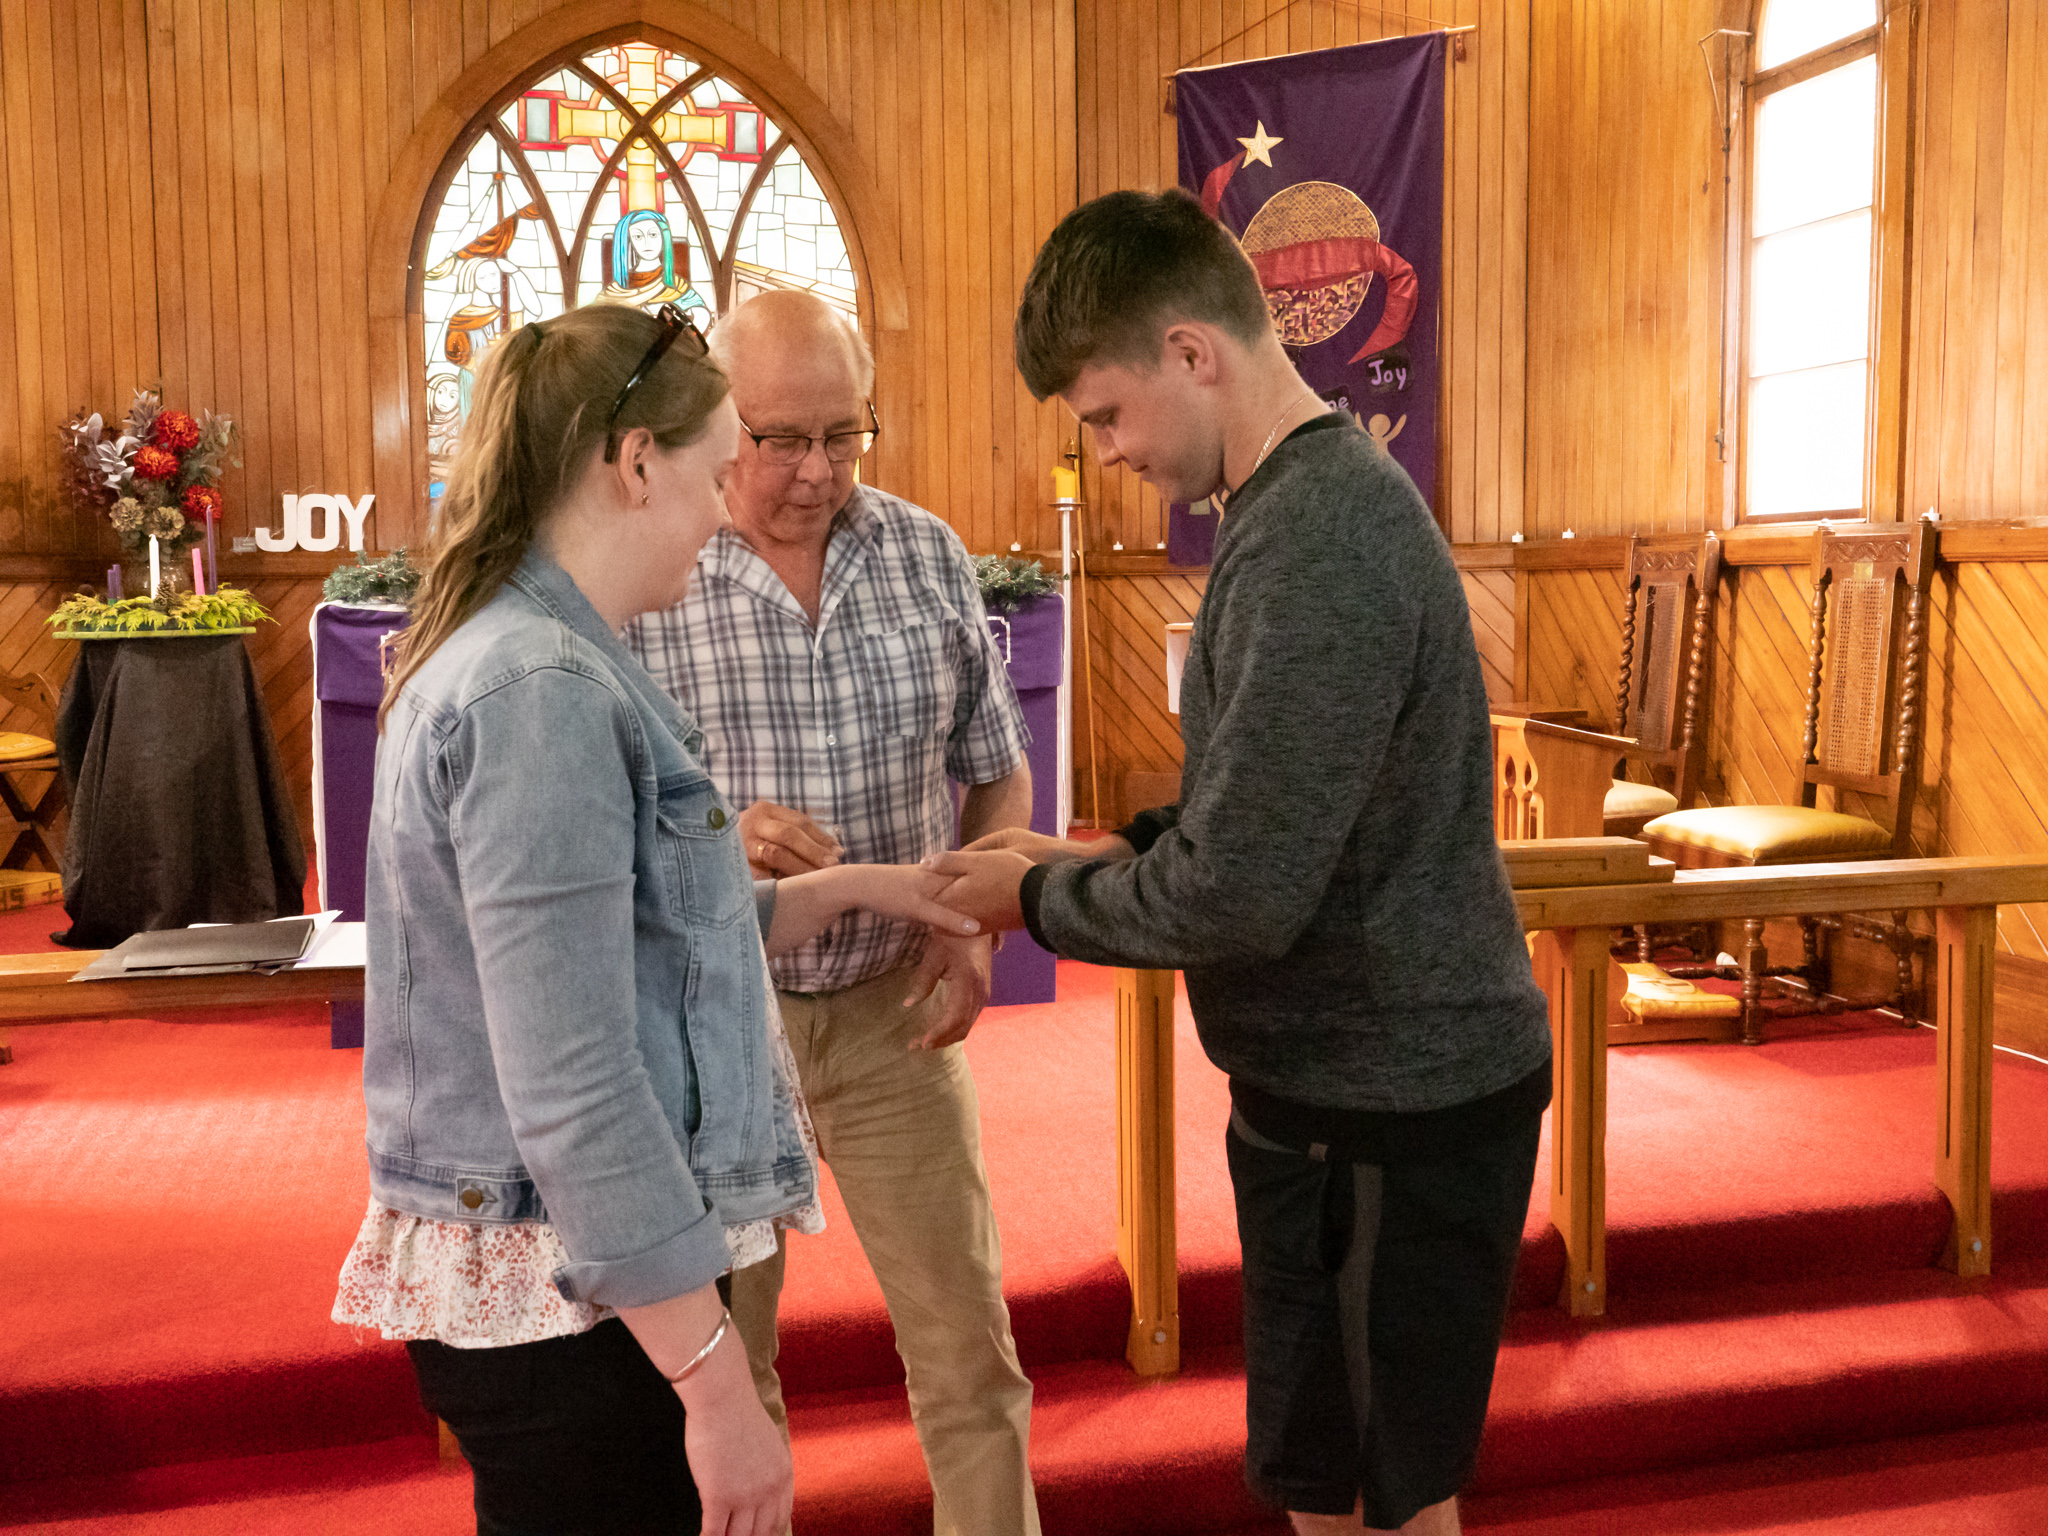
In many ways shooting the ceremony is to most stressful part of the day especially as it is filled with single moments that you simply can’t recreate if you miss them. The two most important are the exchange of rings and the first kiss. Fortunately I was really pleased that we managed to capture them both.
At the end of the ceremony we had allowed a 15 minute gap in our shooting to give Kristi and Taylor time to greet the guests. This also let us have time to set up for the group photos.
I had asked them to prepare a list and then to have a wrangler to get the groups together. We started with the largest first and then moved down. This meant that people did not have to hang around.
The couple wanted a photo of everyone at the ceremony so I had brought my wide angle lens and a small ladder so I could get an elevated view. We then moved through the groups. For these I shot at a lower level with the camera on a tripod. For each group I would take about a dozen photos as this gave me plenty of scope should I need to do a “head swap” later in post.
As it turned out this was only needed on one image.
With a clear list and good organisation we were able to get through all of the group photos within the 15 minutes that we had allocated for part of the shoot. That meant we were well on time. It was a real luxury that everything was running to time as I have shot weddings where the time allocated for the photos has ended up being squeezed by other events running late.
We then got into the cars and headed off to Harcourt Park to shoot the first series of the formal photos. By this time the sun had come out quite strongly and so I was dealing with dappled light on a number of occasions. This meant that I had to do a little bit fix-up’s in post on the images.
While we were now dealing with a much larger party, the time spent on the pre-shoot, enabled us to move on quickly between the locations at the park and nail all the photos exactly as we had done on the visit the week before.
We then moved up to the gardens at Ashton Norwood where the reception was being held. The staff provided a basket of food and some drinks on our arrival, and as we were running well to time, we let the party relax and eat. Personally I do not like taking photos of people eating as the facial expressions are generally not that flattering.
When we started shooting we actually did some images that we had not tried the week before. I mounted the camera on top on a light stand which Samatha held up at full height and the I controlled the camera via the app on my phone. This let us bring in the circular garden not possible at a lower angle.
As it turned out it did not get selected for the category but I have no regrets as it was a fun shoot.
We then moved around the gardens and shot at all of the locations agreed the week before. The sun was getting lower in the sky by this time so for a number of images I used it behind the party and them used my flash to provide some fill.
We were working to a timeline for the day that was very generous and amount of time allocated for the photos. We needed to get them finished by 6:20pm so the couple could have a 10 minute break before they were scheduled to make their official entrance into the reception, via a stairway, at 6:30pm.
As it turned out we were finished the photos are 5:55pm and so the order was changed around so that they would make the entrance early and then have time to mix and mingle with the guests before everyone sat down to eat.
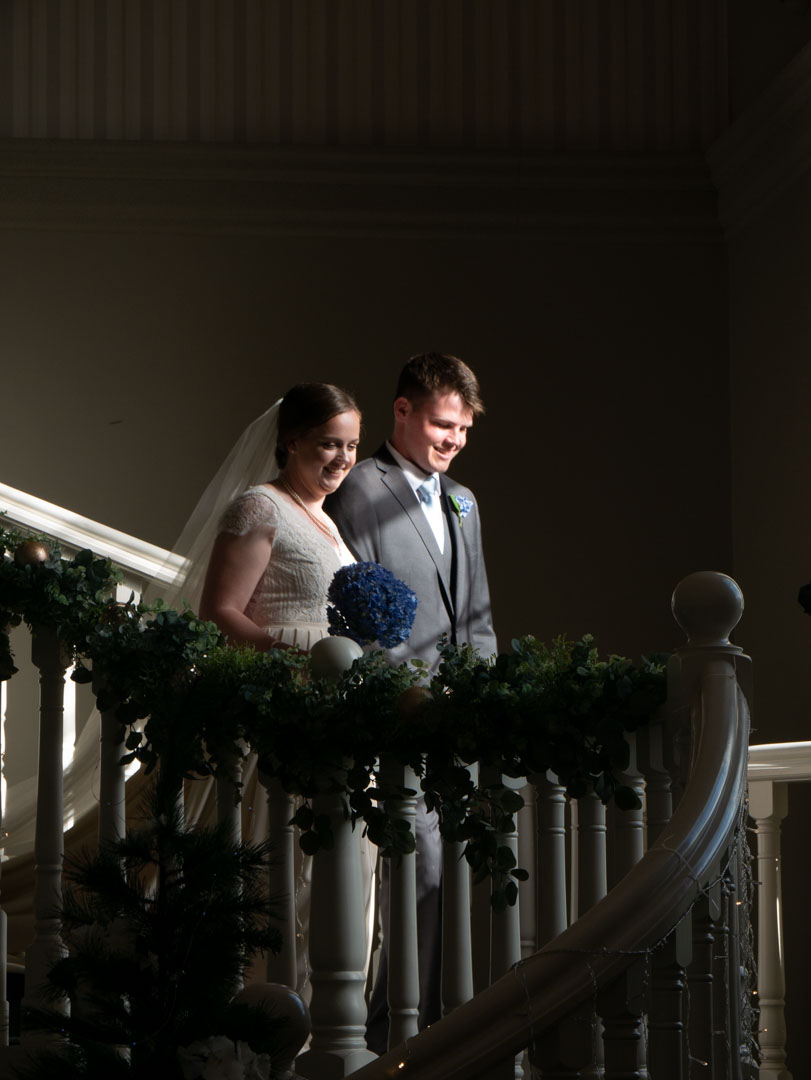
I positioned myself at the bottom of the stairs and Samantha shot across the room from a distance. There was a point half way down where light was flooding in from a large window and Samantha managed to capture them as they came through the light. The couple absolutely loved this image.
The stairway gave us the advantage to get some higher angled shots , and I also packed my wide angle Olympus lens so that I could capture the whole reception area. Normally windows behind the bridal table are a nightmare to shoot with and I had anticipated needed to use flash to capture images of the speech. As it turned out the sun was coming in through the high windows on the opposite side of room lighting the table from the front. This gave me workable light until much later in the evening when I had to resort to flash.
Glen (Father of the Bride) speaks
We shot through the speeches and then into the first dance. For the speeches I would generally shoot the speaker, while Samantha shot the reactions of the bridal party. For the first couple of dances I continued to shoot stills while Samantha set her camera into video mode and recorded them.
Shooting video was not part of the arrangement but we like to add a little bit extra and it was well received.
The first dance
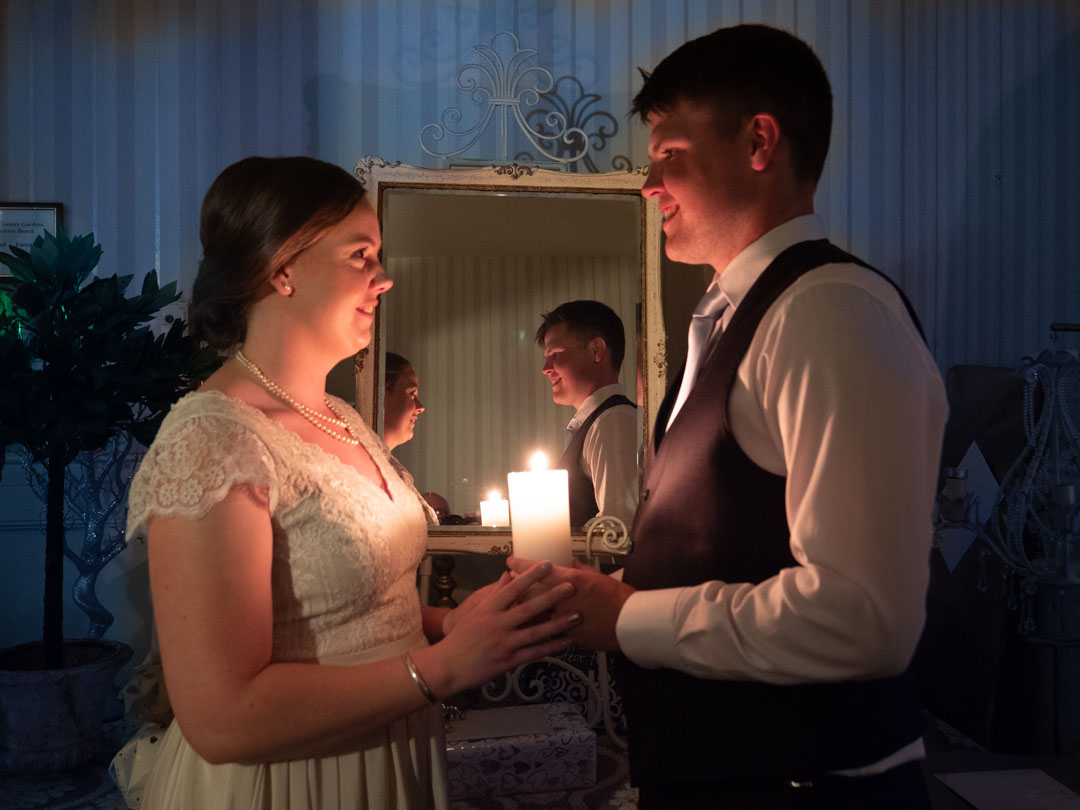
For the final shot of the evening I grabbed the couple and their unity candle and took a photo of them in the entrance way. This was only lit with the candles and a slow shutter speed. It replicated a shot that I had done at Kirsti’s sisters wedding that I knew she liked.
The last images from the evening. Lit only with the candle.
We got home around 10:30pm and my day was not over as I downloaded all of the cards into the computer and took a backup of them on a separate drive. That meant that I had three (and sometimes four) version of the same image before we started the edit.
I hope that you have enjoyed this series on the wedding. This was planned to be the final instalment in the posts. However in writing this post I realised that there will be a fourth post that quickly covers how I go out about culling and editing the images.
This is the second of three posts covering the wedding of Kristi & Taylor. In the first one I covered the pre-shoot and the next one will cover the actual day.
As with the pre-shoot I always try to attend the wedding rehearsal, which in most cases is held the day before the wedding. Again the reason for doing this is to make the wedding day run a lot smoother.
Firstly it is an opportunity to scope out the church and sort out how you and the second shooter can cover it. In this case, St Kilda’s church had side aisles so I knew that we could move from the front to the back quickly without being too obvious. Samantha (my second shooter) could also come up the side aisle opposite me, so that we could record both bride and groom at the same time. I have worked in smaller churches with only a central aisle and this can really restrict you.
Secondly, you can talk to the celebrant (or minister) about any restrictions that may in place. For example some ministers do not like photographers coming up onto the alter, while others don’t allow flash during the main parts of the ceremony. Knowing this ahead of time saves a lot of heartache on the big day. Fortunately Seth (who was the celebrant) was fairly relaxed and we were free to move as we liked.
Thirdly, and most importantly for the planning, attending the rehearsal enables you to know what is actually happening during the ceremony so that you can work out where to position yourself, and any other shooters.
While all weddings tend to follow a similar pattern, there are always individual elements to each. Because these are personalised, they are actually the most important to shoot well. In the case of Kristi & Taylor, their niece was being a flower girl but with a bubble gun, there were two readings from family members and they were doing a unity candle during the ceremony.
The final benefit of attending the rehearsal is that it gives you the opportunity to meet with the larger wedding party and get them comfortable being shot. I will also talk to the best man to find out if there is anything planned that as a surprise for the bride & groom. Again this is so we are prepared for it.
The rehearsal for Kristi and Taylor’s wedding was held on the Friday afternoon starting at 4:00pm. This had the added advantage that the light in the church was going to be much closer to what we could expect the next day. This let me get a white balance reading, as well as determining what settings I needed to dial in to catch the action.
In the other weddings I have shot, the rehearsal has been held in the evening, and so the light was completely different. This was a nice change as it enabled to me to see how much ambient light I would be dealing with.
While not part of a standard rehearsal, I will usually ask the bride and groom to practise putting the rings on each other. Again this makes for a smoother day.
With the pre-shoot and the rehearsal done, it was now time to go home, charge up all of the batteries, pack the bags and check that the times very consistent on all the cameras.
I am not afraid to admit that I love photographing weddings. I know that they are incredible stressful events, where you really do not have the opportunity to reset if you miss shots. They are also days filled with such happiness that the main characters in them just glow.
The wedding of Taylor and Kristi took part in Upper Hutt on December 19. We delivered the photos this week and so it is mow time that I can share them with my readers.
I had photographed Kristi’s sister’s wedding back in January 2015, so I was delighted when they reached out to me to again record the day. As with the earlier wedding we provided them with a full day of both formal and documentary style photography.
I am therefore going to cover the wedding in three posts. This one covers the pre-shoot and then the next two will cover the rehearsal and the actual day.
One of the things that I try to insist on with all of my wedding couples is that we do a pre-shoot a week before the event. If at all possible we also try to do it around the same time as the actual photos will be taken.
The pre-shoot has a number of benefits all designed to make the wedding day run a lot smoother. Firstly it is an opportunity to allow the bride and groom to get comfortable being shot by me. You can see how they react to instructions and gain insights on how to best direct them on the day.
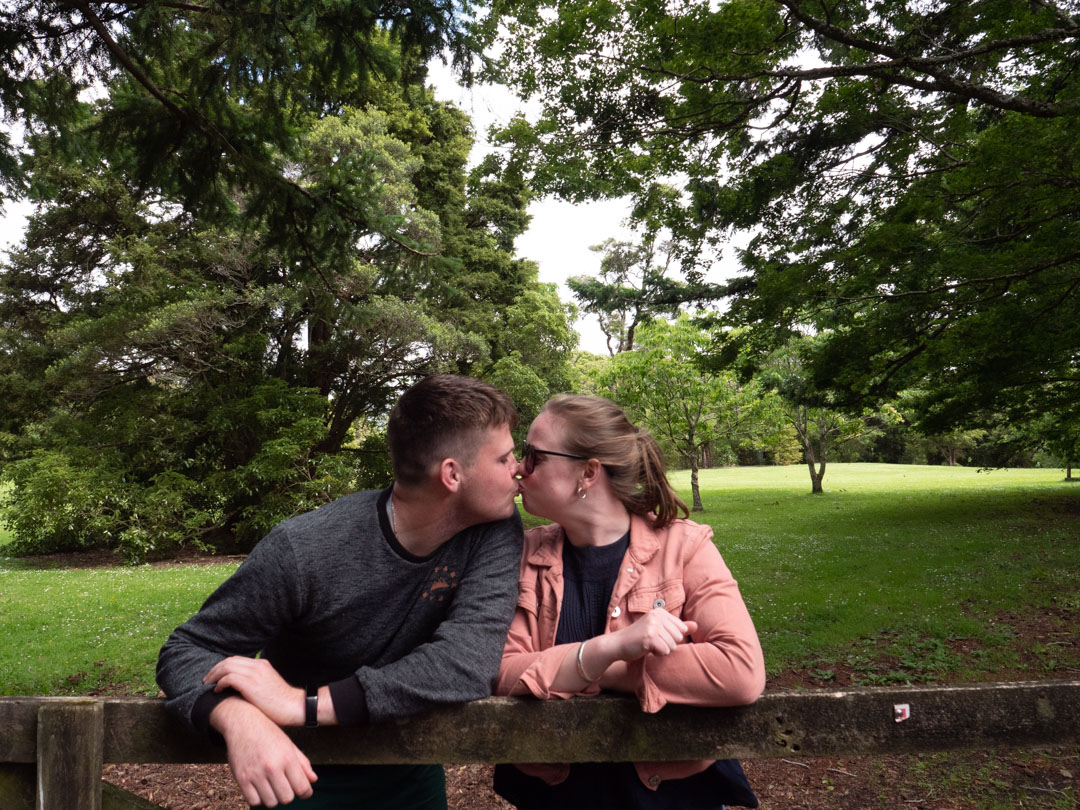
The second advantage of the pre-shoot is that it enables you to try out locations and poses without having the time limitations of the actual day. The reason that I try to hold it at roughly the same time as the actual shoot is that generally wedding photos are taken outside. Shooting at roughly the same time and location gives me advance warning of where the light would be coming from and any issues that I might face.
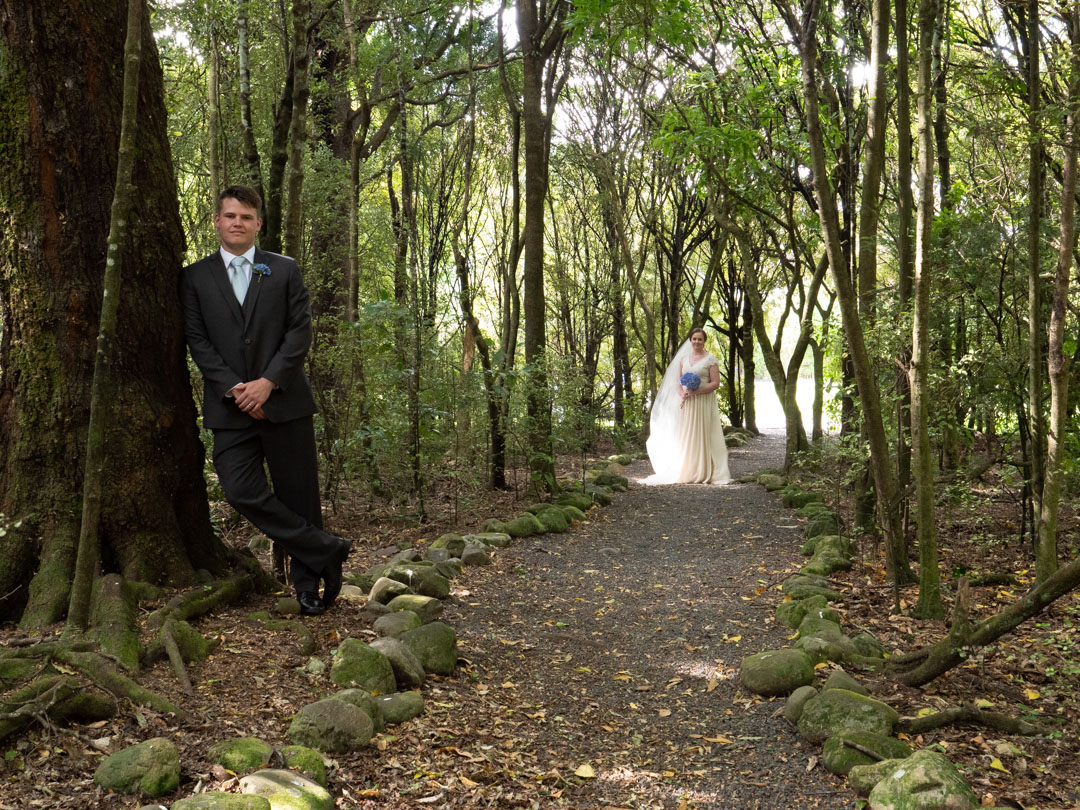
This shot in the forest came to mind as soon as I saw the location. I knew that we would have to cope with a colour cast though.
At the initial consult with Kristi and Taylor we had discussed a number of possible locations for the formal. These included Harcourt Park and the gardens surrounding the reception venue at Kaitoke. As the park was on the way to the reception venue I knew that it would work in terms of timing.
Now I like to be prepared as I find that this enables you to portray confidence. So in the weeks before the shoot my wife and I went to both locations and mapped out a number possibilities to try. Thus meant that the pre-shoot also ran smoothly as we moved from location to location.
I have shot previously with this tree and the couple absolutely loved it.
The other advantage of shooting at a location you plan to use is that it gives you time to work out what is the best way to move around it, and see any issues that you might face. The reality is that on the day it is very easy to get so caught up in the shoot that these can be missed. The walk from the tree (above) to the gate (below) was fairly downhill across grass and the area around the gate was a little muddy. This was fine when Kirsti was in jeans but would be an issue on the day. So that determined that we would shoot the date images first as the cars could drop them off right by it.
The gate actually separates the park from a camping ground and the road is actually on private land. Therefore I needed to get permission, however that was easily given.
We then moved up the reception location and again moved through the various areas that I had sped out earlier.
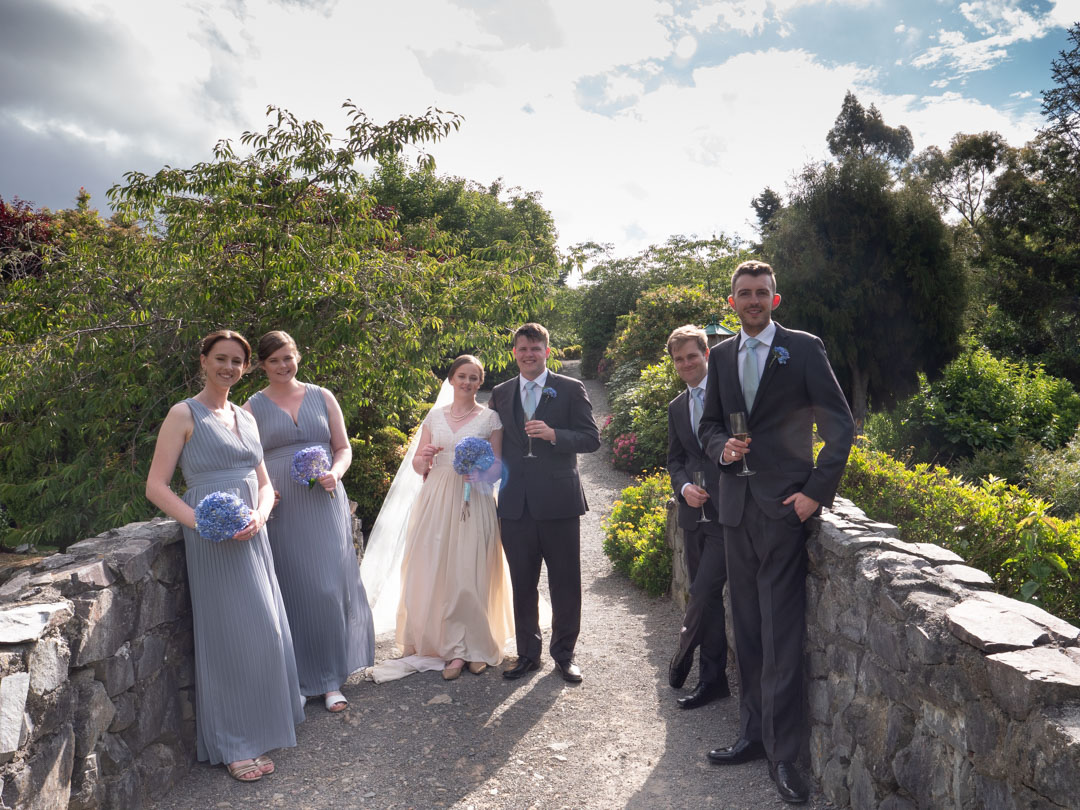
They both loved the image taken on this bridge.
In total we spent about two hours going through the areas that I had scoped, which was time really well spent. It enabled be to know what gear that I needed to bring and while the light was different to actual day, it prepared me.
This is a somewhat unusual post, in that it is not about a photographic session that was run, but rather the reaction that occurred when the images were posted on Facebook. So in someways it is a little bit of a rant.
In my last post I shared the story of the shoot with Heaven and particularly the background as to how I came about shooting her. The session went really well, and she was very happy with how it had gone. Once she saw the images she absolutely loved them.
As is my normal practice she chose the top ones that were shared online.
It was then that one female member of the Facebook group complained that the images were creepy and went onto suggest that they were typical of situations where a male photographer had enticed a female model to pose in next to nothing.
Other female posters did not see anything creepy in the images so her opinion was not wide spread.
Now with criticism like this sometime it is better to ignore it. However in this case I decided not to do that, as the poster was making some very wide assumptions that were frankly incorrect. Heaven was not enticed into the shoot, in fact she wanted to do it. She had also had full control over the poses (which had been discussed in advance) and she had chosen the selected images.
The only thing that the poster had correct was that I was a male photographer.
It is the sad fact that there are male photographers who do shoot nude/lingerie images simply as a way of seeing naked women. However not all of male photographers are like this, but to judge our work on that standard is just not right.
I believe that I got through to the poster, however rather than apologise for her mistake, she simply deleted the whole post.
My shoot with Heaven (that’s her real name) started with a post in a Facebook model group where models were being warned about a photographer who was advertising to pay for shoots but was then turning out really creepy and inappropriate.
Heaven is a 27 year old mother of three who had wanted some lingerie/nude shots taken of her and has been involved with the other photographer. Needless to say that she had not had a very good session and the photos quite frankly were crap.
I therefore offered to do a session for her. We met in a foodcourt and went over what she was looking for and the shoot was planned.
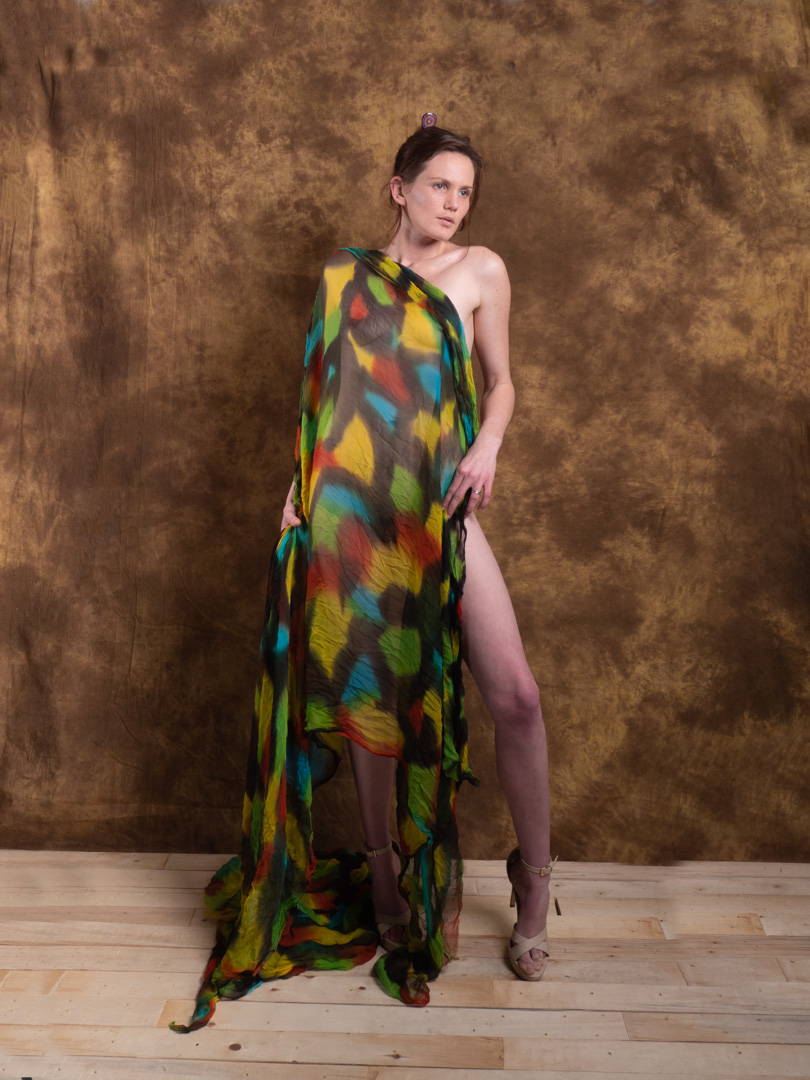
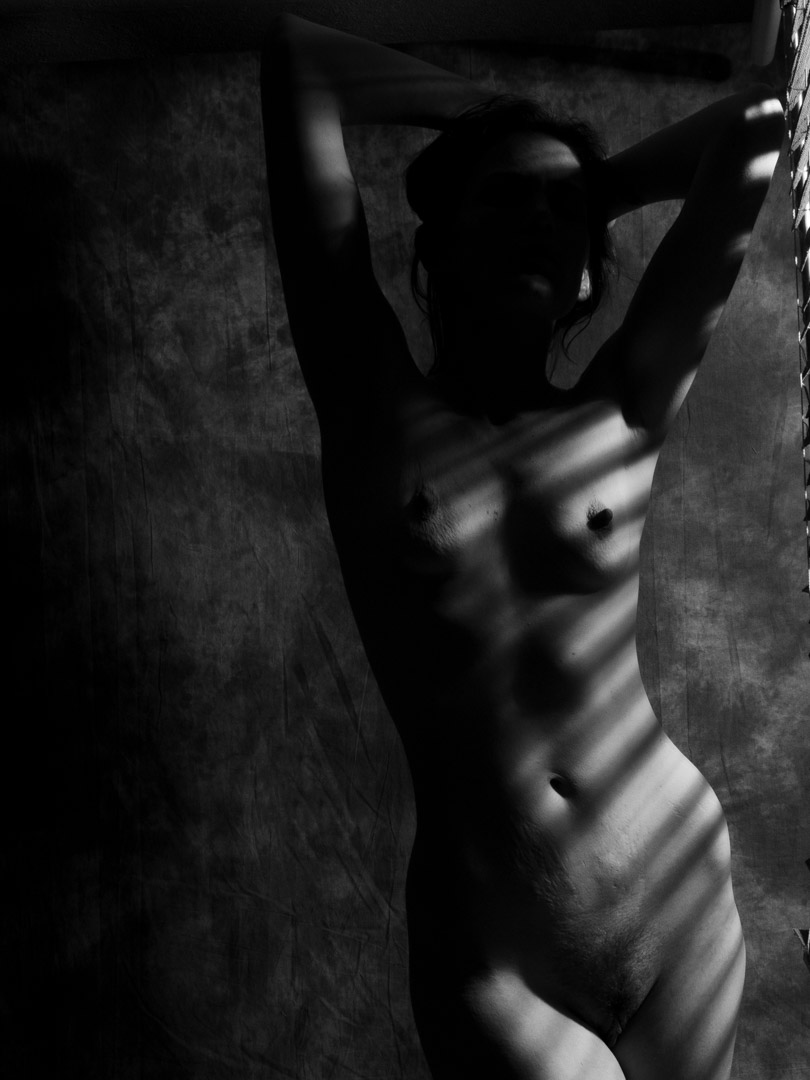
I generally like to ease new nude models into the shoot and the easiest way to do this is to start with sheer pieces of fabric. As it turned out Heaven was very confident with her body and we were able to move to nudes fairly quickly.
We then wanted to try a couple of different approaches so I set up a rod at a 90 degree angle to the backdrop, and from it suspended a venetian blind. I then positioned a bare bulb strobe on the other side of it which created nice hard shadows.
We then moved the rod around to in front of the backdrop and hung lace over it to create a window. To create a completely different look I used my lensbaby as this creates a very unique look.
For the final series of nude image we had discussed recreating the famous flower scene out of the movie “American Beauty”. This involved Heaven lying on a fur rug placed on the floor. Fake petals were then used to conceal.
For this shot the camera was placed on a boom arm above Heaven and fired using the Image App. This is a great setup for these types of vertical shots.
As it turned out I did not have enough petals and more were added in post.
While it may seen the wrong way round, Heaven then put on the lingerie that she had brought. We did it in that order to avoid the underwear causing lines on the body.
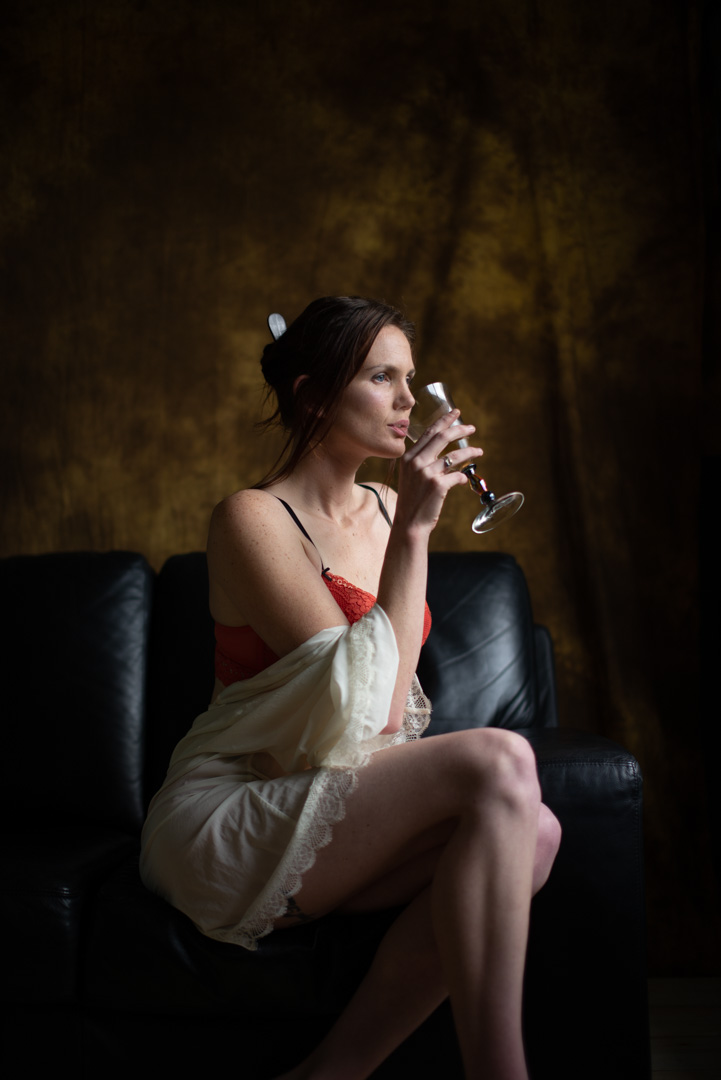
For the lingerie shots I decided to do something quite different. I had noticed that the light in the room was positioned like a Rembrandt style. So I put my 50mm f1.2 lens on and shot using natural light. I was really pleased with the results and so was Heaven.
When her favourites were posted online I did get a very interesting reaction, but that I will outline that in the next post.
Happy New Year everyone. For the first post in 2021 I thought I would something slightly different from previous posts and share with you some images from a trip taken to Christchurch in early September 2020. The reason for the trip was to attend a council meeting of the Photographic Society of New Zealand, and it occurred just after the country had come out of higher Covid restrictions following a second outbreak in Auckland.
Social distancing was still in place on a travel and so the seat beside me was empty. You also were required to wear a mask which fortunately arrived a couple of days before. Many people will already know how challenging it is to wear masks and this took a bit of getting used too. I took this selfie at the airport as I was about to board the plane.
All of the travel advice I had received was to arrive in plenty of time as not all checkin kiosks were in use. As it turned out I needn’t have bothered because the airport was fairly deserted.
Christchurch airport has a combined domestic and international terminal and is the main secondary international arrival point in the country. Most of the flights come into it from Asia so the airport is generally full of lots of different nationalities . With borders closed due to COVID-19 it was eerily quiet.
The way that New Zealand was keeping the virus out hit you right in the face as you left the terminal. The Sudima Hotel is one of the quarantine facilities that all people coming into the country have to spend 14 days. It was surrounded by high fences and groups of visitors were wandering around the exercise areas.
The meeting was not scheduled to start until the Saturday, however we have been requested to travel on the Friday, so they could start first thing in the morning. I decided to travel down on a morning flight so that I had time in the afternoon to go for a wander and have a look around the city.
Christchurch was extensively damaged in a series of earthquakes 10 years ago and the recovery has been very slow. I had not been down there for a couple of years so I was really interested to see how the development was coming along. The city is still full of empty spaces and quite a few have now been turned into parks with art pieces.
The building in the rear of the image is one of the few high rise building that actually survived in tact. While only two building collapsed (which accounted for most of the 185 killed) a significant number of others were damaged and therefore demolished. Newer building in the city all tend to be lower than the ones that they replaced.
Christchurch is a major tourist location and it was amazing to see the city so empty. Most noticeable was the absence of tour buses full of Asian tourist. That was having a major impact on the local economy so I found the sign below in a window rather amusing.
In the middle of the city is a rather unusual nature reserve. When one of the towers was removed a number of years ago the below level structure was left in place, and the basement filled with waters. Yellow beaked gulls (which are apparently endangered) decided that it would make a great breeding colony and set up nests amongst the tangled reinforcing steel.
I understand that the original plan was the allow the bird to nest for one year and then to cover the steel with mesh so that they did not return the next. Not sure what happened to that plan but the birds no regard it as their place, and it will be interesting to see the fight that any future developer is going to have when they want to rebuild.
As I mentioned above art as been springing up all over the city both in terms of sculptures but also in the form of art on buildings. Some of it is very impressive as this example shows. It is on the side of a building currently being used as a boutique movie theatre.
While there were a number of new buildings and retail complexes I was surprised at the number of empty sections and also buildings that still need to be demolished. On some nature had begun to reclaim them and i was amazed to find a tree growing out of a building two stories up an old building.
For the shot above and the one below I actually climbed around the security fencing to get a better angle.
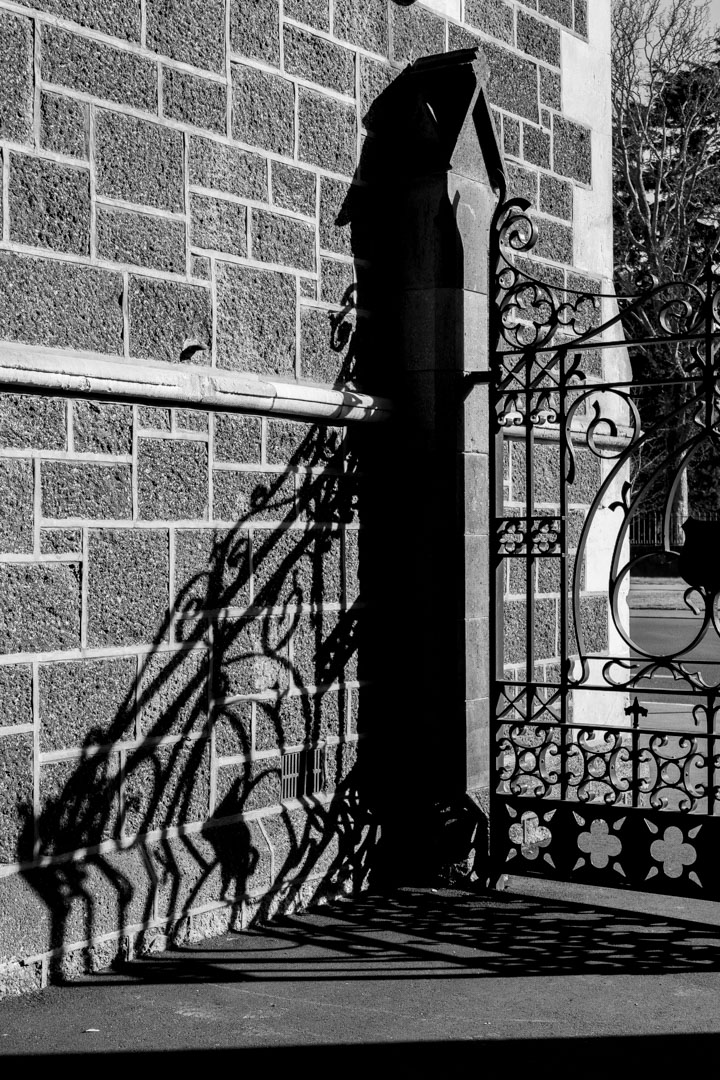
Just on the outskirts of the city centre is Hagley Park. I knew from seeing others photos that at the time of year it contained large areas of daffodils so I headed in that direction. I first went into the Art Centre and I loved the shadows created by the railings of one of the gates with the later afternoon light.
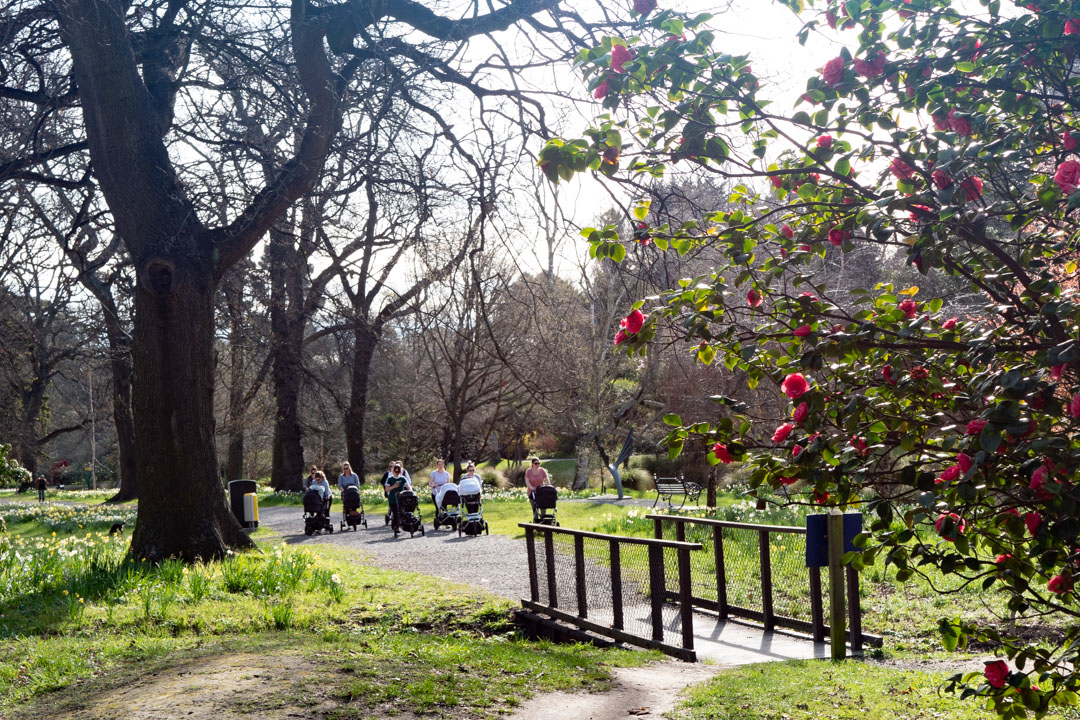
The daffodil fields were quite impressive and in fact none of my images really did them justice. I did, however, spot this group of young mums out on their afternoon stroll.
It was a great afternoon just ambling round and taking photos.
In previous posts I have told you how I went about planning for the Pisces shoot which would turn out to be the final shoot in the zodiac series. As it turned out while finding models of the Pisces was relatively easy, getting them to commit to a shoot day proved to more difficult.
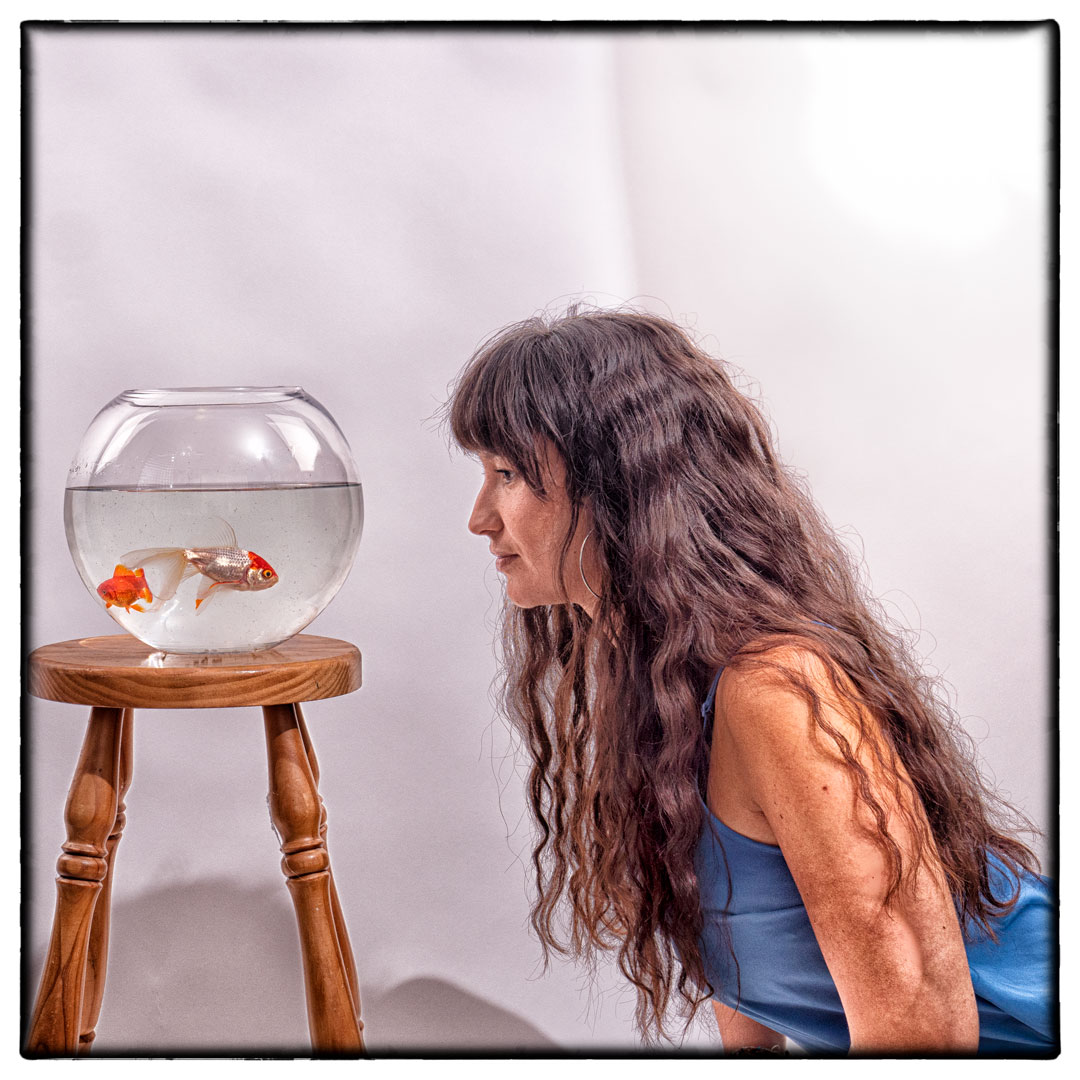
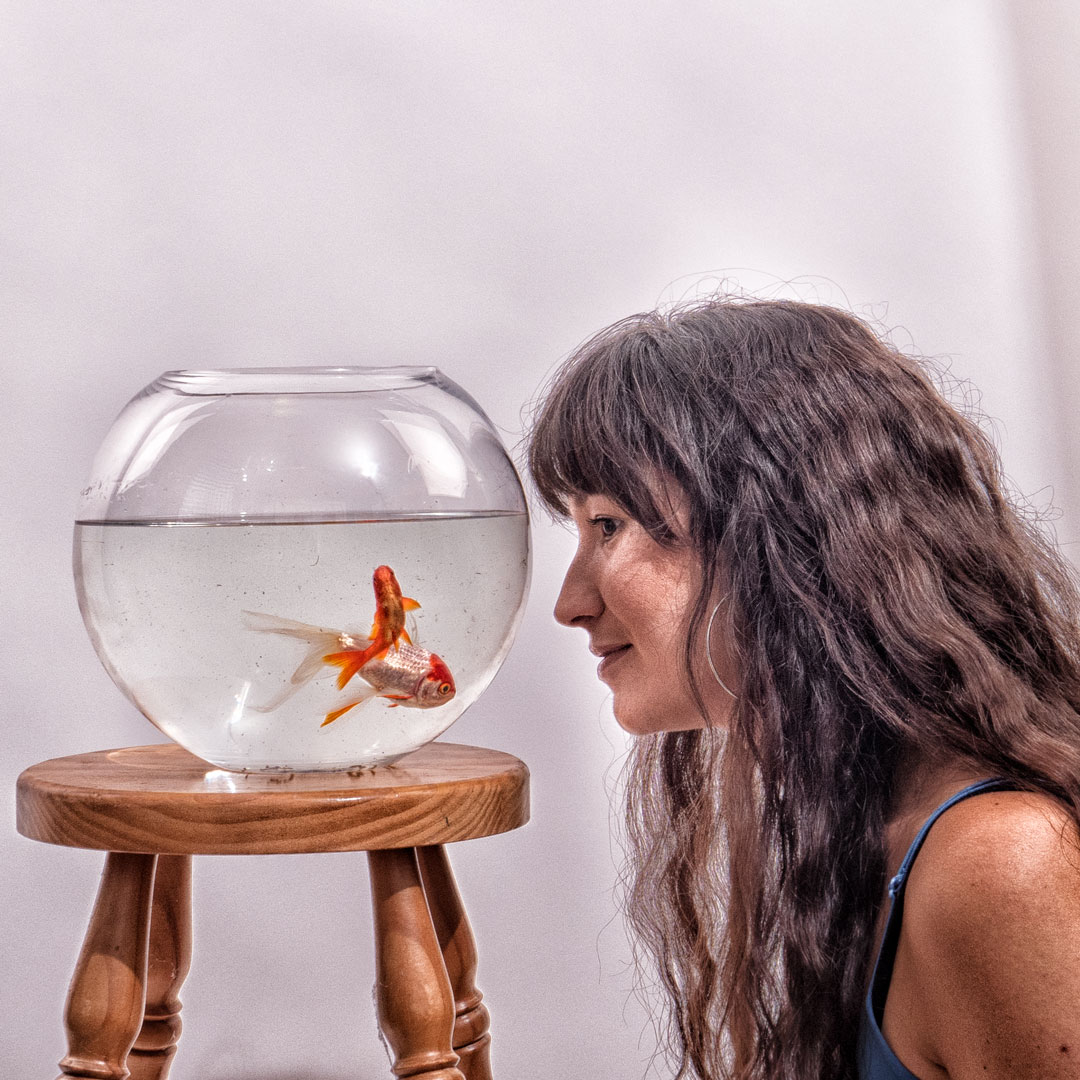
A month nearly past between the test shoot and when Marianne arrived to do the final one. In that time I had also managed to acquire a fishbowl that better resembled what I had envisaged.
The bowl was actually larger than the one that I had tested and therefore heavier. I therefore decided against getting Marianne to lift it even though that is what we have practised. The goldfish had also become better at avoiding me so I ended up not being able to catch the large gold one that I was after, and instead had to settle with a much smaller one.
In my test shots there were two lights aimed solely at the background. However when I started to shoot I realised that if I pulled them further away that the scene was much more evenly lit. To get light on the front of both the bowl and Marianne I positioned my strobe camera right with it being bare bulbed and pointed at the ceiling. Essentially this created a large light source above her.
Although the light positions did result in reflections in the glass I was not worried about that as it did add dimension to the image.
Although I knew fundamentally how this image would fit into the set I wanted to ensure that I had a variety of images with different focal lengths and angles.
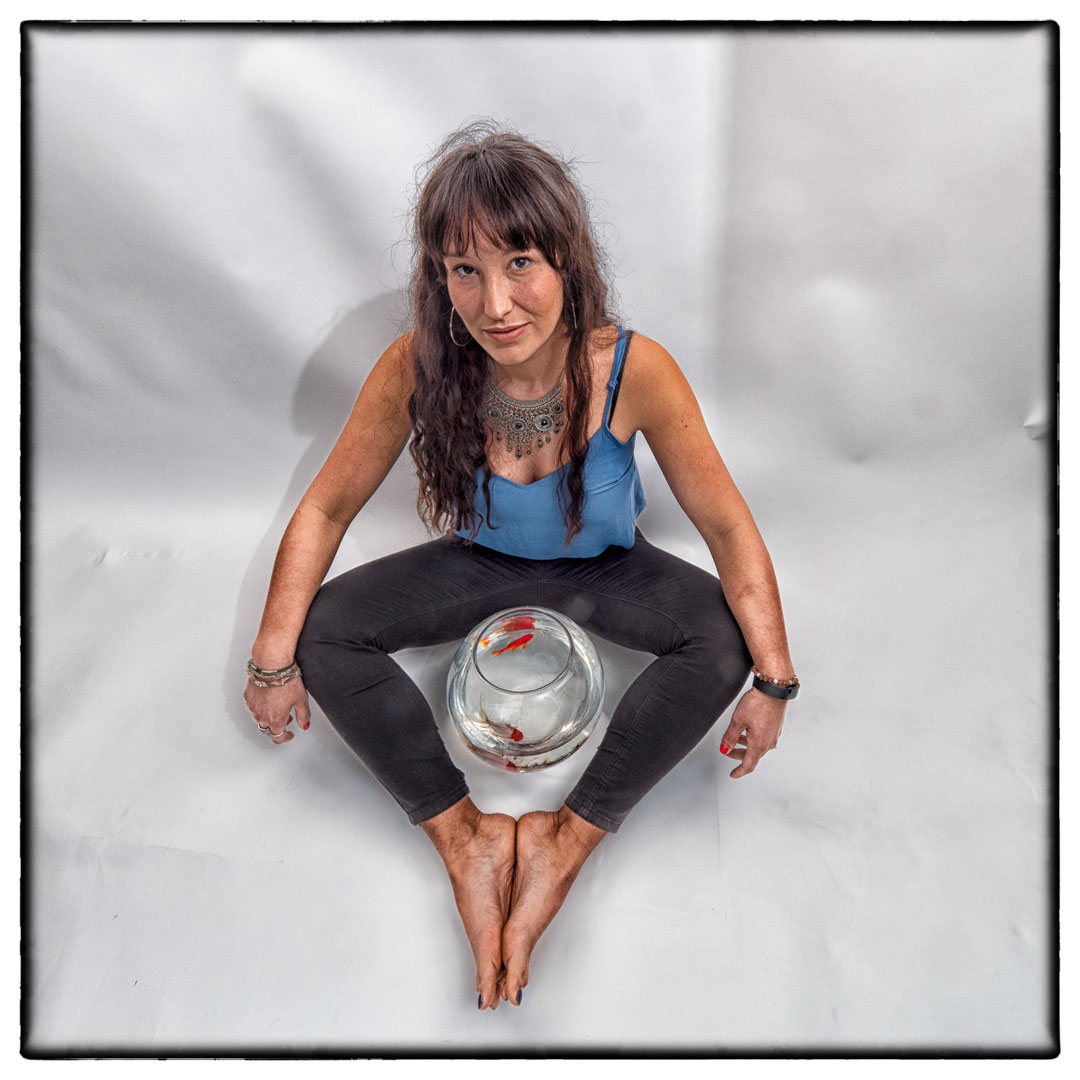
This included having Marianne holding the fish, as well as ones where she was sitting on the ground. Ultimately it was one of her lying on the ground that was selected to be the chosen image.
With Pisces finally shot I now had a complete set of the twelve signs, even though if I was to submit them both Cancer and Virgo needed to be reshot to fit with how the set was now looking.
The level that I am going for the Photographic Society of New Zealand honours has a very low success rate and part of that is the Honours Board’s desire to see a level of diversity in the images submitted. I started to think that the set was not diverse enough and this was confirmed when I took it to one of the members of the board who had just stepped down.
While it did not end up being a submitted set, the process of shooting the twelve image was very enjoyable and worthwhile.
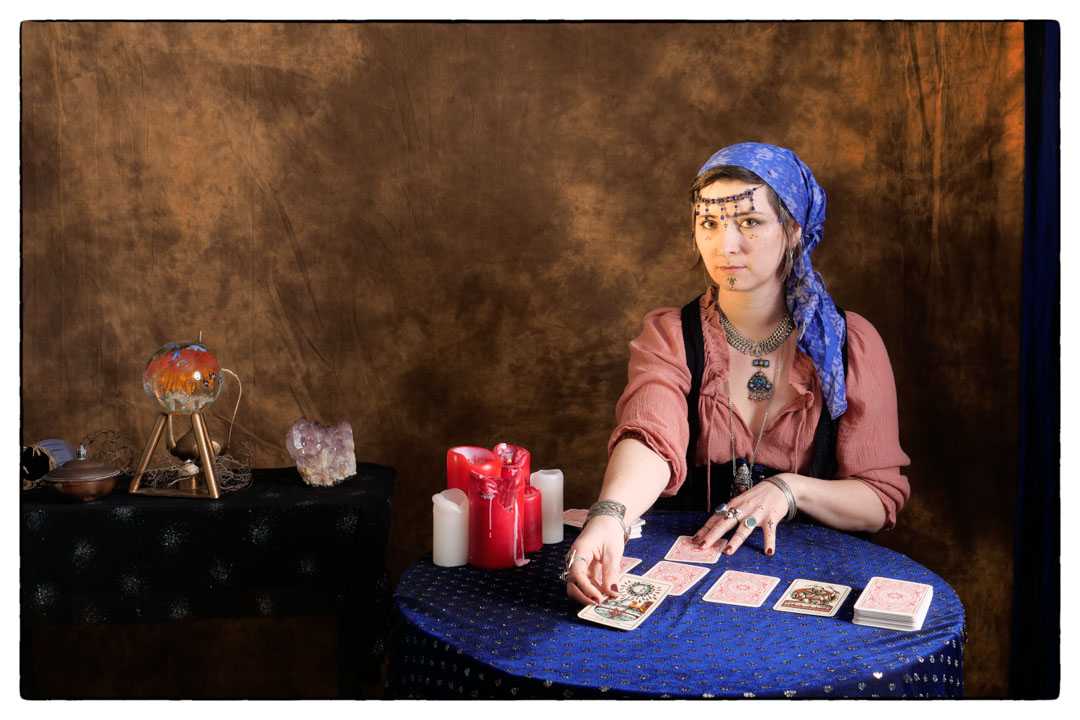
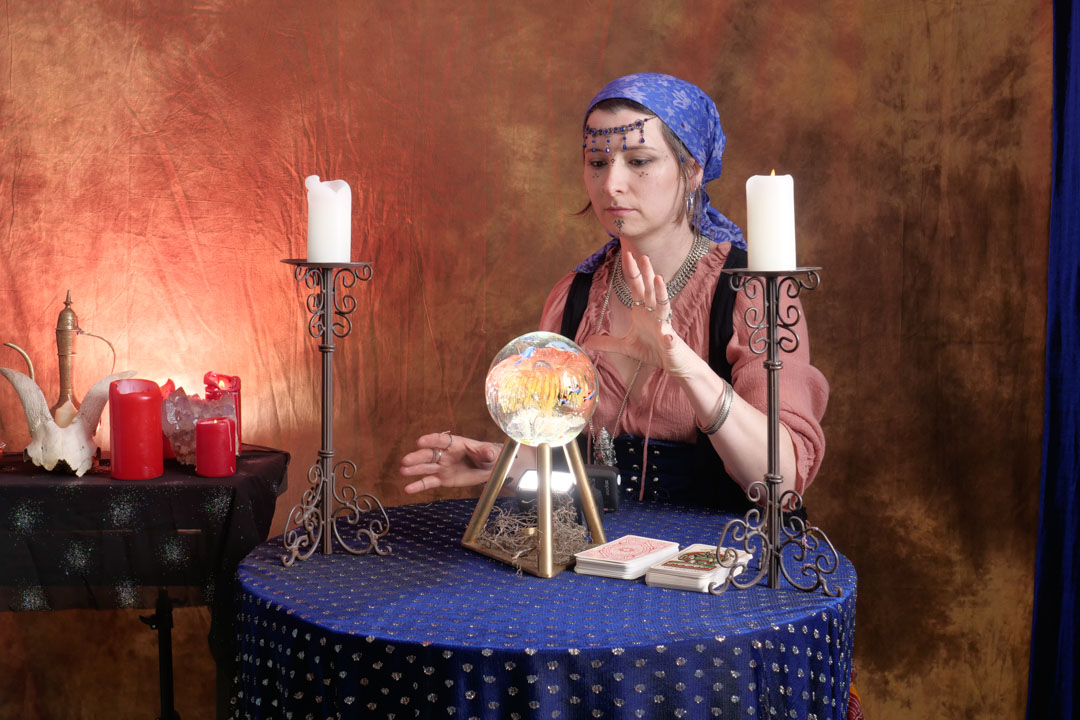
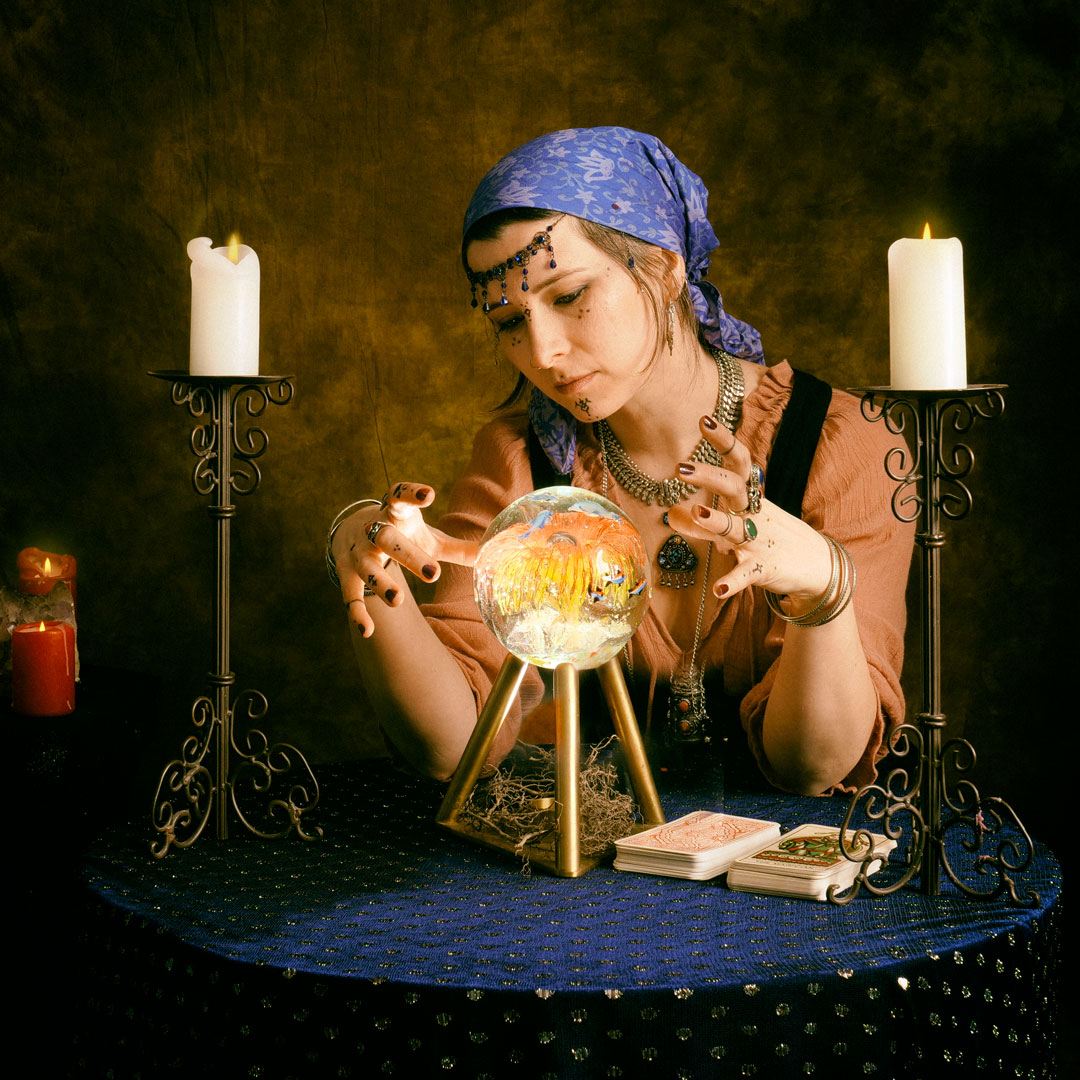
Generally speaking if I go to the effort to build a set and arrange a model, I will try to get more than one look out of the shoot. So when Neena came out for the Fortune Teller we decided to not only do a series with the crystal ball, but also ones with tarot cards. These I had borrowed from my daughter.
The lighting for the shoot was very similar to the first part, with the large octobox providing Rembrant lighting.
The difference with these sets of images was that I was free to move around and try different angles rather than being locked onto the tripod.
I have placed quite a number of candles on the table and so to replicate a glow that would come from them I positioned a gridded speed light that was gelled orange on the floor on a very low power and aimed at Neena’s face.
Although a lot of the candles were that there is very little light actually coming from them. I now realise that I should have added some flame in post.
I made one really big mistake with this shoot, and tat was not checking my camera setting properly before starting. For some reason the camera was set to JPG and not RAW so the amount of adjustments I would do in post was considerable less than what I would have normally done.
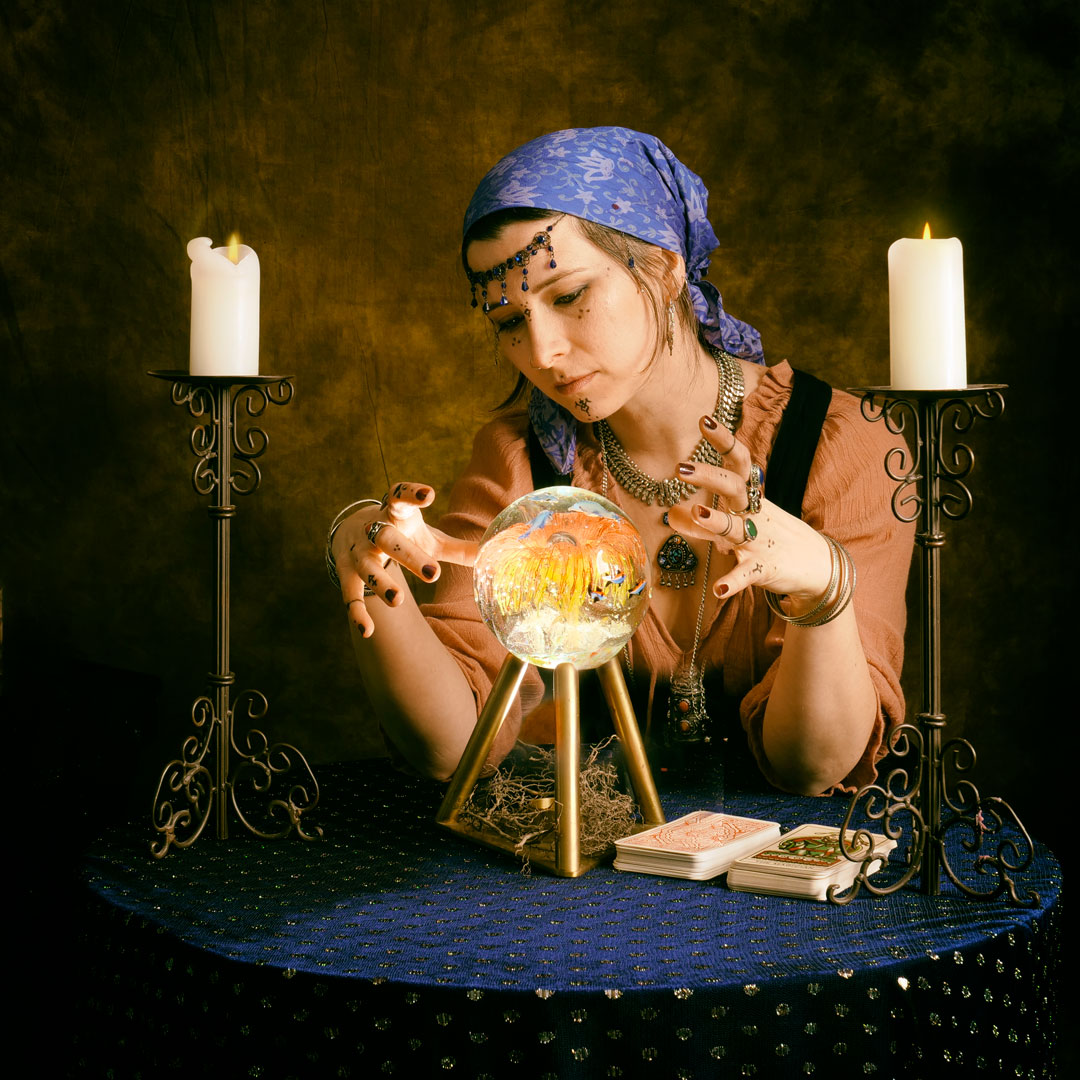
One of the topics in the 2020 Wellington interclub print competition was “illusion”. When I started to think about it the notion of a fortune teller came to mind especially one using a crystal ball.
Neena is a fashion/costume designer who I had met through the Fashion Collective. When I took part in the shot at Staglands in 2019, Neena had arrived in a gypsy style outfit which was exactly the look I was going for. So I reached out to her to see if she would recreate it for me. She agreed and we set up a date for the shoot.
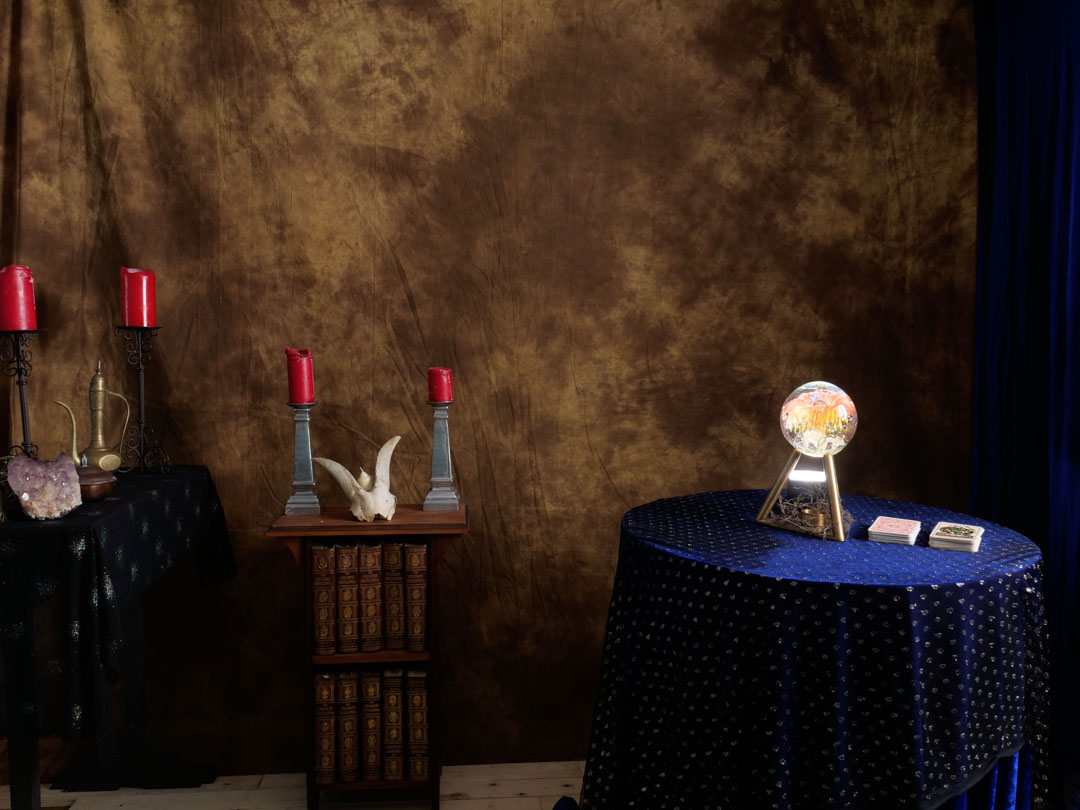
I built a set in my studio so that we could cover any angles that I wanted.
I had decided to use a simple Rembrandt lighting for the main character. The studio is not wide enough to do this effectively however the room has a window in the right location. So i simply fitted a large October to my strobe and shot in from outside.
In addition to the main light I wanted the crystal ball to be omitting light and therefore I decided to position a speed light below it.
I wanted to have a circular table, which we didn’t have so I cut a sheet of plywood into a circle. This then let me drill some holes in the middle under which I then placed to lengths of timber below so that the speed light could fit between them.
I tested this will the stand I had for the ball and it seemed to work okay, although it was not as strong as I would have liked. The advantage of having the light hidden would have been that I could have produced the images in a single take and not had to composite anything.
As it turned out when Neena arrived she had a brass stand with her that looked perfect. The only problem was that the triangular base was solid. This mean that the light had to be positioned on the table rather than below it.
When I am working with multiple lights I always introduce them in the scene one at a time.
I then brought in the main light and played around with the staging of the set.
While originally there was quite a lot of items in the background I decided to simplify them as I would be coming in much tighter on my main character.
To get some extra impact from the candles on the rear table, I positioned another speedlight behind them which was gelled orange.
It was then a matter of taking a series of images with the light on the table aimed at the ball, and then a series where the speed light was removed.
Then in Photoshop the two images were brought together and the speedlight was masked out. Although the candles were lit the glow from them was a little dull so i gave it a little boost.
I then went into Nik software and added a old film simulation to it.
I was quite happy with the results but when I showed the image to some other people, the comment came back that the red candles on the right of the image were distracting. So in the final version they have been removed.
As it turned out it did not get selected for the category but I have no regrets as it was a fun shoot.