Category Archives: Models

reaction to shoot with Heaven (NSFW)

This is a somewhat unusual post, in that it is not about a photographic session that was run, but rather the reaction that occurred when the images were posted on Facebook. So in someways it is a little bit of a rant.

In my last post I shared the story of the shoot with Heaven and particularly the background as to how I came about shooting her. The session went really well, and she was very happy with how it had gone. Once she saw the images she absolutely loved them.

As is my normal practice she chose the top ones that were shared online.

It was then that one female member of the Facebook group complained that the images were creepy and went onto suggest that they were typical of situations where a male photographer had enticed a female model to pose in next to nothing.

Other female posters did not see anything creepy in the images so her opinion was not wide spread.

Now with criticism like this sometime it is better to ignore it. However in this case I decided not to do that, as the poster was making some very wide assumptions that were frankly incorrect. Heaven was not enticed into the shoot, in fact she wanted to do it. She had also had full control over the poses (which had been discussed in advance) and she had chosen the selected images.

The only thing that the poster had correct was that I was a male photographer.

It is the sad fact that there are male photographers who do shoot nude/lingerie images simply as a way of seeing naked women. However not all of male photographers are like this, but to judge our work on that standard is just not right.

I believe that I got through to the poster, however rather than apologise for her mistake, she simply deleted the whole post.

shoot with Heaven (NSFW)

My shoot with Heaven (that’s her real name) started with a post in a Facebook model group where models were being warned about a photographer who was advertising to pay for shoots but was then turning out really creepy and inappropriate.

Heaven is a 27 year old mother of three who had wanted some lingerie/nude shots taken of her and has been involved with the other photographer. Needless to say that she had not had a very good session and the photos quite frankly were crap.

I therefore offered to do a session for her. We met in a foodcourt and went over what she was looking for and the shoot was planned.

I generally like to ease new nude models into the shoot and the easiest way to do this is to start with sheer pieces of fabric. As it turned out Heaven was very confident with her body and we were able to move to nudes fairly quickly.

We then wanted to try a couple of different approaches so I set up a rod at a 90 degree angle to the backdrop, and from it suspended a venetian blind. I then positioned a bare bulb strobe on the other side of it which created nice hard shadows.

We then moved the rod around to in front of the backdrop and hung lace over it to create a window. To create a completely different look I used my lensbaby as this creates a very unique look.

For the final series of nude image we had discussed recreating the famous flower scene out of the movie “American Beauty”. This involved Heaven lying on a fur rug placed on the floor. Fake petals were then used to conceal.

For this shot the camera was placed on a boom arm above Heaven and fired using the Image App. This is a great setup for these types of vertical shots.

As it turned out I did not have enough petals and more were added in post.

While it may seen the wrong way round, Heaven then put on the lingerie that she had brought. We did it in that order to avoid the underwear causing lines on the body.

For the lingerie shots I decided to do something quite different. I had noticed that the light in the room was positioned like a Rembrandt style. So I put my 50mm f1.2 lens on and shot using natural light. I was really pleased with the results and so was Heaven.

When her favourites were posted online I did get a very interesting reaction, but that I will outline that in the next post.

Zodiac series – Pisces final shoot

In previous posts I have told you how I went about planning for the Pisces shoot which would turn out to be the final shoot in the zodiac series. As it turned out while finding models of the Pisces was relatively easy, getting them to commit to a shoot day proved to more difficult.

A month nearly past between the test shoot and when Marianne arrived to do the final one. In that time I had also managed to acquire a fishbowl that better resembled what I had envisaged.

The bowl was actually larger than the one that I had tested and therefore heavier. I therefore decided against getting Marianne to lift it even though that is what we have practised. The goldfish had also become better at avoiding me so I ended up not being able to catch the large gold one that I was after, and instead had to settle with a much smaller one.

In my test shots there were two lights aimed solely at the background. However when I started to shoot I realised that if I pulled them further away that the scene was much more evenly lit. To get light on the front of both the bowl and Marianne I positioned my strobe camera right with it being bare bulbed and pointed at the ceiling. Essentially this created a large light source above her.

Although the light positions did result in reflections in the glass I was not worried about that as it did add dimension to the image.

Although I knew fundamentally how this image would fit into the set I wanted to ensure that I had a variety of images with different focal lengths and angles.

This included having Marianne holding the fish, as well as ones where she was sitting on the ground. Ultimately it was one of her lying on the ground that was selected to be the chosen image.

With Pisces finally shot I now had a complete set of the twelve signs, even though if I was to submit them both Cancer and Virgo needed to be reshot to fit with how the set was now looking.

The level that I am going for the Photographic Society of New Zealand honours has a very low success rate and part of that is the Honours Board’s desire to see a level of diversity in the images submitted. I started to think that the set was not diverse enough and this was confirmed when I took it to one of the members of the board who had just stepped down.

While it did not end up being a submitted set, the process of shooting the twelve image was very enjoyable and worthwhile.

The Tarot Reader

Generally speaking if I go to the effort to build a set and arrange a model, I will try to get more than one look out of the shoot. So when Neena came out for the Fortune Teller we decided to not only do a series with the crystal ball, but also ones with tarot cards. These I had borrowed from my daughter.

The lighting for the shoot was very similar to the first part, with the large octobox providing Rembrant lighting.

The difference with these sets of images was that I was free to move around and try different angles rather than being locked onto the tripod.

I have placed quite a number of candles on the table and so to replicate a glow that would come from them I positioned a gridded speed light that was gelled orange on the floor on a very low power and aimed at Neena’s face.

Although a lot of the candles were that there is very little light actually coming from them. I now realise that I should have added some flame in post.

I made one really big mistake with this shoot, and tat was not checking my camera setting properly before starting. For some reason the camera was set to JPG and not RAW so the amount of adjustments I would do in post was considerable less than what I would have normally done.

The Fortune Teller

One of the topics in the 2020 Wellington interclub print competition was “illusion”. When I started to think about it the notion of a fortune teller came to mind especially one using a crystal ball.

Neena is a fashion/costume designer who I had met through the Fashion Collective. When I took part in the shot at Staglands in 2019, Neena had arrived in a gypsy style outfit which was exactly the look I was going for. So I reached out to her to see if she would recreate it for me. She agreed and we set up a date for the shoot.

I built a set in my studio so that we could cover any angles that I wanted.

I had decided to use a simple Rembrandt lighting for the main character. The studio is not wide enough to do this effectively however the room has a window in the right location. So i simply fitted a large October to my strobe and shot in from outside.

In addition to the main light I wanted the crystal ball to be omitting light and therefore I decided to position a speed light below it.

I wanted to have a circular table, which we didn’t have so I cut a sheet of plywood into a circle. This then let me drill some holes in the middle under which I then placed to lengths of timber below so that the speed light could fit between them.

I tested this will the stand I had for the ball and it seemed to work okay, although it was not as strong as I would have liked. The advantage of having the light hidden would have been that I could have produced the images in a single take and not had to composite anything.

As it turned out when Neena arrived she had a brass stand with her that looked perfect. The only problem was that the triangular base was solid. This mean that the light had to be positioned on the table rather than below it.

When I am working with multiple lights I always introduce them in the scene one at a time.

I then brought in the main light and played around with the staging of the set.

While originally there was quite a lot of items in the background I decided to simplify them as I would be coming in much tighter on my main character.

To get some extra impact from the candles on the rear table, I positioned another speedlight behind them which was gelled orange.

It was then a matter of taking a series of images with the light on the table aimed at the ball, and then a series where the speed light was removed.

Then in Photoshop the two images were brought together and the speedlight was masked out. Although the candles were lit the glow from them was a little dull so i gave it a little boost.

I then went into Nik software and added a old film simulation to it.

I was quite happy with the results but when I showed the image to some other people, the comment came back that the red candles on the right of the image were distracting. So in the final version they have been removed.

As it turned out it did not get selected for the category but I have no regrets as it was a fun shoot.

Zodiac series – Pisces Test shoot

In a previous post I told you how I realised that I had an image that could work for Pisces, and that post centered around embellishing the image.

However as the set developed it became obvious that the image didn’t fit in with the others and that I needed to reshoot it. I therefore decided that I would have a model holding a bowl containing the fish.

My wife found a rather elaborate bowl and when she brought it home I decided to see how we would go about lighting it.

Shooting very reflective surfaces aways presents a challenge especially when you want to avoid the lights appearing in the image. When the surface is flat you can work out the angle of refraction and position the camera or light in such a way that it does not come into the lens. When the surface is curved it becomes a lot more difficult.

As I didn’t want to be mucking around when the model was there I set out to try various lighting patterns and see how they would work. I managed to get my wife to assist me which was a very rare occurrence.

My initial thought was to use the largest possible light source that I could so I put up the seven foot umbrella and boomed it out over top.

While this sort of worked, you could clearly see the inside of the umbrella shape in the glass, which was more dominant when the post process treatment was run over it. This arrangement was clearly not going to work.

Then later in the evening I had an idea and headed into the studio to try it out. By this stage I could not convince my wife to help so it was up to me with the camera on a tripod and a self timer. To ensure that I was going to the same position each time I placed a stool on the set. The glass bowl was placed on the stool and I lifted straight up from it.

I took the umbrella off and replaced with a speedlight in a gridded reflector aiming straight down into the glass. I initially tried it with just the single light and was reasonable happy that there was no reflection on the glass.

I then brought in two soft boxes to light the background. While this produced a good look I felt that there was not enough light on me.

To solve that problem I brought in another light in a gridded softbox and aimed it directly at me making sure that is did not fall on the glass.

The background light did catch in the edge of the bowl but I decided that I was ok with that as it added dimension to the image.

It was no time to find my new Pisces model, which turned out to be more difficult that I thought it would.

Zodiac series – Aquarius

Aquarius is a somewhat unusual Starsign and that it is normally depicted as the water carrier despite the fact that it is one of the air signs along with Gemini and Libra.

As I have simplified the backgrounds significantly it made perfect sense to shoot it as most people would visualise it. I had purchased the dress for the shoot over 12 months before when I saw it on thrift shop and instantly said it fitted Aquarius. I actually used it in the Cancer shoot as well however I changed the colours of it slightly in post.

When I started casting two years ago Manuella approached me to take part of Aquarius so it was natural that I reached out for her again. The only uncertainly was whether the dress would fit. Fortunately, she does not live too far from me so I called around and as it turned out the dress fitting perfectly.

The final piece to the image was the water pitcher that I found in a thrift shop in Petone.

We tried various shots of Manuella holding the bottle but I was also determined to get a shot of water pouring out of it. I wanted to ensure that we would make as little mess as possible so the floor was covered with a tarpaulin and then I placed a towel across the top of a large tub. This meant that she had a large area to pour into and the towel would present any splashes.

I knew that the lighting would freeze the water and that is exactly what it did.

The lighting for the shoot was the same as for both Aries & Capricorn. The Westcott Seven foot umbrella to Manuella’s side and a small softbox lighting the background on the other side.

The shoot ran very smoothly and we got a series of looks to work on very quickly. Each was then taken through the Photoshop recipe to see which one I like. In the end I flipped the image to make the final one for the set as it was felt that the direction better worked in its position.

Zodiac series – Capricorn

As I mentioned in my previous post finding male models for subjects is a lot harder than female models. Therefore I was delighted when Slaine approached me to be part of the Zodiac series has Capricorn.

By the time we arranged the shoot, I settled on simple backgrounds for all of the zodiac elements. In the order of the Zodiac, Capricorn is one of the earth elements along with Taurus, so it made sense to have it consistent with the way that Taurus had been shot.

AriesTaurusGeminiCancer
LeoVirgoLibraScorpio
SagittariusCapricornAquariusPisces

On the trip to Glenburn station earlier in the year I had found a goat skull on the beach and had brought it home to use. It did have a number of sharp edges on the underside so prior to the shoot I had smoothed them off.

Slaine is an actor so it was a simple matter of handing him the prop, and letting him go.

I really enjoy this sort of free flow photography as it produces quite dramatic images. It also meant that Slaine could use the images in his acting portfolio.

We then attached some foam to the bottom of the skull and using bands attached it to Slaine’s head. This enabled us to create a shot very similar to the Taurus on.

I ran this one through the full post process to see what it will look at. The backdrop was not extended onto the floor and the detail enhancer in the post process picked up all of the creases in it. You will see from the original image below that they are not all that prominent.

The lighting for the shoot was very simple with the Westcott Seven foot umbrella to Slaine’s side and a small softbox lighting the background on the other side. This is same lighting as used in the Aries shoot however the camera angle was different.

With a clear idea, and an able model, this was a very simple and quick shoot, which produced exactly what I wanted. In the end I decided to go with the image of Slaine holding the skull, as it added a variety to the set. It also reminded me of the “poor Yorick” scene from William Shakespeares Hamlet.

Zodiac series – Aries

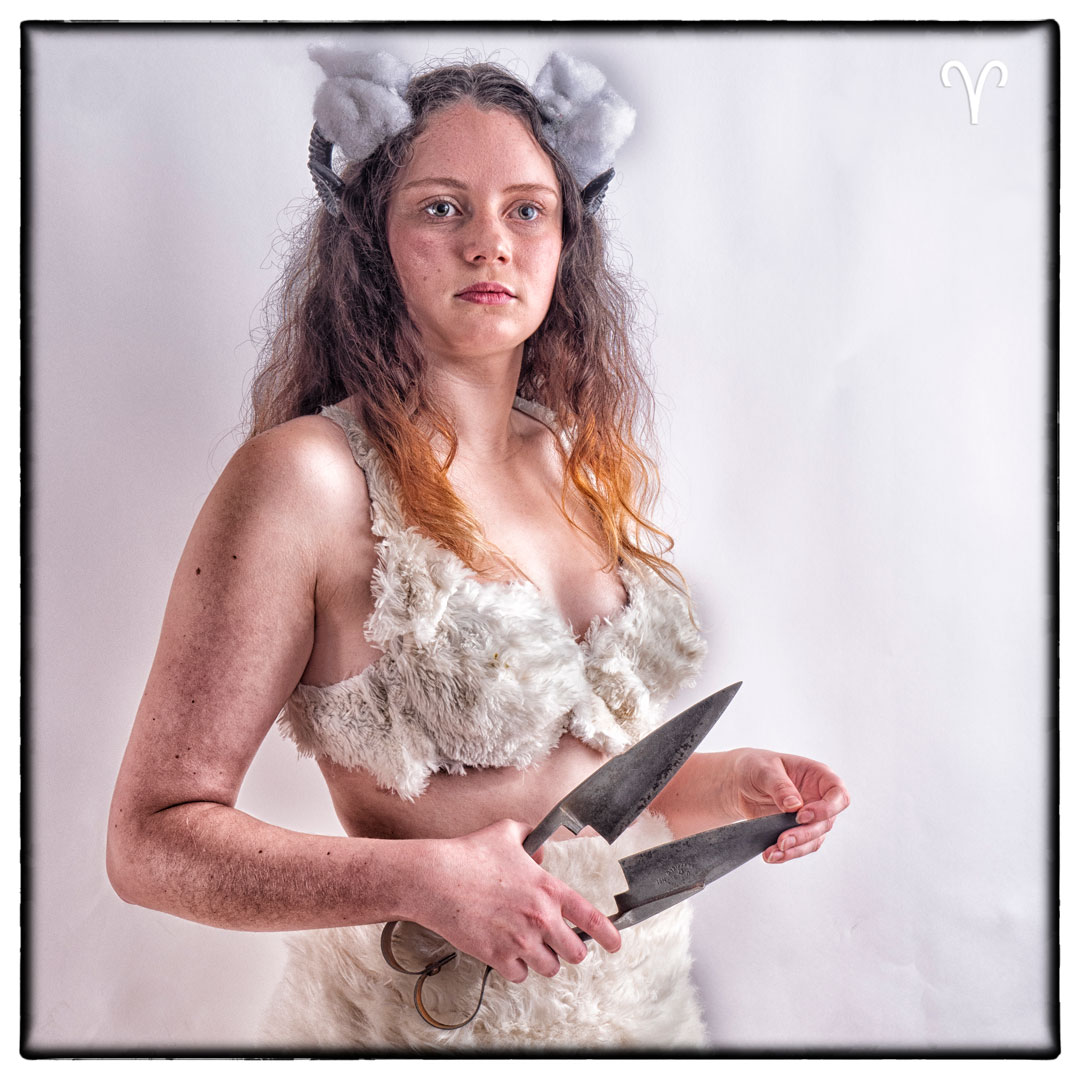
Aries is a sign of the ram so would’ve been more logical to have shot it with a male model. In fact that was my original concept. Unfortunately finding male models with the right Starsign is not the easiest thing to do. Therefore when Nikita, who I have shot before, told me she was here as we booked her for the shoot.

I had a pretty clear idea for the shoot for a very long time. I wanted to model shearing hershelf in the shearing shed. I actually found the perfect location in March 2018 when my wife and I were going through an arts trail in the Wairarapa. One of the stops was on the farm and you were invited to walk around it. At the back was a perfect shearing shed.

The artist had photos in their collection so we got talking and I asked if I could use the location. That was agreed and all I had to do was get a time and model.

Unfortunately by the time I did get around to doing the shoot they had sold the farm and as I had no connection with the new owners I decided to shoot in the studio and composites the image.

I then set about making a costume. I had purchased a set of small horns online, but needed to change the red flowers on them to white wool.

In a thrift shop I found a free white teddy bear and an old pillow. The teddy bear was taken apart and then glued in sections to an old bra. I bought a length of white for to make the skirt. This was simply held together with clips at the back.

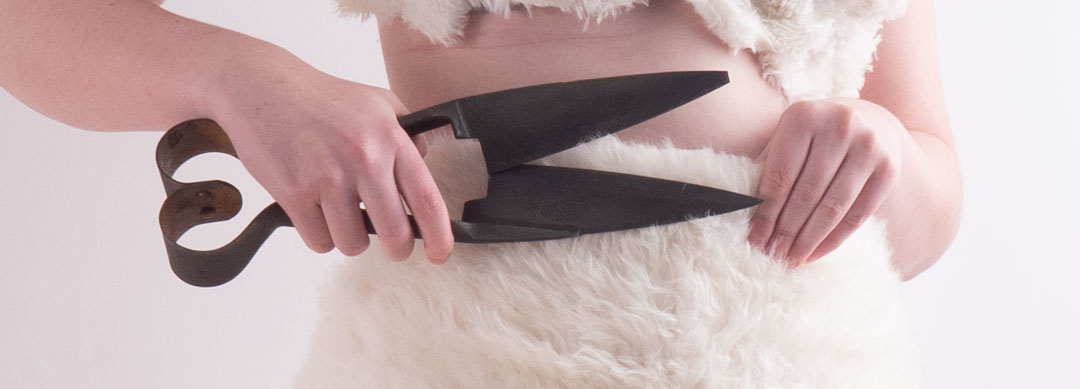
I wanted to use real old style shears so I posted online to see whether anybody had some that I could borrow. Fortunately a friend said they did have a set but they were quite old as they belonged to his wife’s father.

When they arrived they were perfect but he was quite correct that they were totally covered in rust, having spent many years in the shed. Google is a great tool as I quickly learned that soaking them in vinegar for 24 hours would lift the rust.

I did just that and they came out looking really good. A final wipe with vegetable oil brought them back to almost new. The only issue was that one of the tips was broken off but I figured that I could deal with us either with the way Nikita was holding them or I would simply recreated post.

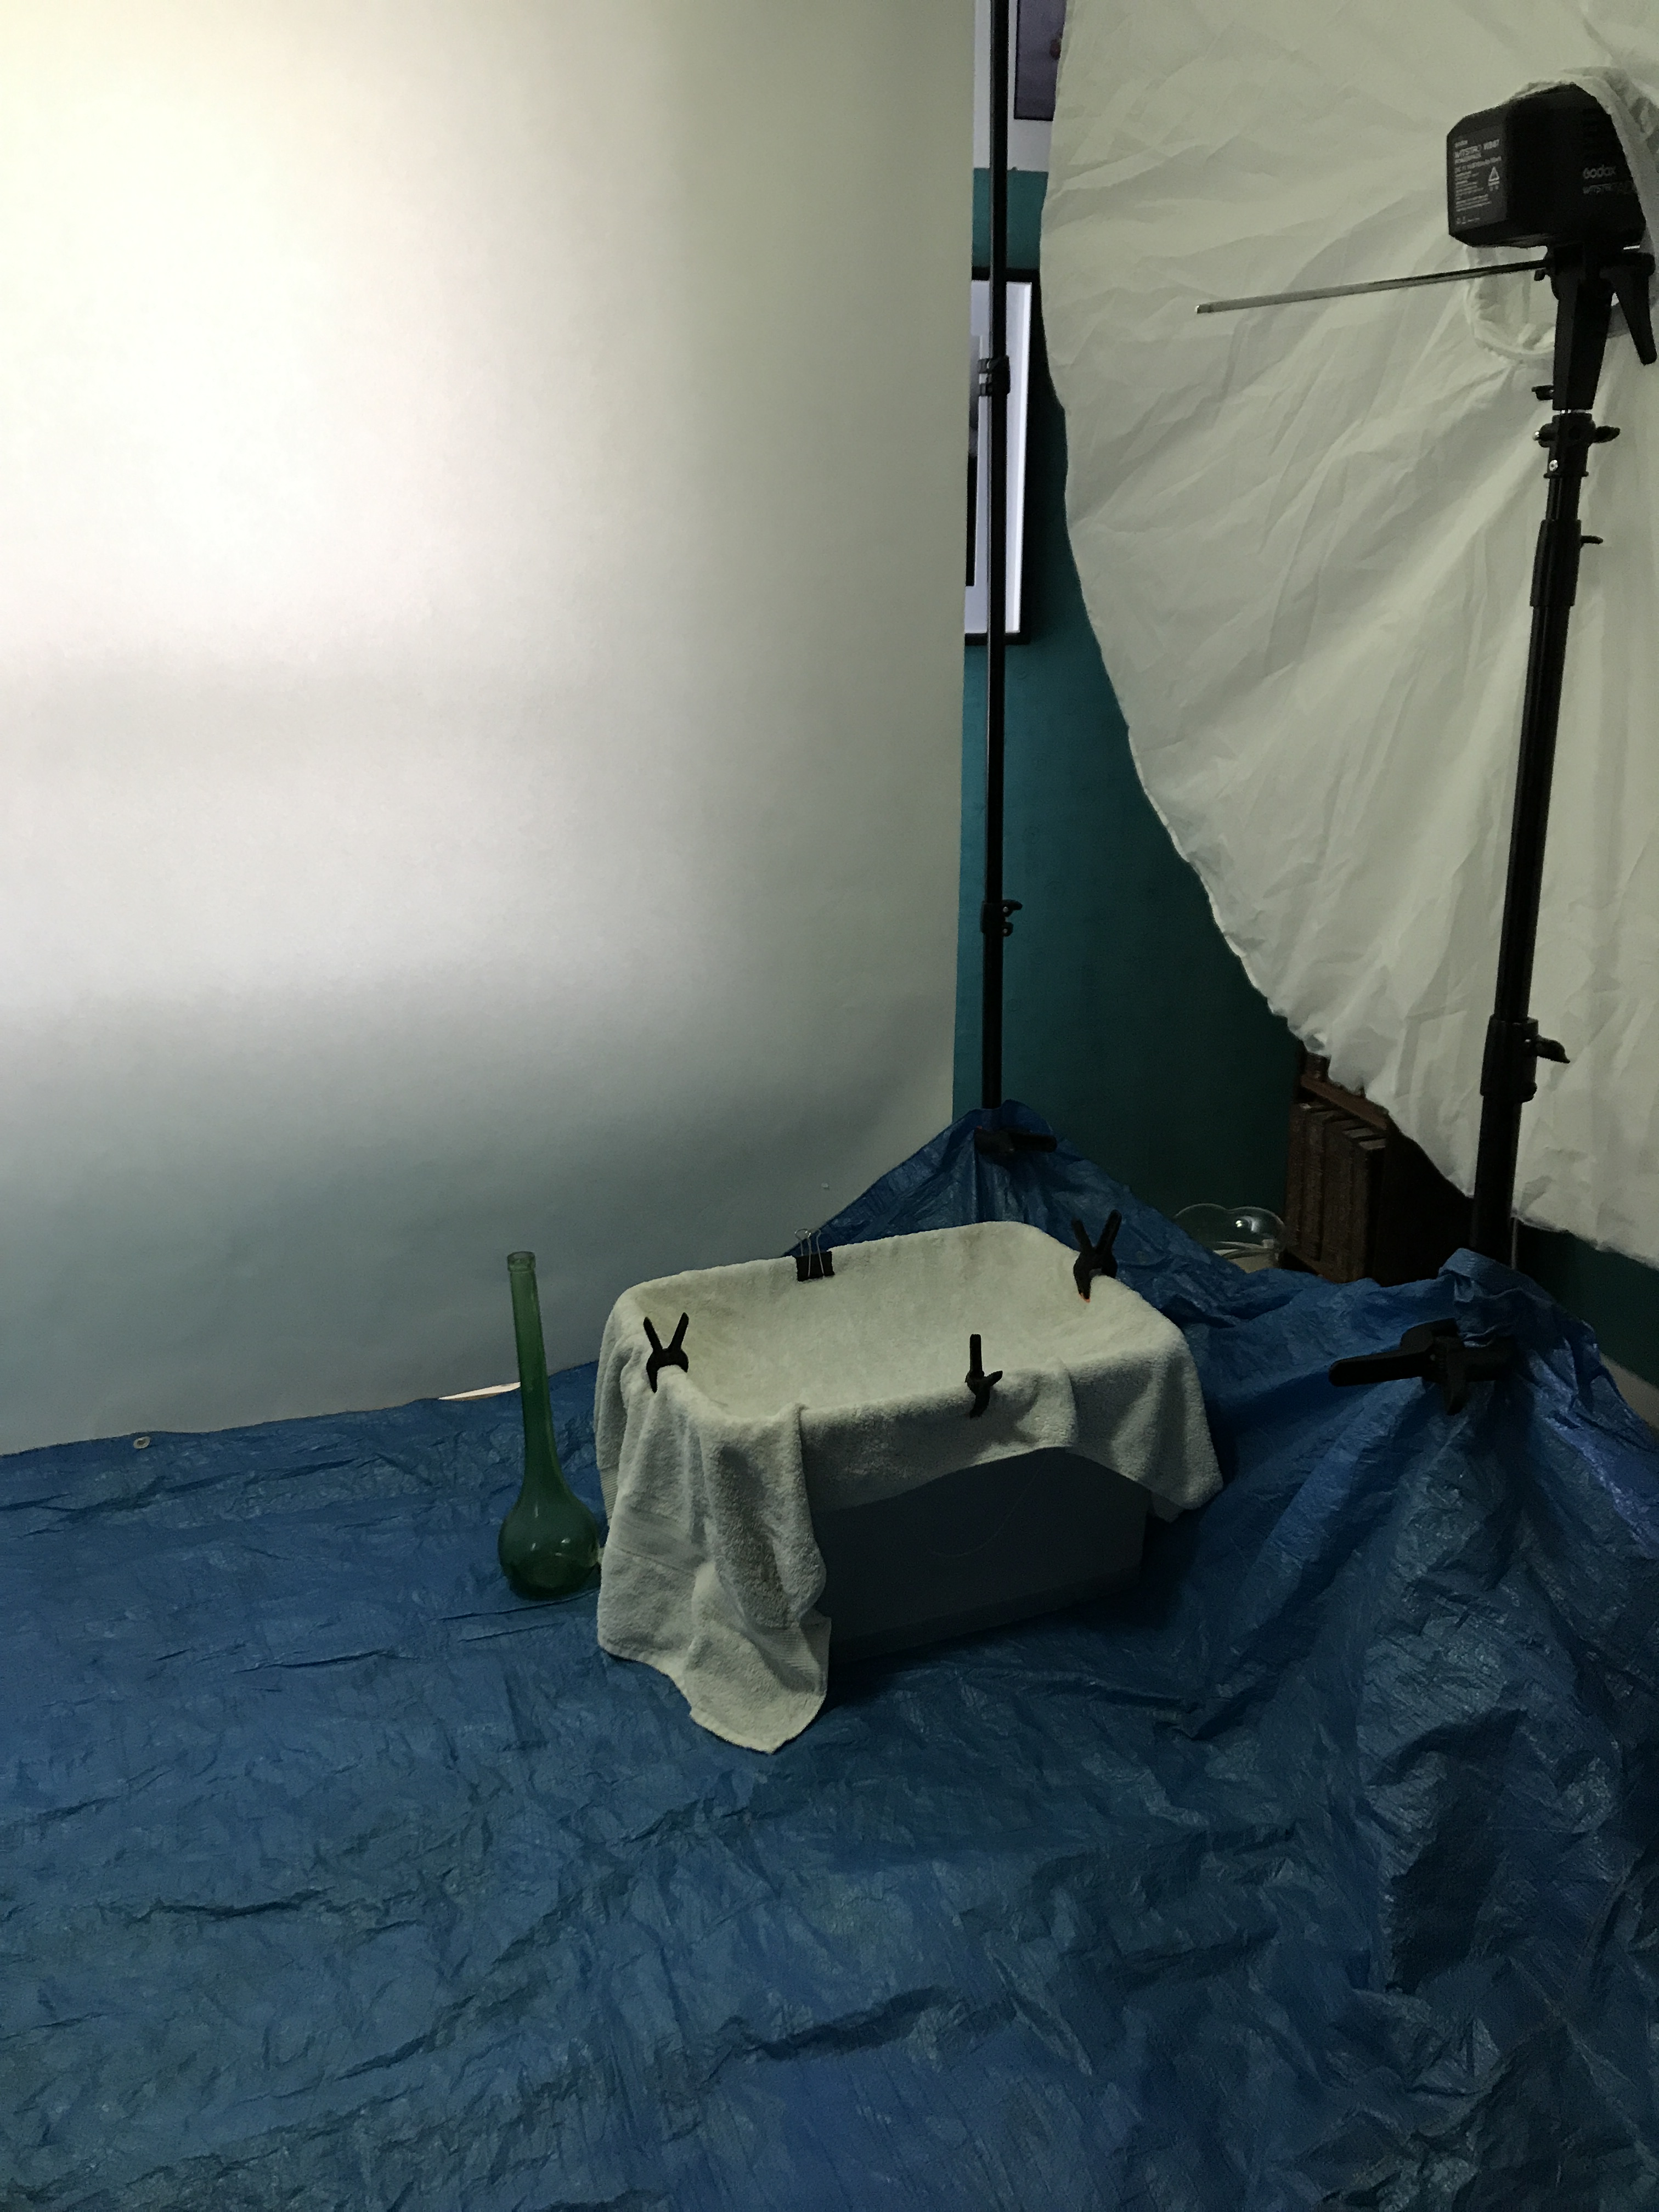
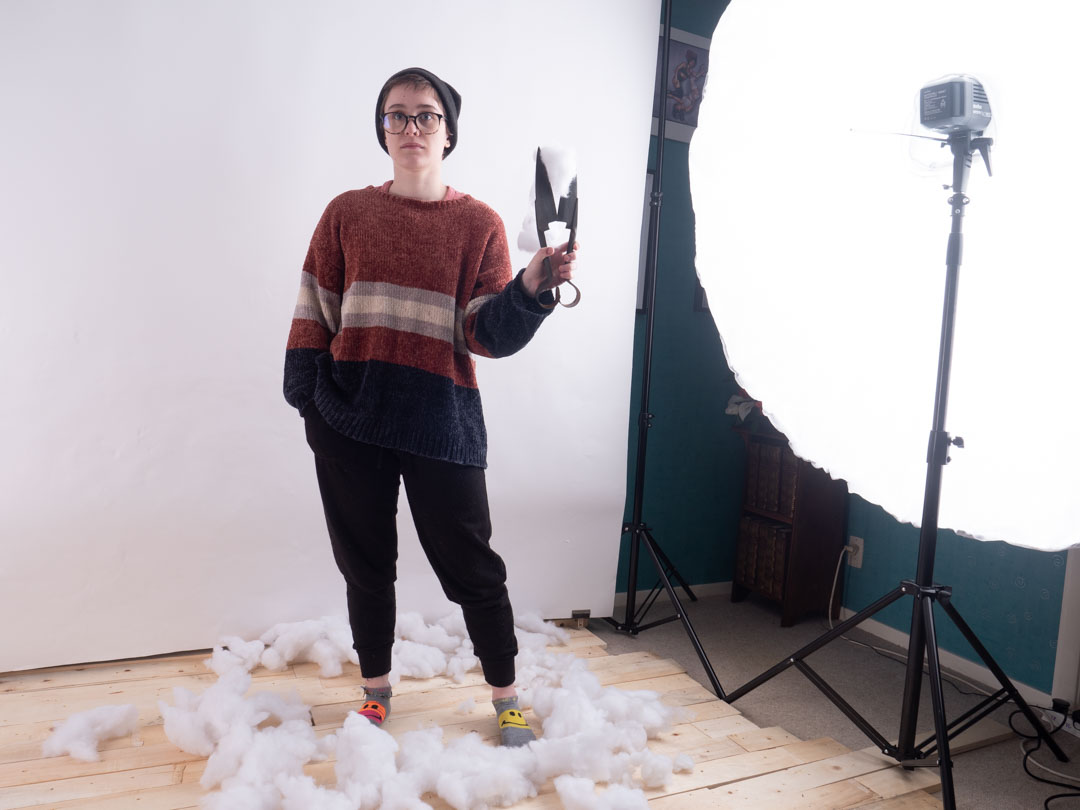
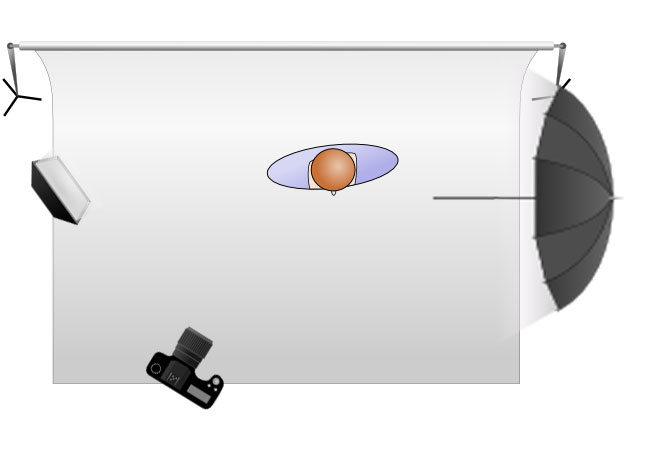
I had shot the background back in 2018 when we visited the farm so I needed to ensure that the studio shoot matched in terms of lighting and angle. The shed had a wooden floor so I recreated one in the studio. The main light in the scene was coming from the bank of windows so replicated this using my large 7 foot umbrella.

My daughter arrived at the time I was sitting at the studio so she ended up being a stand and while I worked out the angle of the camera to ensure that the boards on the floor and the light were consistent with the original image. While putting the floor down was probably not necessary it did make it easier to ground Nakita into the composite later. The stuffing from a pillow was also used to make this process easier.

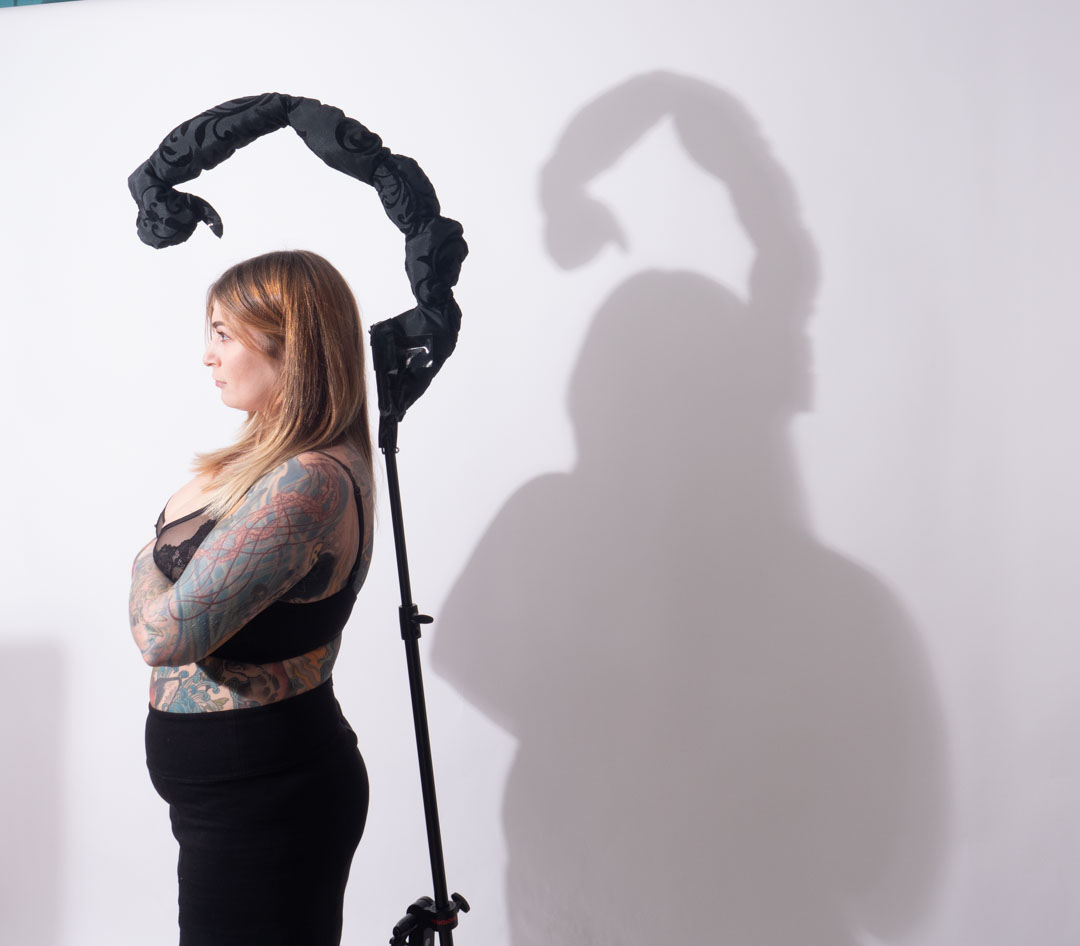
While the umbrella provided more than enough light for the whole scene I did add a second light. This was positioned behind Nakita and aimed at the backdrop. This was the insure a good separation that would make removing her from the backdrop easier.

I then did a series of shots to establish which one would be used as I like to have some variety to choose from.

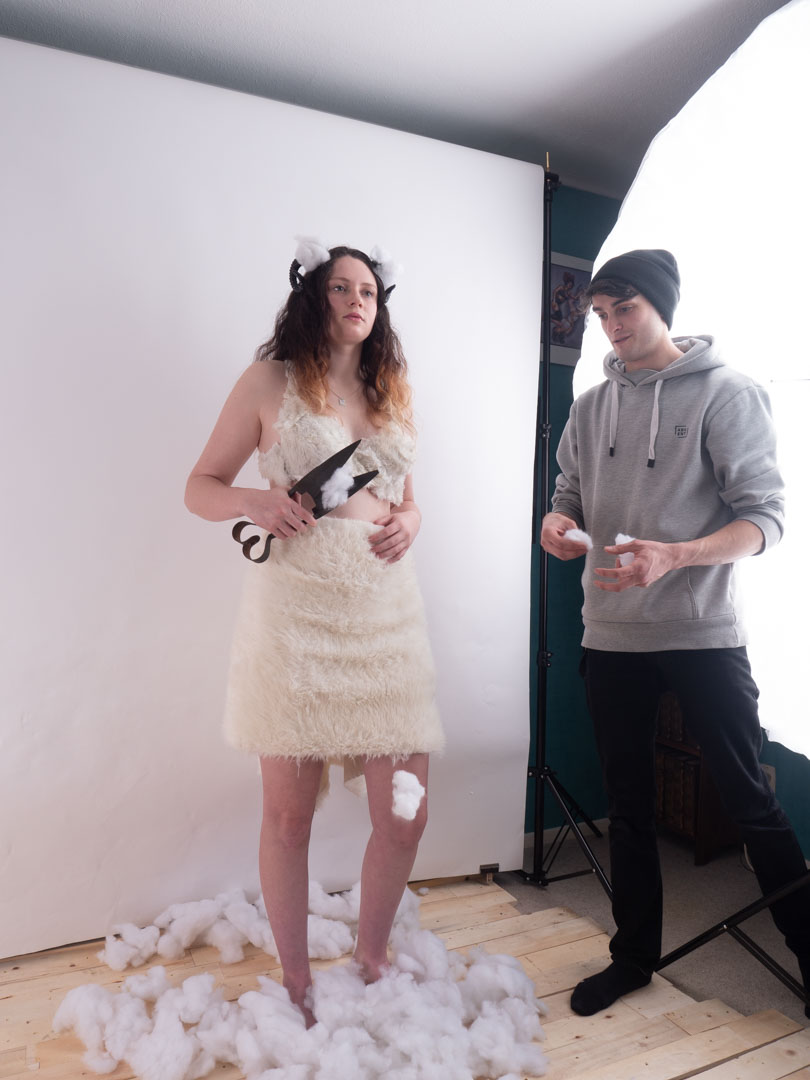
Nikita had brought her boyfriend William to the shoot, which was absolutely no problem with me. I want my models to be comfortable and often bringing a support person is the best way to achieve this. I always say that the one condition however is that they act as my assistant should I need it.

In this case I put William into the role of chief wool thrower. Even though William is standing between the light and Nikita this is not an issue. The seven foot umbrella is so large that it wraps the light around him without casting any shadow.

We took a series of shots with him throwing the wool and then I used these to composite them together.

Once I had all of the images it was a reasonable straight forward job to bring them together in Photoshop. The trickiest part is balancing the colour and brightness between that shot on location and in the studio.

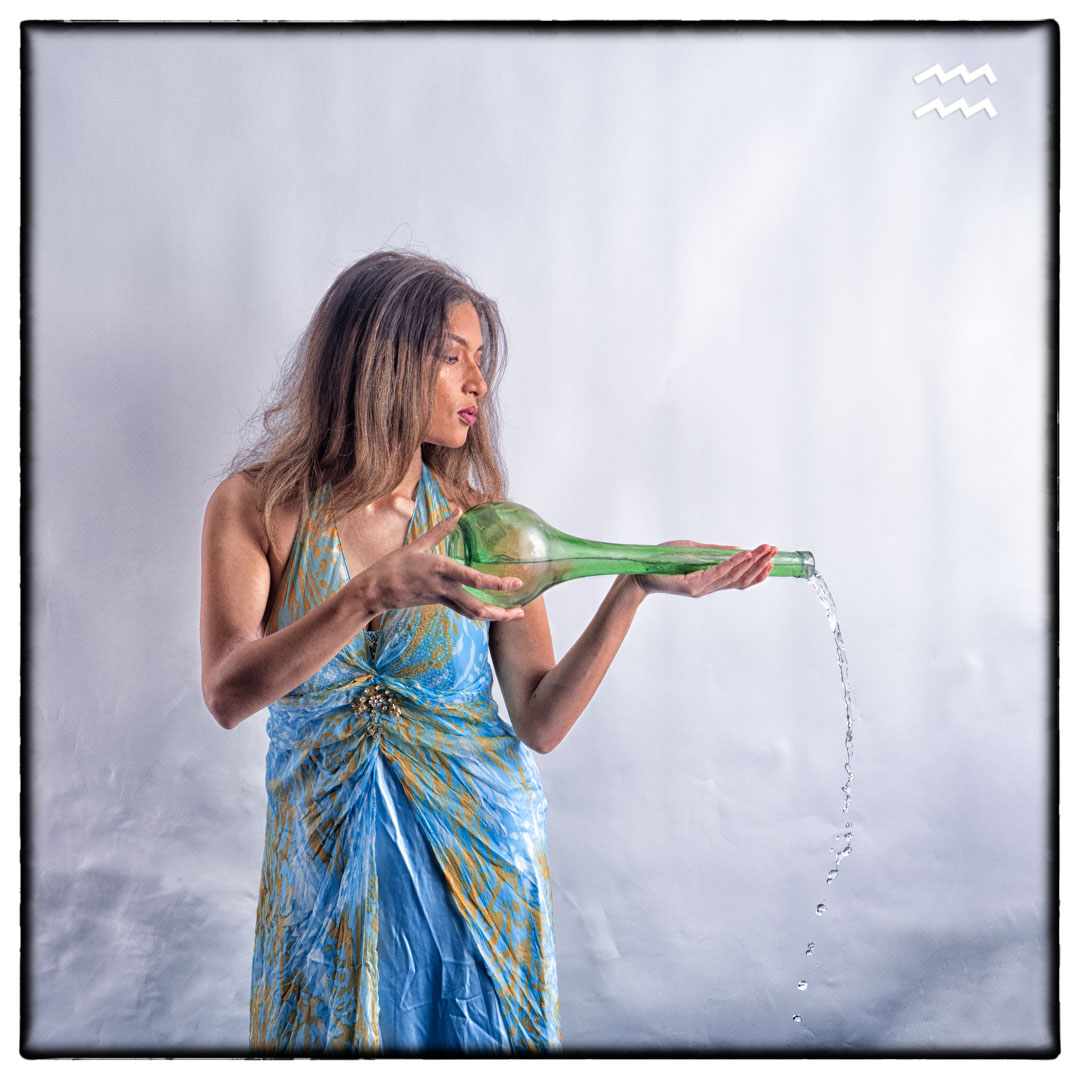
The end result was exactly how I envisaged that it would look. As it turned out by this stage it became obvious that the overall set was splitting into two distinct looks, which did not work together.

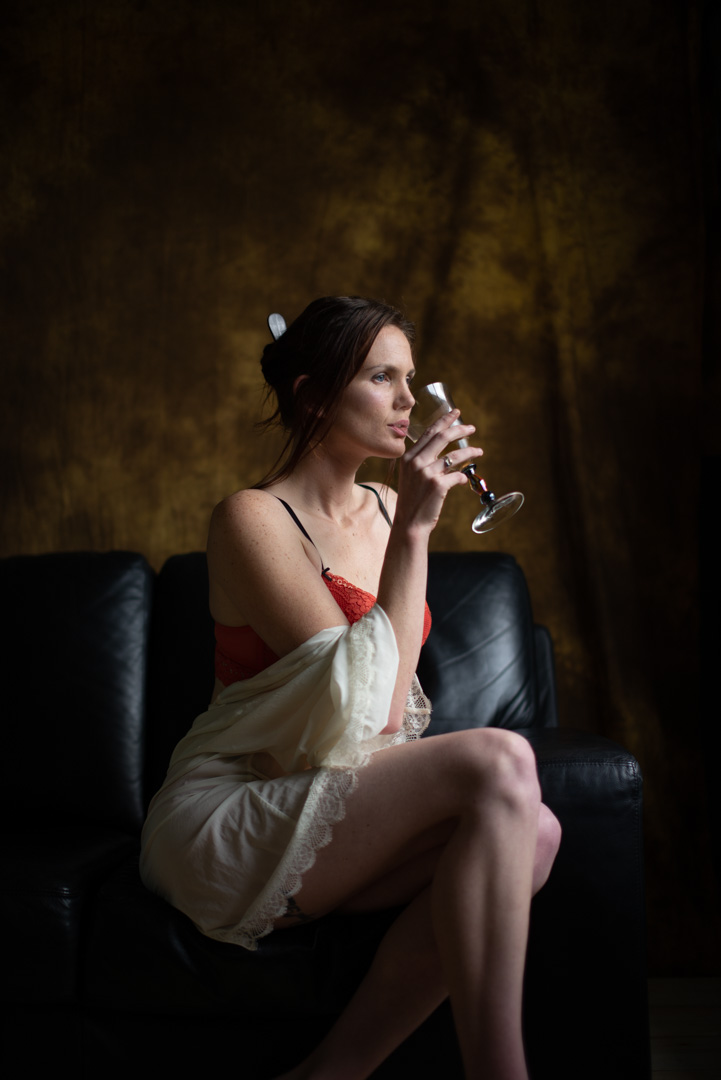
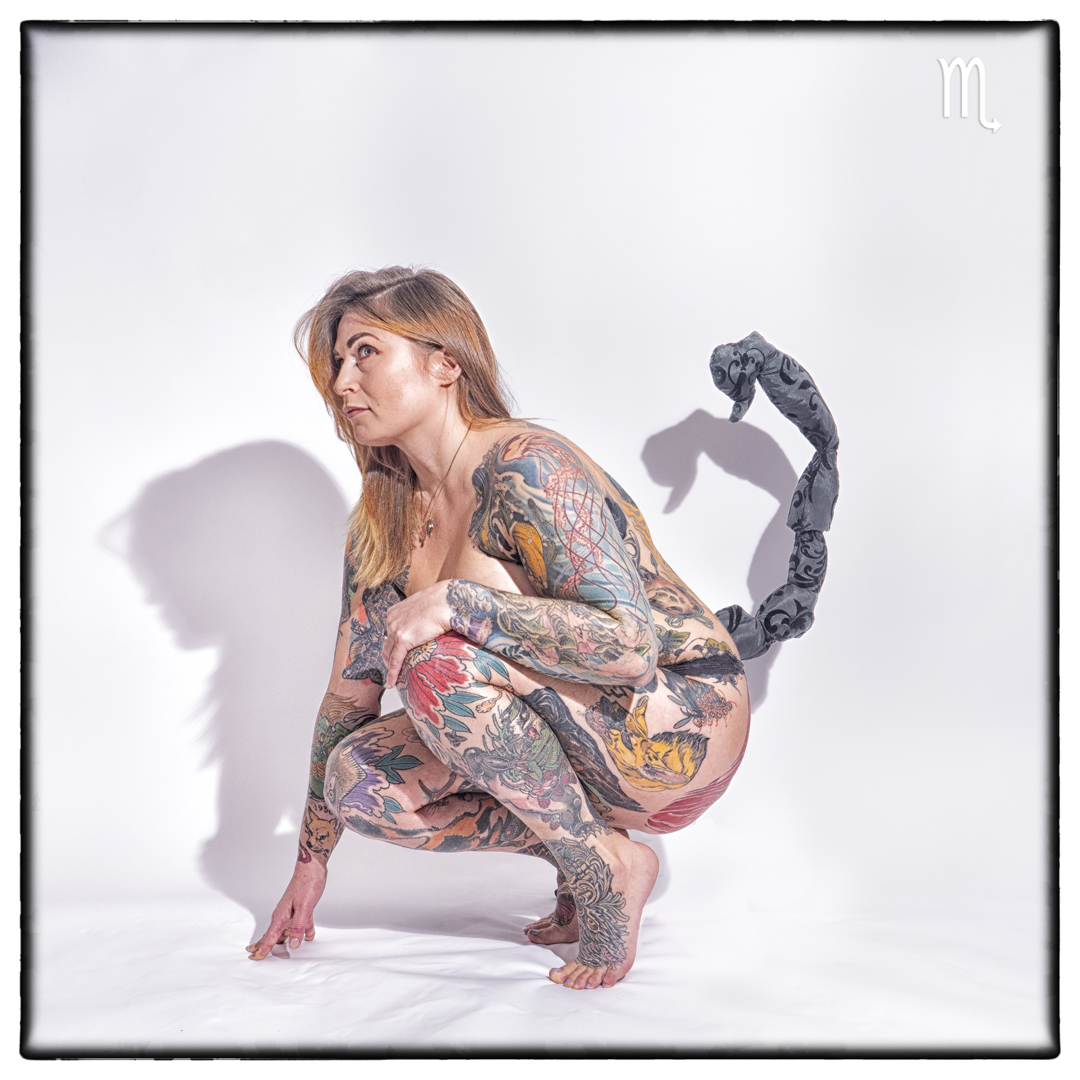
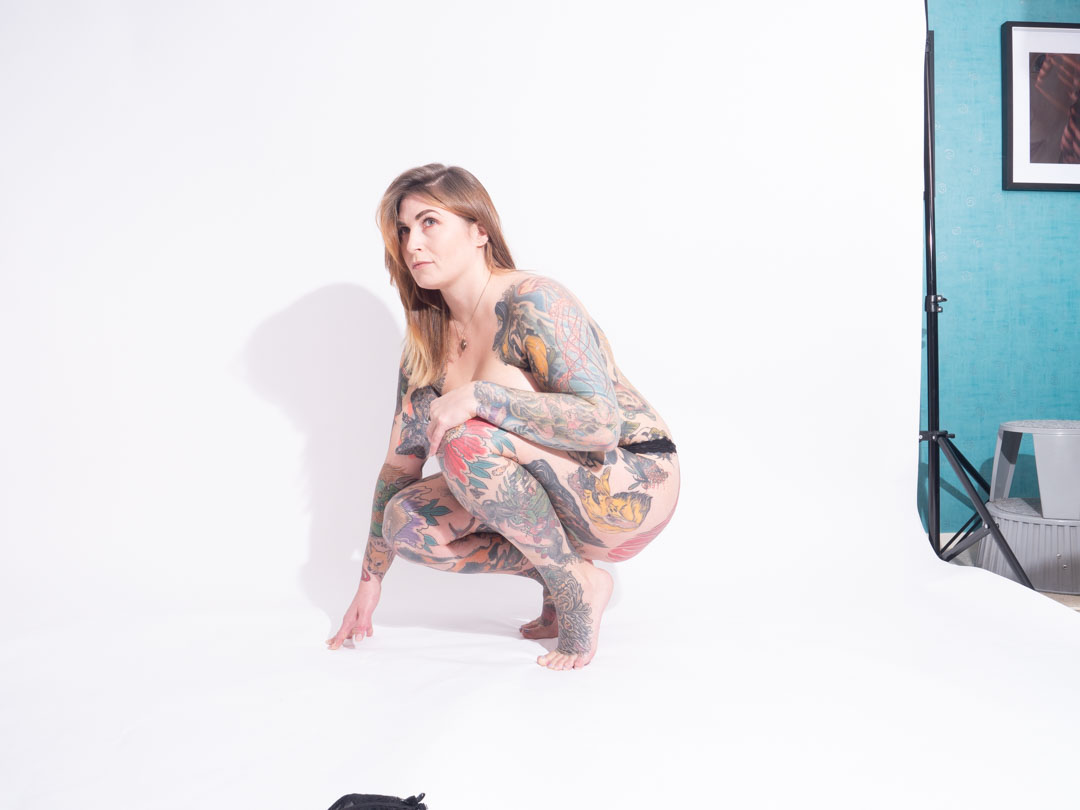
Therefore for the print set I went with a closer crop on the plain background which is the first image shown.

Zodiac series – Second Scorpio shoot

As I started to share the images from the Zodiac series it became easier to recruit models, and in fact for many of the signs I had multiple people sign up. As written in this previous post I had originally had Kimberley down for Scorpio, so when Jasmine expressed an interest I actually told her that I had selected a subject. What I did notice was that Jasmine had some impressive sleeve tattoos so I asked her if she was interested in taking part in my tattoo project. She agreed so a shoot day was set.

As it turned out time constraints in the original Scorpio shoot meant that I did not get the exact look I was going for, so I suggested to her that we incorporate both tattoos and zodiac together. Fortunately she agreed.

Doing a second shoot on a subject is not something that I normally do but it did have the advantage that I could refine the exact lighting settings before Jazmine arrived. My white seamless is much wider than the backdrops previously used with helped with setting the lights.

As before we shot two images with one containing the tail and one without, positioned in such a way that I could get a good separation between the Jazmine’s body and the shadow. When I shoot in studio I am always tethered to the computer so I can see the images full size on the monitor. This means that I can check details like focus, but it also means that I see how a shot lines up with one previously taken.

I also wanted to try some different variations in pose so I asked Jasmine to change from a standing pose to a crawling one. This did require some alteration of the lights, however this was not too difficult as the practise sessions I had done enabled me to reset easily. It was also fortunate that I have a Manfrotto nano stand that is quite small when not extended.

A model session is very much a collaboration and so I am more than happy when the model suggests poses, which is what Jazmine was doing. As it turned out the last pose of the day ended up being the shot used.

After doing the initial culls I ended up with three possibilities that I then took through into Photoshop. It was there that I started to encounter some issues. The final stage of the set was to run a recipe in Nik Color Pro across the image. It created the high texture grunge look I was after but it also brought out details in the blends and especially light differences. These were mainly caused by the difference in the hard light to create the shadow and the soft light on Jazmine.

However as the same time that this was happening I started to realise that I actually liked the tail being in the scene, and so therefore I changed the approach from removing it, to simply removing the stand.

As it turned out the pattern on the tail, which was actually a mistake in making, worked perfect as it fitted with Jazmine’s tattoos.