Category Archives: Models

Melissa – White Shirt

While I have suitcases full of prop clothing, one piece that all models seem to have fun with is a simple white shirt. It is quite a versatile item depending on how it is worn.

The image above was shot when we doing the headshot series and involved a Octobox positioned above the camera and two strip-boxes positioned behind Melissa to light the background.

In hhe rest of the images the two strip boxes were brought forward and angled so that they lit Melissa. Both were metered at the same output so the light would be even.

As I have found on many occasions simply letting the model play with the shirt produces the best results.

It is rarely buttoned up which means they can also determine how much skin they wish to show.

Props are also very useful in terms of providing something for the model to interact with. In this case it was pair of my old glasses.

Melissa – Casting images

The second series of images that we shot with Melissa in the studio were aimed to be used for casting rolls therefore they were more full body than the head shots.

For these images the two strip boxes that had been lighting in the background in the headshot images were brought forward and angled so that they lit Melissa. Both were metered at the same output so the light would be even.

One of the reason that I like shooting in studio is that I can have full control over the light. I typically shoot at f8 or f9 and 1/200 s. This provides me with plenty of depth of field but more importantly is normally sufficient to eliminate all of the ambient light in the room.

As with the headshots Melissa had brought a variety of outfits that enabled us to have diversity in the images.

We even utilised the stool to provide something different. This shot ended up not being used hence it has not been cropped down.

Melissa Headshots

A couple of weeks after our previous shoot I arranged with Melissa to shoot some head shots and images that she could use to promote herself as she is a professional actress.

She came out to my studio and we set up a relatively simple lighting arrangement consisting of an octobox positioned above the camera into strip boxes aimed to light the background. The position of the main light is referred to a butterfly lighting due to the shadow cast under the nose.

Melissa was position on a stool which made everything simple in terms of maintain consistent lighting. In order to give her different options she had come with a variety of outfits.

As with most studio shoots I shot tethered into the computer which meant that at the end of the shoot Melissa was able to select the images that she liked. Tethering is a great tool as it lets you see the images much larger than on the back of the camera, the model can see them as they are being shot to make changes to poses. Plus it really speeds up the process of editing. At the end of the session I get the model to pick their favourites so that I don’t waste time editing images that they will not like.

Being Slack

Over the Christmas break I had been going back through all of the shoots that occurred in recent years and selecting images to put on my Instagram feed.

Last night I went through my Lightroom catalogues and listed all of the various shoots that I had not written about. That came up with the staggering number of 203 possible blog posts.

Starting today I am making a concerted effort to post each day and hopefully by the end of the year I will have caught up.

Melissa and the chicken

With the ice skater and flower shoots done now turned her attention to some images that Melissa asked to be taken with one of her chickens. She changed into a a simple gypsy style outfit for this part of the shoot. The chicken had been caught earlier and it spent the time inside of a pet carriage case.

As I wanted a more classical look to the image I put a painted backdrop over the white that we have previously used and pulled out the background lights. I repositioned the main light into Rembrandt orientation and match this with a reflector to provide a little fill.

There is an old saying in Hollywood that you should never work with children or animals and I’m afraid it was true in this case. In hindsight we probably should have got the chicken out of the garden shortly before we were shooting with it, rather than leaving it in the cage through the other two shoots.

As a result when it came out of the parks it really it really didn’t want to sit still.

In fact it decided that it wanted to be a parrot and sit on Melissa’s shoulder.

Despite all the challenges it was a fun shoot.

Melissa and the flowers

A couple of days before I was to shoot with Melissa she asked me if it was okay if the second photographer (Clara) could join us at the shoot. Clara had an idea that they wanted to use but had no lighting gear. I had no problem in helping another photographer out so I said it was fine and I would show Clara how to use my lights.

Clara’s idea was to shoot Melissa topless with a bunch of flowers strategically hiding her breasts. However when she arrived the small bunch of fake flowers she had were not gonna be sufficient, so while I was doing the skater shoot with Melissa she went off to the supermarket bought a bigger bunch.

There was no need to alter the lighting setup with two lights on the backdrop and a main on Melissa. Although Clara was shooting with a Canon, the trigger I have worked seemlessly.

When I am shooting away from the studio I always take a back up camera which in this case was my Nikon d600. I also had my Lensbaby in the bag as well. I therefore decided to fit it and take some shots as I didn’t need to use the studio lights. The Lensbaby is quite tricky to focus it does produce an awesome result.

After Clara had finished I decided to take the trigger back and shoot some images of my own back on the Panasonic G9.

However in these I got Melissa to pose in completely different ways to what Clara had done so that she would have some alternative images. As it turned out these were the only images that Melissa got from the session.

I never actually saw the images that Clara shot so I’m not sure whether she actually got what she was wanting or not. Nor why she never gave any images to Melissa.

Melissa – the ice skater

The majority of my shoots generally involve me coming up with a concept and then recruiting a model to take part. However, I’m more than happy to work the other way round and for the model to suggest something that I then shoot.

This was the case with Melissa when I answered a message she posted on the Facebook group seeking a photographer. Melissa is a Wellington based model and actress, and she was looking for some updated photos to go into her portfolio. We had a brief discussion about what we would do and then set up a time for me to go to her place and do the shoot. We ended up doing three very different looks so I have split the shoot into three posts.

While I enjoy the challenge of working in a new environment it does mean that the car gets loaded with a lot of gear because he never actually know what he will actually use. Melissa had indicated that she wanted some photos shot against a white background. My seamless paper was actually too wide to transport so I settled on a white sheet.

The key to having a clean white background is to ensure that it is well lit and so I decided to position two lights on it. When shooting in my home studio my lights are in 1 m² soft boxes however there was not sufficient width in the space for me to position the two of them. I therefore removed the soft box from one light and shot with it in a small reflector. As this meant that the light was emitting more light, it was set at a slightly lower power than the other one so that the light was roughly even. The main light was positioned camera lift using the 65 cm soft box with double diffusion.

Melissa wanted to portray her versatility as an actor and so she created a character with some of the props that she owned. She turned into a former Russian Olympic ice skater who was now slightly past the prime of her career.

I have shot with actors a couple of times and they are really great as they can bring lots of different expressions to the images. Furthermore they will actually go with a concept rather than a model that you may have to direct.

Part of Melissa’s costume was a long scarf and so I could not resist using it as a mass that lets you focus solely on the eyes. I have shot such images on a number of occasions and I really enjoy the look and power that comes with them.

While not part of the original concept with Melissa as I was processing the images I realised that as they were shot against a clean background they were perfect candidates to be used in composite.

I generally try to use my own images for composite is that an April sent to be entered into competitions in this case I did not have any images of snow ice or ice drinks. So I went onto unsplash.com to search for some images. This is a site where photographers upload images and allow them to be downloaded without charge royalty free. I found a number of images that I though might work and after clear cutting Melissa out I added as the background.

While I like the image above I found that the image worked better in an interior location such as the ice rink.

I was really pleased with the way the images came out.

Marianne’s Water Shoot

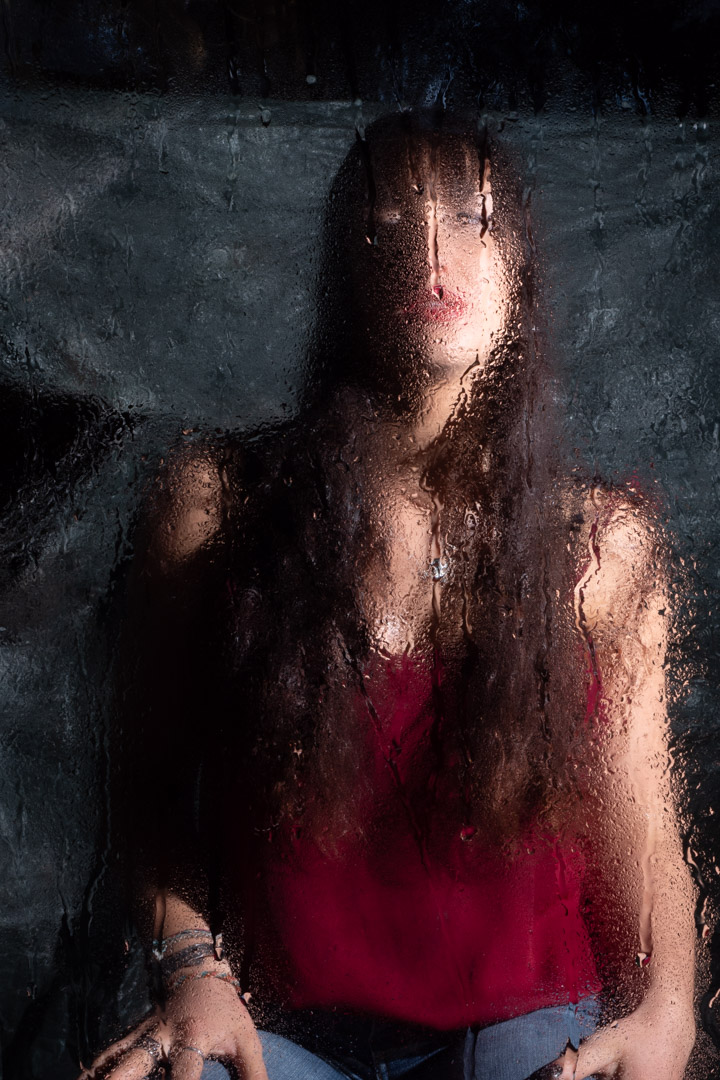
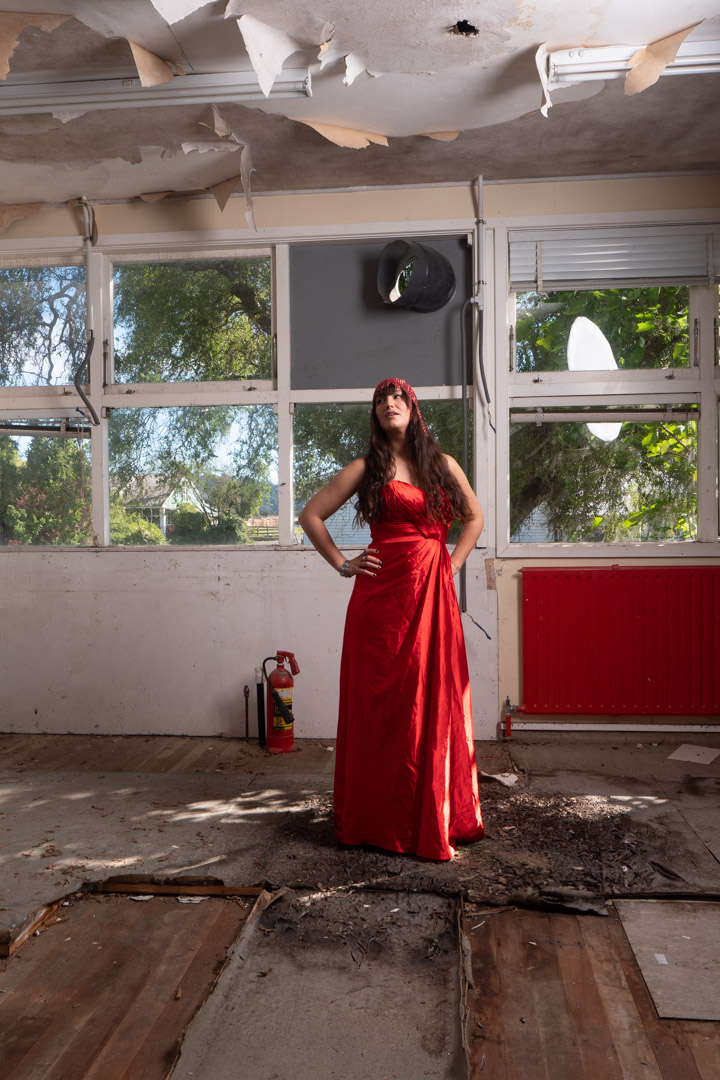
When Marianne and I started discussing options for her shot she said that she wanted to have a water look and showed me some examples that had clearly been shot in a shower. I agreed that we could do something similar and set to work figuring out how to do it.

Now the simple solution would be to shoot in an actual bathroom. Have done this is the past but one of the main issues you run into with such a shoot is having enough room to position the subject and lighting to the way that you want.

Fortunately I had an easy solution. When our main bathroom has been renovated, after a burst pipe, we had completely changed the shower. I had kept the door panel from the old shower as a possible prop for exactly this circumstances. So by using some upright supports and clamps, I was actually able to replicate a shower.

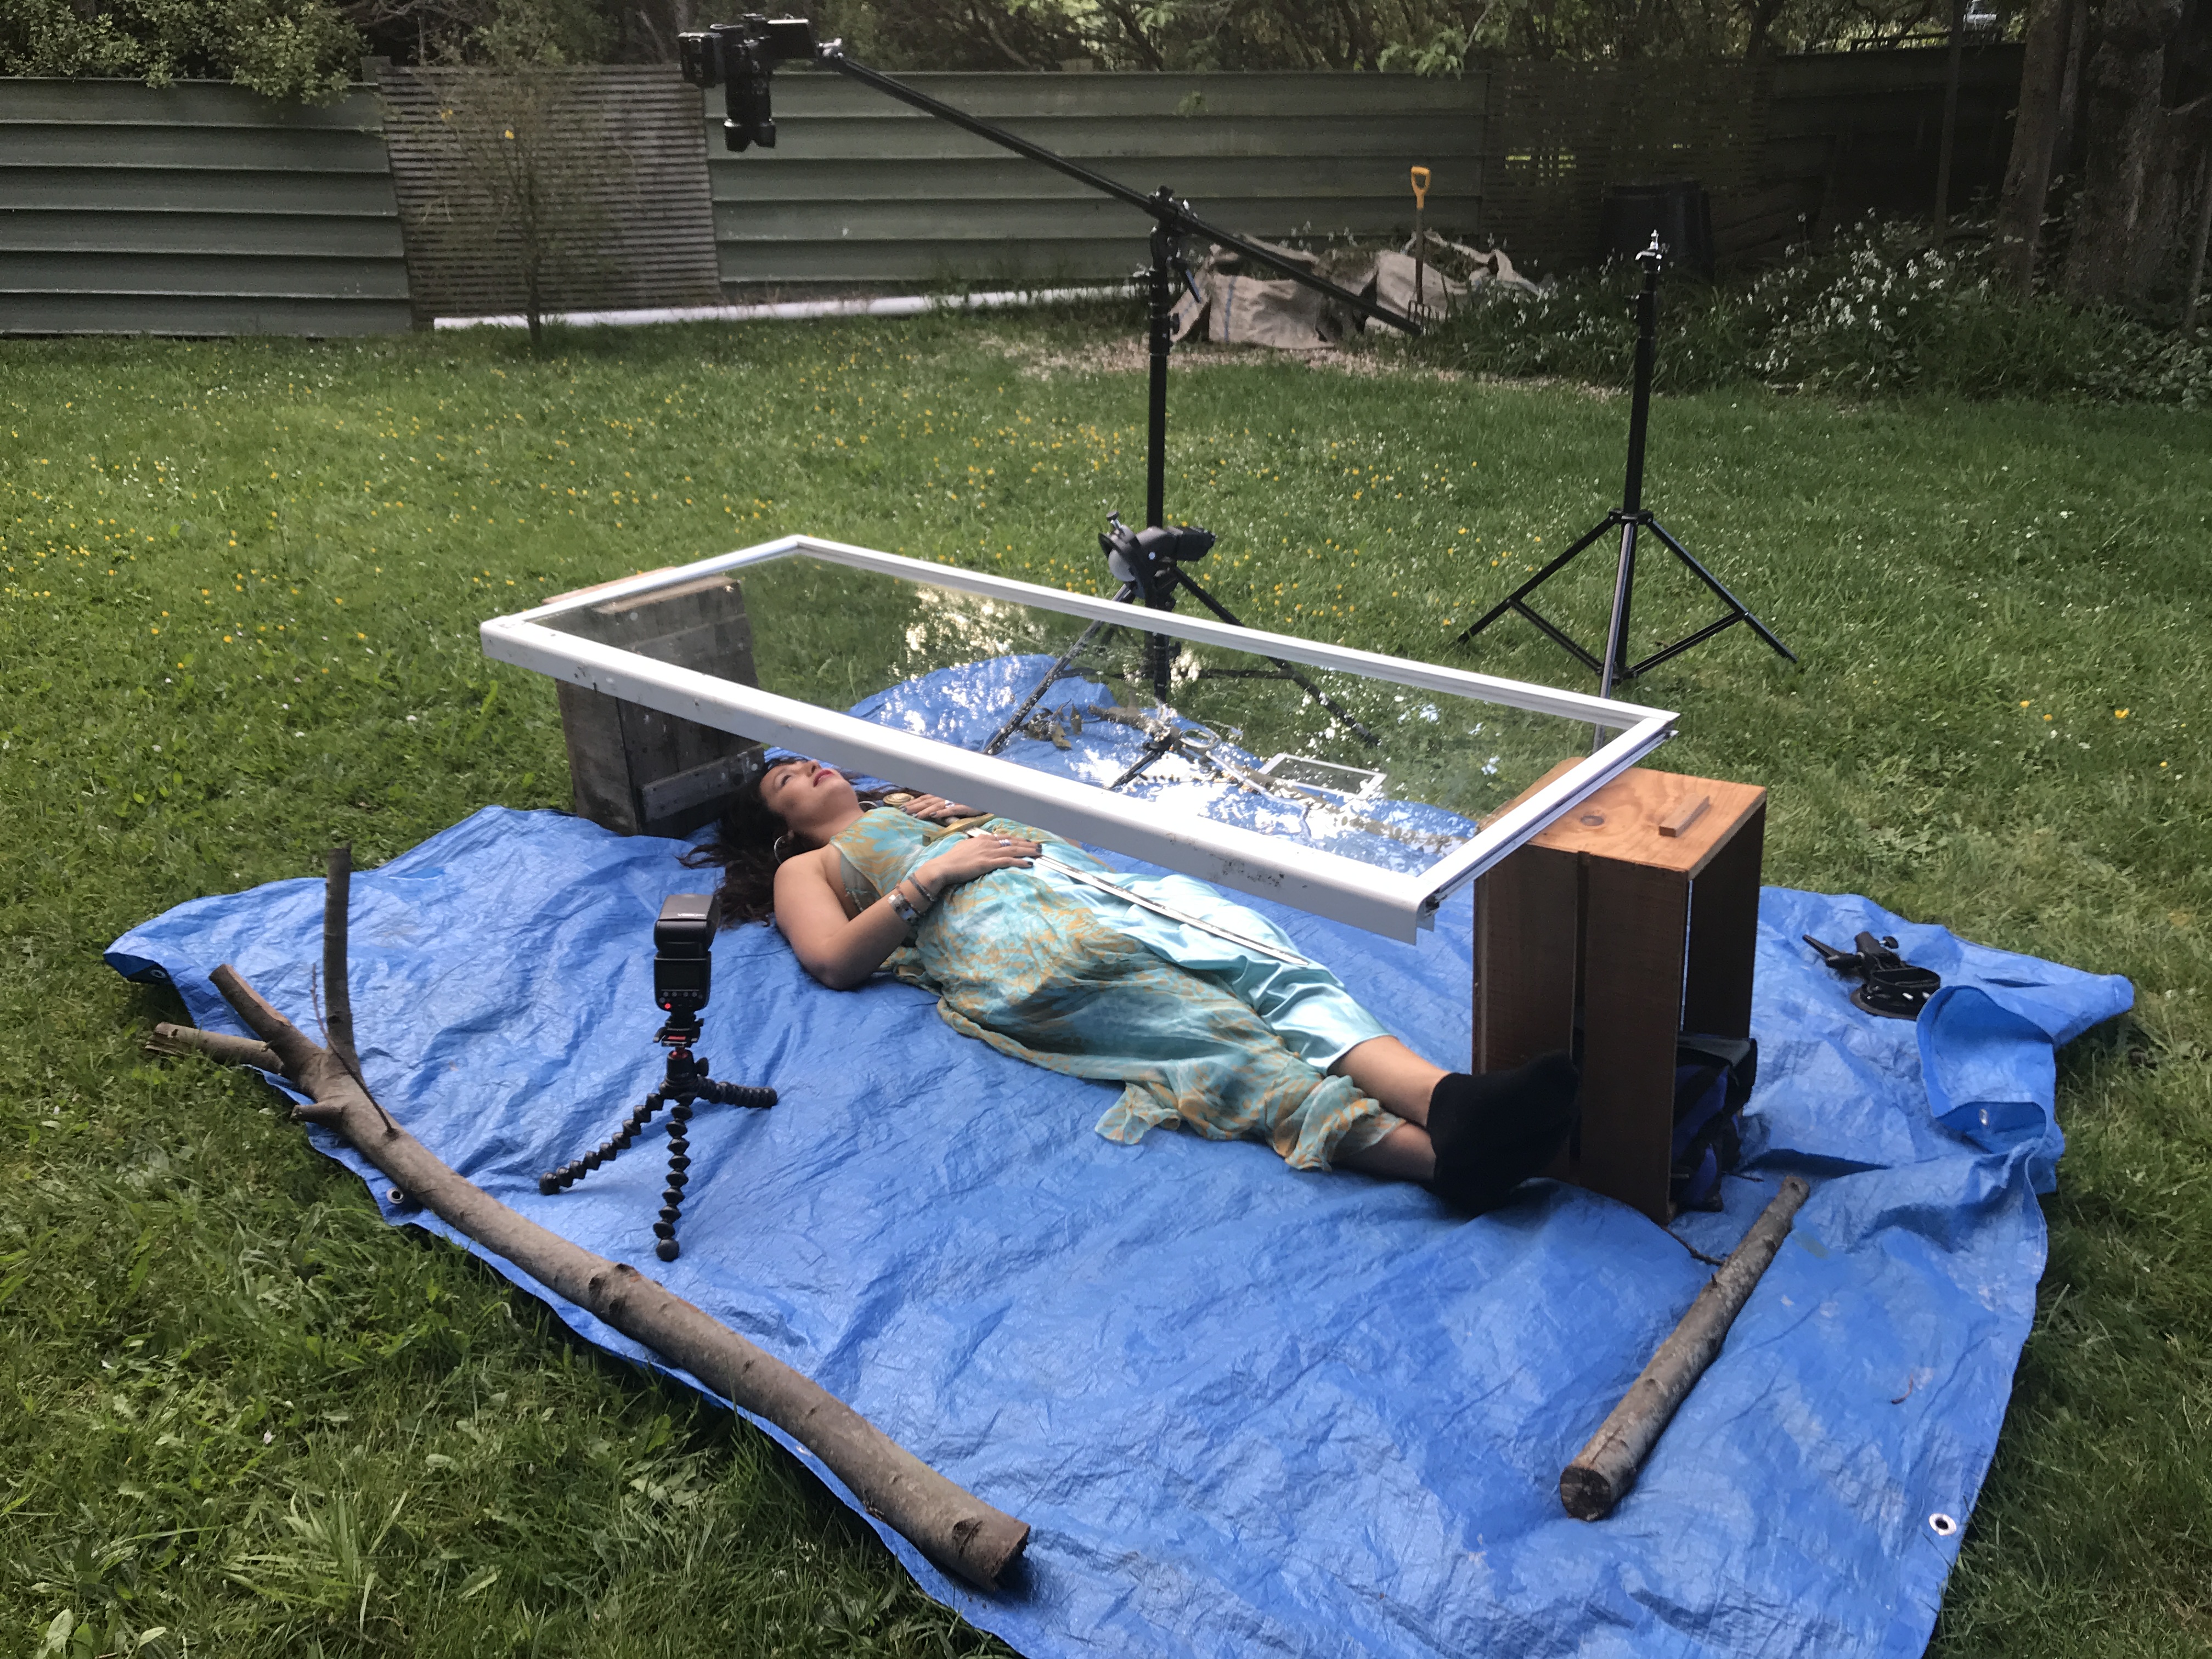
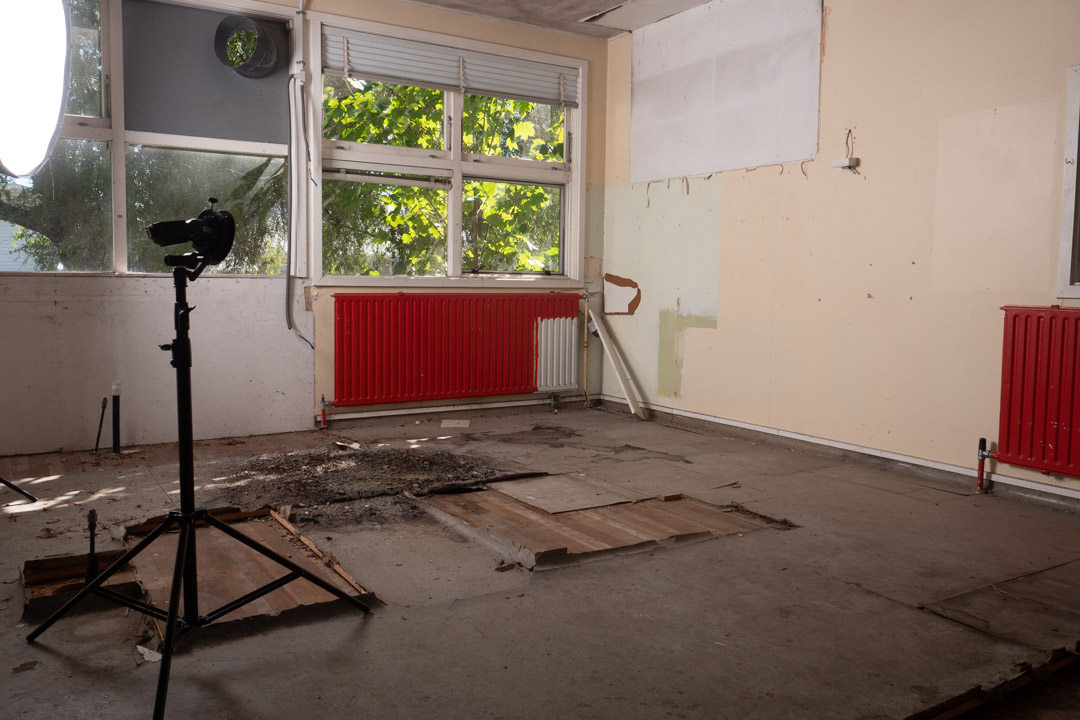
I chose an area under a large tree because this minimised the amount of natural light and let me have better control over the overall light. Generally speaking I will set the camera to remove all ambient light for only flash is used. When shooting outside this becomes more difficult and therefore any technique to limit the amount of natural light helps.

The main lighting was provided by two speed lights that were positioned on either side of Marianne and aimed so that they did not spill onto the glass. In order to avoid reflections on the front of the glass I positioned a large black backdrop behind the camera. As it turned out the light provided from the flash eliminated any reflections on the side of the glass facing the camera.

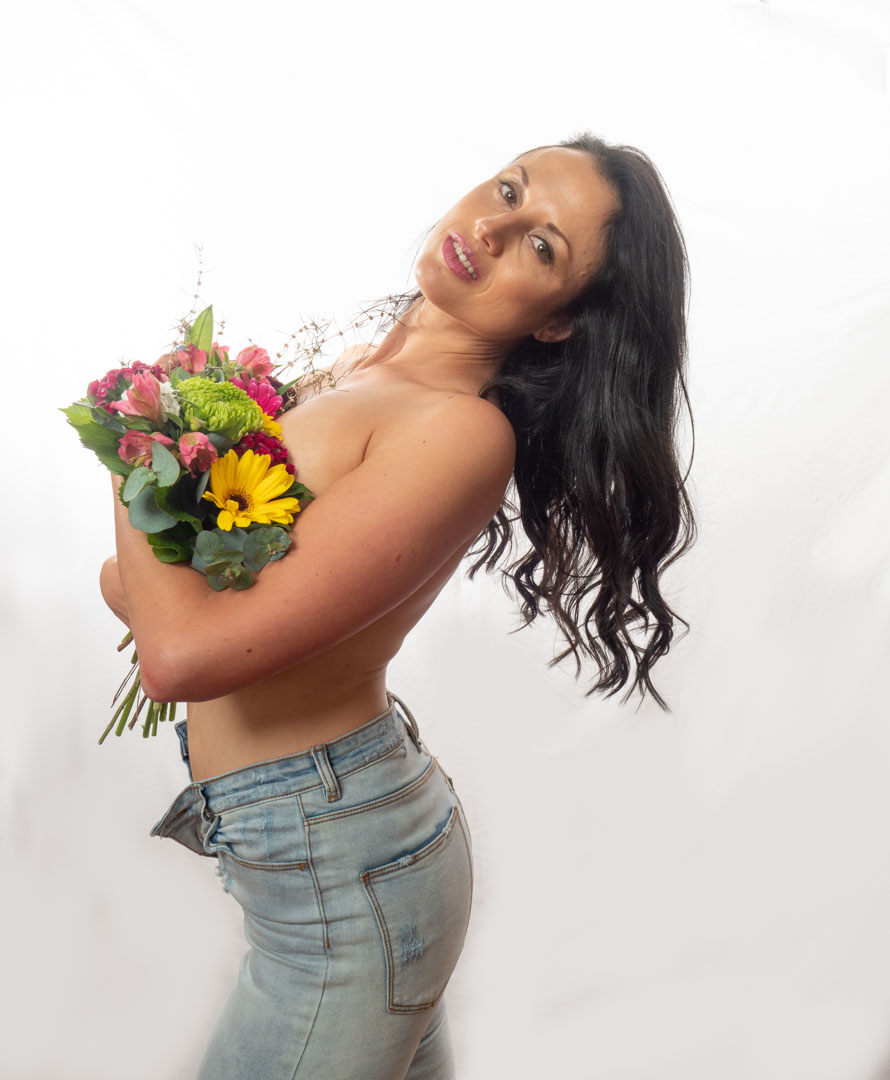
As we were not planning to shoot full body we positioned a stool and Maryann set on that. That gave the advantage that the lights and focus could be pretty much locked into place.

It was now a matter of applying the water. We used a spray bottle to apply water to both the glass and to Marianne and started shooting.

The glass worked really well and it is was a relatively simple setup so I am sure that I will use it again.

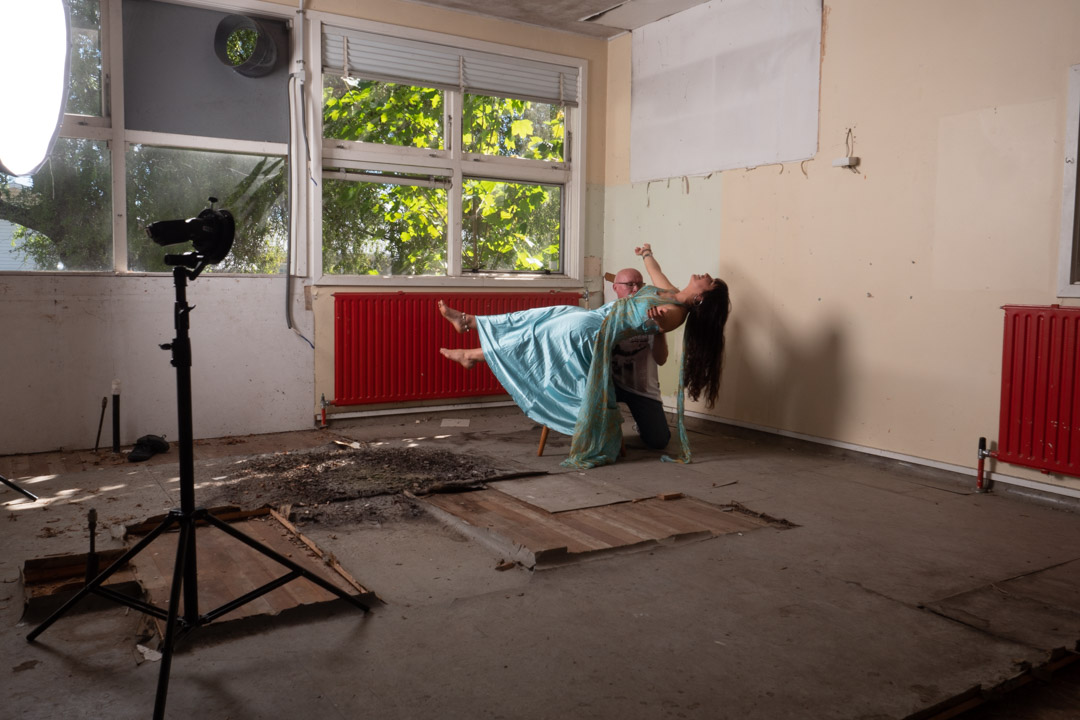
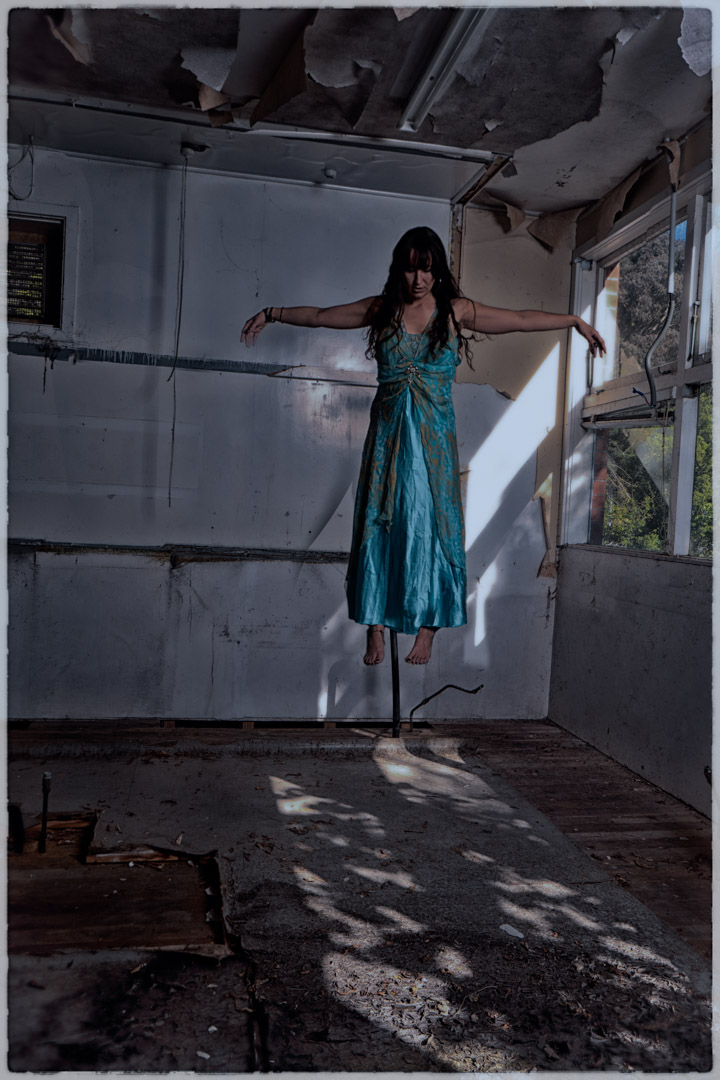
I then changed the setup to see if we could use it to replicate a model being under water. I had shot Megan a number of years before but that was in an actual bath.

I placed a tarpaulin on the ground and set the door on top of two boxes that made it high enough for Marianne to go under. I then positioned the camera on a boom and lights on either side of her. We then filled the top of the glass with about 1cm of water.

To try to mimic the water effect we placed a rolled up towel under Marianne’s neck so that her head was at the right angle. We then started to do a series of images before the local insect population decided were were on their dinner menu, and we were forced to call it quits.

While I ended up with some usable images I would have to say that work is still needed before I would be really happy with the technique. There were two main issues one of which is easier to solve than the other.

The first was that there was two much distance between the water and Marianne. By the time I had focused on her, the water essentially disappeared as it was completely out of focus. The result was an image that just looked soft. The answer would be to close the distance between the glass and subject.

The second issue in not so easy to fix. That is that the body changes shape when it is lying on the ground as opposed to being supported in water. Not sure what we do with that one.

Even though I didn’t come out with images exactly as I had hoped it was still a fun experiment to do.

Marianne in the Red Dress

When Marianne and I went to the old science labs to do the levitation shoot I decided to pack another dress so that we could make the most of the location. As I expected she looked stunning in it.

We started in the same room as the other shots but this time I was using a single light which was positioned camera right in a rough Rembrandt location. This did present one slight challenge when I was shooting into a wall of windows as you clearly see in the image below.

The answer to this was to use the “double tap” technique that I have posted about in the past. Basically you take two shots in rapid fire. The flash will fire on the first but the second shot will occur before it has recharged. The second shot is then used to replace the glass in the area where the flash is visible.

We then moved to another room that had a complete wall of glass that was letting in lots of light. This meant that I could expose just for the ambient and the flash was not needed.

This had the advantage of being able to shoot multiple shots with Marianne walking. I find that option the best shots are obtained when you allow your subject to move freely rather than being posed.

In post I did have to remove some of the signs that were still on the wall as they were somewhat distracting.

I then noticed that the passageway outside of the room was rather dark so we decided to do something a little ghostly. I took the camera right up to f22 and set a 4.0s exposure. I then had Marianne stand out of the shot. When the shutter was pressed she slowly walked into the screen holding for about a second. The created a very ghostly image.

We then moved into what must have been an old freezer room which was completely dark. we used the same setting of f22 for 4s but this time I fired the flash at a very low setting twice.

This created a very unusual double exposure.

For the final series of images we moved to a passageway that ran between two of the buildings. This had glass on both sides so again we were able to shoot without the need of flash.

Overall the venue worked really well and we were able to get a good variety of shots within a small space and time.

Marianne Levitation Shoot

One of the things that I am very mindful of when working with models on my personal projects is that the images produced from them may not be what the models would necessarily put in their portfolios. For this reason I always offer them a second shoot where we will photograph their concepts. This was the case with Marianne who was my model for Pisces in the Zodiac series.

Marianne requested that we do a levitation shoot, as well as one involving a water look. Close to us is a disused scientific complex that I could get access to so I decided this would be a perfect location for the shoot.

Levitating a person is a relatively simply process and much easier than the food mentioned in my previous post. In its simplest form you take an image of the empty area and then have your model lie across a chair or stool. You them blend the two images together in Photoshop and mask out the support.

We used the dress from the Aquarius and Cancer shoot as it was quite flowy. This makes hiding the stool a lot easier and also makes the shot more believable if fabric is falling down.

The issue that we ran into was that Marianne could not balance herself far enough out. The solution was then to set the camera on a timer and I would support her. Her hair did present a problem so we ended up shooting with me in two locations and bringing those together in post.

I generally shoot my blank image at the end of the shoot so that I can be sure that the light falling on it is the same as for the other images. As can be seen in the images we were using two lights, in addition to the small amount of light coming in from the windows. The large light was in a 1.5m octabox to provide fill and the main light was a bare flash at a low power aimed at Marianne’s hair.

To make the job easier I also took a second blank with the light stands pulled back as you see they are not present in the final image.

We then turned around to produce another shot. Unlike the first this area was getting a lot of light from outside and I wanted to incorporate that in the finished result. So I set my camera at 1/100s f8 so that it would not completely overpower the light. I then positioned the Octabox camera left but had it on a very low power to only lift the shadows and not remove them completely.

The concept behind this shot was to be a lot darker and spooky so I had Marianne stand on the stool with her arms stretched out and head down.

To get her feet dangling we then moved the stool out and had her sit on the top of a ladder. While this was not in exactly the same height as the stool, it was reasonable close.

Back at the computer the three images were merged together. As she was in a long dress this make blending the feet and the rest of her much easier. I decided to exclude the lace at the back of the dress.

I used Nik Software to really darken down the image and in the process made it look like it was shot at night with the light of the moon.