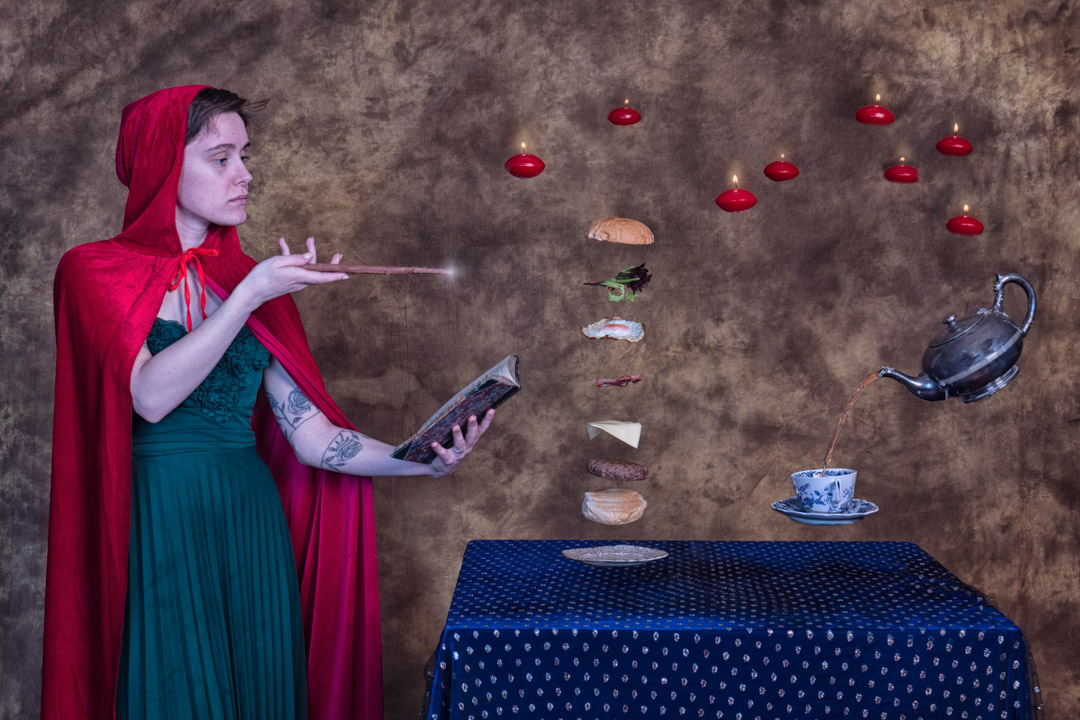
Each year I like to enter an image into the Wellington Interclub that has been specifically created for the event. One of the topics in 2020 was levitation. So I expected to see lots of images of models floating in the year, and decided to go with something different. That was creating an image where there was a reason for items to float, and no better reason than magic.
For the 2020 Interclub we had decided to do things a little different and some concepts were shot by a number of members working together. I had a reasonably clear idea of what I wanted and so I went online. grabbed some clip art and created a concept image. Everyone agreed that it was a great idea.

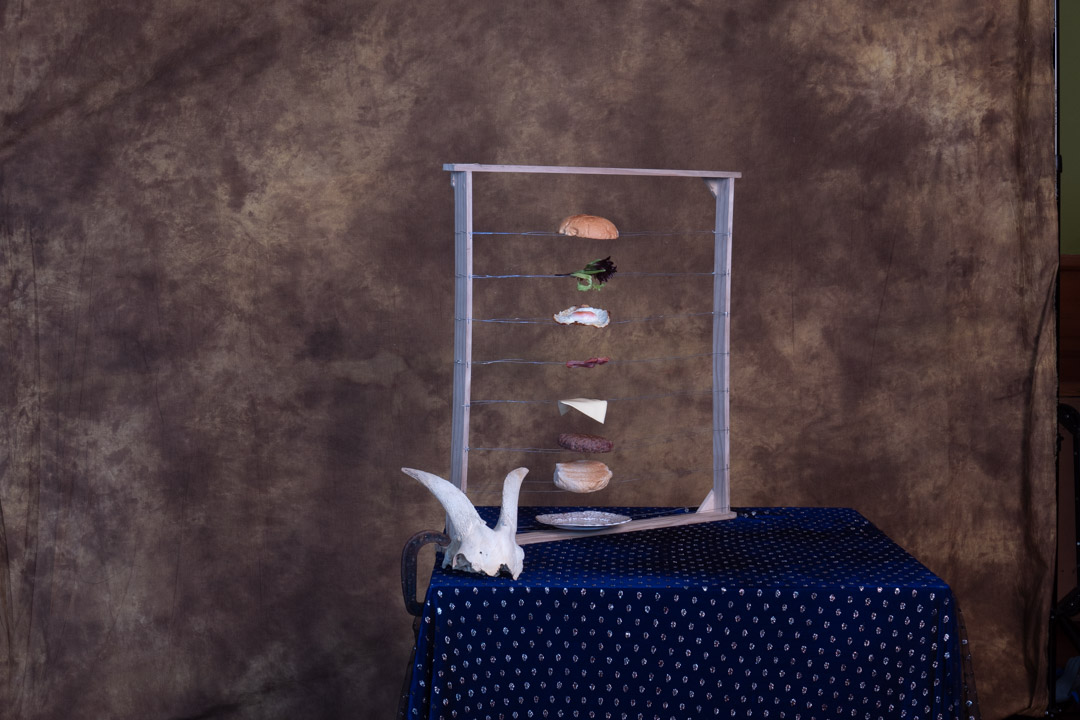
The first task was to assemble the props. The levitation of the food is done by building a frame and placing the individual levels on wire.

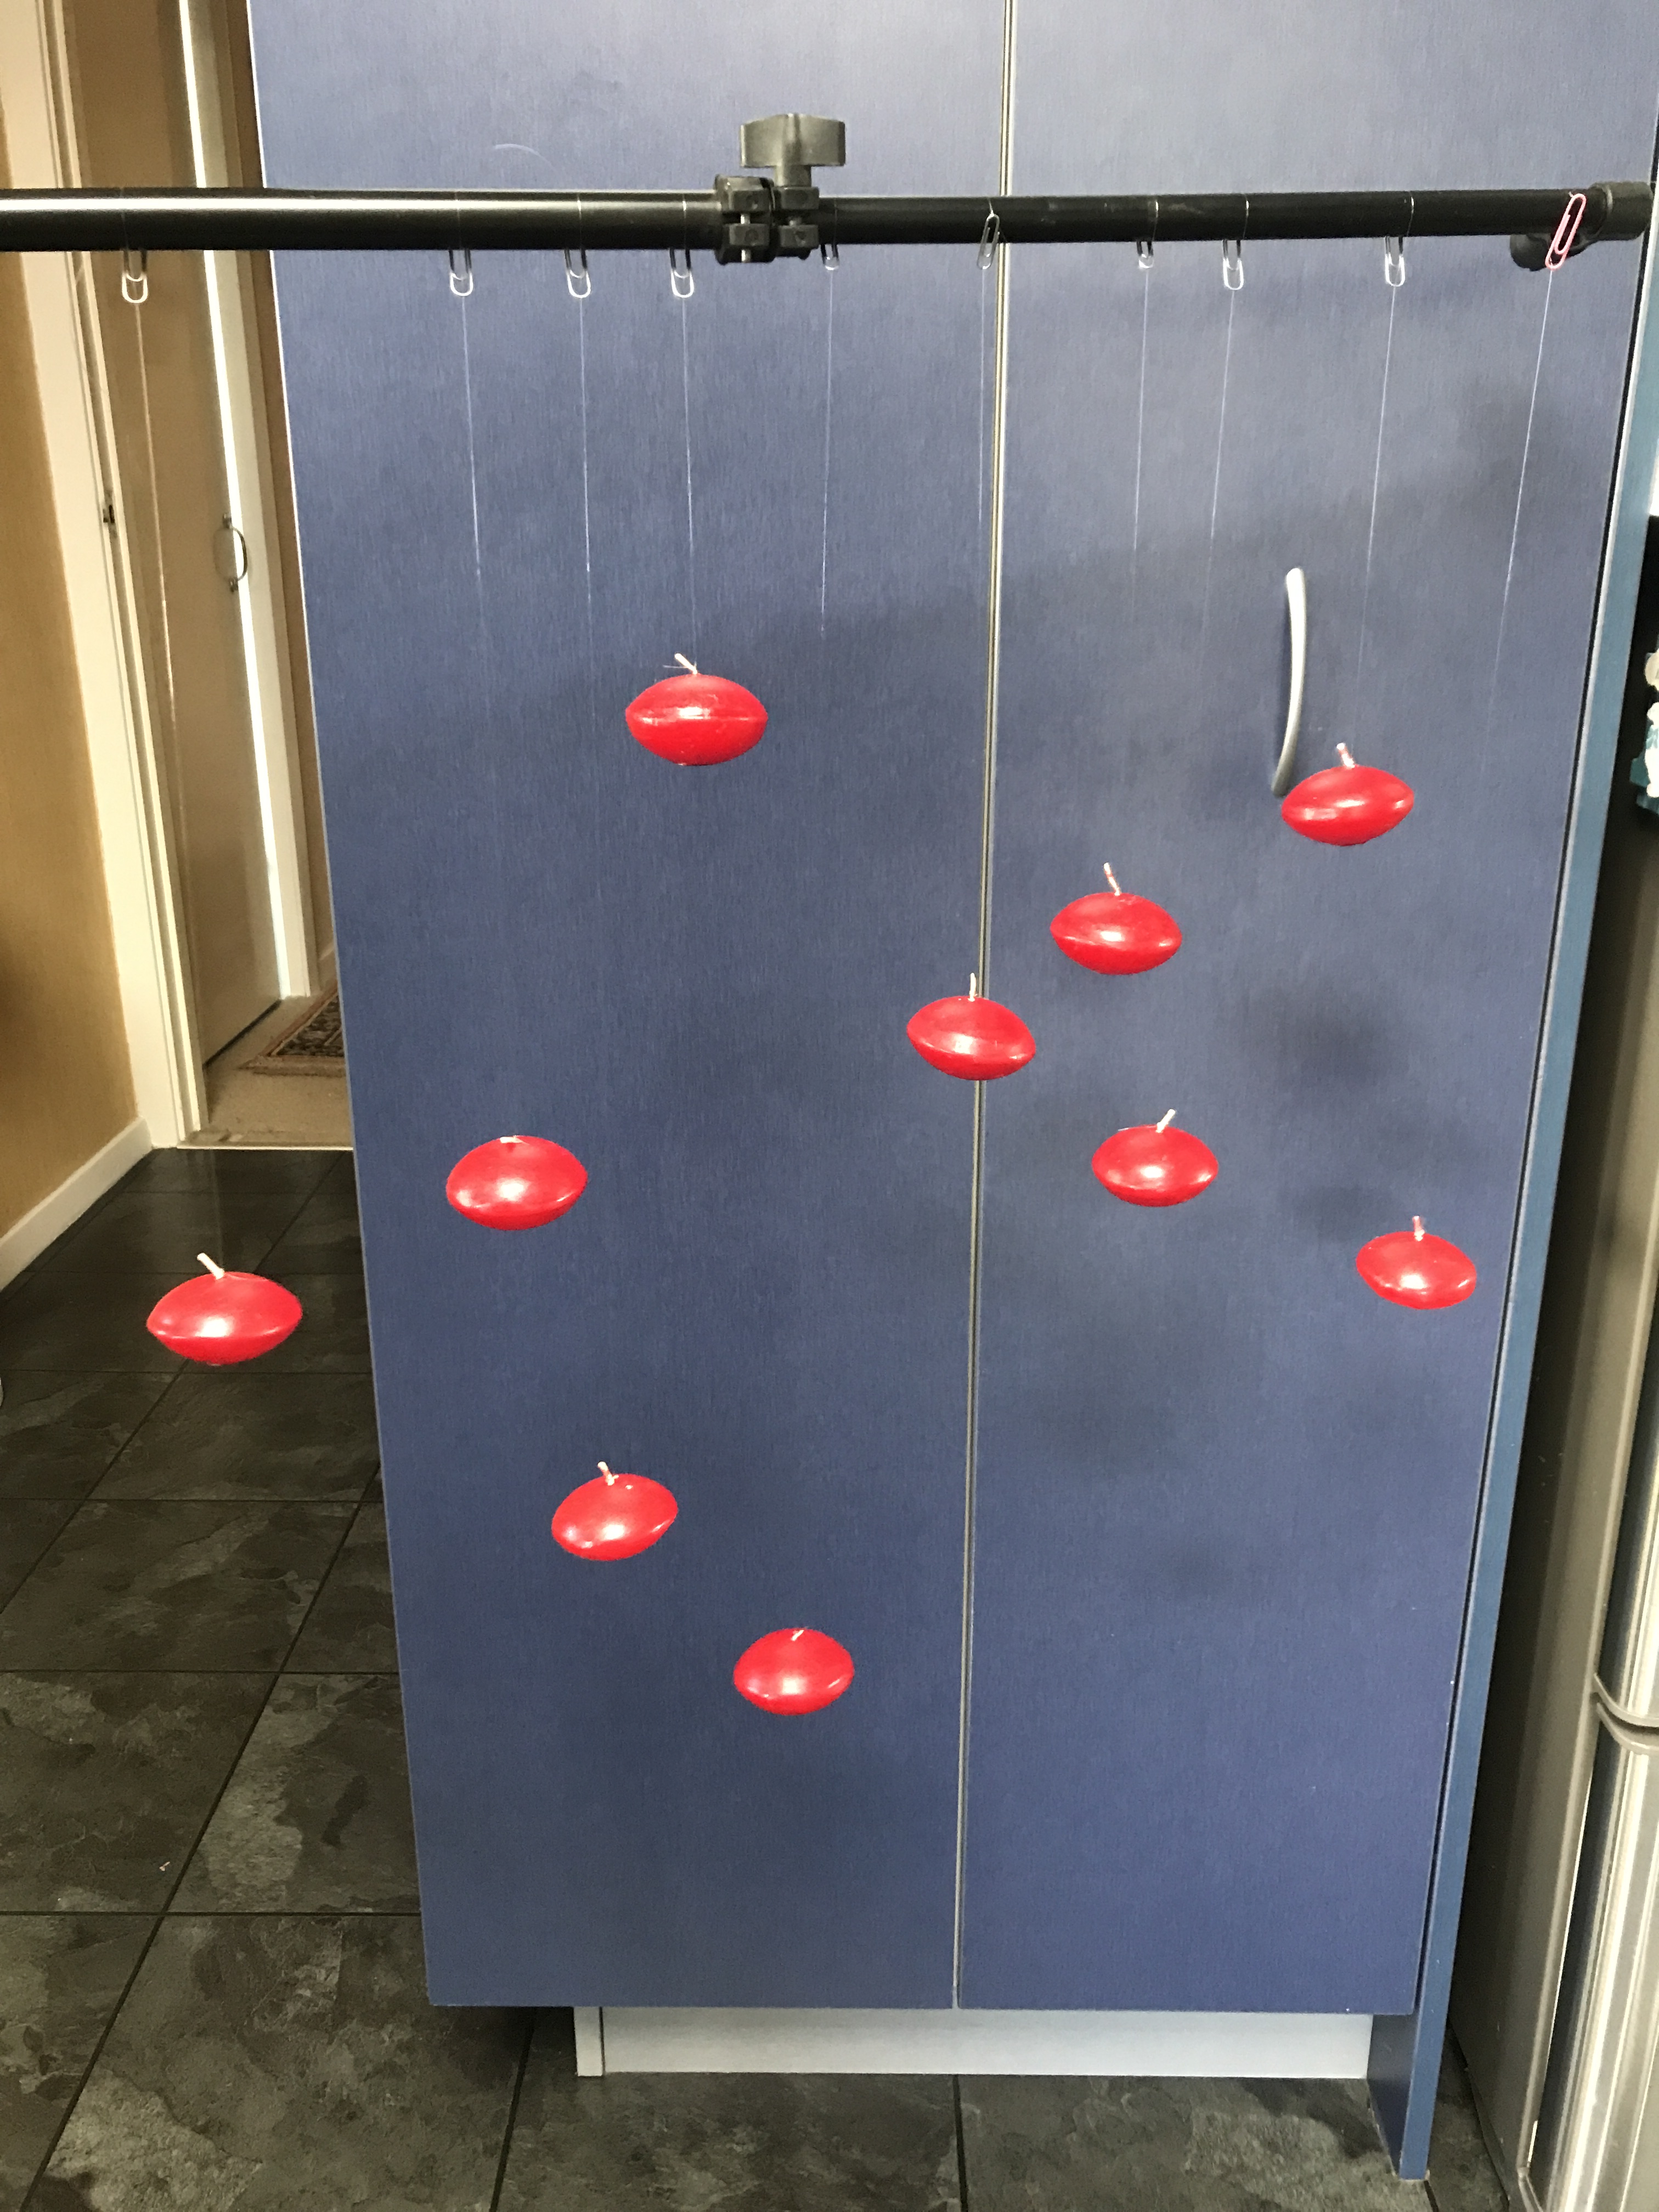
While not shown in the initial layout I decided that I wanted to add some floating candles to the screen. I managed to locate some cheap in the thrift shop and using nylon I tied them onto paper clips. This meant that they could be transported with tangling.
I found a silver teapot that came from my mother-in-law. I was then trying to work out how we could position it to get the angles right. While l was looking in a thrift shop I found a wire stand, and realised that if it was turned upside down, it would hold the pot at exactly the right angle and height.

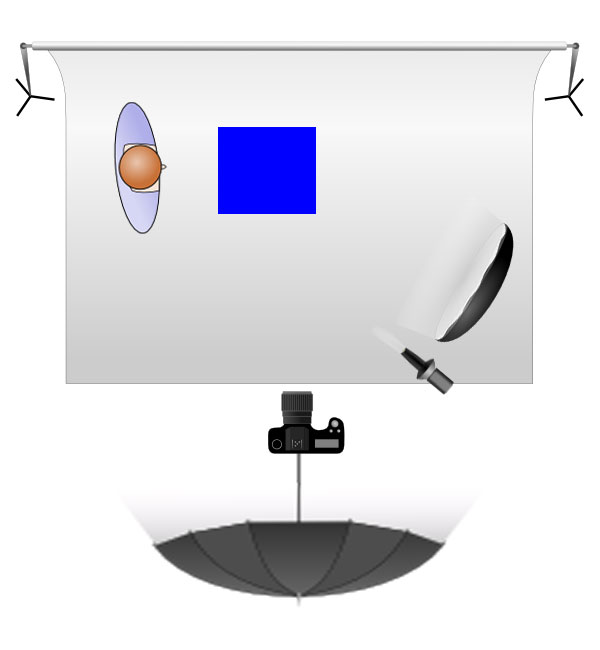
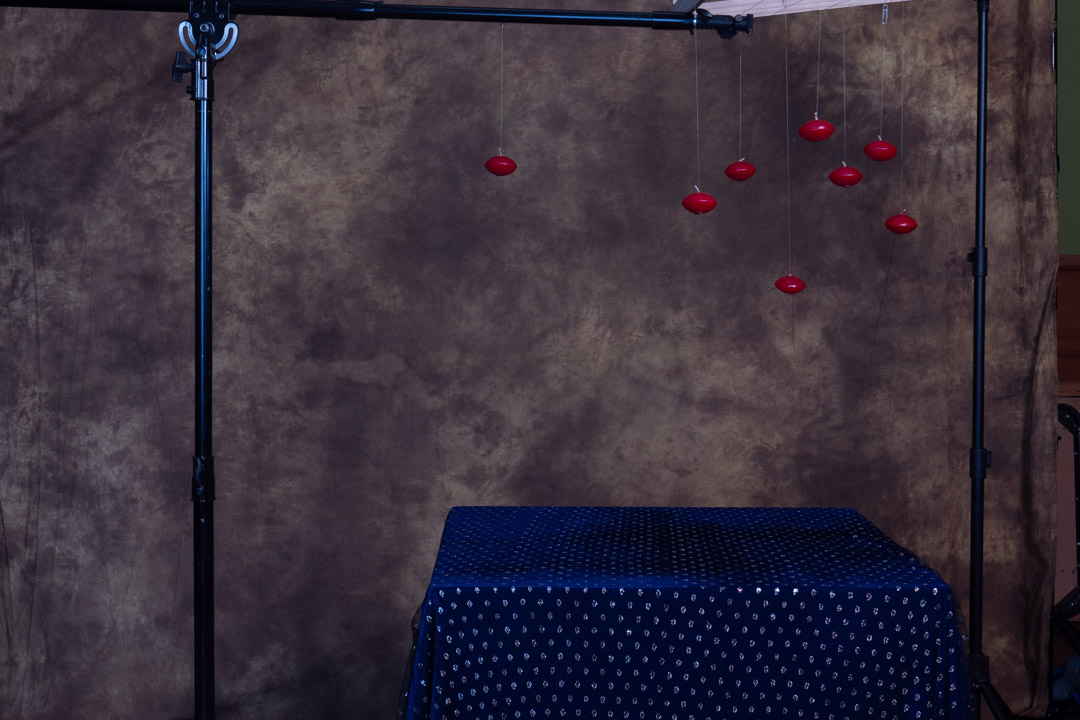
For the shoot we had hired the camera club clubrooms as this gave us plenty of space to work in. The negative was that it meant that all of the lighting gear had to be taken down there. As I was not certain how much we would need, plenty much all of the lights were packed.
As it turned out three lights were used in the shoot. The main light was in a octabox camera right, with a fill light behind the camera shooting into a seven foot umbrella. A third light, with a snoot attachment was positioned between the camera and the main light, however this did not really add much to the screen.
The key to a good composite is ensuring that the lighting is consistent across the whole image. To ensure that we knew what the lighting on a finished image was we placed all of the individual elements on the table and took the photo with them. A long tube was used to substitute where the food would be.

We were shooting tethered and I had brought my 27″ iMac so we had a decent size computer to work on. One of the great features of the tether software I use is that you can place a previous image as an overlay. This means you can accurate position other elements.
Therefore the image we had taken of the whole table became the overlay for the next series of shots, starting with the food. Most items stayed on the wires apart from the cheese that did droop a little.
We knew that the trickiest element of the image was going to be pouring the tea, but in the end it was not that difficult. In fact the hardest part turned out to be getting the angles right on the cup.

If you are observant you will note that in the shots above there is a goats skull and human skull. These were placed on the table as ideas, however in the end we decided that the scene was becoming too cluttered. Fortunately I had taken a completely blank image so removing them later was not that difficult. The blank was also used to remove the stand on the cup and teapot.

After getting all of the elements on the table we then moved to the candles. I mounted the food frame on its side between two stands and the candles were placed around the scene. Again we had the overlay in place so that we could get an idea of how the candles would interact with the other elements. We then took a photo of this placement, which then was used for the next series of shots.
Now it would have been possible to use a single candle and move it around, however we did not do that. I wanted it to look authentic by using individual candles. Once we had the floating shot the candles were placed on the table and lit. Then we used a set of prongs to lift each candle in position.

We now had all of the images we wanted and it was now time to go into Photoshop. This was not all that difficult and simply involving opening the layers and masking out what we didn’t want. Using the overlay in shooting made this process even easier as the make did not not have to that precise in most case.
As I mentioned above the cup did cause some problems mainly because the angle when it was shot off the stand was slightly out.
The video below takes you through all of the layers that make up the Photoshop file.
At the end it was great to produce an image that was ver close to what had been planned. I would have liked to be able to tell you how it did in the competition. Unfortunately the second COVID outbreak resulted in the event being pushed back to March this year.
