Category Archives: water

Tanisha with the pitcher

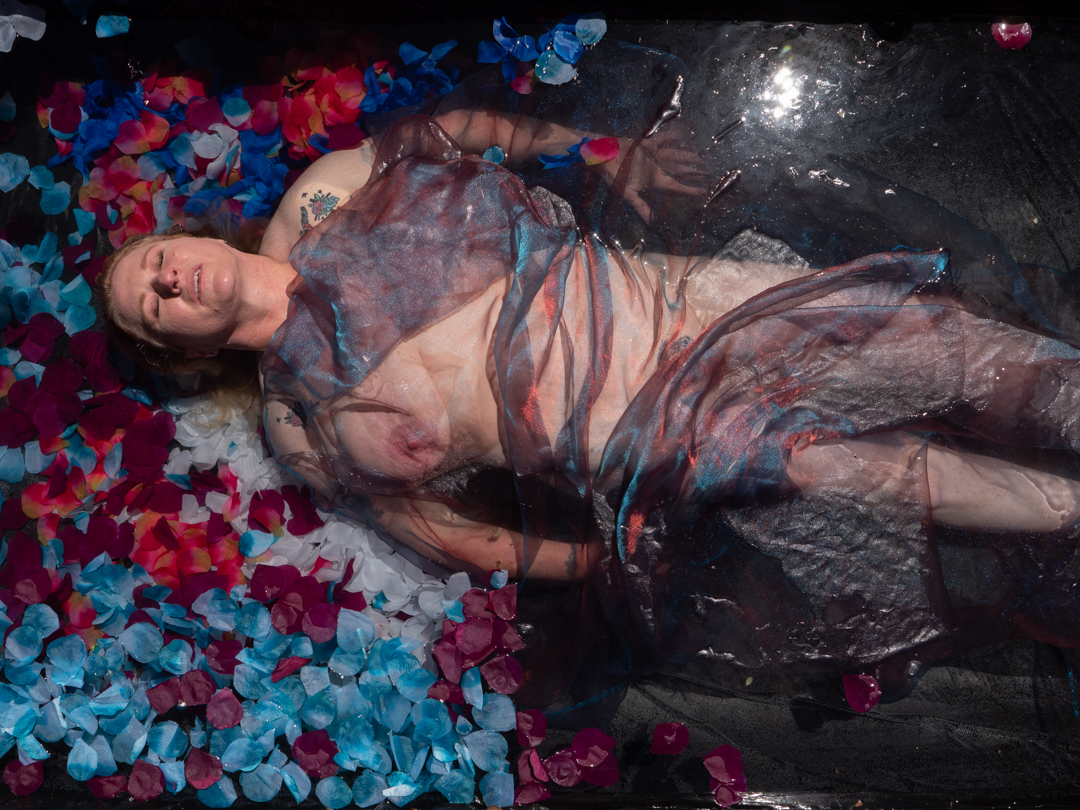
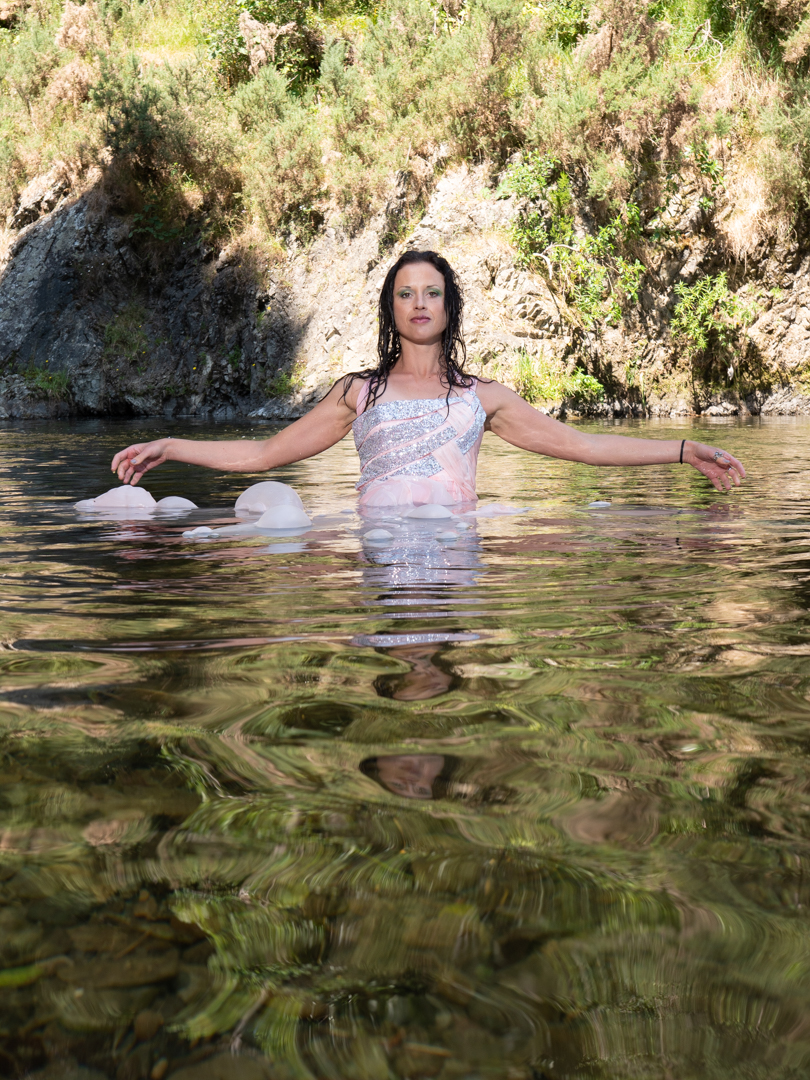
As I mentioned in the previous post I wanted to end the pool shoots with something different. That was to tell a story of a water maiden.

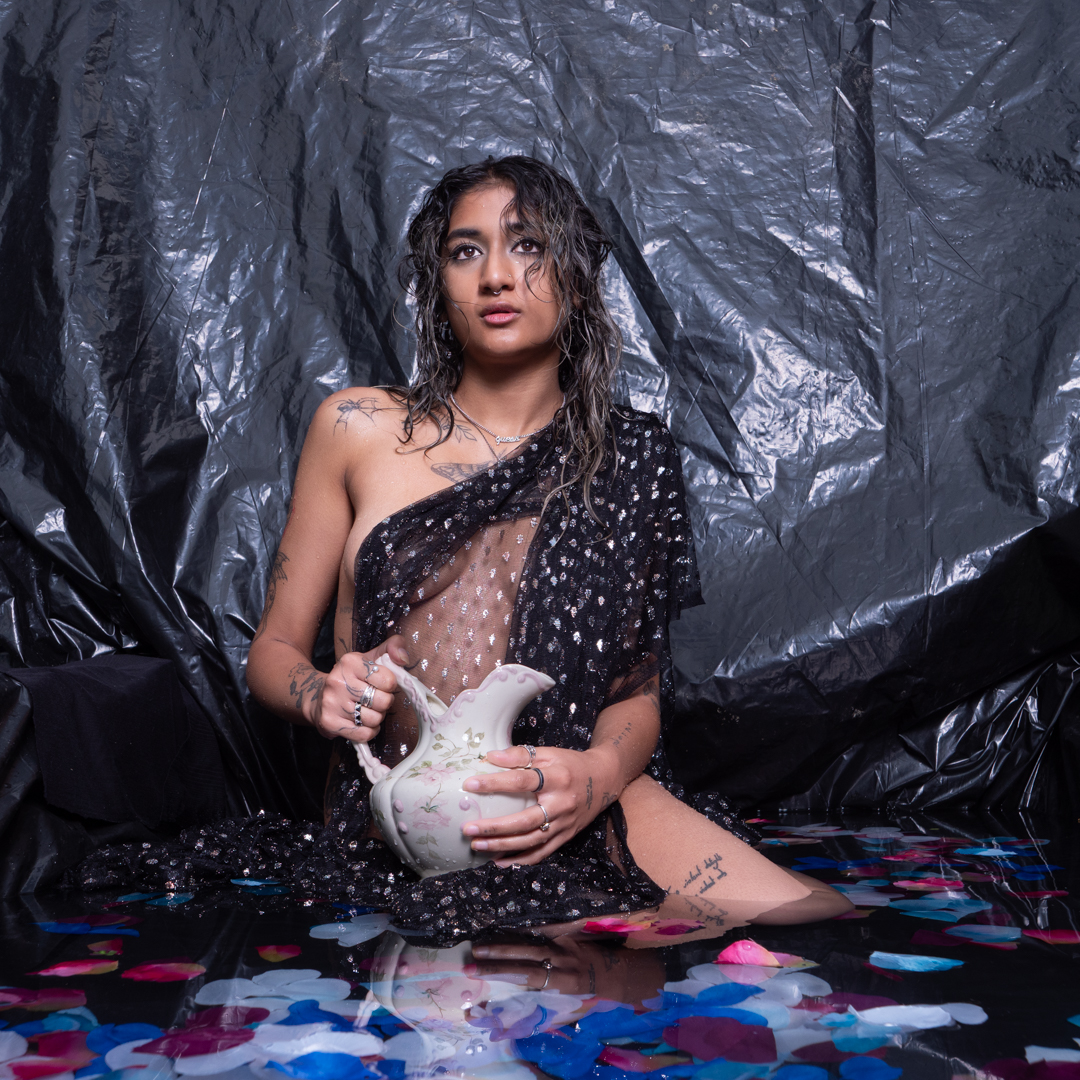
One of the items that I think we got from my in-laws estate was an old Victorian style pitcher. I knew that this would look good in an image. I also knew that my black lace  with silver accents would look stunning Tanisha. Veils like this are great because they allow both modesty and sensuality at the same time.

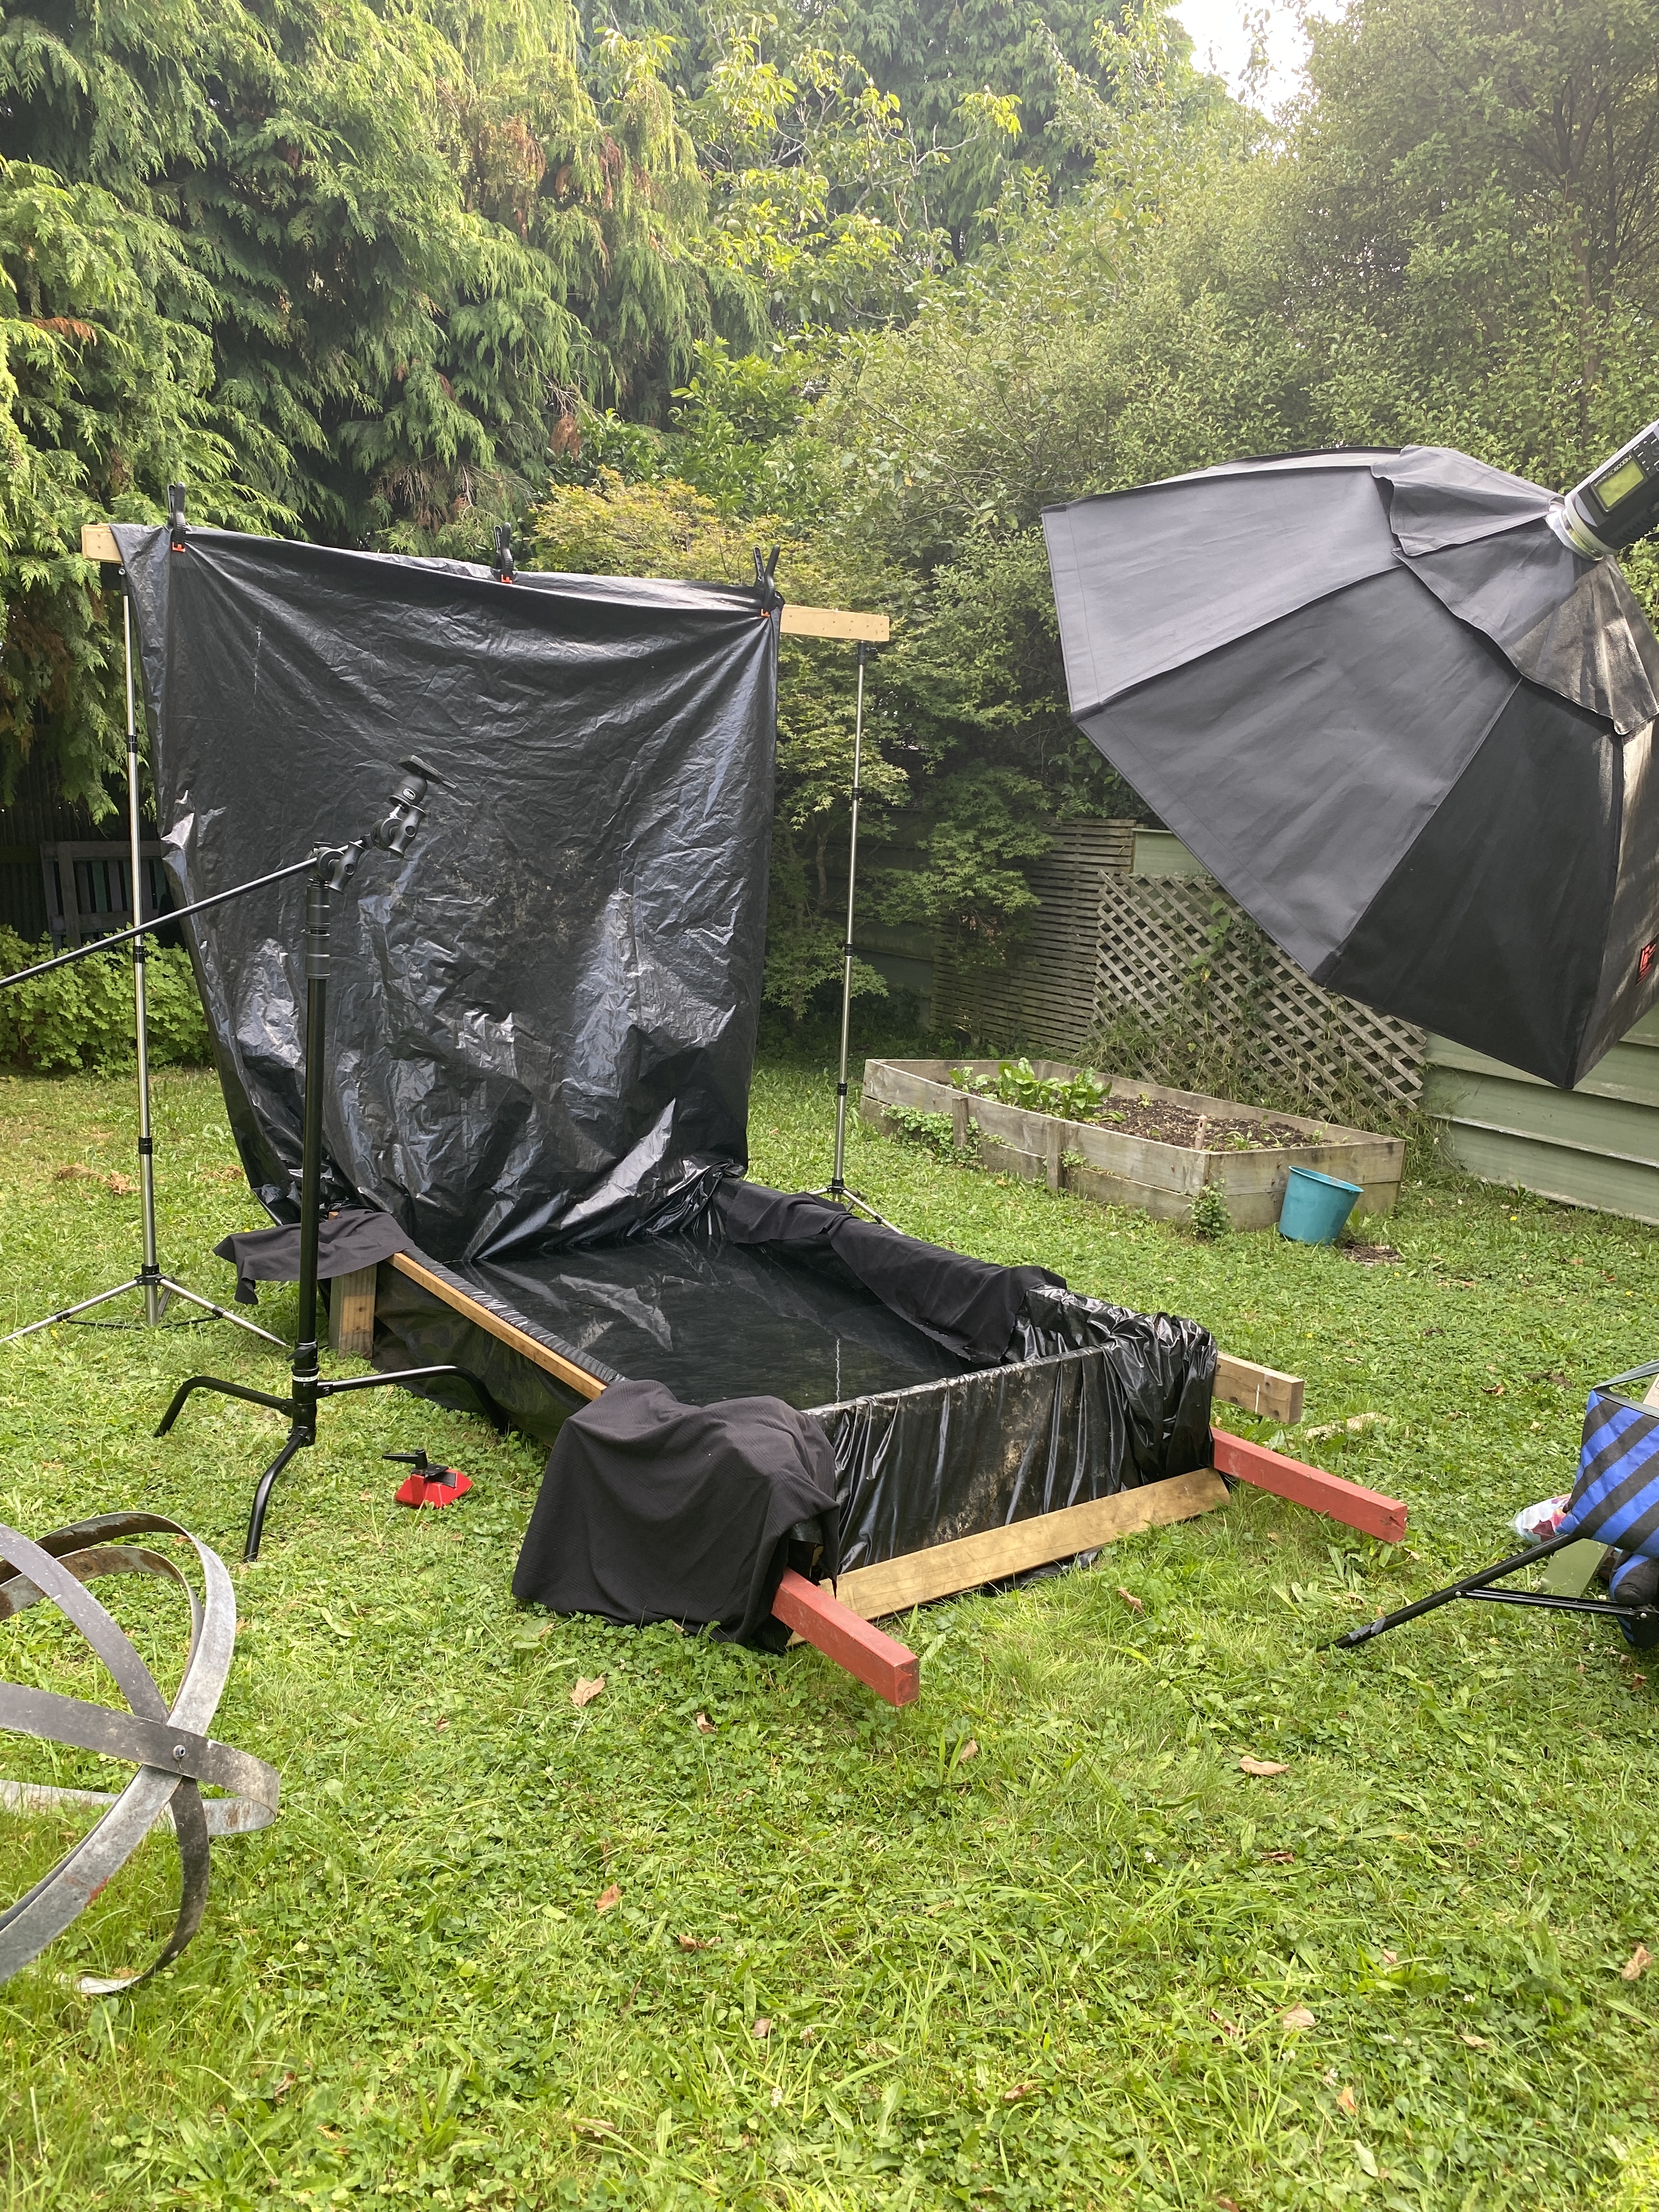
The video below shows Behind behind-the-scenes of this part of the shoot.

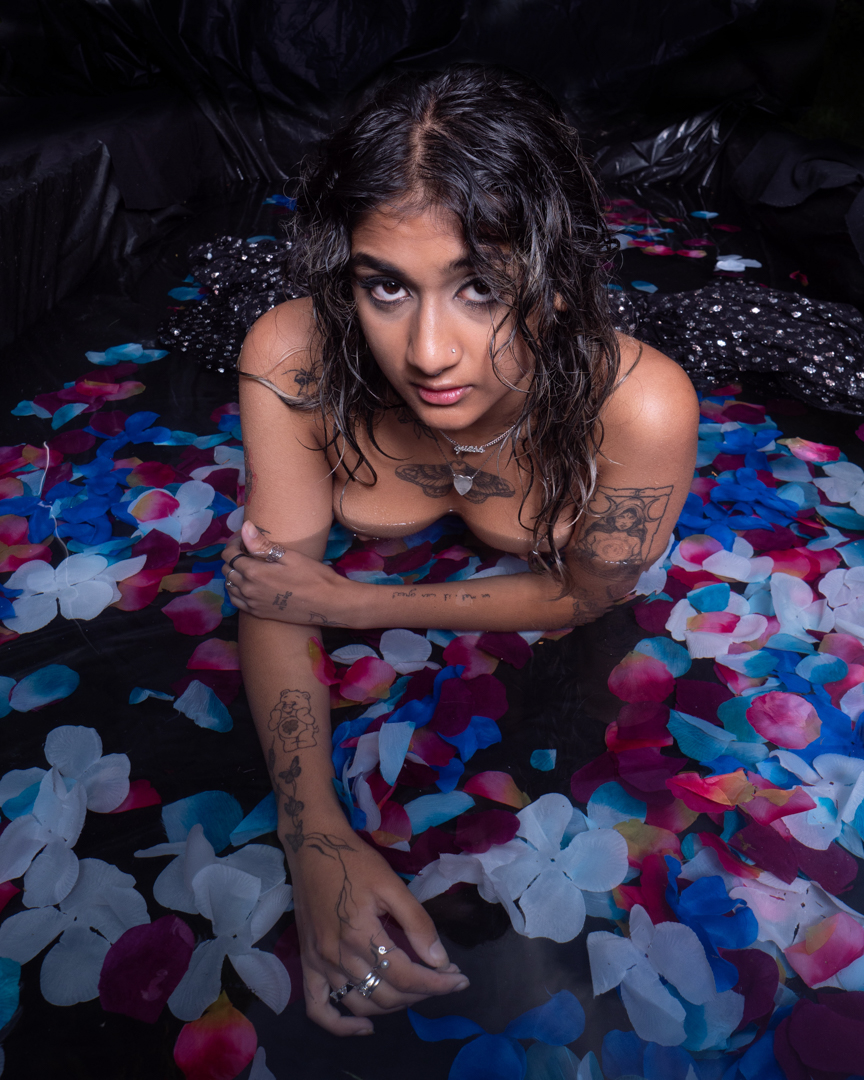
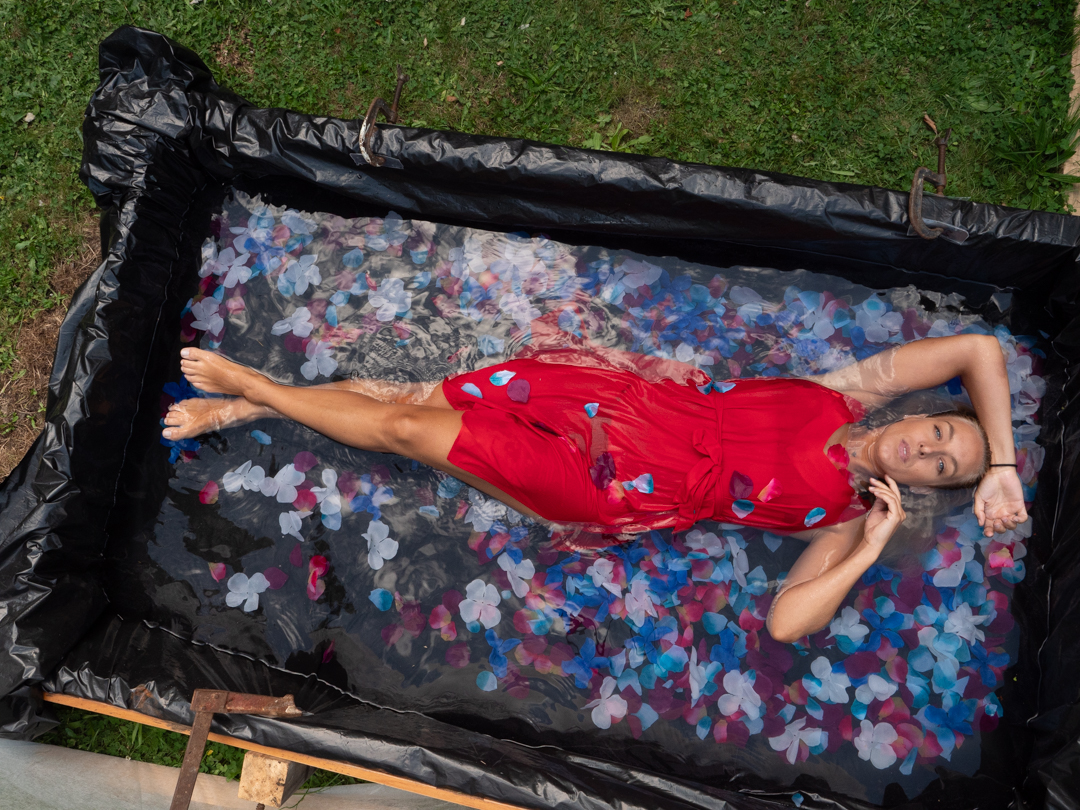
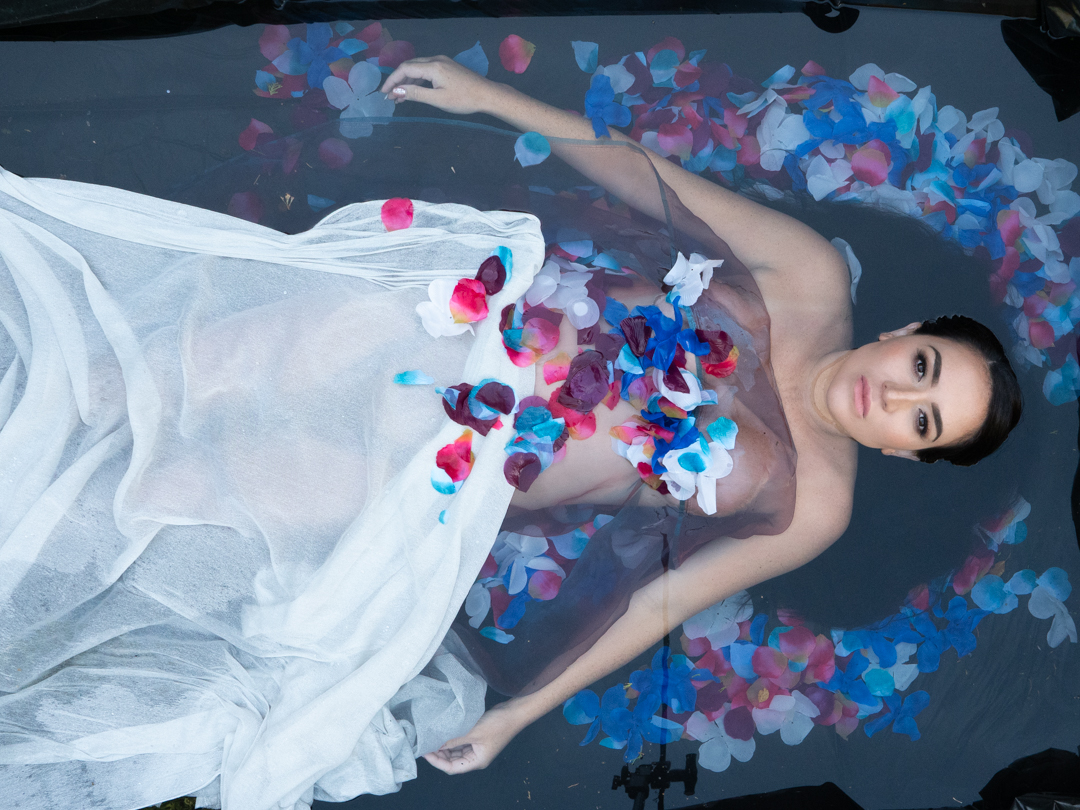
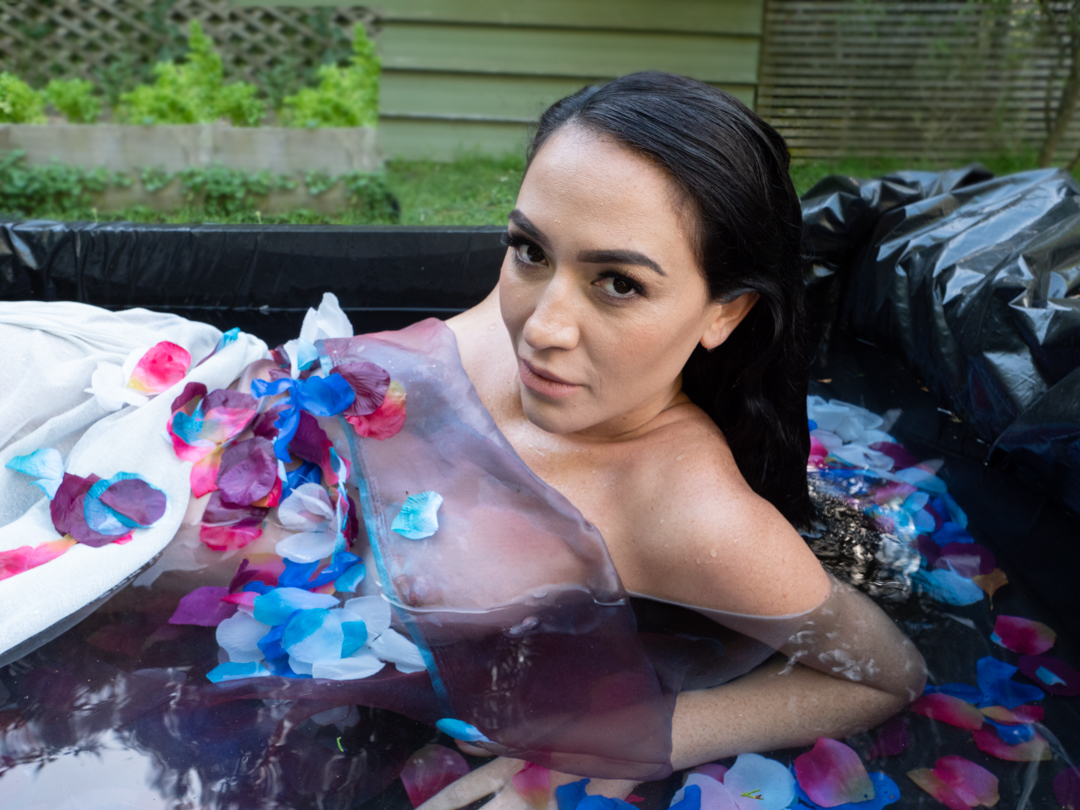
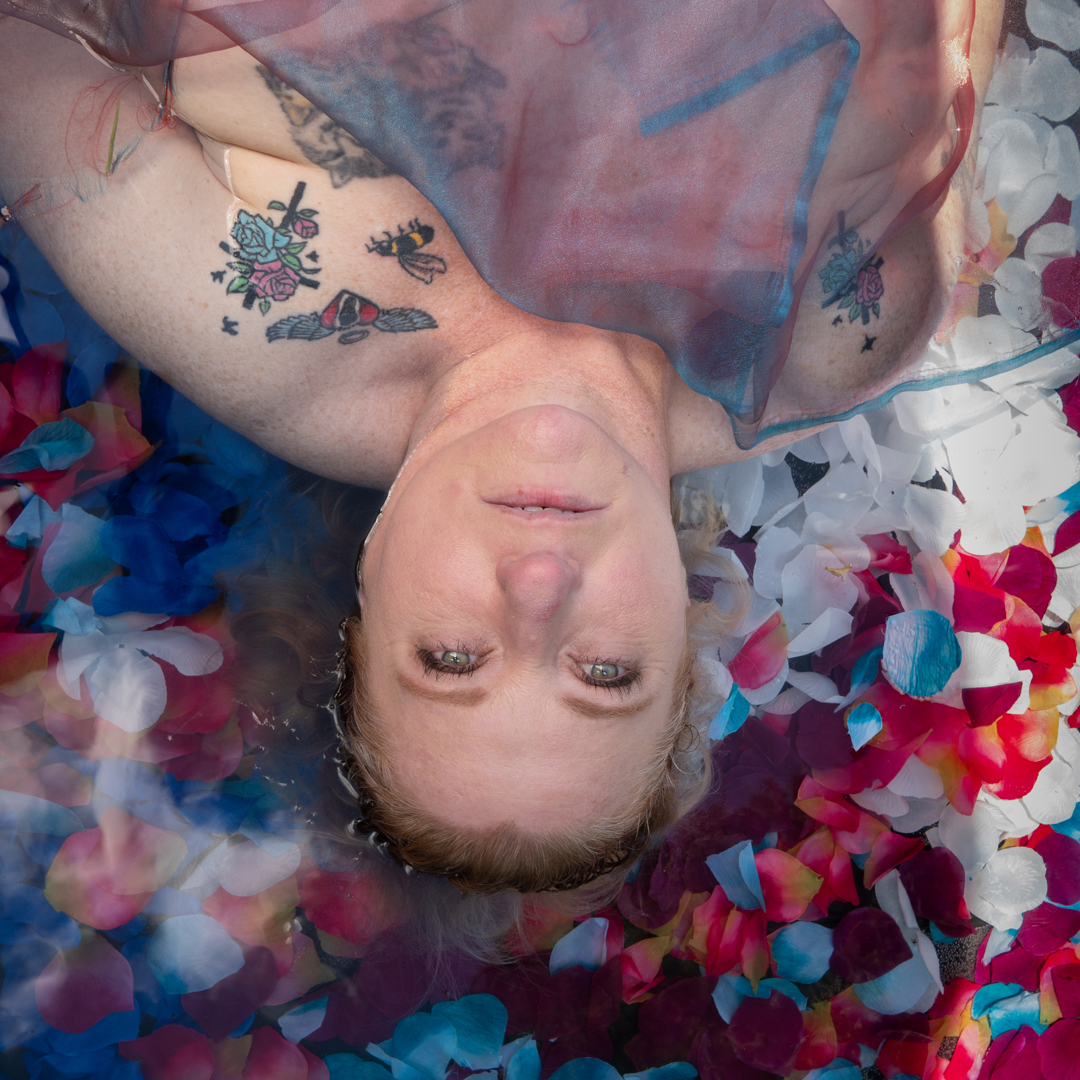
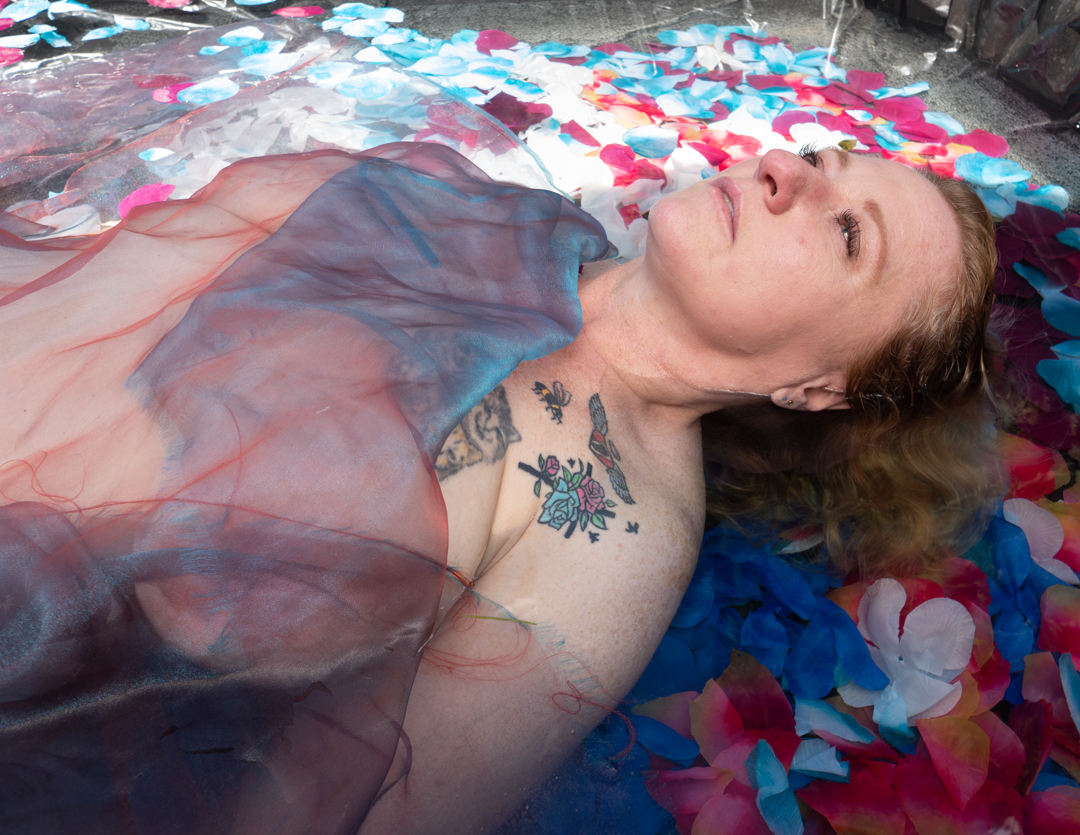
While I knew the overall concept I was not sure exactly how it would look. Therefore to give me flexibility I insured that I shot Tanisha from different angles and also indifferent poses.

The images were shot on my Lumix G9 at f5.6 1/100s ISO200.

I had always intended that the black polythene would not be in the final image. It was acting as a backdrop.

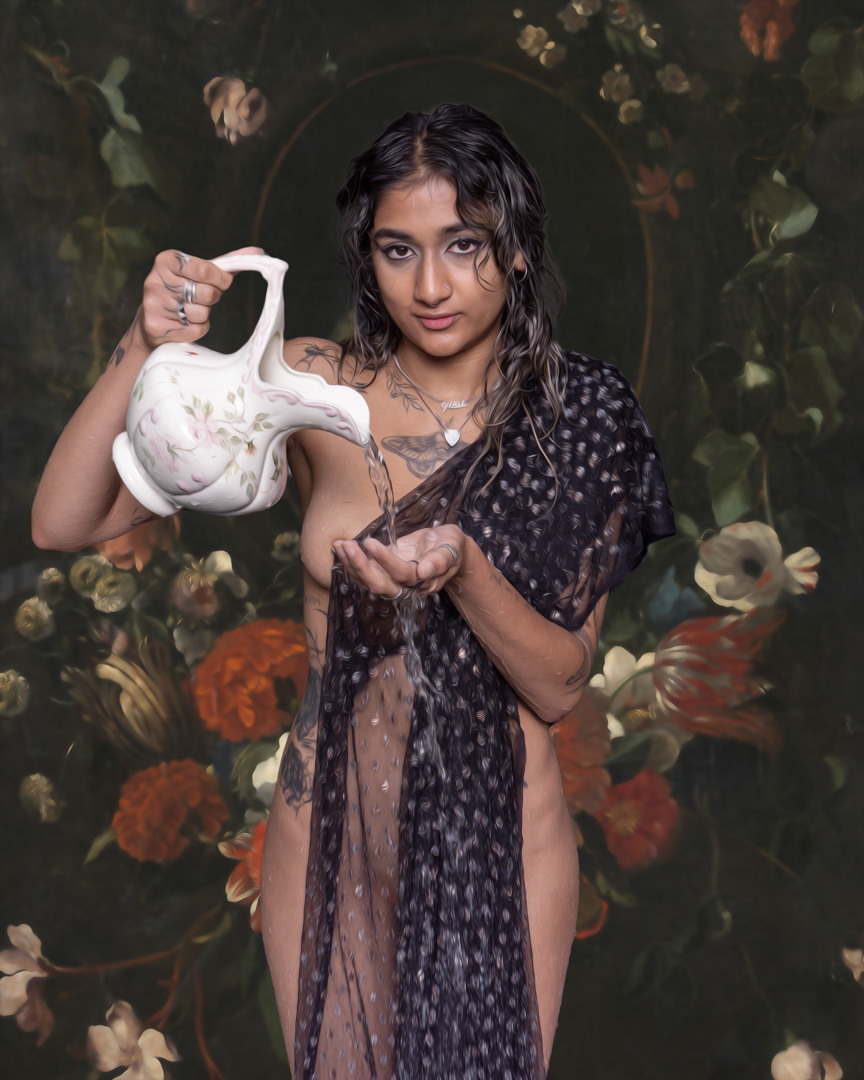
I had downloaded a series of digital backdrops, made by Havelock North photographer Richard Woods. I chose the one that both matched the image while at the same time not overpowering it.

It was now time to put the concept together. In Lightroom I selected the background and the image of Tanisha. I then got the program to open them in Photoshop as separate layers. The layers are shown below. 

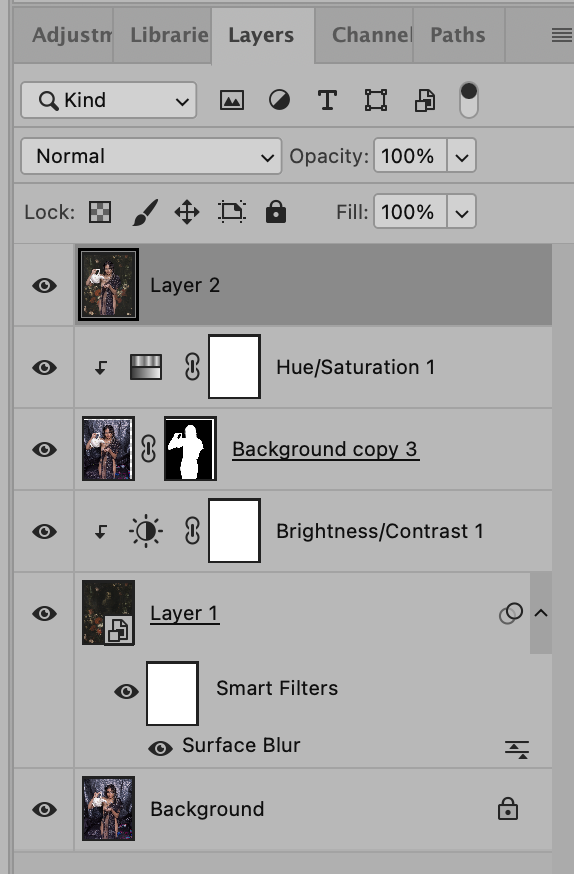
I felt that the digital background was too sharp so I applied a surface blur to it. This was done using a smart filter so that I could come back and tweak it. I also pushed the brightness of the background. 

I did the copy of the layer containing Tanisha and created a mask around her. As often happens when you bring multiple images together in a composite they do not exactly match. So I did a small queue and saturation adjustment.

I wanted this to resemble a painting, so I created a new layer by merging all of the others. Then, I applied the oil paint filter found under Filters: Stylize. I kept the setting really low as I did not want to overpower the underlying photo. 

I was really pleased how the image came out and it has been well received when posted online.  I cannot use it in competitions however as the use of the downloaded digital background disqualifies Me.

Tanisha in the pool

After we finished the studio shoot we headed out to the pool. As this shoot took place almost a month after the previous one the pool had been emptied and refilled. On previous occasions The polythene lining had been doubled up but I determined that that was not necessary. Instead I extended it up at the rear of the pool providing me with a solid wall backdrop.

As in previous shoots we moved fairly quickly. While the pullback image shows the stand mount for the camera this ended up not being used. Something glitched in the camera and iPad app refuse to talk to each other. So rather than mucking around I ditched the idea and shot standing on a stepladder.

The video below is a small section of the behind-the-scenes. The video was shot using a small Panasonic DMC-LF1 which is a point and shoot camera. Despite being small it is great for shooting behind the scenes videos.

The time that I had invested setting up the lights ahead of time paid off. I was able to reposition Tanisha without having to worry too much.

All of the images were taken on my Lumix G9 at f8 1/160s ISO200.

As this was to be the last shoot of the pool series for the summer I wanted to try something different. The next post will cover that .

Getting set up for another pool shoot

There is a lot to be said about the use of repetition to improve your photography. I certainly found that as I was shooting the pool series early 2023. Each shoot presented new challenges that I would then take into the next one. This was a novel experience given that normally my shoots a one off events.

My final shoot of the summer was with Tanisha. She had answered the casting call I placed back in December. We were unable to shoot until mid-February. I booked the shoot for the evening based on previous experience. This timing ensured I would not be fighting bright overhead light.

The previous shoot with Morgane occurred at roughly the same time. It showed me that I could not rely completely on natural light. Therefore I made the decision that I was going to overpower it. 

As I have mentioned before, shoots in pools with sun-heated water have to be done quickly. You cannot spend time playing with the lights while the model is in the water. The answer was to set everything up before the model arrived. That way I could make sure that everything was as I wanted it.

As shown in the image the start of the post I set up my AD600 at the rear of the pool shooting into a 1.5m octabox. The camera was positioned on a boom over the over the pool and triggered from an app on my iPad.

A test shot at f8 1/160s ISO200 proved that I was removing most of the ambient light from the screen. I set the power level of the light in the mid-range and took another shot. This provided enough light on the water but also the softbox reflected in it. I moved the light back and adjusted its power level to compensate.

Once I got the reflection only appearing in a small point of the pool, I was happy. I knew that I could fix this easily in post. There was still a sky reflection in the water. I knew this would go away once the flowers were added.

This test, however, did not show how the light would affect a model. I pulled out my handy mannequin. Then, I placed her in the pool. Being plastic she actually floated which meant it was not an exact replication of a human but it was close.

I was now confident that the set up was in place and ready for Tanisha.

Morgane in the Pool

Morgane and I spent about half an hour shooting around the garden. It was then time to head into the pool. Unlike the previous three pool shoots, Morgane had a new preference. She did not want to use sheers but rather preferred to be in a bikini and coverings. 

As I mentioned in my previous post Morgane wanted to do her own editing of the photos. Therefore, several images on this page are straight out of the camera. They show the surroundings of the pool.

We started the shoot around 6:00pm in the evening. We did not have to worry about high overhead light.  As the day was also reasonably warm we also had time so I positioned my Lumix G9 on the end of the boom. The image below shows how the camera is connected to the boom arm.

The actual connection is not designed for this purpose. Rather it is a bracket to attach a collapsible soft box to a speedlight.  It worked really well for the camera, especially as it enabled me to get it completely level to my subject. I was controlling the the camera via the Panasonic app on my iPad.

The camera was set in Aperture Priority at f8 as I wanted a decent depth of field.  ISO was set at 800 as I wanted to ensure a reasonable shutter speed. The images ended up being between 1/125s and 1/200s.

I took the overhead shots. Then, I repositioned the camera. I shot close to the water, which enabled me to get Mogane’s reflection in it. Because it did not want too much focus on the background I stretched some frost cloth behind the pool

The light had faded somewhat by the stage. So, I positioned a speed light with an orange gel at a very low power to camera right. This added a kick of golden light into the images.

We are both pleased with the results of the shoot.  It was interesting shooting the same scenario with four different models at different times of day. I would learn heaps from each shoot that I would then apply to the next one.

I had thought that Morgane was the last of the pool shoots. However, the following month, I did one more. That will be covered in a subsequent post.

Kaylene Pool Shoot

Once we had finished the studio shoot we headed out to the pool.  

We scheduled the shoot for much later in the day. I knew this timing would give us much more control on the light. The pool was positioned north south. By 5 o’clock, it was in the shade of a line of trees on our boundary. This meant that I did not have to deal with the direct overhead light. 

The light levels were lower than I preferred. I needed to set ISO800 to maintain reasonable levels when shooting at f7.1. The camera was set in aperture priority mode with the overhead shots taken at 1/100s. The ones lower down were taken as 1/50s. This speed is quite slow for a portrait. However, the Lumix G9 has brilliant stabilisation built-in. I can handhold to almost the second.

Unlike the previous weekend the weather was warm and the pool had a chance to warm up. This meant that we had the time to set up the camera overhead and control it via the Ipad. Even so the total shoot lasted only six minutes.

The flowers were fabric which meant that they behaved completely different to actual flowers. Real flowers float whereas the fabric only stayed on the surface for a short period of time before sinking.

The boom arm and camera did appear as a reflection in the image. Knowing that this would happen I was careful where it was positioned. Then it was I knew that I would have to fix this in post. This was achieved mainly using content aware fill. In the lightest version of Photoshop, I would use the Remove tool. It does a much better job of removing such distractions.

This was a great shoot and again I learnt important things to build into the next one. The most obvious was that I needed to work out the background in someway. I had been removing elements in Photoshop but I figured it would be easier to do it in-camera. 

The final shoot in the series booked for the following weekend so I did not have much time to wait.

Camila Pool Shoot

As I planned to shoot the four sessions within a week of each other I had not bothered to empty the pool. The shoot with Camila took place nine days after the previous one with Shirley.

As I mentioned previoulsy, the pool that I constructed for these shoots was built on a wooden frame with an internal measurement of 1.1m (3’ 9”) wide and 2m (6’ 7”) long. It was fitted with a double liming of black polythene. It was then filled with water at approximately depth of 30cm. As the ground sloped it was actually deeper at one end.

Once we had finished the studio shoot Camila stripped down to her underwear and we headed out to the pool. While the conditions were ok for photography with a lot of cloud cover they were less than ideal for the pool. We had not had much sun over the previous three days so the water was very cold. In addition the air temperature was only sitting around 18°c (64.4°F).

Therefore no that we did not have time to muck around. While the camera positioned on the boom does give you the best viewpoint it was not really an option. Getting it positioned and linked to the app on the iPad can prove problematic and takes time.

As both the camera and ipad go into sleep mode it is not something that you can set up in advance. I therefore decided to ditch it and simply handhold the Camera.

This then introduced the problem of a reflection of me in the image. I knew that I would have to fix this in post. This was achieved using a combination of content aware fill and the clone stamp. 

It is interesting that the latest version of Adobe Cameron Raw has introduced a reflection removal tool. While it seems to work well on window reflection, I tried to run one of these images through it and it totally failed at removing my reflection.

The camera was set in aperture priority mode shooting at f5 ISO200. We only shot for a little over a minute. It is a reflection of the lack of light that the camera used shutter speeds between 1/60s and 1/80s. The previous shoot with Shirley was between 1/400s and 1/800s.

The total time from the first to last image was a little over a minute. Despite it being a very short shoot we got the images we were after and Camila really liked the end results.

Shirley Pool Shoot (NSFW)

The pool that I constructed for these shoots was built on a wooden frame with an internal measurement of 1.1m (3’ 9”) wide and 2m (6’ 7”) long. It was fitted with a double liming of black polythene. It was then filled with water at approximately depth of 30cm. As the ground sloped it was actually deeper at one end.

The pool was filled the day before the shoot in the hope that the sun would warm the water. 

At either end of the pool I positioned backdrop supports with a bar running between them. I then draped a double layer of frost cloth over the whole pool. The intention of this was to diffuse the light. The video below shows the pool.

My Lumix G9 camera was positioned at the end of a boom arm over the pool. I controlled it via an app on my iPad. This gave me the advantage that I could get it perfectly square to Shirley without having to stand over her.

We had started the outdoor shoot around 3 o’clock. The idea was to allow time for the pool water to heat up. The day was very bright with next to no clouds. This created an immediate problem and that the frost cloth was not sufficient to diffuse the light. The result was a very bright spot in the pool.

I tried to eliminate this by mounting the inner panel of my largest reflector on a boom. I then positioned this over the pool. While this did reduce most of the light it introduced a new problem. There was now a very strong reflection in the water.

Even with the pool water being heated by the sun, you can only work for a maximum of around 15 minutes. After that, the Model becomes too cold. Therefore I did not have the luxury of time to fully deal with the problem. The solution was to move the reflector so that it was not directly above Shirley and then to shoot from a different angle. I also shot closer so that we could eliminate the reflection.

At the end of the day I managed to get a series of usable images which Shirley was happy with. As this was the first shoot with the pool I always know that it would be challenging and that there were things I could learn from it.

Melissa – River

While I mainly enjoy shooting in the studio (due to the control it gives me) I also enjoy shoots the involve holder water. So when Melissa and I finish the studio series we made plans for another shoot when the weather warmed up.

The Hutt River is only a kilometre from my home but during the summer months it does run into the issue of an algal bloom, which means swimming in it is not recommended. As I don’t want my models ending up sick this meant it was out of the question. Fortunately on a walk over the summer I discovered a path out of the housing development up on Riverstone Terraces that lead to a reasonable size stream that was feeding the river.

I figured that the water would be safer here so Melissa and I planned to shoot and I pulled one of the ballgowns that is in my position.

While we were shooting in the middle of summer the reality was that the water temperature did not change very much therefore we knew that the whole shoot would need to be done within a short period of time. This is also the case with pool shoots anyway.

Most of the shots which taken using natural light however for a few I did bring a speed light which was positioned in the river on a tripod. The light was gelled orange so that we could attempt to recreate gold light.

Given that part of the river was deep enough for Melissa to be almost fully emerged we attempted a hair flip. This was not as difficult as it could have been and we managed a reasonable shot after only a couple of the teams.

It was a fun afternoon and I’m pleased with the results.