Category Archives: 2021 Shoots

Pandora

This post covers the last shoot I completed in 2021. It was a collaborative effort with local stage actress Mandy.

In Greek mythology Pandora was the first woman created. Her curiosity led her to open a jar that Zeus has filled with a whole lot of bad things. As a result mankind was subjected to all of them.

Mandy wanted to bring the myth to life. I knew this would mean some elements would be shot in camera, and others would be created in the computer.

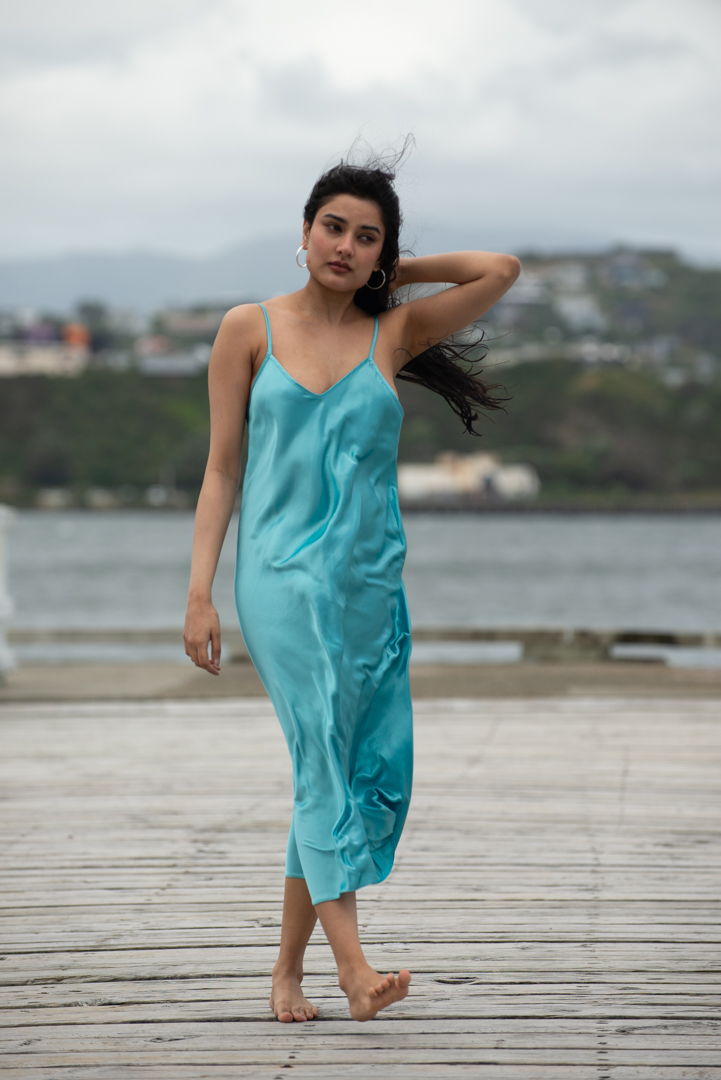
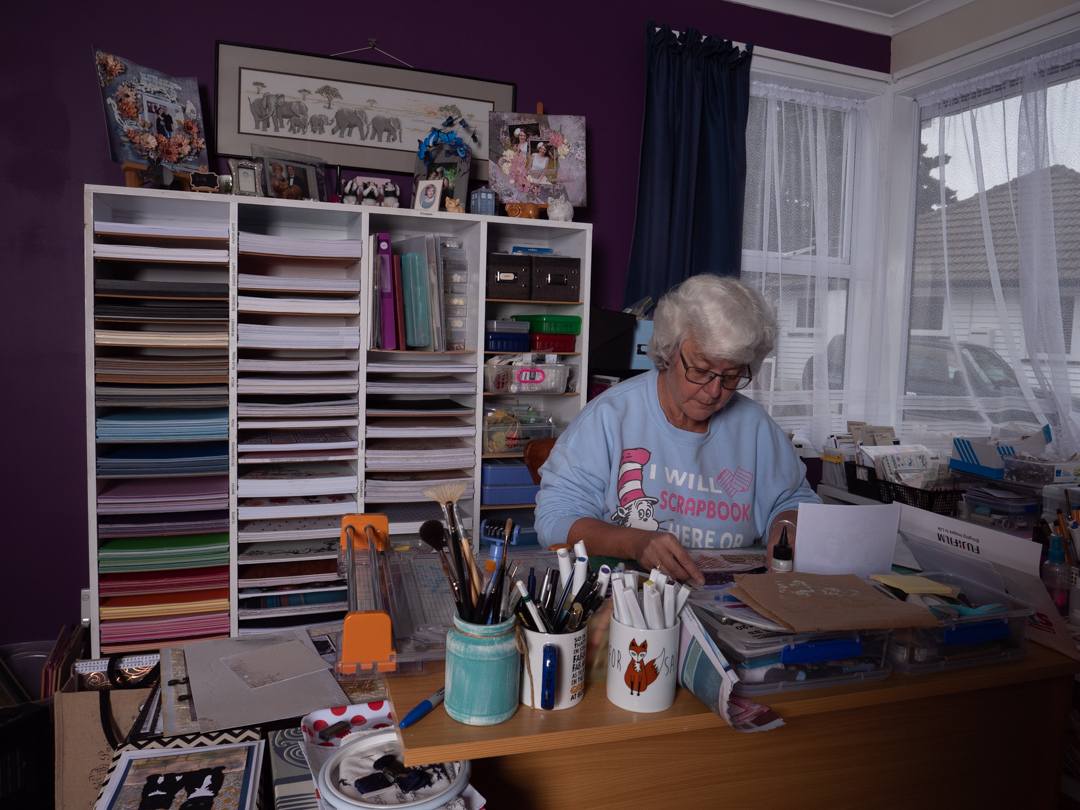
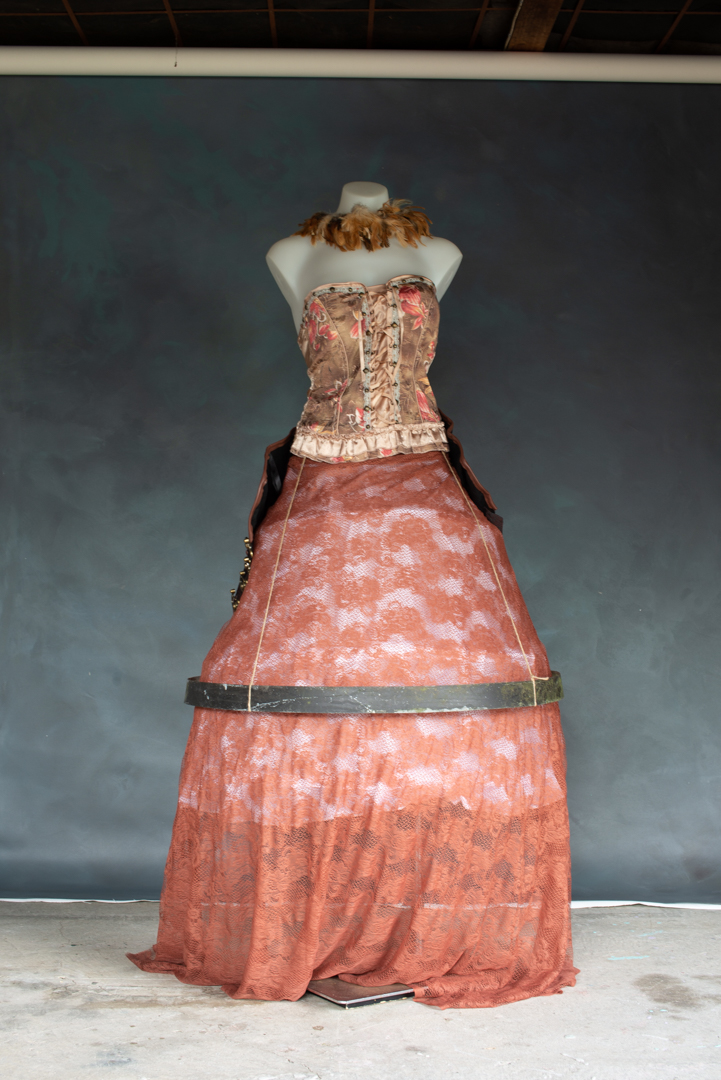
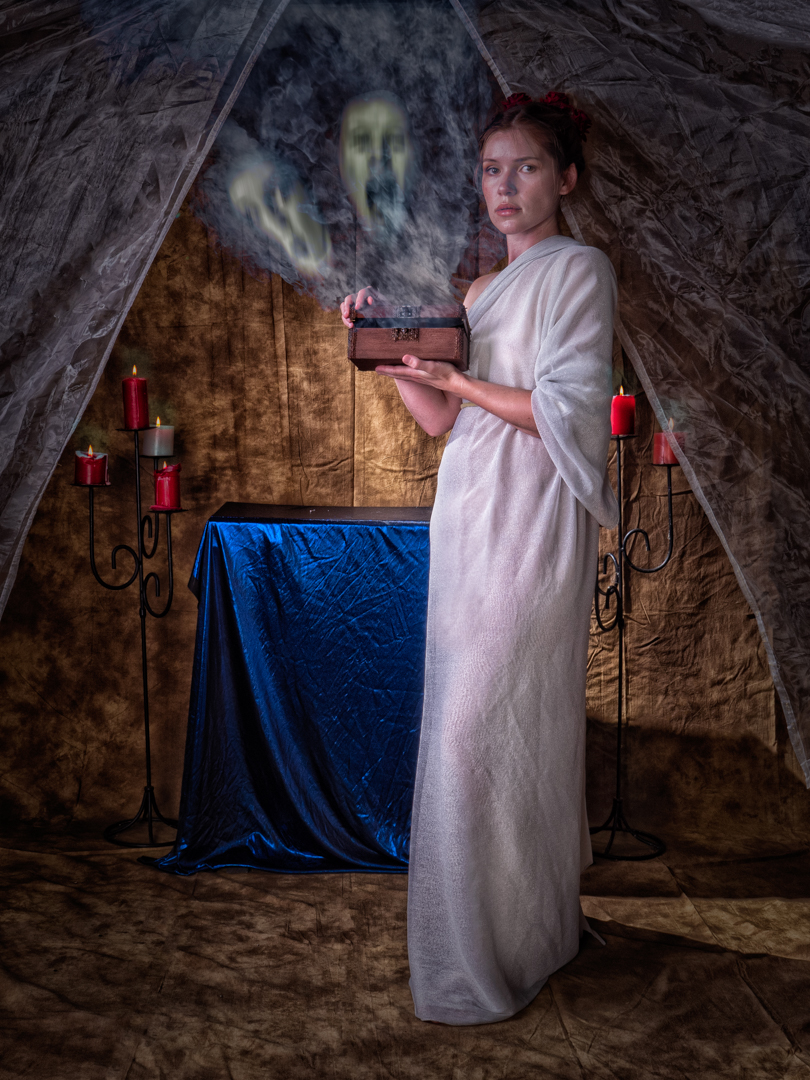
I built a muti-layered set in the garage using lengths of lace. We also fashioned a simple robe for Mandy to wear.

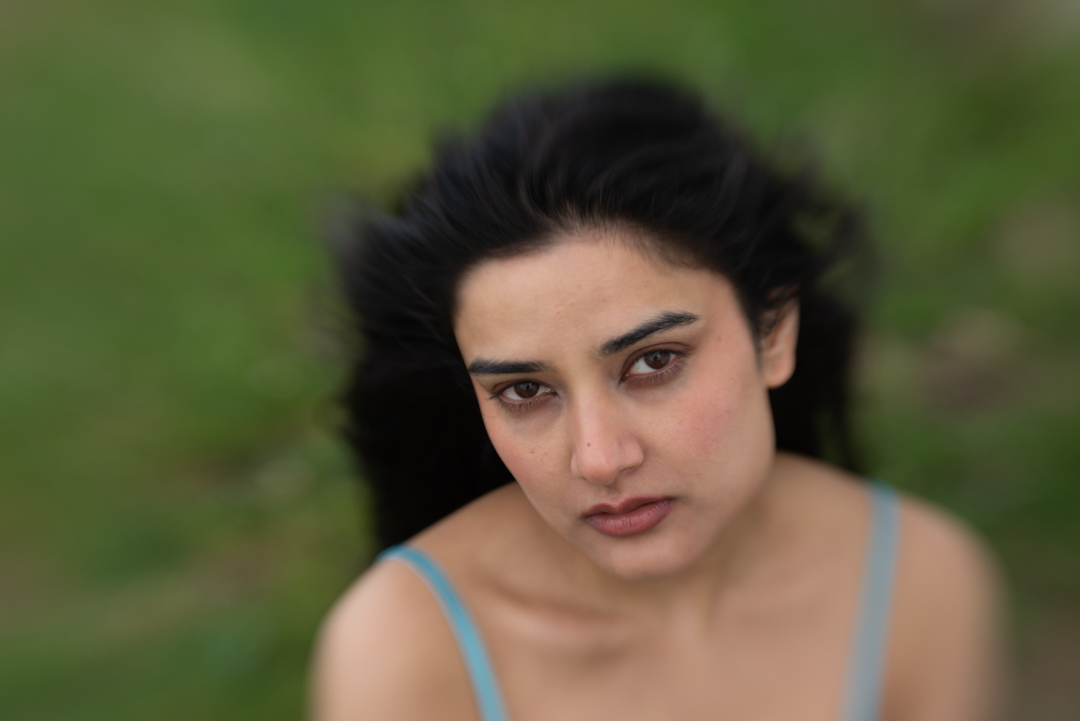
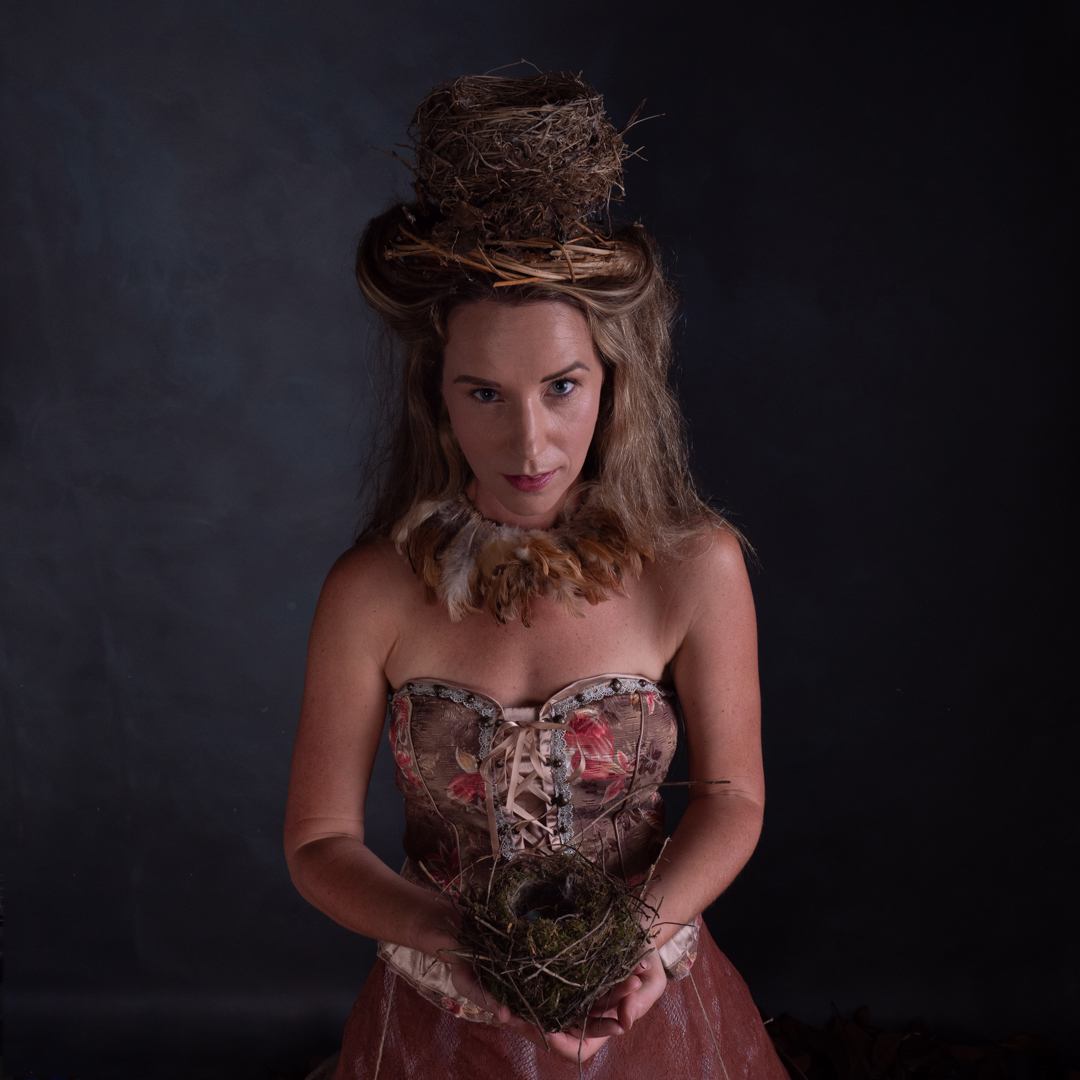
The lighting in the two images above was very simple. A single large soft box was positioned camera left. The camera was set at 1/200s f8 ISO200 and an equivalent focal length on 24mm.

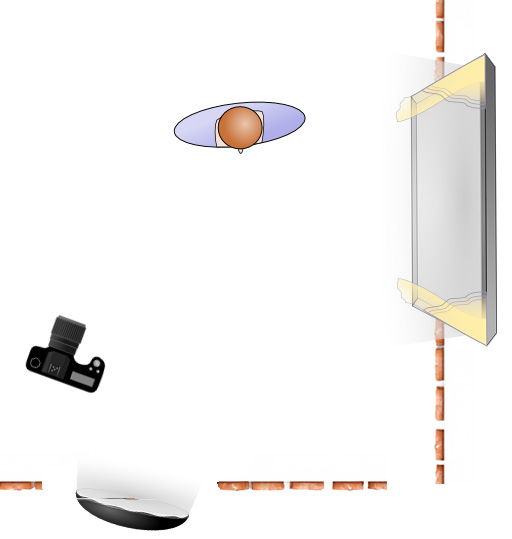
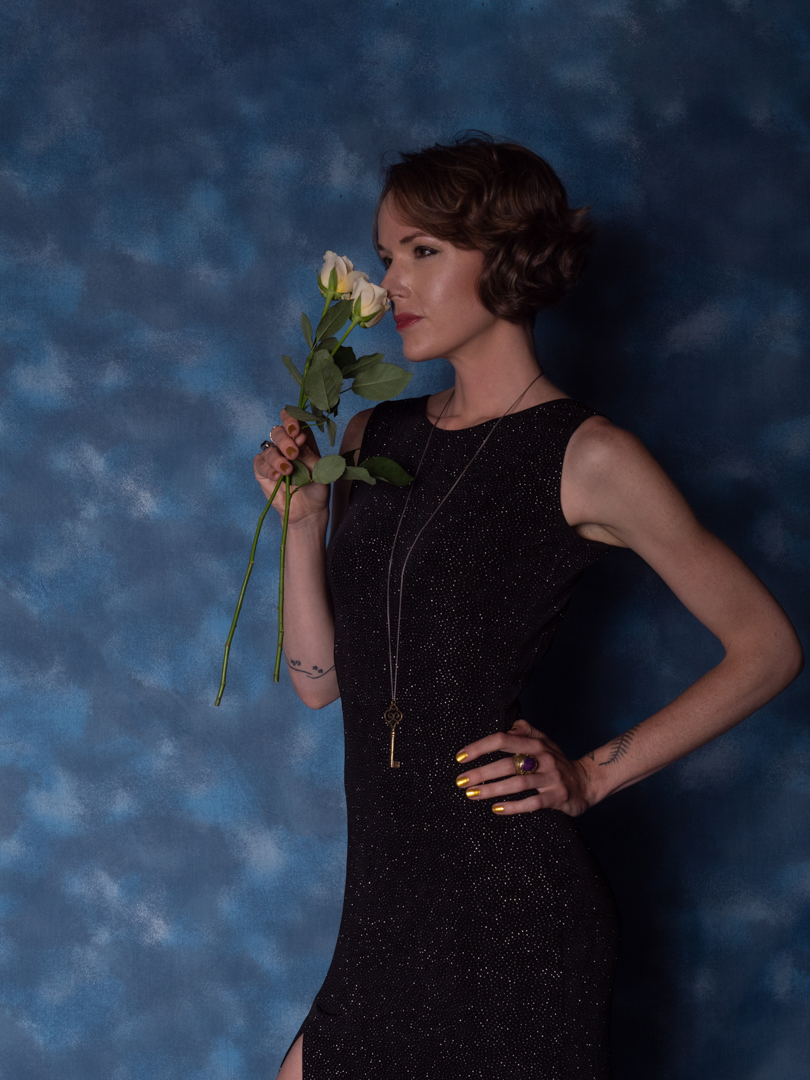
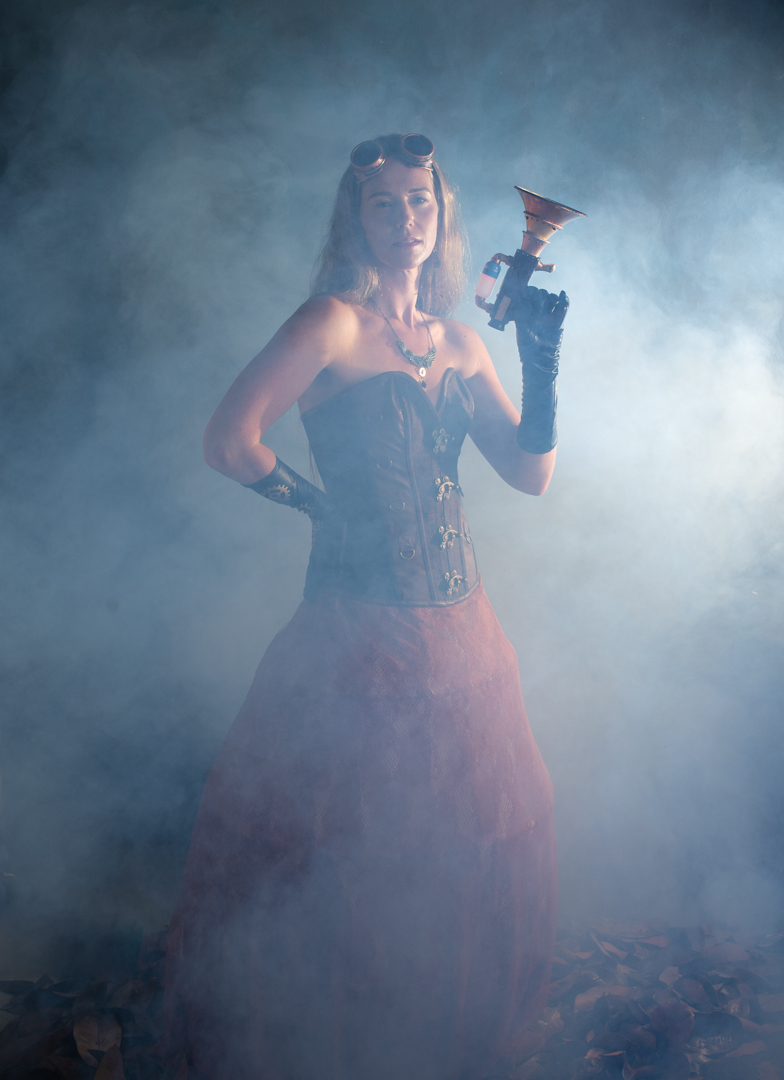
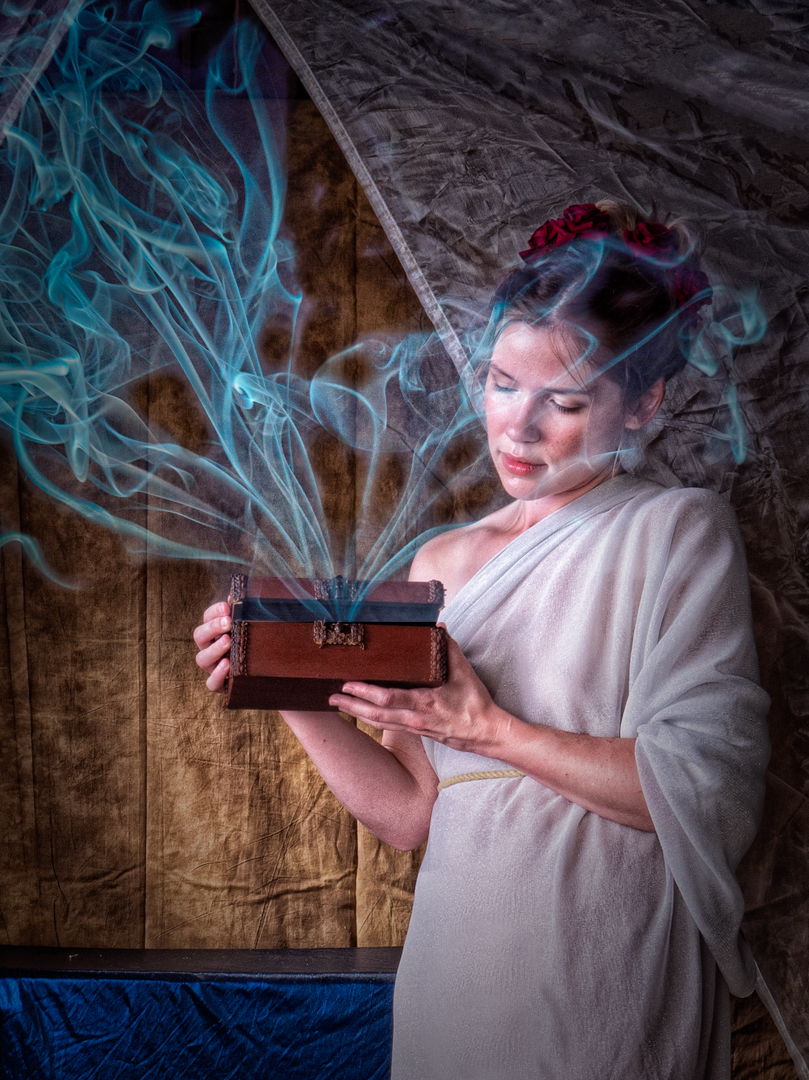
For the images where Pandora was looking into the box I positioned a speedlight in a snoot at the edge of the frame. This was aimed it Mandy’ face.

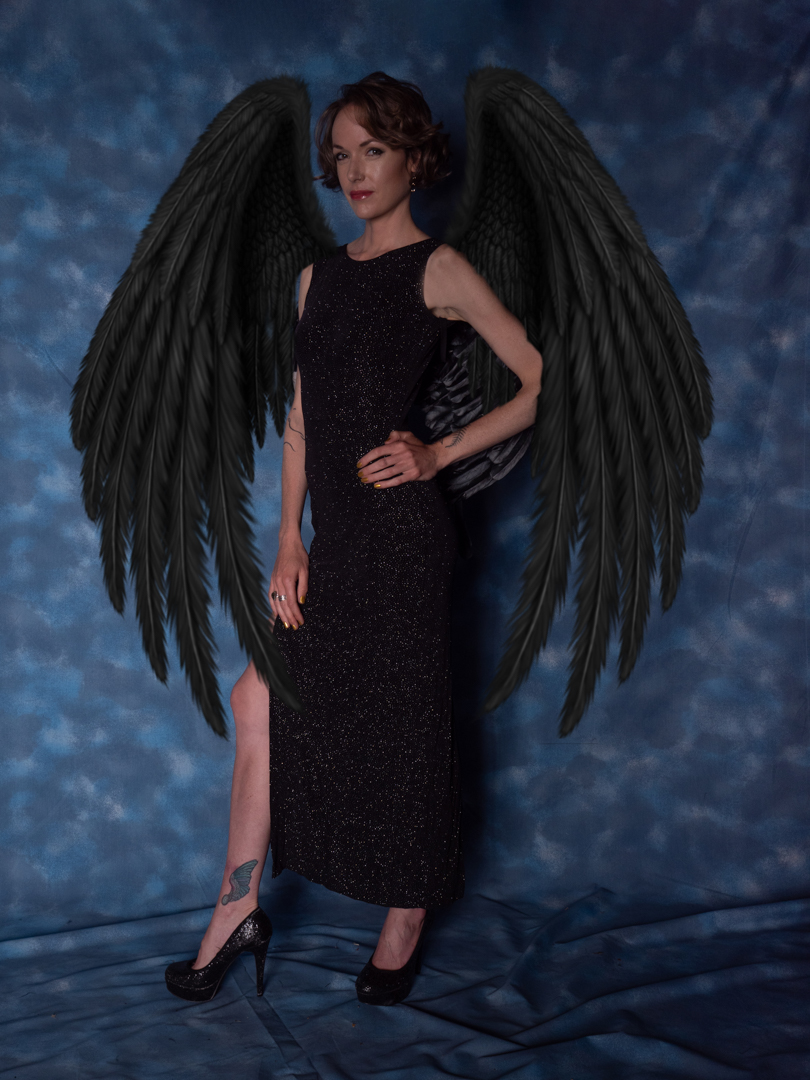
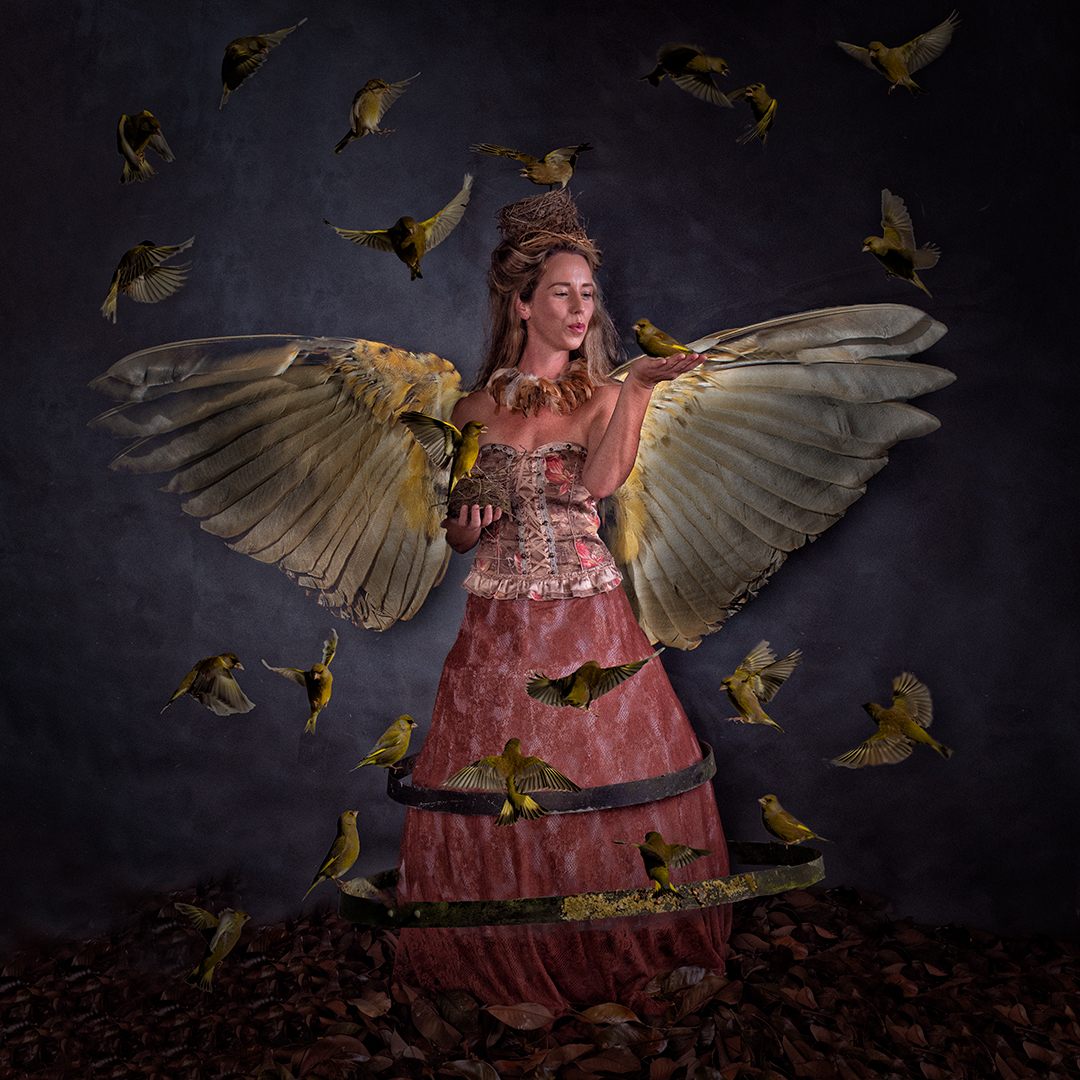
The post processing mainly involved toning the image and then adding the elements coming out of the box. This involved blending in images I had of smoke or creating beams of light mainly using exposure and colour.

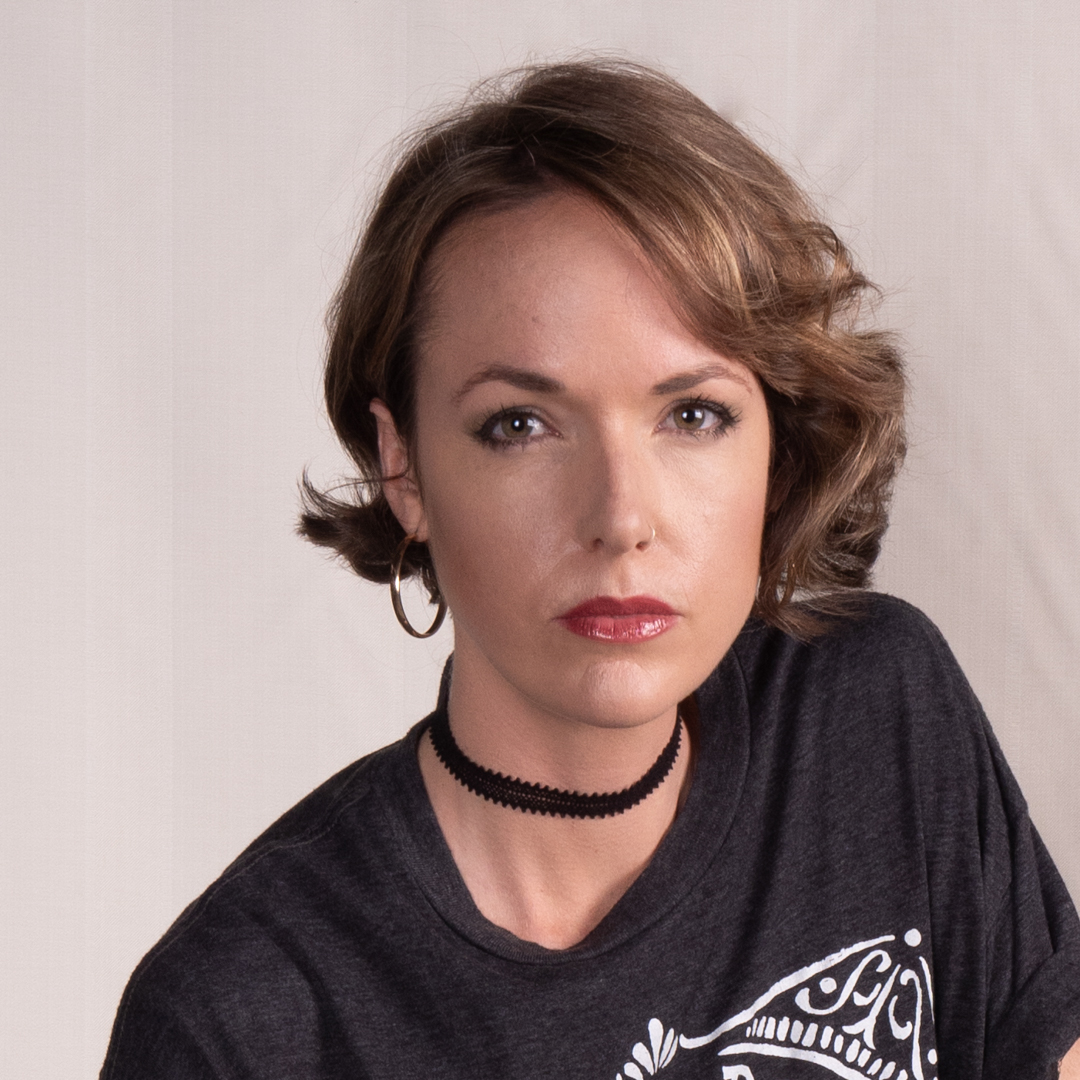
The faces in the first image are self portraits captured direct into the computer and then distorted. I also added the flames on the candles.

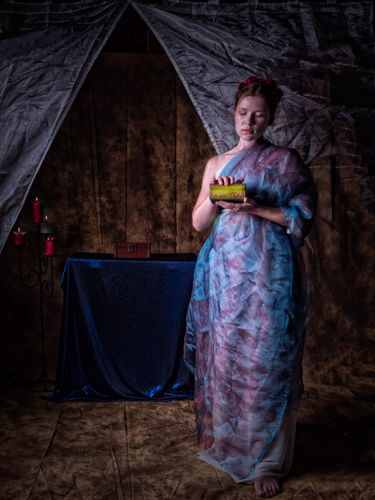
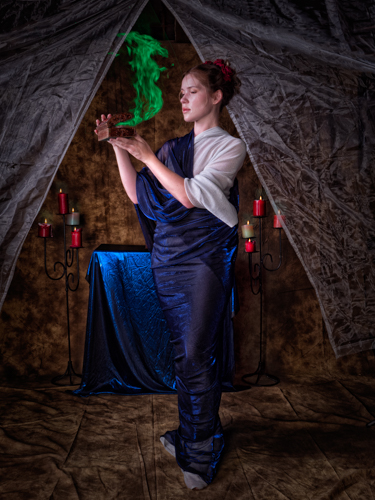
In addition to the three images shown above I edited a further eight with differing effects. These were shot at various parts of the day. You will note that the costume changed slightly as evolved it.

It was a great shoot and a great way to finish off the year.

Sara on the Wharf

1/1600s f5 180mm ISO200

I always take some time to photograph a model when they are booked for one of my concept shoots. I aim to create images that they may be able to use within their portfolio. It was the same with Sara after we had finished the monsoon girl shoot.

Sarah changed out of her wet clothes. We then headed across the road to the wharf in Evans Bay. There, we took a series of images. These images tried to reflect different moods.

1/1250s f5 70mm ISO200

All the images were shot using natural light and as such I had the camera in Aperture Priority. I set f5 so that I would still have a reasonable depth of field on Sara. This setting allowed the background to fall out of focus.

They were all shot with my 70-200mm f2.8 lens on my Nikon D600. The individual settings are shown against each image.

Towards the end of our session I swapped lenses to my Lensbaby Composer. This is a totally manual lens that creates a very narrow area of focus within the image. It creates great results but it is quite tricky to work with.

1/2500s f2.8 ISO200

When I delivered the photos to Sara, she was really pleased with them. That is the ultimate time of any model shoot.

Looking back now I realise that the images could have done with a little lift from flash.

Sara – Recreating a Classic

In photography, as with other art forms, there is nothing wrong with taking inspiration from the work of others. Or even copying it as long as you don’t try to pass it off as your own.

I have long time admirer of work of New Zealand photographer Brian Brake OBE. He shot editorial series through the 1950’s – 1970’s appearing in such publications as Life.

Monsoon girl is Brake’s most famous image. It was also controversial because it was a ‘set-up’ shot shown in the context of photojournalism, where viewers assume the images are ‘real life’ witnessed by the photographer.

Monsoon Girl by Brian Brake

The subject, Aparna Das Gupta (later Aparna Sen), was an actress on a movie set. Many years later, she recalled that Brake, ‘…took me up to the terrace, had me wear a red sari in the way a village girl does, and asked me to wear a green stud in my nose. …Someone had a large watering can, and they poured water over me. Brake said, “Feel the rain on your face.”’

Given that it was a set up shot I knew we could recreate it without having to travel to India. I posted a casting call on Facebook for a model with Indian heritage and Sara responded so we set up a time.

As in the original the rain was provided via a watering can which was held by my daughter . We filled it with warm water.

To recreate the golden light of the original, I placed a full CTO gel over the AD600 that was firing into a 65cm soft box. If you look carefully at the first shot you will see that the orange is picked up in some of the water droplets.

Because I did not want a direct copy of Brian’s image I did not get Sara to wear a sari. Rather she chose a simple white dress.

All images were taken with my Nikon D 600 camera using a 70-200mm f2 .8 lens. The lens gave with the option of keeping well away from the water. The images were mainly shot at 1/200s f5 ISO200.

Sara really nailed the look I was going for and I was really pleased with the final image.

Liz Portrait Session

I have known Liz for a very long time. Over the years, I have shot several family group sessions with her. She likes to keep her images up-to-date. It came as no surprise when she asked me to do a series of images just of her.

We shot several poses around her property. The one I’m focusing on here were taken inside her scrap-booking studio. It truly showed Liz’s love of scrap-booking. In photographic terms it is called an environmental portrait because the setting tells you something about the individual.

The room she uses for scrap-booking is small and pretty much full of her stuff. While there was a large window on one side this was not sufficient to fully light the room. I had to position my main light in the doorway from the hall. There was not enough room to position it anywhere else.

All of these images were shot on my Lumix G9 1/200s f7.1 ISO200 at an equivalent lens of 24mm.

Liz really like the shots as they she said they captured exactly what she loved doing.

Lucy – Dark Angel

When Lucy and I were discussing her shoot, she mentioned that she wanted to create a dark angel look.

Lucy had brought a black top and skirt but it was not really working. So I grabbed one of my wife’s old ball dresses and a set of small angel wings. The wings were intended to be a simple placeholder with the intention of replacing them in Photoshop later.

We reduced the amount of light on the set to a single light in a beauty dish. That would provide some punch to the image but also allow for a lot of shadow.

The images were all shot on my Lumix G9 at 1/200s f8 ISO 200 and with focal lengths ranging from 34mm to 60mm.

Once I had the image selected in Photoshop I added wings that I had downloaded as a transparent PNG. I had to warp them to make them fit completely and then adjust them to fit the lighting.

I was really happy with the way the image came out. Recently I tried to use the new Generative AI features in Photoshop to create the wings. I cannot say that this made the process easier as it took several attempts to get what I wanted. That image is shown below.

Lucy – Creating a look

Lucy ran a coaching business. She was looking for some images to use in her profile. The images needed to express different aspects of her personality. She described them as being “rock chick” and “flower child”. Fortunately she sent through some sample images from a mood board so I was not completely lost.

I set up the studio in the garage. To give us lots of flexibility, I hung several backdrops over the top of each other. This way, we could quickly swap from one to the other.

Lucy wore all black for the “rock chick” look. We initially shot against a plain background. I had envisaged the final image to be black & white.

However, to give us flexibility I also shot in colour against a very complex background.

For the “flower child” images Lucy got changed into something that screamed 1970’s. Fortunately I had a couple of cloth backdrops that came out of an old studio and also fitted the era.

I had a collection of old records and so we built them into a tower so that they could take part in the shoot.

This was a two light setup however the positions changed. For the Rocker images the main light was positioned camera right and was a large soft box. A beauty dish was positioned camera left to provide some fill.

For the Flower images, the lights stayed in the same position. For these images, the beauty dish was the main light. This give a slightly different look and feel to the images.

Lucy was pleased with the photos.

Steampunk Shoot

When I book a session with a model especially one where I’m spending some time setting up the studio I would generally try to maximise our time together and shoot multiple outfits

When we started planning for Rachel to come out for the bird lady she happened to mention that she had some steam punk goggles and gloves and so we decided to incorporate them on the day

We swapped out the top half of her costume. We replaced it with a leather corset. I brought in a prop gun that I had painted.

The lighting for the set up was slightly different than used earlier in the day. The main light was a 1.5 meter octabox with a grid positioned 90° to Rachel. On the opposite side a reflector was brought in close to provide some fill.

To add some atmosphere to the images I had borrowed a smoke machine from another photographer. The speedlight shown in the diagram was used only in the images with the smoke. To really see the effect of smoke in an image it needs to be backlit.

It was a fun part of the shoot and I was really pleased with the images. All of the images were shot using a 50mm prime 1/200s f7.1 ISO200.

White Angel

When Rachel and I started planning for the bird lady shoot, she mentioned that she had a white dress. She thought that it be suitable as a choice to the costume I was designing.

I believe that model shoots are collaborations. I had no problem with her bringing the outfit. So, we took some shots with her in it.

We also included the nest that would form part of the birdlady shoot.

For the lighting I used two lights. My main light was a Godox AD600 in a 1.5m Octobox positioned at 90° to Rachel. The light was covered with a grid so that I control the direction of it. This lighting positioned closely resembled the angle that the sun had been when the birds were photographed.

The imaged were shot using my Nikon D600 f7.1 1/200s ISO200 on a 50mm prime lens.

Although the image below shows it as a square was actually octagonal. On the opposite side to the main light, I positioned a white polystyrene reflector. It provided a bit of fill. At the rear of the studio, I had an Elinchrom D400 firing into the 7 foot umbrella covered with diffusion. This was solely to fill-in the shadows. While Elinchrom and Godox lights operate on different triggers, I could use the optical slave on the Elinchrom. This approach worked really well.

In post I added the wings and the bird sitting on the nest. The image was now looking very angelic so I photographed a glass bowl to create the halo.

The feel of this image is quite different to the birdlady but in someways very complimentary.

The Birdlady Part 3 (Photoshop)

Once I had all of the images it was now time to put them together.

I created a Photoshop document and built it up layer by elements as I went.

I had already gone through the Lightroom catalogue containing the bird photos and classified them into potential positions in the final image. From these I selected around 36 images taking each one into Photoshop, making a rough selection, copying it into my main document and then masking out the bird.

I realised that this would be a large file, hence I did not copy across anything that I did not need. Even with an effort I had to use the Photoshop large file format as the resulting file is 2.7 GB.

The image was tweaked over several sessions. The video below takes you through the photoshop document showing what each layer does. I alway work non-destructively so adjustment are always applied on their own layer.

The Birdlady Part 2 (Model Shoot)

I have shot Rachel several times and so I approached her with a mockup of the image to see if she would be interested. She thought it would be quite fun so we scheduled a shoot.

I had always envisaged a Victorian style outfit and so I made one using a corset and then placing lave over a hoop skirt frame. I attached the ring to a belt for strings and positioned it at roughly same height as it appeared on the feeder.

I borrowed a handpainted canvas backdrop and set up a studio in the garage. I knew that the final image would be a composite but at that stage I was not sure whether I would leave the background as it was or replace it. One of the hardest things of bringing a person into a new scene is getting their feet to look right on the new surface. To make this process a lot easier I had collected leaves and I sprayed those around Rachel’s feet.

I also collected a number of nests during the previous year and we fixed one to Rachel’s head and she held the other one. It was the a simple matter of shooting her where she was interacting with birds that would be added later. I only provided minimal direction as Rachel is an experienced model. Plus I find that letting a model find their own rhythm makes for better images.

For the lighting I used two lights. My main light was a Godox AD600 in a 1.5m Octobox positioned at 90° to Rachel. The light was covered with a grid so that I could control the direction of it. This lighting positioned closely resembled the angle that the sun had been when the birds were photographed.

Although the image below shows it as a square was actually octagonal. On the opposite side to the main light I positioned a white polystyrene reflector to provide a bit of fill and at the rear of the studio I had an Elinchrom D400 firing into the 7 foot umbrella covered with diffusion. This was solely to fill-in the shadows. While Elinchrom and Godox lights operate on different triggers, I could use the optical slave on the Elinchrom and this worked really well.

All of the images on this page were shot with my Nikon D600 f7.1 1/200s ISO200 using a prime 50mm lens. The camera was mounted on a tripod that was set at the same height as when the birds were shot.

We also shot some images from a different angle but these were never taken any further in post.

You can see a behind the scenes video of the shoot below

In part three we will cover putting it all together.