Once I had all of the images it was now time to put them together.
I created a Photoshop document and built it up layer by elements as I went.
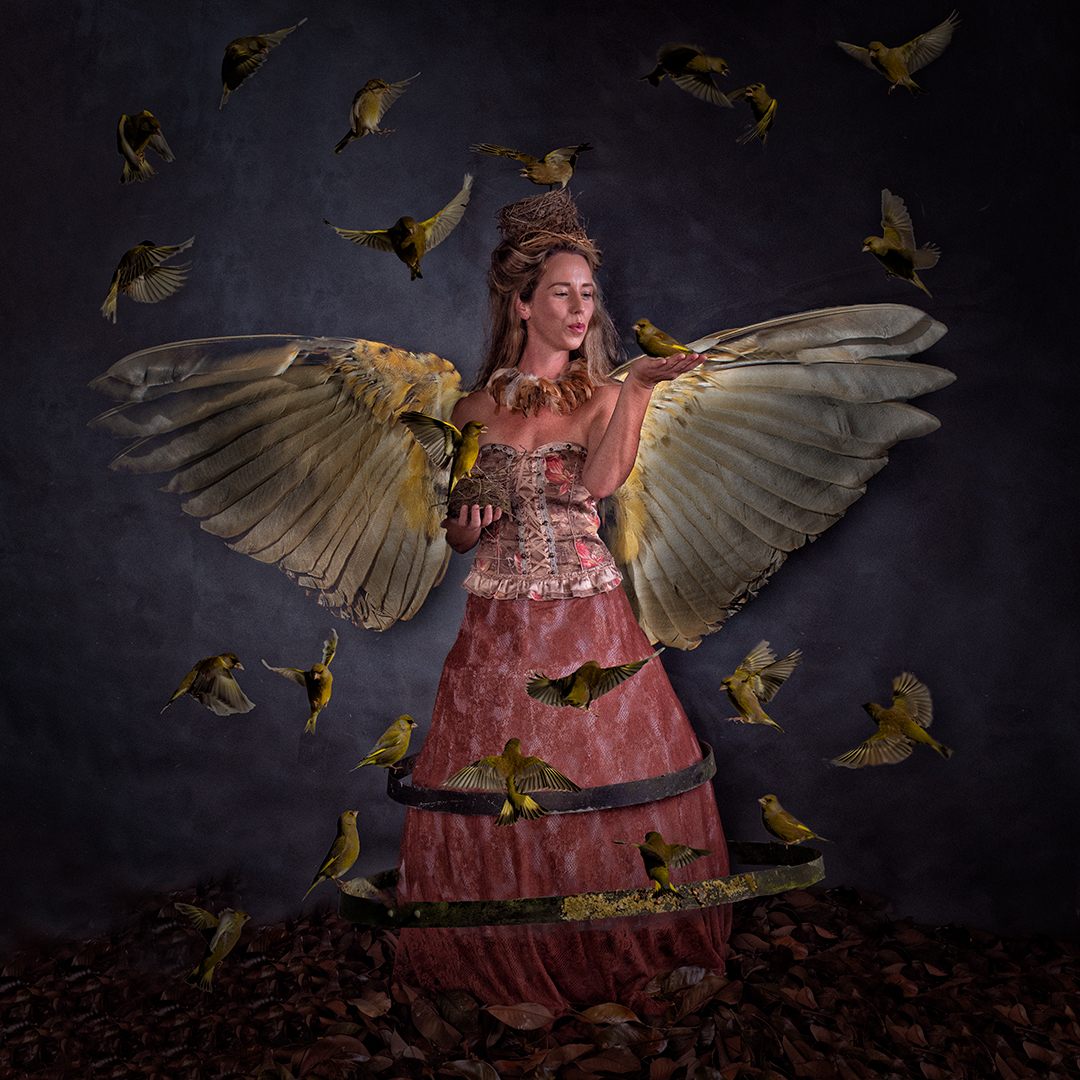
I had already gone through the Lightroom catalogue containing the bird photos and classified them into potential positions in the final image. From these I selected around 36 images taking each one into Photoshop, making a rough selection, copying it into my main document and then masking out the bird.
I realised that this would be a large file, hence I did not copy across anything that I did not need. Even with an effort I had to use the Photoshop large file format as the resulting file is 2.7 GB.
The image was tweaked over several sessions. The video below takes you through the photoshop document showing what each layer does. I alway work non-destructively so adjustment are always applied on their own layer.
